Chicken Enchilada Casserole Easy Family Favorite Meal
![- 2 cups cooked chicken, shredded - 2 cups enchilada sauce (homemade or canned) - 1 can black beans, drained and rinsed - 1 cup corn kernels (fresh, frozen, or canned) - 1 red bell pepper, diced - 1 cup chopped onions - 2 cups shredded cheddar cheese - 8 corn tortillas, cut into strips - 1 teaspoon cumin - 1 teaspoon chili powder - ½ teaspoon garlic powder - Salt and pepper to taste - Fresh cilantro for garnish - Sour cream (optional) for serving You can swap chicken for other proteins. Turkey works well too. If you prefer plant-based options, try tofu or beans. For the enchilada sauce, you can use low-sodium canned sauce. Homemade sauce is another great choice. Just mix tomatoes, spices, and broth. If you follow a gluten-free diet, use corn tortillas. They add a nice crunch. For a vegetarian version, skip the chicken. Add more beans or vegetables. This way, you keep all the flavor without meat. You can also use vegan cheese if you want a plant-based option. 1. Preheat the oven to 350°F (175°C). This step helps cook the casserole evenly. 2. Prepare your baking dish. Use a 9x13 inch dish, as it fits all the layers well. 3. Sauté the vegetables. In a large skillet, heat over medium. Add the chopped onions and diced bell pepper. Cook until soft, about 5 minutes. 4. Combine with chicken. Stir in the cooked chicken, black beans, corn, cumin, chili powder, garlic powder, salt, and pepper. Cook for 3-4 more minutes until heated through. 1. Start with enchilada sauce. Spread a thin layer at the bottom of your baking dish. 2. Add tortilla strips. Layer half of the strips over the sauce. This creates a solid base. 3. Add chicken mixture. Spoon half of the chicken mix on top of the tortillas. This ensures each bite is flavorful. 4. Sprinkle cheese. Add a cup of shredded cheddar cheese on top of the chicken mixture. The cheese melts beautifully in the oven. 5. Repeat the layers. Add more enchilada sauce, the rest of the tortilla strips, the remaining chicken mixture, and finish with the remaining cheese. Even distribution of flavors matters for a tasty casserole. 1. Cover the casserole. Use aluminum foil to cover the dish. This helps steam the ingredients while baking. 2. Bake for 25 minutes. This allows the flavors to meld and the cheese to start melting. 3. Uncover and bake again. Remove the foil and bake for an additional 10-15 minutes. You want the cheese to be bubbly and slightly golden. 4. Check for doneness. Look for a golden top and warm filling. Let it cool for a few minutes before cutting. Garnish with fresh cilantro for a lovely finish. For the complete recipe, check out the [Full Recipe]. To shred chicken well, use two forks. Hold one fork steady and pull the chicken apart with the other. This method gives you nice, even shreds. If you have a stand mixer, you can use it too. Just place the cooked chicken in the bowl and mix on low for a few seconds. When sautéing vegetables, heat the pan first. Add a splash of oil, then toss in the chopped onions and bell peppers. Stir them often until they are soft, about five minutes. This method brings out the sweet flavors and keeps the veggies bright. Boost flavor with garnishes. Fresh cilantro adds a fresh taste. A dollop of sour cream gives a nice creamy touch. You can also add sliced jalapeños for some heat. Pair chicken enchilada casserole with sides like rice, beans, or a simple salad. These add color and balance to the meal. You can serve tortilla chips for a fun crunch. To reheat leftovers, use the oven for the best results. Preheat it to 350°F (175°C). Place the casserole in a baking dish, cover it with foil, and heat for about 20 minutes. If you're in a hurry, the microwave works too. Just heat in short bursts, stirring in between. This helps keep the texture nice. Avoid overheating, as it can dry out the dish. {{image_2}} You can easily change the flavor of your Chicken Enchilada Casserole. Add spices like jalapeños or cayenne for extra heat. These spices can bring a nice kick to the dish. If you love cheese, try using pepper jack or Monterey Jack. These cheeses melt well and add a creamy texture. You can also switch up the style of your casserole. For a vegetarian version, use black beans and your favorite veggies. This version is healthy and full of flavor. You can even try a green enchilada sauce instead of the red. This gives the dish a fresh twist that many enjoy. If you're on a keto diet, you can make some changes. Use cauliflower rice instead of tortillas. This keeps the carbs low. For vegan options, swap chicken for plant-based proteins like lentils or chickpeas. Both options work well and keep the dish hearty and filling. For the full recipe, check out the Cheesy Chicken Enchilada Casserole. To store your Chicken Enchilada Casserole, let it cool first. Then, place it in an airtight container. I recommend using glass or plastic containers with tight lids. This keeps the casserole fresh and prevents any spills in your fridge. If you want to freeze portions, cut the casserole into squares. Wrap each piece tightly in plastic wrap, then place them in a freezer bag. This method saves space and protects the flavors. When ready to eat, take a piece out and thaw it in the fridge overnight. Reheat in the oven at 350°F until warm. In the refrigerator, Chicken Enchilada Casserole lasts about 3 to 4 days. If you freeze it, it can last up to 3 months. Just remember to label your containers with the date. This helps you keep track of freshness. You can swap chicken for many tasty options. If you want a vegetarian dish, use black beans or lentils. For a vegan choice, try jackfruit or tofu. Shredded mushrooms can also add nice texture. If you prefer meat, turkey is a great substitute. You can also use shredded beef or pork for a different flavor. Yes, you can prepare the Chicken Enchilada Casserole in advance! Assemble it in the baking dish, cover it, and store it in the fridge for up to 24 hours. When you're ready, just bake it straight from the fridge. If you want to freeze it, wrap it well and store for up to three months. Thaw it overnight in the fridge before baking. To make a complete meal, pair your casserole with simple sides. A fresh green salad adds crunch. You can serve rice or quinoa for a hearty touch. Guacamole and tortilla chips are also fun options. For a cooling effect, try a dollop of sour cream on the side. Chicken Enchilada Casserole comes from Mexican cuisine. Enchiladas are rolled tortillas filled with meat and sauce. The casserole form makes it easier to serve. It blends flavors from different regions, showcasing spices and fresh ingredients. This dish brings families together at the table and is a favorite for gatherings. This blog post covered how to make a tasty Chicken Enchilada Casserole. We started with a list of ingredients, including different proteins and sauces. Next, we shared easy step-by-step instructions for preparation, layering, and baking. We explored tips for cooking and serving, as well as variations to suit dietary needs. Lastly, we discussed storage options and common questions. Enjoy making this dish your own. It's simple, flexible, and full of flavor!](https://dailydishly.com/wp-content/uploads/2025/07/9970a47c-7c3f-446c-bbbe-f15e5a47e982.webp)
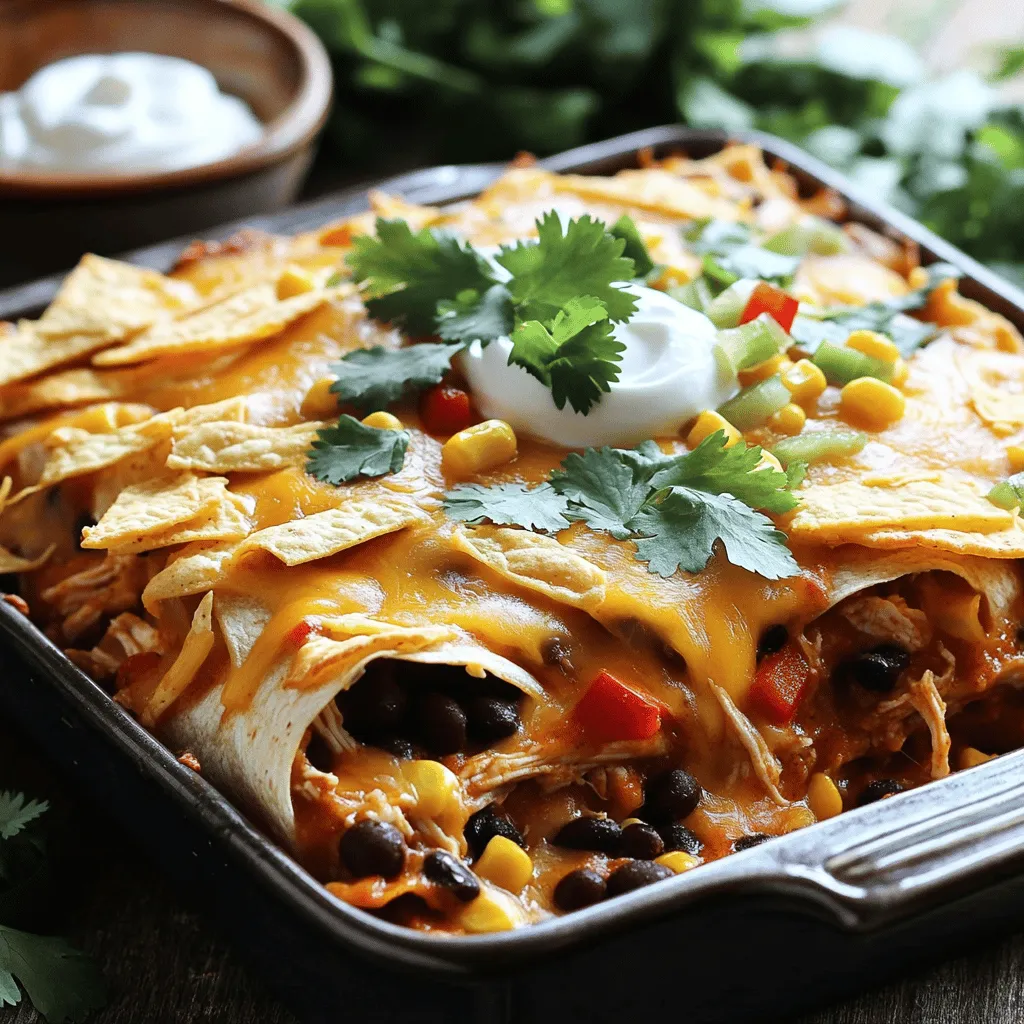
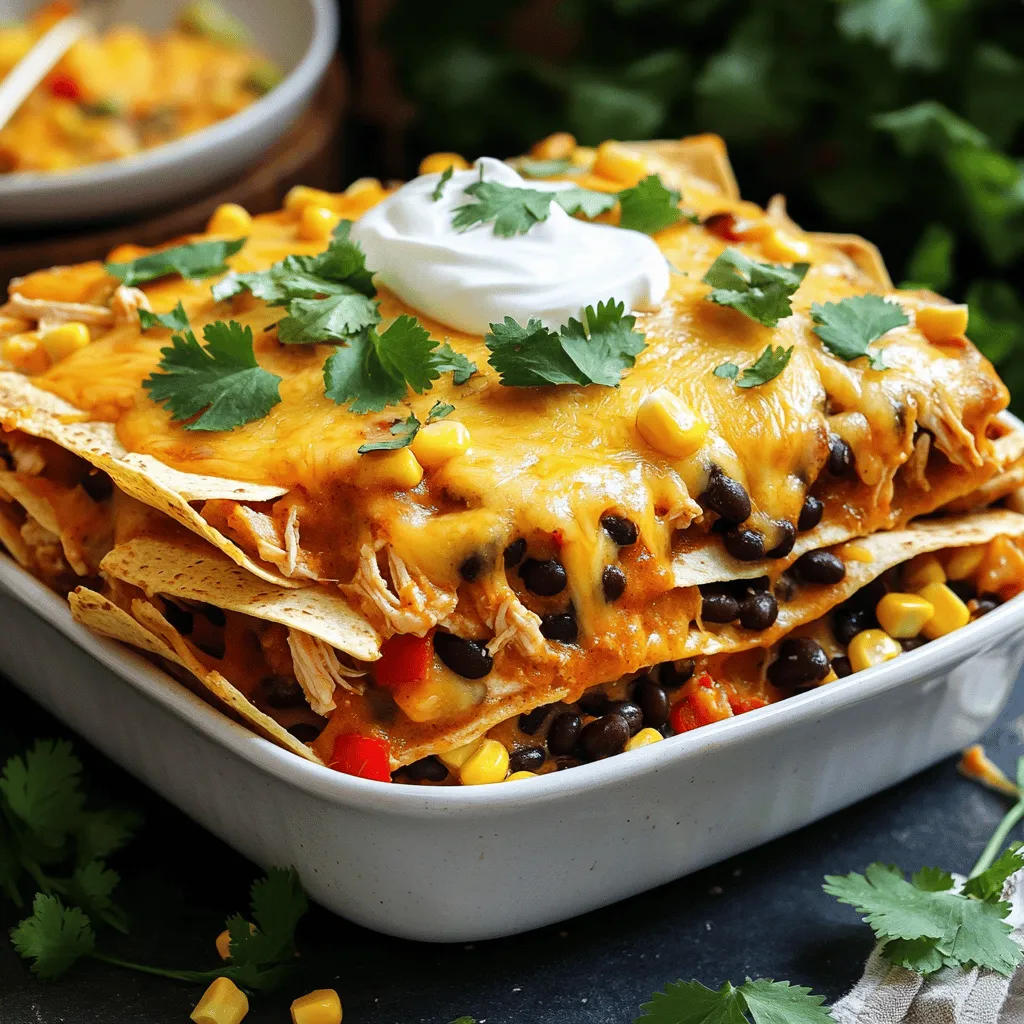
Looking for a delicious, easy meal your whole family will love? You’ve found it! This Chicken Enchilada Casserole combines tender chicken, zesty sauce, and layers of flavor to create a dish that’s both comforting and satisfying. With simple ingredients and easy steps, you can whip up this family favorite in no time. Let’s dive in and get cooking!
Ingredients
List of Ingredients
– 2 cups cooked chicken, shredded
– 2 cups enchilada sauce (homemade or canned)
– 1 can black beans, drained and rinsed
– 1 cup corn kernels (fresh, frozen, or canned)
– 1 red bell pepper, diced
– 1 cup chopped onions
– 2 cups shredded cheddar cheese
– 8 corn tortillas, cut into strips
– 1 teaspoon cumin
– 1 teaspoon chili powder
– ½ teaspoon garlic powder
– Salt and pepper to taste
– Fresh cilantro for garnish
– Sour cream (optional) for serving
Ingredient Substitutions
You can swap chicken for other proteins. Turkey works well too. If you prefer plant-based options, try tofu or beans. For the enchilada sauce, you can use low-sodium canned sauce. Homemade sauce is another great choice. Just mix tomatoes, spices, and broth.
Dietary Considerations
If you follow a gluten-free diet, use corn tortillas. They add a nice crunch. For a vegetarian version, skip the chicken. Add more beans or vegetables. This way, you keep all the flavor without meat. You can also use vegan cheese if you want a plant-based option.
Step-by-Step Instructions
Preparation
1. Preheat the oven to 350°F (175°C). This step helps cook the casserole evenly.
2. Prepare your baking dish. Use a 9×13 inch dish, as it fits all the layers well.
3. Sauté the vegetables. In a large skillet, heat over medium. Add the chopped onions and diced bell pepper. Cook until soft, about 5 minutes.
4. Combine with chicken. Stir in the cooked chicken, black beans, corn, cumin, chili powder, garlic powder, salt, and pepper. Cook for 3-4 more minutes until heated through.
Layering the Casserole
1. Start with enchilada sauce. Spread a thin layer at the bottom of your baking dish.
2. Add tortilla strips. Layer half of the strips over the sauce. This creates a solid base.
3. Add chicken mixture. Spoon half of the chicken mix on top of the tortillas. This ensures each bite is flavorful.
4. Sprinkle cheese. Add a cup of shredded cheddar cheese on top of the chicken mixture. The cheese melts beautifully in the oven.
5. Repeat the layers. Add more enchilada sauce, the rest of the tortilla strips, the remaining chicken mixture, and finish with the remaining cheese. Even distribution of flavors matters for a tasty casserole.
Baking Instructions
1. Cover the casserole. Use aluminum foil to cover the dish. This helps steam the ingredients while baking.
2. Bake for 25 minutes. This allows the flavors to meld and the cheese to start melting.
3. Uncover and bake again. Remove the foil and bake for an additional 10-15 minutes. You want the cheese to be bubbly and slightly golden.
4. Check for doneness. Look for a golden top and warm filling. Let it cool for a few minutes before cutting. Garnish with fresh cilantro for a lovely finish.
Tips & Tricks
Cooking Tips
To shred chicken well, use two forks. Hold one fork steady and pull the chicken apart with the other. This method gives you nice, even shreds. If you have a stand mixer, you can use it too. Just place the cooked chicken in the bowl and mix on low for a few seconds.
When sautéing vegetables, heat the pan first. Add a splash of oil, then toss in the chopped onions and bell peppers. Stir them often until they are soft, about five minutes. This method brings out the sweet flavors and keeps the veggies bright.
Serving Suggestions
Boost flavor with garnishes. Fresh cilantro adds a fresh taste. A dollop of sour cream gives a nice creamy touch. You can also add sliced jalapeños for some heat.
Pair chicken enchilada casserole with sides like rice, beans, or a simple salad. These add color and balance to the meal. You can serve tortilla chips for a fun crunch.
Reheating Tips
To reheat leftovers, use the oven for the best results. Preheat it to 350°F (175°C). Place the casserole in a baking dish, cover it with foil, and heat for about 20 minutes.
If you’re in a hurry, the microwave works too. Just heat in short bursts, stirring in between. This helps keep the texture nice. Avoid overheating, as it can dry out the dish.

Variations
Flavor Variations
You can easily change the flavor of your Chicken Enchilada Casserole. Add spices like jalapeños or cayenne for extra heat. These spices can bring a nice kick to the dish. If you love cheese, try using pepper jack or Monterey Jack. These cheeses melt well and add a creamy texture.
Different Enchilada Styles
You can also switch up the style of your casserole. For a vegetarian version, use black beans and your favorite veggies. This version is healthy and full of flavor. You can even try a green enchilada sauce instead of the red. This gives the dish a fresh twist that many enjoy.
Dietary-Specific Variations
If you’re on a keto diet, you can make some changes. Use cauliflower rice instead of tortillas. This keeps the carbs low. For vegan options, swap chicken for plant-based proteins like lentils or chickpeas. Both options work well and keep the dish hearty and filling.
Storage Info
Storing Leftovers
To store your Chicken Enchilada Casserole, let it cool first. Then, place it in an airtight container. I recommend using glass or plastic containers with tight lids. This keeps the casserole fresh and prevents any spills in your fridge.
Freezing Tips
If you want to freeze portions, cut the casserole into squares. Wrap each piece tightly in plastic wrap, then place them in a freezer bag. This method saves space and protects the flavors. When ready to eat, take a piece out and thaw it in the fridge overnight. Reheat in the oven at 350°F until warm.
Shelf Life
In the refrigerator, Chicken Enchilada Casserole lasts about 3 to 4 days. If you freeze it, it can last up to 3 months. Just remember to label your containers with the date. This helps you keep track of freshness.
FAQs
What can I substitute for chicken in Chicken Enchilada Casserole?
You can swap chicken for many tasty options. If you want a vegetarian dish, use black beans or lentils. For a vegan choice, try jackfruit or tofu. Shredded mushrooms can also add nice texture. If you prefer meat, turkey is a great substitute. You can also use shredded beef or pork for a different flavor.
Can I make this dish ahead of time?
Yes, you can prepare the Chicken Enchilada Casserole in advance! Assemble it in the baking dish, cover it, and store it in the fridge for up to 24 hours. When you’re ready, just bake it straight from the fridge. If you want to freeze it, wrap it well and store for up to three months. Thaw it overnight in the fridge before baking.
What sides pair well with Chicken Enchilada Casserole?
To make a complete meal, pair your casserole with simple sides. A fresh green salad adds crunch. You can serve rice or quinoa for a hearty touch. Guacamole and tortilla chips are also fun options. For a cooling effect, try a dollop of sour cream on the side.
What is the origin of Chicken Enchilada Casserole?
Chicken Enchilada Casserole comes from Mexican cuisine. Enchiladas are rolled tortillas filled with meat and sauce. The casserole form makes it easier to serve. It blends flavors from different regions, showcasing spices and fresh ingredients. This dish brings families together at the table and is a favorite for gatherings.
This blog post covered how to make a tasty Chicken Enchilada Casserole. We started with a list of ingredients, including different proteins and sauces. Next, we shared easy step-by-step instructions for preparation, layering, and baking. We explored tips for cooking and serving, as well as variations to suit dietary needs. Lastly, we discussed storage options and common questions.
Enjoy making this dish your own. It’s simple, flexible, and full of flavor!
![- 2 cups cooked chicken, shredded - 2 cups enchilada sauce (homemade or canned) - 1 can black beans, drained and rinsed - 1 cup corn kernels (fresh, frozen, or canned) - 1 red bell pepper, diced - 1 cup chopped onions - 2 cups shredded cheddar cheese - 8 corn tortillas, cut into strips - 1 teaspoon cumin - 1 teaspoon chili powder - ½ teaspoon garlic powder - Salt and pepper to taste - Fresh cilantro for garnish - Sour cream (optional) for serving You can swap chicken for other proteins. Turkey works well too. If you prefer plant-based options, try tofu or beans. For the enchilada sauce, you can use low-sodium canned sauce. Homemade sauce is another great choice. Just mix tomatoes, spices, and broth. If you follow a gluten-free diet, use corn tortillas. They add a nice crunch. For a vegetarian version, skip the chicken. Add more beans or vegetables. This way, you keep all the flavor without meat. You can also use vegan cheese if you want a plant-based option. 1. Preheat the oven to 350°F (175°C). This step helps cook the casserole evenly. 2. Prepare your baking dish. Use a 9x13 inch dish, as it fits all the layers well. 3. Sauté the vegetables. In a large skillet, heat over medium. Add the chopped onions and diced bell pepper. Cook until soft, about 5 minutes. 4. Combine with chicken. Stir in the cooked chicken, black beans, corn, cumin, chili powder, garlic powder, salt, and pepper. Cook for 3-4 more minutes until heated through. 1. Start with enchilada sauce. Spread a thin layer at the bottom of your baking dish. 2. Add tortilla strips. Layer half of the strips over the sauce. This creates a solid base. 3. Add chicken mixture. Spoon half of the chicken mix on top of the tortillas. This ensures each bite is flavorful. 4. Sprinkle cheese. Add a cup of shredded cheddar cheese on top of the chicken mixture. The cheese melts beautifully in the oven. 5. Repeat the layers. Add more enchilada sauce, the rest of the tortilla strips, the remaining chicken mixture, and finish with the remaining cheese. Even distribution of flavors matters for a tasty casserole. 1. Cover the casserole. Use aluminum foil to cover the dish. This helps steam the ingredients while baking. 2. Bake for 25 minutes. This allows the flavors to meld and the cheese to start melting. 3. Uncover and bake again. Remove the foil and bake for an additional 10-15 minutes. You want the cheese to be bubbly and slightly golden. 4. Check for doneness. Look for a golden top and warm filling. Let it cool for a few minutes before cutting. Garnish with fresh cilantro for a lovely finish. For the complete recipe, check out the [Full Recipe]. To shred chicken well, use two forks. Hold one fork steady and pull the chicken apart with the other. This method gives you nice, even shreds. If you have a stand mixer, you can use it too. Just place the cooked chicken in the bowl and mix on low for a few seconds. When sautéing vegetables, heat the pan first. Add a splash of oil, then toss in the chopped onions and bell peppers. Stir them often until they are soft, about five minutes. This method brings out the sweet flavors and keeps the veggies bright. Boost flavor with garnishes. Fresh cilantro adds a fresh taste. A dollop of sour cream gives a nice creamy touch. You can also add sliced jalapeños for some heat. Pair chicken enchilada casserole with sides like rice, beans, or a simple salad. These add color and balance to the meal. You can serve tortilla chips for a fun crunch. To reheat leftovers, use the oven for the best results. Preheat it to 350°F (175°C). Place the casserole in a baking dish, cover it with foil, and heat for about 20 minutes. If you're in a hurry, the microwave works too. Just heat in short bursts, stirring in between. This helps keep the texture nice. Avoid overheating, as it can dry out the dish. {{image_2}} You can easily change the flavor of your Chicken Enchilada Casserole. Add spices like jalapeños or cayenne for extra heat. These spices can bring a nice kick to the dish. If you love cheese, try using pepper jack or Monterey Jack. These cheeses melt well and add a creamy texture. You can also switch up the style of your casserole. For a vegetarian version, use black beans and your favorite veggies. This version is healthy and full of flavor. You can even try a green enchilada sauce instead of the red. This gives the dish a fresh twist that many enjoy. If you're on a keto diet, you can make some changes. Use cauliflower rice instead of tortillas. This keeps the carbs low. For vegan options, swap chicken for plant-based proteins like lentils or chickpeas. Both options work well and keep the dish hearty and filling. For the full recipe, check out the Cheesy Chicken Enchilada Casserole. To store your Chicken Enchilada Casserole, let it cool first. Then, place it in an airtight container. I recommend using glass or plastic containers with tight lids. This keeps the casserole fresh and prevents any spills in your fridge. If you want to freeze portions, cut the casserole into squares. Wrap each piece tightly in plastic wrap, then place them in a freezer bag. This method saves space and protects the flavors. When ready to eat, take a piece out and thaw it in the fridge overnight. Reheat in the oven at 350°F until warm. In the refrigerator, Chicken Enchilada Casserole lasts about 3 to 4 days. If you freeze it, it can last up to 3 months. Just remember to label your containers with the date. This helps you keep track of freshness. You can swap chicken for many tasty options. If you want a vegetarian dish, use black beans or lentils. For a vegan choice, try jackfruit or tofu. Shredded mushrooms can also add nice texture. If you prefer meat, turkey is a great substitute. You can also use shredded beef or pork for a different flavor. Yes, you can prepare the Chicken Enchilada Casserole in advance! Assemble it in the baking dish, cover it, and store it in the fridge for up to 24 hours. When you're ready, just bake it straight from the fridge. If you want to freeze it, wrap it well and store for up to three months. Thaw it overnight in the fridge before baking. To make a complete meal, pair your casserole with simple sides. A fresh green salad adds crunch. You can serve rice or quinoa for a hearty touch. Guacamole and tortilla chips are also fun options. For a cooling effect, try a dollop of sour cream on the side. Chicken Enchilada Casserole comes from Mexican cuisine. Enchiladas are rolled tortillas filled with meat and sauce. The casserole form makes it easier to serve. It blends flavors from different regions, showcasing spices and fresh ingredients. This dish brings families together at the table and is a favorite for gatherings. This blog post covered how to make a tasty Chicken Enchilada Casserole. We started with a list of ingredients, including different proteins and sauces. Next, we shared easy step-by-step instructions for preparation, layering, and baking. We explored tips for cooking and serving, as well as variations to suit dietary needs. Lastly, we discussed storage options and common questions. Enjoy making this dish your own. It's simple, flexible, and full of flavor!](https://dailydishly.com/wp-content/uploads/2025/07/9970a47c-7c3f-446c-bbbe-f15e5a47e982-300x300.webp)


![- Chicken and Vegetables - 2 boneless, skinless chicken breasts, sliced into thin strips - 1 red bell pepper, sliced - 1 cup broccoli florets - 1 cup snap peas - 1 carrot, julienned - Sauces and Seasonings - 2 tablespoons honey - 4 cloves garlic, minced - 2 tablespoons soy sauce (low sodium) - 1 tablespoon sesame oil - 2 tablespoons vegetable oil - Salt and pepper to taste - Optional Garnishes - Sesame seeds - Green onions, sliced This dish shines with fresh ingredients. Each one adds a unique flavor and texture. The chicken provides protein, while the vegetables give crunch and color. Honey and garlic create a sweet and savory sauce that ties everything together. Using low sodium soy sauce keeps the dish healthy. Sesame oil adds depth and richness. Don’t skip the garnishes; they add a lovely finish. You can find the full recipe in the detailed section above. Enjoy your cooking! Whisking the Honey Garlic Sauce In a small bowl, combine honey, minced garlic, soy sauce, and sesame oil. Use a whisk to mix until smooth. This sauce gives the dish a sweet and savory flavor. Set it aside for later. Seasoning the Chicken Take your sliced chicken and sprinkle salt and pepper over it. This adds flavor and prepares the chicken for cooking. Make sure to coat all sides evenly. Preparing the Vegetables Wash and chop your vegetables. Slice the red bell pepper, julienne the carrot, and get the broccoli florets and snap peas ready. Fresh veggies add color and crunch to the dish. Sautéing the Chicken Heat one tablespoon of vegetable oil in a large skillet or wok over medium-high heat. Once hot, add the seasoned chicken strips. Cook for 5 to 7 minutes, stirring often. The chicken should turn golden and be fully cooked. Remove it from the skillet and set aside. Stir-Frying the Vegetables In the same skillet, add the remaining tablespoon of vegetable oil. Toss in the red bell pepper, broccoli, snap peas, and carrot. Stir-fry for about 3 to 4 minutes. You want them crisp-tender, not mushy. Combining Chicken and Sauce Return the cooked chicken to the skillet with the veggies. Pour your prepared honey garlic sauce over everything. Stir well to coat all the ingredients evenly. Cook for an additional 2 to 3 minutes to let the sauce thicken slightly. Plating the Dish Serve your honey garlic chicken stir fry in shallow bowls. A bed of fluffy rice or noodles makes it even better. This adds substance and absorbs the sauce. Garnishing Tips Top your dish with sesame seeds and sliced green onions for extra flavor and color. A wedge of lime on the side gives a nice citrus kick. For the complete recipe, check out the [Full Recipe]. Optimal Cooking Temperature Heat is key for a great stir fry. Start with medium-high heat. This temperature helps brown the chicken and keeps veggies crisp. Too low, and your food stews instead of fries. Too high, and you might burn everything. Keep an eye on the pan! Avoiding Overcooked Chicken and Vegetables Cook the chicken until it's just done. It should be golden, not dry. Remove it from the pan as soon as it’s cooked. For the veggies, stir-fry for 3-4 minutes. They should be bright and a bit crunchy. Overcooked veggies lose their color and nutrients. Choosing the Best Chicken Cuts I always use boneless, skinless chicken breasts for this dish. They cook quickly and stay juicy. You can also use thighs if you prefer more flavor. Just cut them into thin strips for even cooking. Freshness of Vegetables Fresh veggies make a big difference. Look for bright colors and firm textures. Bell peppers, broccoli, and snap peas should feel crisp. Avoid any limp or brown spots. The better the veggies, the better your stir fry will taste. Pairing Suggestions (Rice, Noodles, etc.) Serve this stir fry over fluffy rice or noodles. Both absorb the honey garlic sauce well. For rice, jasmine or basmati works great. If you choose noodles, try egg noodles or rice noodles for a nice touch. Customizing for Dietary Preferences You can easily adapt this recipe. Want it vegetarian? Use firm tofu instead of chicken. Gluten-free? Swap soy sauce for tamari or coconut aminos. Make it your own while keeping the flavor! For more ideas, check out the Full Recipe. {{image_2}} You can mix it up with different proteins. Tofu works great for a vegetarian option. Beef strips add a rich flavor. Just remember to adjust cooking times for each protein. When it comes to veggies, the options are endless. You can add mushrooms for an earthy touch. Zucchini gives a nice crunch. Carrots, bell peppers, and snap peas are also good choices. Feel free to use what you have in your fridge. Want to boost the flavor? Try adding new sauces or spices. A splash of sriracha can add heat. Ginger adds a nice zing. Experiment with different flavors to find your perfect mix. Adjust the sweetness to your liking too. If you prefer less sweetness, cut the honey by half. For a sweeter taste, add more honey. Taste as you go to find what works best for you. You can make this dish in an Instant Pot or slow cooker. For the Instant Pot, sauté first, then pressure cook for quick results. In a slow cooker, let it simmer for a few hours. Grilling or baking can also work well. Grill the chicken for a smoky flavor. Bake it in the oven for a hands-off approach. No matter the method, the taste will still be amazing. If you're looking for the full recipe, check out the Honey Garlic Chicken Stir Fry ! To keep your honey garlic chicken stir fry fresh, store any leftovers in an airtight container. Place the container in the fridge right after the meal. This helps lock in flavors and prevent bacteria growth. You should enjoy your leftovers within 3 to 4 days for the best taste. If you want to save your stir fry for later, freezing is a great option. First, let the dish cool completely before packing it. Use freezer-safe bags or containers for best results. Be sure to remove as much air as possible to prevent freezer burn. Your honey garlic chicken stir fry can last up to 3 months in the freezer. When you're ready to eat, thaw the stir fry overnight in the fridge. Then, reheat it on the stovetop over low heat. Stir occasionally until it’s hot. You can also microwave it, but ensure you stir it every minute to heat evenly. Enjoy your meal all over again! Can I use frozen vegetables? Yes, you can use frozen vegetables. They save time and are easy to find. Just add them directly to the pan. You might need to cook them a bit longer. This will help them get warm and tender. How to make this dish gluten-free? To make this dish gluten-free, use tamari instead of soy sauce. Tamari is a great gluten-free option. Check the labels to ensure no gluten ingredients are included. What to do if the sauce is too thick? If the sauce is too thick, add a little water or chicken broth. Stir it in slowly. This will help loosen the sauce and keep it tasty. How do I know when the chicken is fully cooked? Check the chicken's color and texture. It should be white and firm. The safest way is to use a meat thermometer. The internal temperature should reach 165°F (75°C). Can this recipe be made ahead of time? Yes, you can prepare the chicken and sauce ahead of time. Store them in the fridge for up to two days. Then, cook the stir fry when you are ready to eat. What's the best way to reheat stir fry? Reheat the stir fry in a skillet over medium heat. Add a splash of water to keep it moist. Stir often until it’s hot. This will help keep the flavors fresh. For the full recipe, check out the Honey Garlic Chicken Stir Fry. To make a great Honey Garlic Chicken Stir Fry, we discussed all the key ingredients, steps, and tips. Start with fresh chicken and vibrant vegetables. Whisk together a yummy sauce and cook everything just right. Don’t forget to play with flavors or cooking methods to suit your taste. Proper storage keeps leftovers tasty for later. With a few variations, this dish can easily fit your dietary needs. Enjoy your stir-fry and impress family or friends with your new skills!](https://dailydishly.com/wp-content/uploads/2025/07/ad7e2fa8-e610-4152-a96e-e496d4740468-768x768.webp)
![To make a tasty spiced lentil soup, gather these key ingredients: - 1 cup green or brown lentils, rinsed - 1 tablespoon olive oil - 1 medium onion, diced - 2 cloves garlic, minced - 2 medium carrots, diced - 2 celery stalks, diced - 1 teaspoon ground cumin - 1 teaspoon ground coriander - 1/2 teaspoon smoked paprika - 1/4 teaspoon cayenne pepper (adjust to taste) - 1 can (14 oz) diced tomatoes - 6 cups vegetable broth - 1 bay leaf - Salt and pepper to taste - Fresh cilantro, chopped (for garnish) - Lemon wedges (for serving) These ingredients create a warm and filling soup. The lentils are the star, giving protein and fiber. The spices add a nice kick and depth of flavor. You can make your soup even better with extra touches. Here are some fun ideas: - Avocado slices for creaminess - Chopped green onions for a fresh crunch - A dollop of yogurt for richness - A sprinkle of feta cheese for a tangy twist These add-ins not only add flavor but also make the soup look pretty. If you need to change the amounts, here are some quick tips: - 1 cup equals 240 ml - 1 tablespoon equals 15 ml - 1 teaspoon equals 5 ml If you want to double the recipe, just multiply each amount by two. This way, you can share the joy of this soup with more people! For the full recipe, check out the complete guide. Start by heating the olive oil in a large pot over medium heat. This oil adds great flavor. Add the diced onion and sauté it for about 5 minutes. You want it to turn soft and clear. Next, stir in the minced garlic, diced carrots, and diced celery. Cook these for another 5 minutes. Stir them often until the veggies soften. This mix of aromatics forms the base of your soup. Once your aromatics are ready, it's time to add the lentils. Pour in the rinsed green or brown lentils. Then, add the canned diced tomatoes with their juice. Next, pour in the vegetable broth and add the bay leaf. This broth gives your soup deep taste. Bring the mix to a boil, and then reduce the heat. Let it simmer uncovered for about 30 to 35 minutes. Stir occasionally until the lentils are tender. After the lentils cook, remove the bay leaf. This step is important, as the leaf does not taste good. Season your soup with salt and pepper. If it seems too thick, you can add more broth. Adjust it to your liking. Finally, serve the soup hot. Garnish with fresh cilantro and a squeeze of lemon juice for added flavor. Enjoy your warm, spiced lentil soup! You can find the full recipe [here]. To get the richest taste, use fresh spices. Ground spices lose their kick over time. I recommend buying whole spices and grinding them. This adds a nice depth to your soup. Also, let your spices toast for a minute before adding liquid. This step brings out their natural oils and flavors. Cooking lentils is easy. Rinse them well to remove dirt. I prefer green or brown lentils for this soup. They hold their shape better. Always check the cooking time on the package. Most lentils need 20 to 30 minutes. If you overcook them, they can turn mushy. Serve the soup hot for the best experience. A dollop of yogurt or sour cream adds creaminess. Fresh cilantro brightens the dish and adds flavor. You can also squeeze some lemon juice on top. For a complete meal, pair it with crusty bread or a salad. This soup is filling and perfect for any day. Try the [Full Recipe] for more details! {{image_2}} This spiced lentil soup is naturally vegetarian and vegan. You can keep it plant-based by using vegetable broth. If you want creaminess, add a dollop of coconut milk. It gives the soup a rich taste without losing its core flavors. You can also add more veggies, like spinach or kale, for added nutrition. If you want to boost the protein, there are great options. You can add cooked chickpeas or diced tofu. Both mix well with the flavors. If you enjoy meat, try adding shredded chicken or turkey. This addition can make the soup heartier and more filling. You can change the soup's flavor by using different spices. Try adding turmeric for a warm, earthy taste. A splash of soy sauce or a bit of ginger can bring a new twist. Experiment with fresh herbs like thyme or rosemary. Each change adds a unique flavor to your bowl. To store leftover spiced lentil soup, let it cool first. Then, pour the soup into an airtight container. Make sure to seal it tightly. You can keep it in the fridge for up to five days. Label the container with the date so you remember when you made it. When you're ready to enjoy your soup again, take it out of the fridge. Pour the soup into a pot. Heat it over medium heat, stirring often. If the soup seems too thick, add a bit of water or broth to thin it out. You can also microwave it. Place it in a microwave-safe bowl and cover it loosely. Heat for one to two minutes, stirring halfway through. If you want to save your spiced lentil soup for later, freezing is a great option. Use freezer-safe containers or bags. Leave some space at the top, as soup expands when frozen. It will stay fresh for up to three months. When you're ready to eat it, thaw it overnight in the fridge. Then, reheat as mentioned before. Enjoy the flavors of your delicious soup again! For the full recipe, check out the details above. Yes, you can use various lentils in this soup. Green and brown lentils work best. They hold their shape well during cooking. Red lentils cook faster and become soft, creating a creamier texture. If you use red lentils, reduce the cooking time by about 10 minutes. Mixing lentils can also add unique flavors and textures. This spiced lentil soup is naturally gluten-free! The ingredients, like lentils and vegetables, do not contain gluten. Always check your vegetable broth to ensure it is gluten-free. Some broths may have added ingredients that contain gluten. As long as you select the right broth, you can enjoy this soup worry-free. Here are a few common mistakes to watch out for: - Not rinsing lentils: Rinse them well before cooking to remove dust and debris. - Overcooking the lentils: Keep an eye on them to avoid mushiness. - Skipping the spices: The spices add depth, so don’t skip them! - Not seasoning enough: Taste as you go and adjust the salt and pepper. By avoiding these mistakes, you’ll create a flavorful and nourishing soup. For the full recipe, check the section above. This blog post walks you through making spiced lentil soup, from essential ingredients to cooking tips. You learned how to prepare the soup with aromatics, finish it with flavorful seasonings, and serve it perfectly. With variations for different diets and easy storage tips, you'll enjoy this dish anytime. Remember, cooking is about exploring flavors, so have fun with it. Enjoy your warm, hearty bowl of spiced lentil soup!](https://dailydishly.com/wp-content/uploads/2025/06/8505bcbc-e76d-49ee-a85a-9fa1b9dff162-768x768.webp)

