
Looking for a quick meal that bursts with flavor? Chicken Pesto Pasta is your answer! This dish combines tender chicken, fresh pesto, and your choice of pasta for a mouthwatering, easy dinner. I’ll walk you through each step, from selecting ingredients to preparing the sauce, ensuring you impress everyone at your table. Let’s get cooking and elevate your weeknight dinners!
Ingredients
List of Essential Ingredients
– 8 oz spaghetti or fettuccine pasta
– 2 chicken breasts, boneless and skinless
– Salt and pepper, to taste
– 2 tablespoons olive oil
– 1 cup homemade or store-bought basil pesto
– 1/2 cup heavy cream
– 1/4 cup cherry tomatoes, halved
– 1/4 cup grated Parmesan cheese
– Fresh basil leaves, for garnish
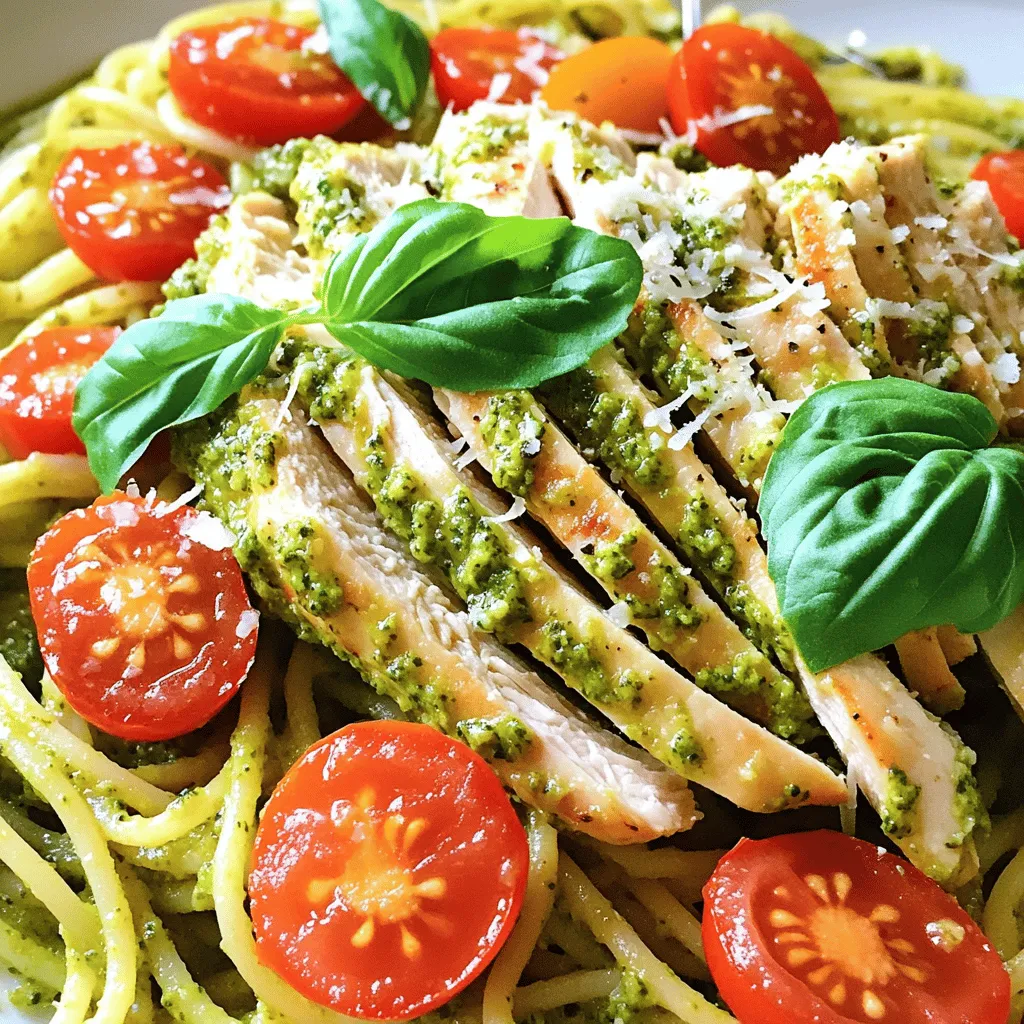
To create a tasty Chicken Pesto Pasta, you need simple ingredients. Start with 8 ounces of spaghetti or fettuccine. Both types work well and hold the sauce nicely. You will also need two boneless chicken breasts. Season the chicken with salt and pepper for flavor.
Next, grab some olive oil. This helps to cook the chicken and adds richness. For the sauce, you need one cup of basil pesto. You can use homemade pesto or store-bought, depending on your time and taste. Add half a cup of heavy cream to make the sauce creamy and rich.
Don’t forget the cherry tomatoes; they add a juicy bite. Lastly, sprinkle on some grated Parmesan cheese for taste and garnish with fresh basil leaves. These ingredients combine to create a delicious meal that is full of flavor and easy to make.
Optional Garnishes
– Grated mozzarella or goat cheese for topping
– Fresh herbs like parsley or extra basil
– Sautéed spinach or roasted bell peppers
For extra flavor, consider garnishing your dish. You can add grated mozzarella or goat cheese on top. This adds a nice creaminess. Fresh herbs like parsley or extra basil also brighten the dish. If you want more veggies, sautéed spinach or roasted bell peppers work well. These optional garnishes enhance the dish and let you customize it to your taste.
Step-by-Step Instructions
Cooking the Pasta
Start by filling a large pot with water. Add a generous amount of salt to it. Bring the water to a rolling boil. This helps flavor the pasta as it cooks. Add your spaghetti or fettuccine to the pot. Cook according to the package instructions, usually around 8-10 minutes. You want it to be al dente, which means it should still have a slight bite. After cooking, drain the pasta but save about 1/2 cup of the starchy pasta water. This water is important for the sauce later.
Preparing the Chicken
Next, take two boneless, skinless chicken breasts. Season both sides with salt and pepper. This simple step boosts the flavor. Heat 2 tablespoons of olive oil in a large skillet over medium heat. Add the chicken breasts carefully. Cook for 6-7 minutes on each side. You want them golden brown and fully cooked. Use a meat thermometer to check the internal temperature; it should reach 165°F (75°C). After cooking, let the chicken rest for a few minutes. Slice it into strips for easy mixing later.
Making the Sauce
In the same skillet, lower the heat after removing the chicken. Add 1 cup of basil pesto, stirring it gently. I recommend using homemade or good-quality store-bought pesto for the best flavor. Next, pour in 1/2 cup of heavy cream. Mix it well until it combines completely. Cook for 2-3 minutes, just until warmed through. The key is to achieve a creamy consistency without boiling the sauce.
Finishing the Dish
Now it’s time to bring everything together. Add the cooked pasta into the skillet with the sauce. Toss it well to coat every strand in that creamy pesto. If the sauce feels too thick, slowly add the reserved pasta water. This will help reach your desired creaminess. Then, fold in the sliced chicken and 1/4 cup of halved cherry tomatoes. Warm everything together for another 2 minutes. For the final touch, sprinkle 1/4 cup of grated Parmesan cheese on top. Serve hot, garnished with fresh basil leaves for a lively finish.
Tips & Tricks
Perfecting the Pasta
To make pasta just right, cook it until al dente. This means it should be firm but not hard. Follow these steps:
– Boil water and add salt before cooking the pasta. The salt adds flavor.
– Check the package for cooking times. Taste the pasta a minute early.
To avoid mushy pasta, do not overcook it. Here are some tips:
– Stir the pasta while it cooks to prevent it from sticking.
– Drain it right away and do not let it sit in hot water.
Chicken Cooking Tips
For juicy chicken, use these methods:
– Cook chicken breasts on medium heat. This helps cook them evenly.
– Use a meat thermometer to check if they reach 165°F (75°C). This ensures safety.
Resting chicken is also key. Let it sit for a few minutes after cooking. This keeps the juices inside. If you slice it too soon, the juices run out.
Sauce Adjustments
You can change the sauce thickness to suit your taste. To make it thicker, try these methods:
– Add more pesto or cream. This will make the sauce richer.
– Cook it longer on low heat to reduce it.
If you want a thinner sauce, use reserved pasta water. Just add a little at a time until it’s how you like it.
For extra flavor, consider these enhancements:
– Add spices like garlic powder or red pepper flakes.
– Fresh herbs can bring brightness. Basil or parsley work well.
Variations
Pasta Alternatives
You can change up your pasta for this dish. Here are some options:
– Gluten-free options: Use quinoa or brown rice pasta for a gluten-free meal.
– Other types of pasta: Try penne, rotini, or even whole wheat pasta. Each type gives a unique twist.
Protein Substitutes
If you want to swap the chicken, you have great choices:
– Suggestions for vegetarian proteins: Use grilled tofu or chickpeas for a tasty vegetarian option. They soak up the pesto flavor well.
– Variations with seafood or other meats: Shrimp or salmon work great in this dish. Cook them until just done for the best taste.
Dietary Modifications
You can adjust this recipe to fit your diet:
– Low-carb or keto-friendly options: Replace pasta with spiralized zucchini or cauliflower rice. This keeps the dish tasty and low in carbs.
– Dairy-free alternatives: Use coconut cream instead of heavy cream. It adds a nice flavor without the dairy.
Storage Info
Refrigeration Guidelines
To store your chicken pesto pasta, let it cool first. Then, place it in an airtight container. Store it in the fridge for up to three days. This keeps it fresh and tasty for your next meal.
Reheating Instructions
When it’s time to enjoy your leftovers, reheat them gently. Use a skillet over low heat. This method helps keep the pasta creamy. You can also add a splash of water or cream to help with the texture. Stir often to ensure even heating and to prevent sticking. Enjoy your meal just like the first time!
FAQs
How do I make Chicken Pesto Pasta from scratch?Start by cooking the pasta in salted boiling water. While the pasta cooks, season and cook the chicken in olive oil. Once cooked, slice the chicken. In the same pan, mix the pesto with heavy cream to make the sauce. Combine everything, adding the pasta and chicken to the sauce. Toss well and serve with fresh basil on top.
Can I use store-bought pesto?
Yes, you can use store-bought pesto. It saves time and still adds great flavor. Look for a brand made with fresh basil and quality ingredients. However, homemade pesto often tastes brighter and fresher. Store-bought options can sometimes be a bit salty, so taste and adjust your dish as needed.
What can I serve with Chicken Pesto Pasta?
You can serve Chicken Pesto Pasta with many delicious sides. Here are some ideas:
– Garlic bread for a crunchy, buttery touch.
– A fresh green salad with lemon vinaigrette.
– Roasted vegetables to add color and nutrients.
– Grilled asparagus for a light, healthy option.
– Parmesan cheese on the side for extra flavor.
This blog post covered how to make a tasty Chicken Pesto Pasta. We discussed essential ingredients and provided detailed steps for cooking. I shared tips for perfecting your dish, including variations for dietary needs, and how to store leftovers.
To make this meal your own, try different pasta or proteins. Enjoy experimenting with flavors and presentation. The key is to have fun while cooking!


