Chocolate Chip Mug Cake Easy and Quick Recipe

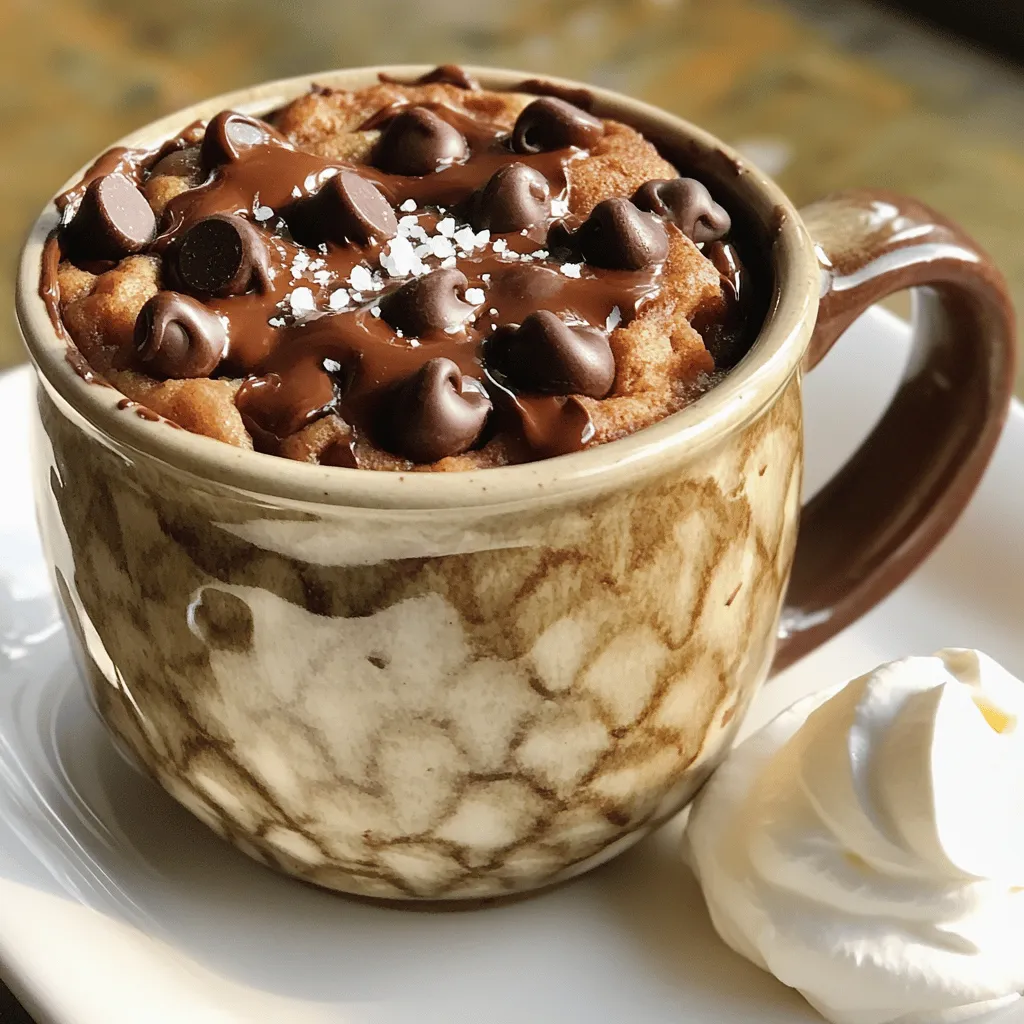
If you’re craving a warm dessert but are short on time, try my Chocolate Chip Mug Cake! This easy and quick recipe lets you whip up a sweet treat in minutes. With just a few simple ingredients, you can indulge in a moist, chocolatey mug cake that’s perfect for satisfying your sweet tooth. Ready to dive into the world of microwave magic? Let’s get started!
Ingredients
Dry Ingredients
– 4 tablespoons all-purpose flour
– 2 tablespoons granulated sugar
– 1 tablespoon unsweetened cocoa powder
– 1/8 teaspoon baking powder
– 1/8 teaspoon salt
Wet Ingredients
– 3 tablespoons milk (or almond milk)
– 2 tablespoons vegetable oil
– 1/2 teaspoon vanilla extract
Mix-ins and Toppings
– 2 tablespoons semi-sweet chocolate chips
– A pinch of sea salt (optional)
To make the best chocolate chip mug cake, gather these simple ingredients. For the dry ingredients, you need all-purpose flour, granulated sugar, unsweetened cocoa powder, baking powder, and salt. Each adds a key flavor and texture.
Next, for the wet ingredients, you need milk, vegetable oil, and vanilla extract. Milk keeps the cake moist. Oil adds richness, and vanilla gives that lovely aroma.
Finally, don’t forget the mix-ins. Semi-sweet chocolate chips are a must! They melt and create gooey pockets of chocolate. A sprinkle of sea salt on top enhances the sweetness, making this dessert even better.
Each ingredient plays a role in crafting a delicious mug cake. When combined, they create a quick treat that is warm, gooey, and full of flavor!
Step-by-Step Instructions
Prepare the Mug
Choose a mug that fits well in your microwave. A standard coffee mug works great. Make sure your mug is microwave-safe. Look for a label that says it can go in the microwave.
Mixing the Ingredients
First, combine the dry ingredients in your mug. Add 4 tablespoons of all-purpose flour, 2 tablespoons of granulated sugar, 1 tablespoon of cocoa powder, 1/8 teaspoon of baking powder, and a pinch of salt. Whisk these together until they are mixed well.
Next, add the wet ingredients. Pour in 3 tablespoons of milk, 2 tablespoons of vegetable oil, and 1/2 teaspoon of vanilla extract. Use a fork or a mini whisk to stir the mix. Keep stirring until the batter is smooth and there are no lumps.
Now, it’s time to fold in the chocolate chips. Add 2 tablespoons of semi-sweet chocolate chips to the batter. Gently fold them in so they spread evenly.
Cooking the Cake
Place the mug in the microwave. Cook it on high for about 1 minute and 30 seconds. Every microwave is different, so check at the 1-minute mark. If the center is still wet, keep microwaving in 10-second bursts until it’s done.
Once the cake is cooked, carefully remove it from the microwave. It will be hot! Let it cool for about a minute before serving. For a tasty touch, sprinkle a pinch of sea salt on top. Enjoy your delicious mug cake!
Tips & Tricks
Perfecting Your Mug Cake
To make the best mug cake, avoid common mistakes. First, mix your dry ingredients well. This helps the baking powder activate. If you don’t mix enough, your cake may not rise. Second, don’t overmix the wet and dry ingredients. Stir just until smooth. Overmixing can make the cake tough.
Next, check your microwave’s power. Cooking time varies by wattage. Start with one minute. If it’s still wet in the center, add ten seconds. You want a moist, fluffy texture, not a dry cake.
Serving Suggestions
You can enjoy your mug cake right from the mug. It’s warm and comforting. For a special treat, try adding toppings. A dollop of whipped cream makes it rich and creamy. You can also add a scoop of ice cream. The cold ice cream pairs well with warm cake.
Alternative Ingredients
Want to make it dairy-free? Use almond milk instead of regular milk. This keeps the cake moist and delicious. You can also try gluten-free flour options. Almond flour or a gluten-free blend works well. Just remember to use the same amount as the all-purpose flour.

Variations
Flavor Variations
You can make your mug cake even better by adding flavors. Try mixing in peanut butter or Nutella. Just add about a tablespoon into the batter. This will give your cake a rich, creamy twist. You can also change up the chocolate. Use white chocolate chips, dark chocolate, or even mint chocolate. Each choice gives a new taste and fun surprise.
Healthier Options
If you want a lighter cake, you can cut down on sugar. Use natural sweeteners like honey or maple syrup instead. This keeps the sweetness but cuts out some calories. You can also swap vegetable oil for applesauce. This change adds moisture without extra fat. Your mug cake will still taste great, and it might be a bit healthier too!
Themed Mug Cakes
Get creative with seasonal flavors! For fall, add pumpkin spice to your cake. It brings warm, cozy vibes. For holidays, think about adding festive decorations or flavors. You can sprinkle colored sugar on top or mix in dried fruits. This makes your mug cake fun for any occasion!
Storage Info
Best Practices for Storage
You can store leftovers of your chocolate chip mug cake. Once it cools, cover it tightly. This keeps it fresh for up to two days. For best taste, eat it soon after making it. If you have batter left over, store it in the fridge. Use it within one day. Stir well before cooking the batter again.
Reheating Mug Cake
The best way to reheat your mug cake is in the microwave. Heat it for about 10 to 15 seconds. Check if it’s warm enough. If not, heat it in small bursts. This helps keep the texture soft. Avoid overcooking, or it may turn dry.
Freezing Options
You can freeze your mug cake, but it works best with the batter. Pour the batter into a freezer-safe container. Seal it well, and use it within three months. When you’re ready to bake, thaw it in the fridge overnight. To reheat, microwave as before, checking for doneness.
FAQs
How long does it take to cook a mug cake?
It takes about 1 minute and 30 seconds to cook a mug cake in the microwave. You should check it at 1 minute. If it is still wet in the center, cook for 10 more seconds. Each microwave is different, so cooking time may vary.
Can I make this mug cake without cocoa powder?
Yes, you can make this mug cake without cocoa powder. Just skip it and use more flour instead. You can add extra vanilla for flavor. This will give you a plain cake but still tasty.
Why is my mug cake rubbery?
A mug cake can turn rubbery if you cook it too long. It can also happen if you mix the batter too much. Make sure to stop mixing as soon as the batter is smooth.
Are there alternatives for chocolate chips?
Absolutely! You can use white chocolate chips, peanut butter chips, or dried fruit. Each will give a new twist to your mug cake. Try whatever you like best!
Can I use a bigger mug for this recipe?
Yes, you can use a bigger mug. Just make sure it can hold all the batter. If the mug is too big, the cake may not cook evenly. Stick to a standard size for best results.
This blog post guides you on making a delicious mug cake. We explored essential dry and wet ingredients, along with mix-ins. I provided helpful tips for perfecting your cake and suggested fun variations. You also learned storage and reheating methods.
A mug cake is quick, simple, and a delight. With practice, you can create many tasty flavors. Enjoy your baking and share your creations!


![- 1 ½ cups all-purpose flour - 1 teaspoon baking powder - ½ teaspoon baking soda - ¼ teaspoon salt - ½ cup unsalted butter, softened - 1 cup granulated sugar - 2 large eggs - ½ cup plain yogurt - 2 tablespoons lemon zest (from about 2 lemons) - ¼ cup fresh lemon juice - 3 tablespoons poppy seeds - Optional: Glaze made from ½ cup powdered sugar and 2 tablespoons lemon juice When making Lemon Poppy Seed Bread, I find that using fresh ingredients makes the biggest difference. Fresh lemons give your bread a bright flavor. You want ripe lemons for zest and juice. Look for lemons that feel heavy for their size and have a smooth skin. These lemons are juicy and full of flavor. For yogurt, I prefer plain yogurt. It adds moisture and a slight tang. Greek yogurt works well too, but regular plain yogurt keeps the texture light. If you want to switch things up, consider using sour cream instead. It can give your bread a rich flavor. - Selecting ripe lemons for zest and juice: Look for heavy, smooth-skinned lemons. - The best type of yogurt to use: Use plain yogurt or sour cream for moisture. If you need gluten-free options, try using a gluten-free flour blend. Mix it with a bit of xanthan gum for texture. For a vegan version, substitute unsalted butter with coconut oil or a vegan butter. You can replace eggs with a mashed banana or unsweetened applesauce. This will still keep the bread moist and tasty. Let’s make cooking easier and more fun with these simple tips! If you want to dive deeper into the recipe, check out the Full Recipe for all the steps. 1. Preheat your oven to 350°F (175°C). Grease and flour a 9x5 inch loaf pan. This step helps the bread rise well and not stick. 2. In a medium bowl, whisk together the dry ingredients: flour, baking powder, baking soda, and salt. Set this mix aside for later. 3. In a large bowl, cream the softened butter and granulated sugar together. Use an electric mixer on medium speed for about 3 to 4 minutes. This makes the mixture light and fluffy. 4. Add the eggs one at a time, mixing well after each. This helps to blend everything smoothly. 5. Stir in the yogurt, lemon zest, and lemon juice until fully mixed. Each ingredient adds a burst of flavor to the bread. 6. Gradually add the dry ingredients to the wet mixture. Stir gently until just combined. Do not overmix; this keeps the bread soft. 7. Fold in the poppy seeds, being careful not to overmix again. They add a nice crunch and visual appeal. 1. Pour the batter into the prepared loaf pan. Smooth out the top with a spatula to ensure even baking. 2. Bake in the oven for about 55 to 60 minutes. Check if it's done by inserting a toothpick into the center. If it comes out clean, your bread is ready! 1. Let the bread cool in the pan for about 10 minutes. This makes it easier to remove without breaking. 2. Transfer it to a wire rack to cool completely. This prevents sogginess and keeps the crust nice. 3. Slice the bread and serve it on a platter. If you like, drizzle the optional glaze over the top. Garnish with thin lemon slices and a sprinkle of poppy seeds for a beautiful finish. For the complete recipe, refer to the [Full Recipe]. Enjoy your baking! To bake the best Lemon Poppy Seed Bread, avoid common mistakes. First, do not skip the baking powder or baking soda. They help the bread rise and stay fluffy. Mix the dry and wet ingredients gently. Overmixing can make the bread tough. Make sure your butter is softened, not melted. This helps create the right texture. A beautiful presentation makes your bread shine. Slice the bread and arrange it on a nice platter. Drizzle a glaze on top for extra flair. You can make the glaze by mixing powdered sugar and lemon juice. Garnish with thin lemon slices and a sprinkle of poppy seeds. This adds color and makes it look fancy. Want a stronger lemon flavor? Use lemon extract in addition to fresh juice. This boosts the citrus taste. You can also add mix-ins like chopped nuts or dried fruit. These add texture and flavor. Feel free to explore your own ideas to customize your bread! For the full recipe, check out the complete guide. {{image_2}} To make gluten-free lemon poppy seed bread, start with a good flour blend. Look for blends that contain rice flour, almond flour, or tapioca starch. These work well in most recipes. You may need to adjust the liquid in your recipe. Gluten-free flours often absorb more moisture. So, add a little extra yogurt or lemon juice if needed. For a vegan version, swap out the eggs and butter. Use flaxseed meal mixed with water as an egg substitute. One tablespoon of flaxseed meal mixed with three tablespoons of water equals one egg. For butter, use coconut oil or a vegan alternative. This keeps your bread moist and tasty. To maintain the batter's texture, ensure you mix well, so it remains light and fluffy. You can add nuts or dried fruits for extra flavor. Walnuts or almonds give a nice crunch. Dried cranberries or blueberries add sweetness. If you want more citrus, try adding orange or lime zest. This will brighten the flavor of the bread. You can even mix different citrus fruits for a unique twist. Don't hesitate to experiment, and see what flavors you love best! To keep your Lemon Poppy Seed Bread fresh, you have two main options: room temperature and refrigeration. Storing it at room temperature is best if you plan to eat it within a few days. Place the bread in an airtight container. This keeps it soft and moist. If you want to store it longer, refrigeration works too. Just know that it may dry out a bit. Using airtight containers is key. They block air and moisture. This helps prevent your bread from going stale. If you choose to refrigerate it, wrap the bread tightly in plastic wrap first. Then, place it in the container. This double layer helps keep the bread fresh. Freezing is a great way to save your Lemon Poppy Seed Bread for later. To freeze it, let the bread cool completely first. Once cool, slice it into pieces if you prefer. Wrap each slice in plastic wrap. Then, place the wrapped slices in a freezer-safe bag or container. This method saves space and makes it easy to grab a slice when you want one. When you’re ready to enjoy it, thaw the bread in the fridge overnight. If you want it warm, you can reheat it in the oven. Preheat the oven to 350°F (175°C) and bake for about 10 to 15 minutes. This brings back its fresh-from-the-oven taste. For optimal flavor and freshness, Lemon Poppy Seed Bread lasts about 3 to 4 days at room temperature. If refrigerated, it can last up to a week. However, freezing extends its shelf life to about 2 to 3 months. Keep an eye out for signs of spoilage. If you see mold or if the bread smells off, it's time to toss it. Freshness is key to enjoying this delightful bread. Always trust your senses! Lemon poppy seed bread stays fresh for about 3 to 5 days at room temperature. To keep it fresh longer, store it in an airtight container. You can also wrap it tightly in plastic wrap or foil. This helps block out air and moisture. If you want to enjoy it later, freeze it for up to three months. Yes, you can make this bread ahead of time. Bake it and let it cool completely. Then, wrap it tightly and store it in the fridge for up to a week. For longer storage, freeze it. Just remember to slice it before freezing. This makes it easy to grab a slice whenever you want. Lemon poppy seed bread pairs well with many items. For breakfast, try it with fresh fruit or yogurt. You can also enjoy it with coffee or tea. For dessert, a scoop of vanilla ice cream or a dollop of whipped cream adds a nice touch. You can even drizzle some honey or jam on top for extra flavor. Absolutely! To make mini loaves, use small loaf pans. Adjust the baking time to about 30 to 40 minutes. Check for doneness with a toothpick. It should come out clean when the bread is done. This way, you can share or gift smaller portions easily. In this blog post, we've covered everything about Lemon Poppy Seed Bread. You learned the full list of ingredients and tips for choosing fresh ones. You also found step-by-step instructions for baking, plus tips and tricks for perfect results. Variations like gluten-free and vegan options were discussed, along with storage tips to keep your bread fresh. Enjoy making this tasty loaf that gives you bright flavors. With these ideas, you can bake with confidence and impress anyone who tries your bread. Happy baking!](https://dailydishly.com/wp-content/uploads/2025/06/d333cd57-b5c0-4704-bdd2-e8fc2d1dc8a6-768x768.webp)


 - [Try these unique variations on classic cookie recipes](#) - [Explore more about baking with matcha in this article](#) You learned how to make delicious matcha cookies from scratch. We covered all the key ingredients and steps. Remember to follow the tips for better baking. You can also try different flavors and shapes. Store your cookies properly to keep them fresh. With these skills, you can impress friends and family. Enjoy the process of baking and sharing your treats!](https://dailydishly.com/wp-content/uploads/2025/10/4f6c0078-ad7e-405f-ae22-b14a1484e544_U1-768x768.webp)
