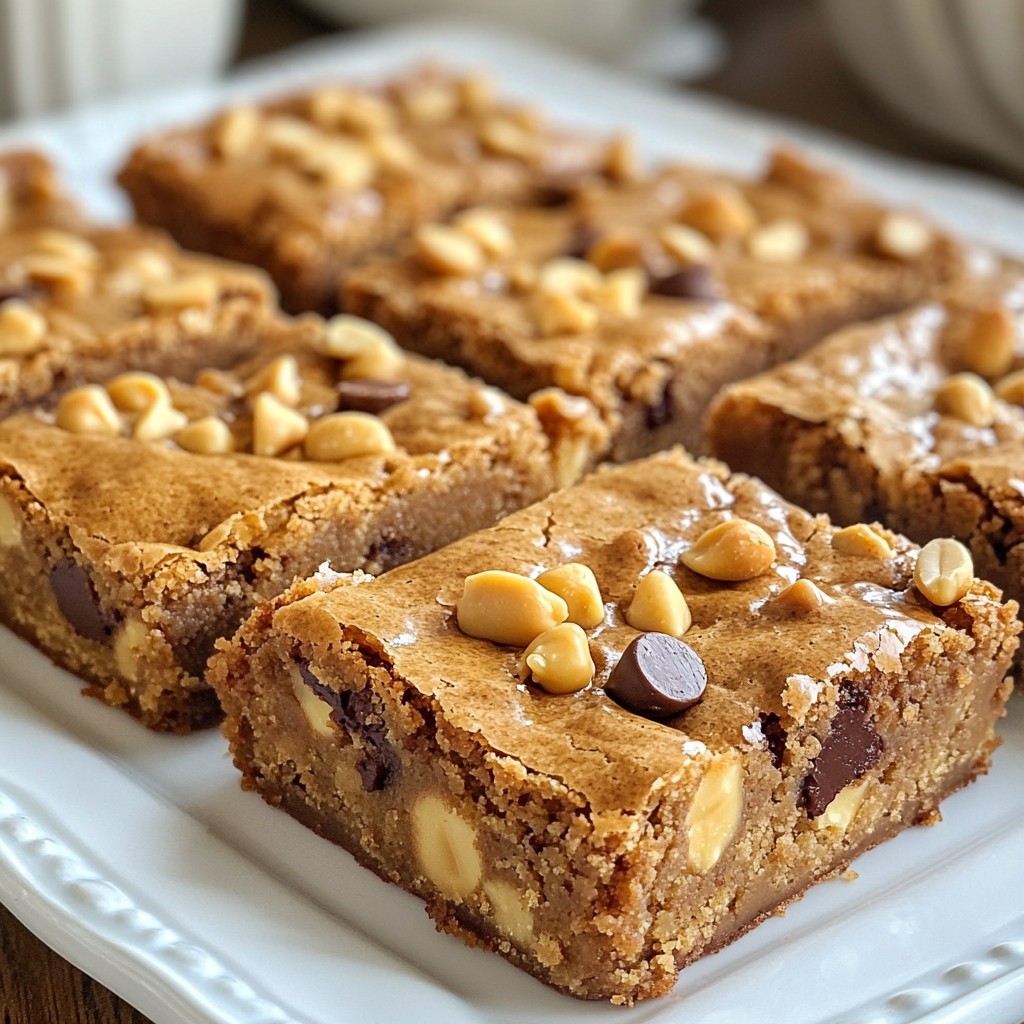
If you love the rich flavors of chocolate and peanut butter, you'll adore these Chocolate Chip Peanut Butter Blondies! They’re simple to make, and you'll impress everyone with your baking skills. I’ll guide you through every step, from essential ingredients to tips for perfecting your blondies. Ready to indulge in a treat that's both creamy and chewy? Let’s get started on this sweet adventure!
Why I Love This Recipe
- Nutty Flavor Explosion: The combination of creamy peanut butter and roasted peanuts creates a rich, nutty flavor that is truly irresistible.
- Chocolatey Goodness: With semi-sweet chocolate chips folded into the batter, every bite is a delightful mix of sweetness and nuttiness.
- Easy to Make: This recipe requires minimal ingredients and steps, making it perfect for a quick and satisfying treat.
- Perfect for Sharing: Cut these blondies into squares and they’re ideal for parties, potlucks, or simply sharing with friends and family.
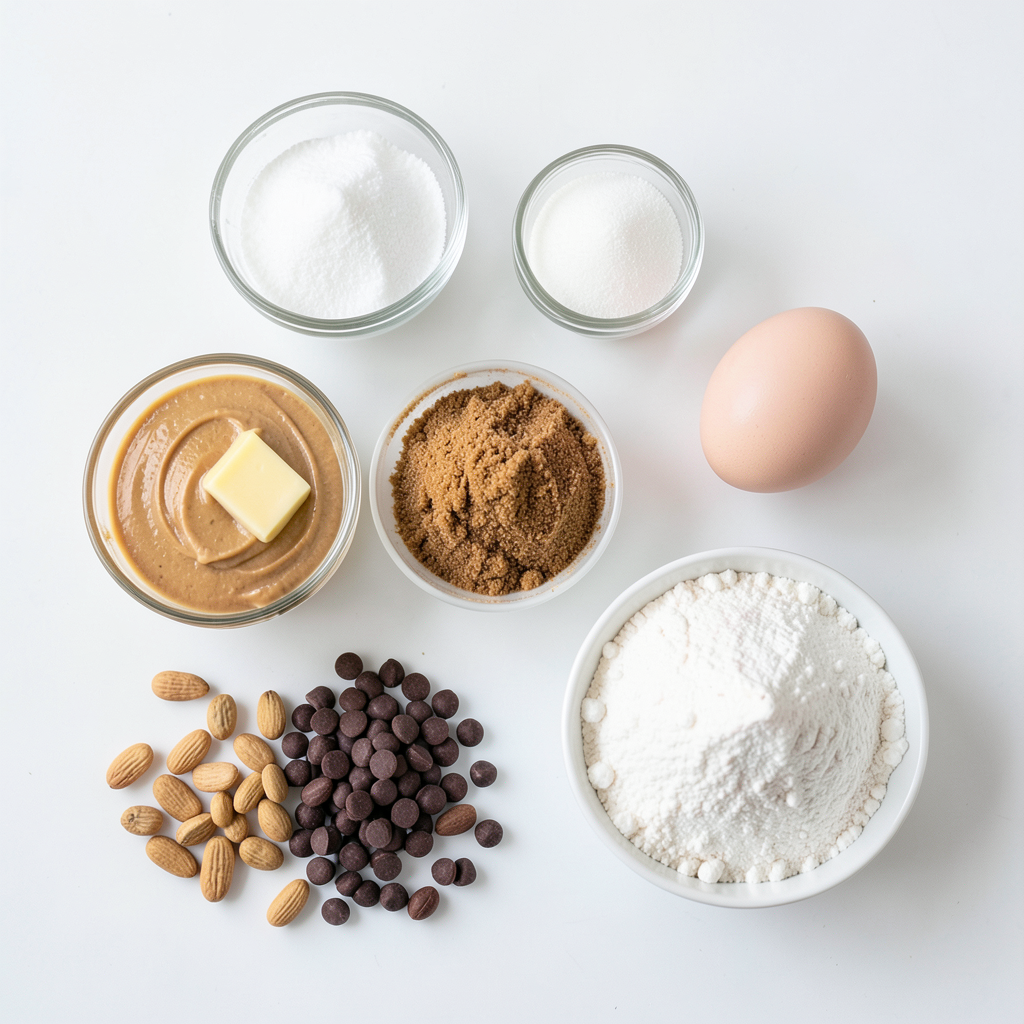
Ingredients
To make Chocolate Chip Peanut Butter Blondies, gather these key ingredients:
- 1 cup creamy peanut butter
- 1/2 cup unsalted butter, melted
- 1 cup brown sugar
- 1/2 cup granulated sugar
- 1 teaspoon vanilla extract
- 2 large eggs
- 1 cup all-purpose flour
- 1 teaspoon baking powder
- 1/2 teaspoon salt
- 1 cup semi-sweet chocolate chips
- 1/2 cup chopped roasted peanuts (optional)
Each ingredient plays a special role. The creamy peanut butter adds rich flavor and moisture. Unsalted butter helps the blondies stay soft. Brown sugar gives a deep sweetness, while granulated sugar adds a nice crunch.
Vanilla extract adds warmth, and eggs bind everything together. All-purpose flour gives structure, while baking powder ensures they rise. Salt enhances all the flavors. Semi-sweet chocolate chips bring sweetness and texture, and roasted peanuts add a delightful crunch.
Now you have all the ingredients ready. Grab your measuring cups and let's get cooking!
Step-by-Step Instructions
Preparation Steps
1. Preheat your oven to 350°F (175°C). This step is vital for baking.
2. Grease a 9x9 inch baking dish. You can also use parchment paper for easy removal.
3. Mix wet ingredients. In a large bowl, combine 1 cup of creamy peanut butter and 1/2 cup of melted unsalted butter. Stir until smooth.
Combining Dry Ingredients
1. Whisk the flour mixture. In another bowl, mix 1 cup of all-purpose flour, 1 teaspoon of baking powder, and 1/2 teaspoon of salt. This blend gives structure to your blondies.
2. Fold wet and dry mixtures together. Slowly add the dry mix to the wet one. Stir gently until just combined. Avoid overmixing, as it can make the blondies tough.
Baking and Cooling
1. Pour the batter into the prepared baking dish. Spread it evenly with a spatula.
2. Bake for 25-30 minutes. Check for doneness by inserting a toothpick in the center. It should come out with a few moist crumbs.
3. Cool before serving. Let the blondies cool in the pan for about 10 minutes. Then transfer them to a wire rack to cool completely. This step helps them set up nicely and makes cutting easier.
Tips & Tricks
Achieving the Perfect Blondies
To get the best blondies, avoid overmixing the batter. Overmixing can make them tough. Mix until just combined. This helps keep them soft and chewy.
Ensure even baking by spreading the batter evenly in the pan. Use a spatula for this. If the batter is uneven, some parts may bake faster than others.
Substitutions and Additions
You can use different nut butters if you want. Almond or cashew butter works well too. These nut butters add unique flavors to your blondies.
For sweeteners, you can try honey or maple syrup. These will change the taste a bit but still keep it sweet.
Serving Suggestions
For pairings, consider serving with vanilla ice cream or whipped cream. The cold creaminess balances the warm, soft blondies.
I recommend serving them warm for the best taste. Let them cool slightly but serve them while they are still a bit warm. Enjoy!
Pro Tips
- Use Room Temperature Ingredients: Make sure your eggs and butter are at room temperature for better emulsification, resulting in a smoother batter.
- Don’t Overmix: Gently fold the dry ingredients into the wet mixture until just combined to keep the blondies soft and chewy.
- Check for Doneness: Start checking your blondies at the 25-minute mark. They should be golden brown and a toothpick inserted in the center should come out with a few moist crumbs.
- Storage Tips: Store any leftovers in an airtight container at room temperature for up to 3 days, or refrigerate for up to a week for extra freshness.
Variations
Flavor Enhancements
You can make these blondies even better. Try adding spices like cinnamon or nutmeg. A splash of almond extract adds a nice touch. Different types of chocolate can also change the taste. Use dark chocolate or white chocolate chips for fun flavors. You can even mix in chunks of your favorite candy bars.
Dietary Adjustments
If you want gluten-free blondies, swap all-purpose flour with almond flour or a gluten-free blend. Many brands offer these mixes now. For a vegan version, replace eggs with flax eggs or applesauce. Use a vegan butter and ensure your chocolate chips are dairy-free. These swaps keep the blondies delicious.
Seasonal Variants
You can have fun with seasonal flavors. During the holidays, add in festive spices like ginger or nutmeg. Dried cranberries or chopped nuts give a nice crunch. In summer, you can pair blondies with fresh berries. Strawberries or raspberries add a fruity taste. These variations make your blondies special for any occasion.
Storage Info
Best Practices for Storing
To keep your chocolate chip peanut butter blondies fresh, store them at room temperature. Place them in an airtight container. This method keeps them soft and chewy. If you live in a warm area, store them in the fridge. Just make sure they are in a sealed container to prevent them from drying out.
Freezing Instructions
You can freeze blondies for later enjoyment. Cut them into squares before freezing. Wrap each piece tightly in plastic wrap. Place the wrapped blondies in a freezer-safe bag. They will stay fresh for about three months.
When you want to eat them, take out a piece and thaw it at room temperature. You can also reheat them in the microwave for a few seconds. This warms them up nicely.
Shelf Life
Chocolate chip peanut butter blondies last about a week at room temperature. In the fridge, they can last up to two weeks. If frozen, they remain good for about three months. Always check for any signs of spoilage before enjoying your treats!
FAQs
Common Questions
How to tell when blondies are done? Blondies are done when the edges are firm, and the center looks slightly set. A toothpick inserted into the center should come out with a few moist crumbs. This shows they are baked but still soft.
Can I use crunchy peanut butter instead of creamy? Yes, you can use crunchy peanut butter. It will add more texture and crunch to the blondies. The flavor will still be rich and tasty.
What can I substitute for eggs in this recipe? You can use unsweetened applesauce or mashed banana as an egg substitute. Use 1/4 cup per egg. This will keep the blondies moist and yummy.
Additional Recipe Queries
Are blondies different from brownies? Yes, blondies are different from brownies. Blondies have a base of brown sugar and vanilla, while brownies use cocoa powder. Blondies taste sweet and nutty, while brownies are chocolatey.
Can I make these blondies nut-free? Absolutely! You can omit the peanut butter and use sun butter or a nut-free spread. Just make sure to check for any allergens in your ingredients.
What is the best way to cut blondies into perfect squares? To cut blondies into perfect squares, use a sharp knife. Lightly grease the knife or dip it in hot water for a clean cut. This helps avoid sticking and gives you nice edges.
You now have a complete guide to making delicious blondies. We covered the key ingredients, preparation steps, and baking tips. I shared variations to customize your blondies and how to store them for later. With these simple steps and helpful ideas, you can enjoy good blondies at any time. Remember, the right mix of ingredients and a bit of care can make your treats great! Dive into baking and make these tasty treats your own.