Want a treat that's easy to make and fun to eat? Chocolate covered banana pops are the perfect choice! With just a few simple steps, you can turn ripe bananas into a delicious snack. In this post, I’ll guide you through the ingredients, instructions, and tips. You’ll also find ways to customize your pops with tasty toppings. Let's get started on this sweet adventure!
Why I Love This Recipe
- Easy to Make: This recipe requires minimal ingredients and steps, making it perfect for anyone, even beginners in the kitchen.
- Healthy Twist: Using bananas as the base gives a nutritious spin to a classic treat, satisfying sweet cravings without the guilt.
- Customizable: You can personalize these pops with your favorite toppings, from nuts to sprinkles, catering to everyone's tastes.
- Fun for Kids: Kids love helping out in the kitchen, and creating these chocolate-covered banana pops is a delightful activity for families.
Ingredients
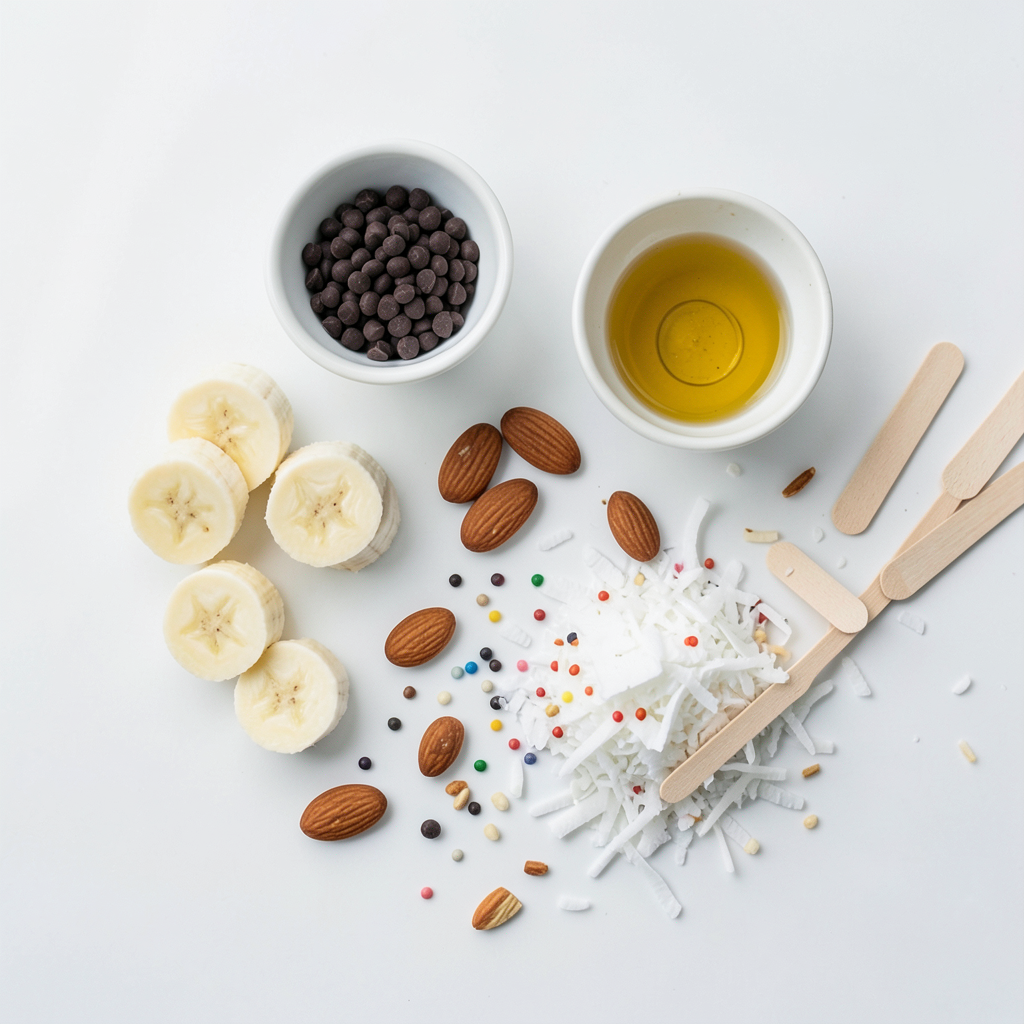
List of Main Ingredients
- 2 ripe bananas, cut into 1-inch pieces
- 1 cup dark chocolate chips (or milk chocolate for a sweeter taste)
- 1 tablespoon coconut oil (optional, for smoother chocolate)
- Wooden popsicle sticks
Optional Ingredients for Toppings
- 1/4 cup chopped nuts (almonds, walnuts, or peanuts)
- 1/4 cup shredded coconut (unsweetened)
- 1/4 cup sprinkles (optional)
Required Equipment
- Parchment-lined baking sheet
- Microwave-safe bowl
- Fork or spoon for dipping
- Freezer
Gather these ingredients and tools before you start. The bananas should be ripe for the best flavor. Choose chocolate chips based on your taste. Dark chocolate gives a rich taste, while milk chocolate offers sweetness. Coconut oil helps make the chocolate smooth.
For toppings, you can get creative. Chopped nuts add crunch. Shredded coconut brings a tropical touch. Sprinkles add fun colors for kids. Use whatever you like!
Make sure you have a baking sheet ready. It should be lined with parchment paper. This helps the pops not stick. A microwave-safe bowl is vital for melting the chocolate.
With these items, you are ready to make your chocolate-covered banana pops!
Step-by-Step Instructions
Preparing the Bananas
Start by peeling the bananas. Cut them into 1-inch thick pieces. Each piece should be sturdy enough to hold. Next, take a wooden popsicle stick. Insert it into each banana piece. This stick will help you dip and hold the pops. Once all pieces have sticks, place them on a baking sheet lined with parchment paper. Now, put the baking sheet in the freezer for about 30 minutes. This helps the banana pieces become firm and easier to coat.
Melting the Chocolate
Take a microwave-safe bowl. Add 1 cup of dark chocolate chips. If you like sweeter chocolate, use milk chocolate instead. For a smoother mix, add 1 tablespoon of coconut oil. Place the bowl in the microwave. Heat it in 30-second intervals. After each interval, stir the chocolate. Keep heating until the chocolate is smooth and fully melted.
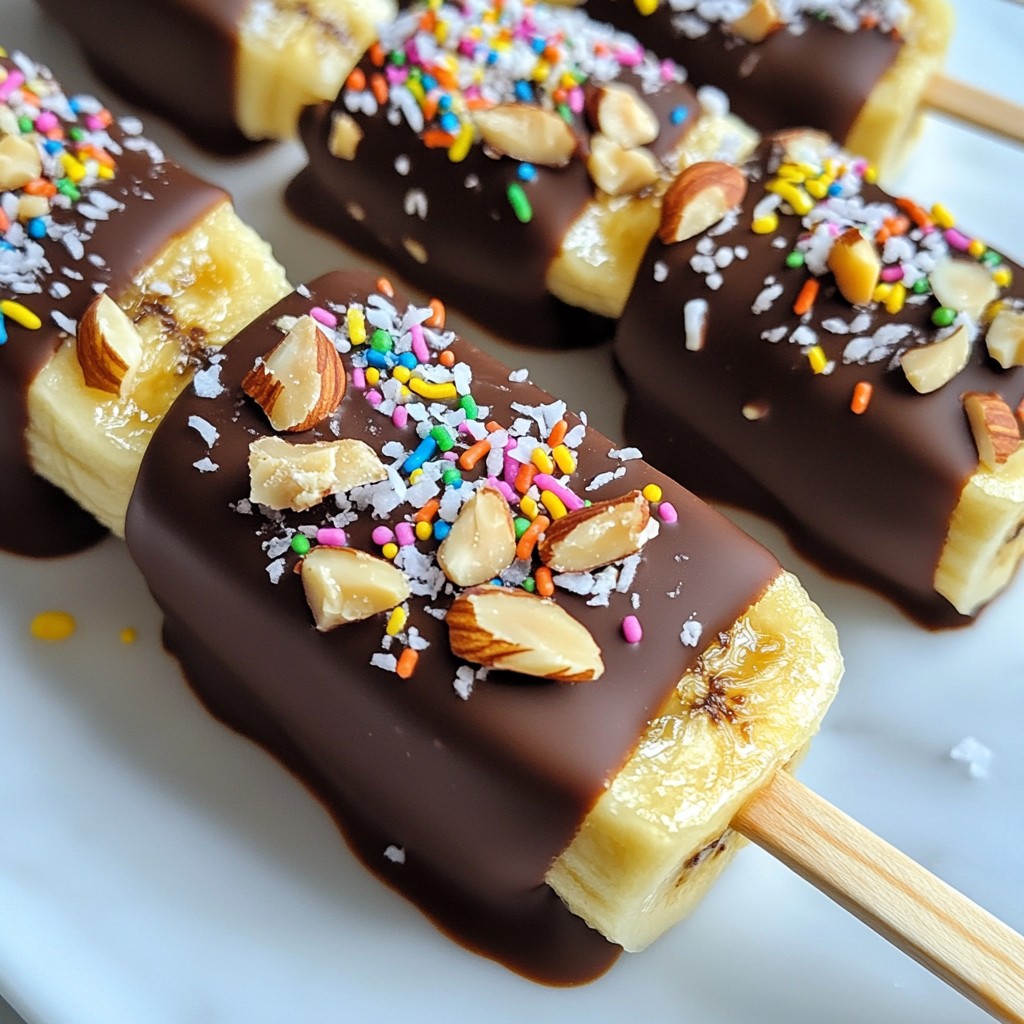
Dipping and Decorating the Pops
Now, take the frozen banana pops from the freezer. Dip each banana piece into the melted chocolate. Make sure to coat each piece fully. After dipping, let any extra chocolate drip off. While the chocolate is still wet, add your favorite toppings. You can sprinkle on chopped nuts, shredded coconut, or colorful sprinkles. Place the dipped banana pops back on the parchment-lined baking sheet. Freeze them again for about an hour. This helps the chocolate set. Once ready, serve these fun treats straight from the freezer!
Tips & Tricks
Choosing the Best Chocolate
Pick chocolate that you like best. Dark chocolate gives a rich taste. Milk chocolate adds sweetness. You can even mix both. Look for good-quality chips. They melt better and taste great. If you want a smooth finish, add a little coconut oil. This will make the chocolate shiny and thin.
Ensuring Smooth Chocolate Coating
To melt the chocolate, use a microwave-safe bowl. Heat it in short bursts of 30 seconds. Stir it after each time. This helps prevent burning. When the chocolate is smooth, it will coat your bananas evenly. Make sure to dip the banana pops quickly. This keeps the chocolate from hardening too fast.
Perfect Freezing Tips
Freezing the banana pops is key. After you coat them, place them on a lined baking sheet. Make sure they do not touch each other. This keeps them from sticking. Freeze them for about one hour. This helps the chocolate set well. If you want a firmer treat, freeze them longer. Enjoy your cold and tasty pops straight from the freezer!
Pro Tips
- Choose Ripe Bananas: Select bananas that are ripe but not overly soft for the best texture and sweetness.
- Use Quality Chocolate: High-quality chocolate will enhance the flavor of your pops. Opt for a brand you love!
- Experiment with Toppings: Get creative with your toppings! Try adding crushed cookies, seeds, or dried fruits for a unique twist.
- Store Properly: Keep leftover pops in an airtight container in the freezer to maintain freshness and prevent freezer burn.
Variations
Different Chocolate Options
You can change the chocolate for your banana pops. Dark chocolate gives a rich flavor. Milk chocolate is sweeter and great for kids. White chocolate offers a fun twist. You can also try flavored chocolate, like mint or orange for a new taste.
Alternative Toppings
Toppings make your banana pops unique. Chopped nuts add crunch. You can use almonds, walnuts, or peanuts. Unsweetened shredded coconut gives a tropical touch. Sprinkles add color and fun. Try crushed cookies for a sweet crunch. You can also use granola for a healthy option.
Flavor Enhancements
You can enhance flavors in your banana pops. Add a pinch of sea salt after dipping. This brings out the chocolate taste. Try drizzling caramel or peanut butter over the chocolate. You can also mix spices like cinnamon or chili powder into the chocolate. These little changes can make a big impact!
Storage Info
How to Store Chocolate Covered Banana Pops
To keep your chocolate covered banana pops fresh, pack them in an airtight container. Use parchment paper between layers to avoid sticking. This method works best for short-term storage. Make sure the pops are fully frozen before placing them in the container.
Freezer-Friendly Tips
These banana pops freeze well. You can keep them in the freezer for up to three months. For best results, wrap each pop in plastic wrap before putting them in the container. This extra layer helps prevent freezer burn. When you want a treat, just grab one and enjoy!
Shelf Life and Quality Maintenance
Chocolate covered banana pops last up to three months in the freezer. Their taste and texture remain good if stored properly. However, they taste best within the first month. After that, the banana may change slightly in texture. Always check for any frost or ice crystals before eating. If they look good, they should taste great!
FAQs
Can I use other fruits instead of bananas?
Yes, you can use other fruits. Strawberries, pineapple, or apple slices work well. Just cut them into bite-sized pieces. These fruits taste great with chocolate. Each fruit adds its own flavor. Experiment to find your favorite!
Is there a way to make this recipe healthier?
You can make this recipe healthier. Use dark chocolate for less sugar. Add nuts for protein and healthy fats. You can also skip the sprinkles and coconut. Fresh fruit toppings can also replace the chocolate. This keeps the treat tasty and light.
Can chocolate-covered banana pops be made in advance?
Yes, you can make these pops ahead of time. Just freeze them after dipping. They stay fresh for up to a month. Wrap them in plastic wrap or store them in a freezer bag. This way, you’ll have a fun treat ready to go!
You learned how to make delicious chocolate-covered banana pops. We covered key ingredients, needed tools, and step-by-step instructions. I shared tips for smooth coating and perfect freezing. You can try different chocolate and toppings for fun variations. Storing these treats is easy, too. Keep them fresh in the freezer or fridge.
Enjoy this tasty treat, and share your sweet snacks with family and friends. Make it your own, and have fun creating!