Chocolate Covered Oreo Truffles Irresistible Delight

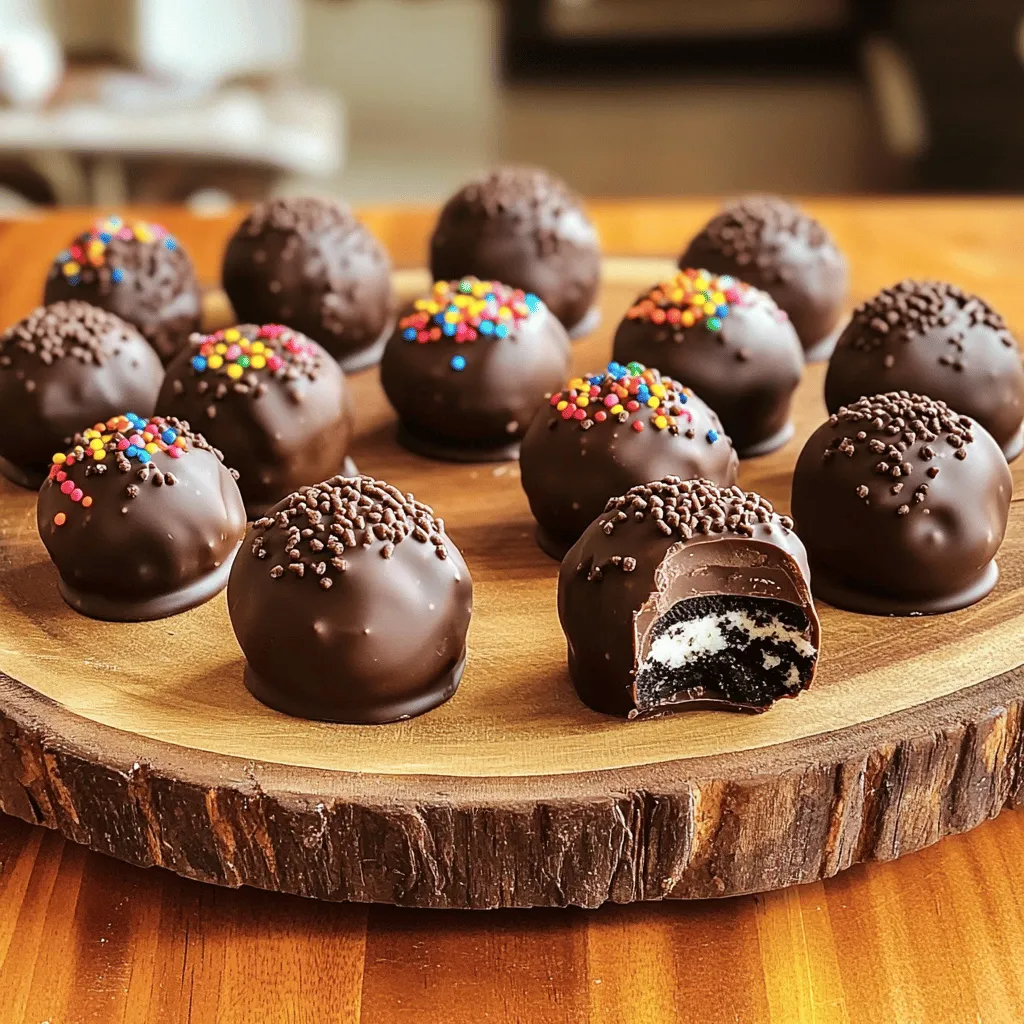
If you’re craving a sweet treat that’s easy to make and oh-so-delicious, you’ve come to the right place. Chocolate-covered Oreo truffles are a delightful mix of crunchy and creamy. With just a handful of ingredients, you can whip up these indulgent bites in no time. Whether for a celebration or a cozy night in, these truffles deliver joy in every bite. Let’s dive into how you can make your own irresistible delight!
Ingredients
To make delicious Chocolate Covered Oreo Truffles, you need just a few simple ingredients. Here is what you will need:
– 1 package (15.35 oz) Oreo cookies
– 8 oz cream cheese, softened
– 1 cup semisweet chocolate chips
– 1 tablespoon coconut oil (optional)
– Sprinkles or crushed Oreos for decoration
This list keeps it easy for you. The Oreo cookies give a rich flavor. Cream cheese makes the filling smooth and creamy. Semisweet chocolate chips create a sweet outer layer that complements the cookies. Coconut oil helps the chocolate melt smoothly, but it’s not a must. You can choose colorful sprinkles or crushed Oreos to make your truffles look fun and festive.
Using these ingredients, you can create a treat that everyone loves. It’s great for parties or just a sweet snack at home. I love how simple it is to bring these truffles together. You’ll impress your friends and family with this easy recipe.Enjoy every bite of these tasty treats!
Step-by-Step Instructions
Preparation of Oreo Mixture
To start, you need to crush the Oreos. You can use a food processor or a rolling pin. If you choose a rolling pin, place the cookies in a zip-lock bag first. Aim for fine crumbs. Next, take your crushed Oreos and combine them with softened cream cheese in a large bowl. Use a spatula or your hands. Mix until everything is well blended and forms a dough-like consistency.
Forming and Chilling Truffles
Now comes the fun part! Take tablespoon-sized portions of your Oreo mixture and roll them into balls. Make sure they are even-sized for uniform truffles. Place your rolled truffles on a baking sheet lined with parchment paper. It’s time to chill! Put the baking sheet in the refrigerator for about 30 minutes. This step helps firm up the truffles, making them easier to dip later.
Chocolate Coating Process
While your truffles chill, let’s melt some chocolate. In a microwave-safe bowl, combine the semisweet chocolate chips with coconut oil if you want a smoother coating. Microwave in 30-second increments. Stir after each time until the chocolate is fully melted and smooth. Once your truffles are chilled, take each one and dip it into the melted chocolate using a fork. Make sure they are completely covered, then gently tap off any excess chocolate.
Final Touches
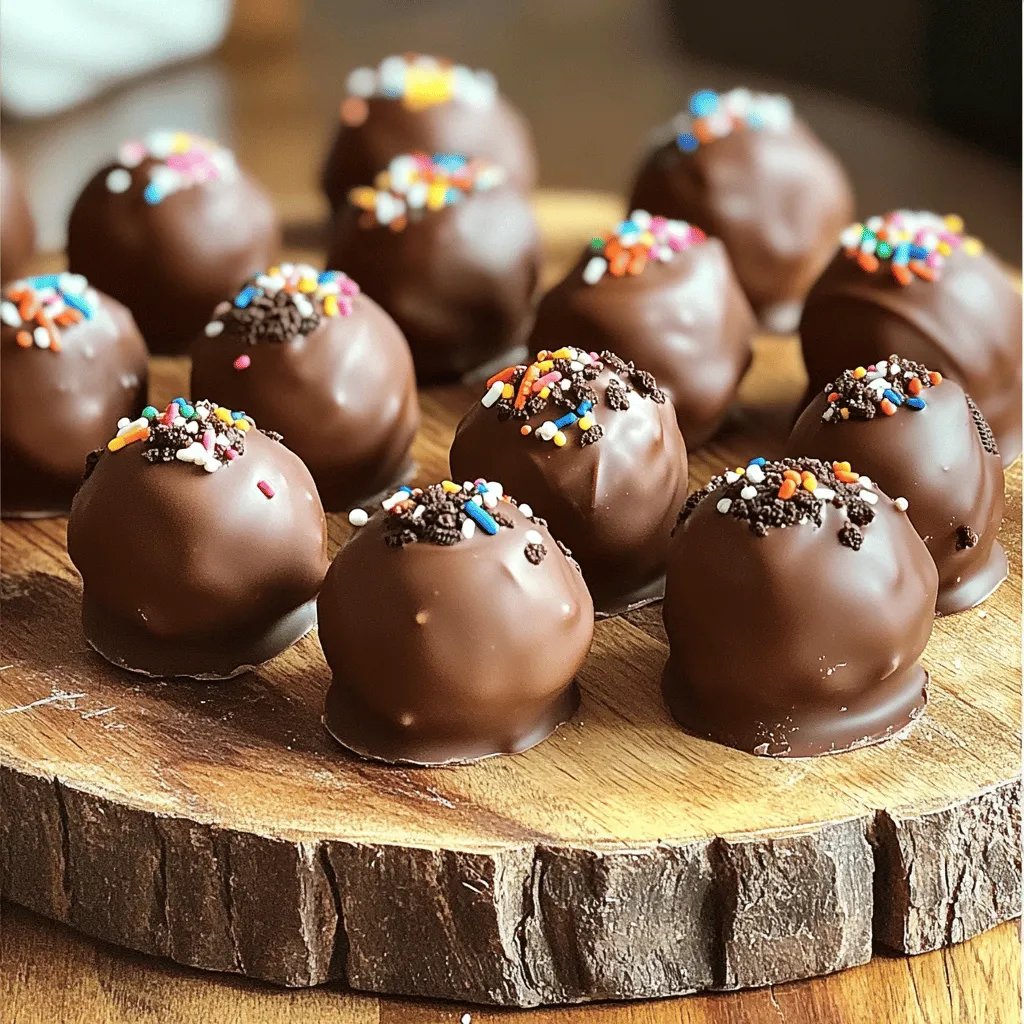
While the chocolate is still wet, get creative! You can decorate your truffles with sprinkles or crushed Oreos. This adds a fun touch. Place the decorated truffles back on the baking sheet. Let them sit at room temperature or in the fridge until the chocolate sets completely. This may take a little time, but trust me, it is worth the wait!
Tips & Tricks
Success Tips for the Best Truffles
– Make sure your cream cheese is fully softened. This helps blend it well with the Oreos.
– Chill the truffles adequately before dipping. This keeps their shape when coated in chocolate.
Melting Chocolate Tips
– Use a double boiler for easier melting. It prevents the chocolate from burning.
– Stir thoroughly to avoid clumping. Smooth chocolate makes for a better dip.
Serving Suggestions
– Present truffles in decorative packaging. This adds a special touch for gifts or parties.
– Pair with coffee or milk for dessert. The flavors blend nicely and enhance your treat.

Variations
Flavor Enhancements
You can make your chocolate covered Oreo truffles even tastier. Try adding flavored extracts. Peppermint and almond extracts work great. Just a drop or two adds a fun twist. You can also mix in different types of chocolate. Use white chocolate for a sweet touch or dark chocolate for a rich flavor. Each type changes the taste and look of your truffles.
Dietary Adaptations
If you have dietary needs, you can still enjoy these truffles. For gluten-free options, use gluten-free Oreos. This swap keeps the taste while fitting your diet. If you want vegan truffles, use dairy-free cream cheese. It gives the same creamy texture without any dairy. These changes let everyone enjoy this sweet treat.
Creative Toppings
Be bold and get creative with your toppings! You can use chopped nuts for a crunchy texture. Colored sprinkles add a fun pop of color. If you want more sweetness, try crushed candy bars on top. Coconut flakes also make a tasty addition. Each topping gives your truffles a unique and fun twist.
Storage Info
Storing Truffles
You should store your truffles in an airtight container. The refrigerator is best for this. They can stay fresh for up to two weeks. I love keeping them cold; it helps them hold their shape and flavor.
Freezing Options
If you want to keep your truffles longer, try freezing them. Simply place them in a freezer-safe container. When you’re ready to enjoy, thaw them in the fridge. This way, they taste fresh and delicious!
FAQs
Can I use different cookies instead of Oreos?
Yes, try different sandwich cookies for unique flavors. Use chocolate cookies for a rich taste. Vanilla cookies give a lighter touch. Experiment with flavors like peanut butter or mint. Each option brings a new twist to your truffles.
How can I make them less sweet?
Consider reducing the amount of chocolate or using dark chocolate. Dark chocolate has a rich taste with less sugar. You can also add a pinch of salt. This balance can cut the sweetness nicely. It creates a more complex flavor that you may enjoy.
Do I need to chill the truffles before dipping?
Yes, chilling helps maintain shape during the chocolate coating process. Firm truffles hold up better when dipped. After rolling them, place them in the fridge for about 30 minutes. This step is key to getting that perfect chocolate coat.
What other flavors work well in this recipe?
Peanut butter, caramel, or cookie dough flavors can be delicious alternatives. Mixing in peanut butter gives a creamy texture. Caramel adds a sweet, gooey surprise. You can even use flavored extracts to boost the taste.
Where can I buy Chocolate Covered Oreo Truffles?
Check local bakeries or specialty shops for ready-made options. Many places sell these tasty treats. You might find unique flavors that you can’t make at home. Enjoy the convenience of grabbing a box for special occasions.
These Oreo truffles are easy to make and fun to enjoy. You can crush Oreos, mix them with cream cheese, and form delightful bites. Dipping them in chocolate adds a rich finish. Remember to chill your truffles for the best texture. Get creative with flavors and toppings too! Store them right, and they’ll last up to two weeks in the fridge. Whether it’s a special event or just a treat for yourself, these truffles are sure to please. Enjoy making them and sharing with friends and family!


![To make a tasty no-bake strawberry cheesecake, you need a few key ingredients: - 200g digestive biscuits, crushed - 100g unsalted butter, melted - 400g cream cheese, softened - 100g powdered sugar - 1 teaspoon vanilla extract - 250ml heavy cream - 300g fresh strawberries, hulled and sliced - 100g strawberry jam These ingredients work together to create a rich and creamy dessert. The digestive biscuits form a crunchy base, while the cream cheese and heavy cream give it a smooth texture. You can customize your cheesecake with a few optional ingredients: - Fresh mint leaves for garnish - Additional fruit toppings like blueberries or raspberries - A splash of lemon juice for a tangy flavor - Chocolate shavings for a sweet touch These extras allow you to add your personal flair to the cheesecake. If you need substitutions, here are some ideas: - Use graham crackers instead of digestive biscuits for the base. - Swap cream cheese with Greek yogurt for a lighter option. - Try coconut cream instead of heavy cream for a dairy-free version. - Use honey instead of powdered sugar for a natural sweetener. These alternatives can make the recipe fit your needs while still tasting great. For the full recipe, check the detailed steps to create this delightful dessert. To start, gather your ingredients. You need crushed digestive biscuits and melted butter. In a mixing bowl, combine these two. Mix until you see a texture that looks like wet sand. Next, take a 9-inch springform pan. Press the biscuit mixture firmly into the bottom. Make sure it is even. This will be the base of your cheesecake. After that, refrigerate the pan for about 10 minutes. This helps the base to set nicely. Now, let’s make that creamy filling. In a new bowl, add softened cream cheese, powdered sugar, and vanilla extract. Beat these together until they become smooth and creamy. In another bowl, whip the heavy cream. Keep whipping until stiff peaks form. This means it will hold its shape well. Now, gently fold the whipped cream into the cream cheese mixture. Do this carefully so the filling stays light and airy. Once your filling is ready, pour it over the chilled biscuit base. Spread it evenly with a spatula. Now, let’s add some color. Arrange the sliced strawberries on top of the cheesecake. You can be creative with this step! In a small saucepan, melt the strawberry jam over low heat. Once it is runny, let it cool a little. Drizzle the jam over the strawberries for a shiny finish. Finally, cover your cheesecake with plastic wrap. Refrigerate it for at least 4 hours, or even overnight. This waiting time helps it set perfectly. For the full recipe, check the earlier section. When making a no-bake strawberry cheesecake, a few common mistakes can spoil your treat. First, don’t skip chilling the biscuit base. It needs to set before adding the filling. Second, make sure your cream cheese is fully softened. Cold cream cheese can create lumps in your mixture. Lastly, don’t rush the whipping of the heavy cream. Whip it until stiff peaks form for the best texture. To get a creamy and smooth texture, follow these steps. Mix the cream cheese, powdered sugar, and vanilla extract until it’s really smooth. Then, whip the heavy cream separately until it’s nice and fluffy. When you fold the whipped cream into the cream cheese mix, do it gently. This keeps air in the mixture, making it light and fluffy. Serving your cheesecake can be fun and creative. Cut slices and place them on pretty dessert plates. You can add fresh mint leaves on top for a pop of color. For extra sweetness, drizzle more strawberry jam over the slices. You can also serve it with a side of fresh strawberries. This adds a nice touch and makes the dessert look even better. For the full recipe, refer to the earlier sections. {{image_2}} You can change up the fruity flavor of your cheesecake. Swap strawberries for other berries like blueberries or raspberries. You can also use peaches, mangoes, or even kiwi. Just chop the fruit and layer it on top or mix it into the filling. This makes your dessert colorful and fun. Want a richer taste? Try adding chocolate or caramel. For chocolate, mix in cocoa powder or melted chocolate into the cream cheese. Drizzle caramel sauce on top for a sweet touch. Both options give your cheesecake a new twist that chocolate lovers will adore. If you need a gluten-free option, use gluten-free cookies for the base. Many brands offer tasty gluten-free biscuits. Check the label to be sure. This way, everyone can enjoy this delicious treat without worry. Make sure to use gluten-free cream cheese and whipped cream too. For the full recipe, check out the [Full Recipe]. To keep your No-Bake Strawberry Cheesecake fresh, store it in the fridge. Use an airtight container to prevent any odors from mixing in. If you don’t have one, cover the cheesecake tightly with plastic wrap. This keeps it safe and tasty. Your cheesecake stays fresh in the fridge for about 3 to 5 days. After that, the texture may change, and the flavor might fade. Keep an eye on any signs of spoilage, like a sour smell or discoloration. Yes, you can freeze No-Bake Strawberry Cheesecake. Wrap it well in plastic wrap and then foil. This keeps out air and prevents freezer burn. It can last up to 3 months in the freezer. When ready to eat, thaw it in the fridge for a few hours. Enjoy the creamy goodness! For the full recipe, check out the details above. Baked cheesecakes use heat to set the filling. This process gives a dense, rich texture. No-bake cheesecakes rely on cold temperatures to firm up. They often taste lighter and creamier. Baked cheesecakes need time in the oven, while no-bake ones chill in the fridge. This makes no-bake cheesecakes quicker to prepare. To make your cheesecake firmer, try these tips: - Use full-fat cream cheese. This adds richness and firmness. - Add gelatin to the filling. Dissolve it in water and mix it in. - Chill the cheesecake longer. Let it set overnight for the best results. - Avoid overmixing the cream cheese. This keeps air out and helps it firm up. Yes, you can use frozen strawberries. Just thaw them first and drain excess liquid. The flavor will still be great, but the texture may change slightly. Fresh strawberries give a firmer bite and vibrant look. For best results, try to use fresh strawberries in the recipe. For the full recipe, check the main article. No-bake strawberry cheesecake is easy and fun to make. We explored key ingredients, like strawberries and cream cheese, and even how to customize them. I shared step-by-step instructions to help you prepare the base, filling, and assembly. Tips on avoiding common mistakes will guide you to the perfect texture. With various topping options, you can get creative. Finally, proper storage keeps your cheesecake fresh longer. Remember, this dessert is versatile, so don't hesitate to experiment. Enjoy every bite of your delicious creation!](https://dailydishly.com/wp-content/uploads/2025/06/5274bd3f-8d96-4968-97f1-1841490db53b-768x768.webp)


![To make the best Cinnamon Sugar French Toast Sticks, you need a few simple ingredients. Here’s what you'll need: - 4 slices of thick bread (preferably brioche or challah) - 2 large eggs - 1/2 cup milk - 1 teaspoon vanilla extract - 1 teaspoon ground cinnamon - 2 tablespoons sugar - Pinch of salt - 2 tablespoons butter (for cooking) - Maple syrup or honey (for serving) Each ingredient plays a part in creating the perfect French toast sticks. Thick bread, like brioche or challah, helps give a soft and fluffy center. Eggs and milk form the custard mix, adding richness and flavor. The cinnamon and sugar will coat the outside, giving you that sweet crunch. You can serve these sticks warm with maple syrup or honey for dipping. For the complete guide, check out the Full Recipe. Enjoy cooking! Start by whisking together eggs, milk, and seasonings in a bowl. Use 2 large eggs and 1/2 cup of milk. Add 1 teaspoon of vanilla extract, 1 teaspoon of ground cinnamon, and a pinch of salt. This mixture will soak into the bread, giving it flavor and richness. Make sure everything blends well. Next, take 4 slices of thick bread, like brioche or challah. Slice each piece into 3 equal strips. This makes it easy to soak and cook. The strips should be about the size of your fingers. Now, dip each strip of bread into the custard mixture. Soak each piece for about 20-30 seconds on each side. You want each stick well-coated but not too soggy. This soaking step is key for taste and texture. In a large non-stick skillet, melt 2 tablespoons of butter over medium heat. The pan should be hot enough to sizzle when you add the bread. This step helps create a nice golden crust on the sticks. Add the soaked bread sticks to the skillet. Space them out so they don’t touch. Cook for 2-3 minutes on each side until golden brown. You might need to add more butter for later batches. Watch them closely! While the sticks cook, mix 2 tablespoons of sugar with 1 teaspoon of ground cinnamon in a small bowl. Once the sticks are done, toss them in this mixture right away. This gives them a sweet and spicy layer. Serve the warm sticks with a side of maple syrup or honey for dipping. You can also add fresh fruit or whipped cream if you like. Enjoy your tasty breakfast! For the full recipe, refer to the earlier section. The choice of bread can make or break your French toast sticks. For the best results, I recommend using thick bread. Brioche or challah works wonderfully. These breads are soft and sweet, giving your sticks a lovely flavor. You can also use Texas toast if you want a different taste. Just ensure the bread is thick enough to hold the custard well. Soaking time is key to getting the right texture. I suggest soaking each piece for about 20 to 30 seconds per side. This time allows the bread to absorb the custard without becoming too soggy. If you soak too long, the sticks can fall apart. You want them to be moist but still hold their shape. To prevent soggy French toast sticks, here are some tips: - Don’t soak too long: Stick to the recommended soak time. - Use a non-stick skillet: This helps them cook evenly. - Don’t overcrowd the pan: Leave space between each stick. This allows for better heat and crispiness. - Serve immediately: Enjoy them warm for the best taste. These tricks will help you make the perfect Cinnamon Sugar French Toast Sticks every time! For the full recipe, check out the [Full Recipe]. {{image_2}} You can easily add more flavor to your cinnamon sugar French toast sticks. Try mixing in some nutmeg or cardamom for a warm twist. You can also add a drop of almond or orange extract to the egg mix. These little changes can transform your dish into something special. Want to make your breakfast lighter? Use whole grain bread instead of white bread. This adds fiber and nutrients. You can also swap regular milk for almond or oat milk. For fewer calories, use egg whites instead of whole eggs. You could even try a gluten-free bread option if needed. These changes keep the taste while making it healthier. Dipping sauces can make your French toast sticks even more fun. Maple syrup is a classic choice, but you can try chocolate sauce or yogurt. A berry compote adds a nice fruity touch. For something unique, mix peanut butter with a bit of honey for a creamy dip. These sauces can take your breakfast to the next level. For the full recipe, check out the instructions above! To keep your Cinnamon Sugar French Toast Sticks fresh, first let them cool. Place them in an airtight container. Store them in the fridge for up to three days. This way, they stay tasty and safe to eat. When it's time to enjoy your leftovers, reheating is key. The best way to reheat them is in the toaster or skillet. For the toaster, set it on medium and toast until warm and crispy. If using a skillet, add a bit of butter and heat on low until warmed through. This keeps the texture just right. You can freeze these sticks for later, too! First, let them cool completely. Next, place them in a single layer on a baking sheet. Freeze for about an hour. Once frozen, transfer them to a freezer bag. They can last up to two months. To reheat, bake them straight from the freezer at 350°F until crispy. Enjoy a quick breakfast anytime! Yes, you can prep these sticks in advance. Make the custard mix and soak the bread sticks. After soaking, place them on a baking sheet and freeze them. When ready to cook, just heat your skillet and fry them until golden. This method saves time on busy mornings. For the best French toast sticks, use thick bread. Brioche and challah are perfect choices. They soak up the custard well and stay soft inside. Avoid thin bread, as it may break during cooking. You can make these French toast sticks dairy-free easily. Swap regular milk for almond milk, oat milk, or soy milk. Use dairy-free butter for cooking. These options keep the flavor rich without any dairy. For the full recipe, check out the [Full Recipe](#). Enjoy making these tasty breakfast sticks! You learned how to make tasty French toast sticks. We covered the ingredients, step-by-step instructions, and helpful tips. Variations let you get creative, while storage info keeps your leftovers fresh. Making this dish is simple and fun. Enjoy serving them with syrup or honey. With these tips, you’ll always have perfect French toast sticks. Now, it’s time to impress your family and friends with your cooking!](https://dailydishly.com/wp-content/uploads/2025/07/b44f5941-c526-4695-8628-c54dc71bcebc-768x768.webp)
