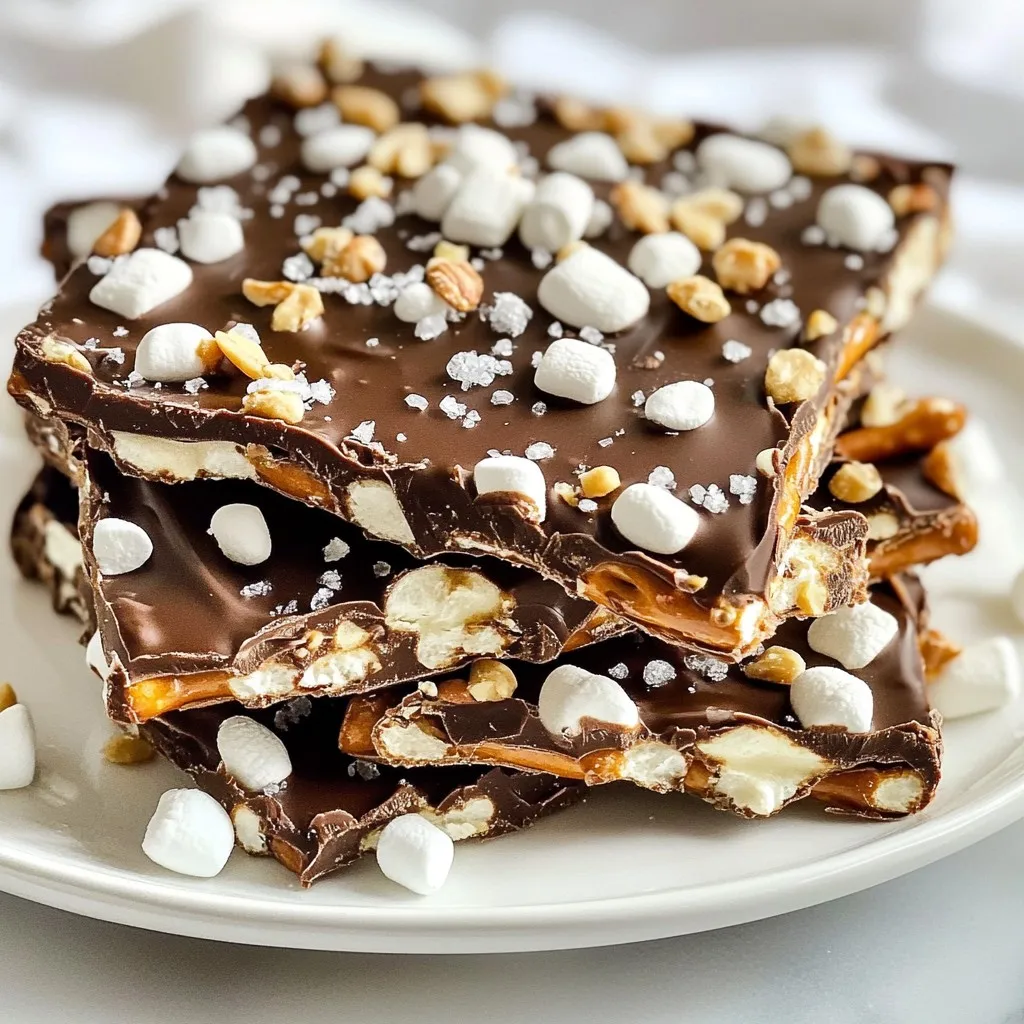
Are you ready to treat yourself to something delicious? Chocolate Covered Pretzel Bark is here to satisfy those sweet and salty cravings. This simple, no-fuss recipe combines crunchy pretzels, rich chocolate, and tasty toppings. Whether for a snack or a gift, you can’t go wrong. Let’s dive in and create the perfect crunchy treat that everyone will love!
Why I Love This Recipe
- Delicious Combination: The sweet and salty flavors of chocolate and pretzels create a delightful treat that everyone loves.
- Easy to Make: This recipe requires minimal ingredients and can be prepared in just 15 minutes, making it perfect for last-minute cravings.
- Customizable: You can easily modify this recipe by adding your favorite toppings, such as nuts or marshmallows, for a personal touch.
- Perfect for Sharing: This bark is great for parties, gifts, or family gatherings, ensuring there’s something for everyone to enjoy.
Ingredients
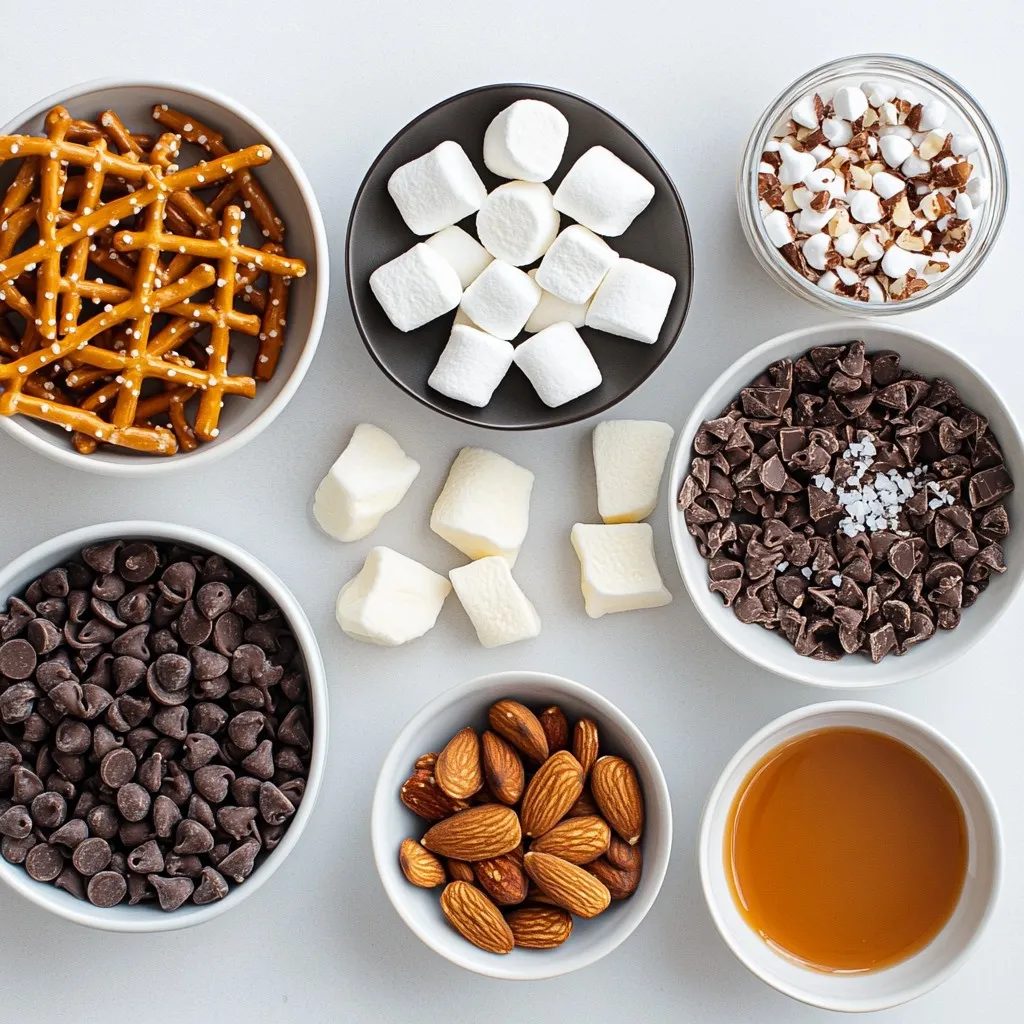
List of Ingredients
– 2 cups pretzels, broken into pieces
– 1 cup dark chocolate chips
– 1 cup white chocolate chips
– 1/2 cup crushed nuts (almonds, pecans, or walnuts)
– 1/4 cup mini marshmallows (optional)
– Sea salt for sprinkling
– 1/4 cup caramel sauce (optional for drizzling)
To make chocolate covered pretzel bark, you need a mix of salty and sweet. The pretzels add a nice crunch. You can use any kind of pretzels you like. I often break them into smaller pieces for easy snacking.
Dark chocolate and white chocolate create a lovely contrast. The dark chocolate gives a rich flavor, and the white chocolate adds sweetness. I love using high-quality chocolate chips. They melt well and taste great.
Nuts add texture. Almonds, pecans, or walnuts work well here. You can also use crushed peanuts or cashews if you prefer. For extra fun, mini marshmallows add a sweet touch. They are optional, but they make the bark look festive and fun.
Sprinkling sea salt on top balances the sweetness. It enhances the flavor of the chocolate. If you want a caramel twist, drizzling caramel sauce is a great option. It adds a rich, gooey element to your bark.
Optional Ingredient Variations
– Different types of chocolate (milk chocolate, white chocolate)
– Alternative nuts (cashews, macadamia nuts)
– Flavor enhancements (coconut flakes, dried fruit)
Feel free to mix and match your ingredients. You can use milk chocolate if you prefer a sweeter taste. Cashews or macadamia nuts bring a unique flavor. Adding coconut flakes or dried fruit can make the bark even more interesting. You can create your own signature version!
Step-by-Step Instructions
Preparation Steps
– Line a baking sheet with parchment paper. This makes clean-up easy.
– In a microwave-safe bowl, melt the dark chocolate chips. Heat in 30-second bursts. Stir after each interval until smooth.
Mixing and Spreading
– Take 2 cups of broken pretzels and fold them into the melted chocolate. Make sure they are all coated.
– Pour this mixture onto your lined baking sheet. Spread it out evenly to about 1/4 inch thick.
Adding the Toppings
– Melt the white chocolate chips in another bowl, using the same method.
– Drizzle the melted white chocolate over the dark chocolate layer. Use a spoon for a fun design.
– While the chocolate is still warm, sprinkle crushed nuts and mini marshmallows on top.
– If you like, drizzle some caramel sauce over the bark for extra sweetness.
– Add a pinch of sea salt to enhance the flavors.
– Place the baking sheet in the fridge for about 1 hour to set.
– Once it’s hard, break the bark into pieces and store in an airtight container.
Tips & Tricks
Melting Chocolate
To melt chocolate well, use a microwave or a double boiler. If using a microwave, place the chocolate chips in a bowl. Heat them for 30 seconds. Stir and repeat until smooth. This keeps the chocolate from burning. If you prefer a double boiler, fill a pot with water. Heat it until simmering, then place a bowl with chocolate on top. Stir until melted. This method offers more control over the heat.
Storing the Bark
To keep your chocolate covered pretzel bark fresh, store it in an airtight container. Use a container that prevents air and moisture from getting in. If you want to keep it for longer, place parchment paper between layers. This stops the pieces from sticking together.
Presentation Ideas
When serving the bark, break it into fun shapes. You can cut it into squares or use a mallet to create random pieces. For gifting, wrap the bark in clear cellophane. Add some colorful ribbon for a special touch. This makes your treat look even more inviting and thoughtful.
Pro Tips
- Use Quality Chocolate: Opt for high-quality chocolate chips to enhance the flavor of your bark.
- Perfect Pretzel Pieces: Break the pretzels into similar-sized pieces for even chocolate coating and a uniform look.
- Chill for Crunch: Allow the bark to chill in the refrigerator longer if you prefer a firmer texture.
- Customize Toppings: Feel free to experiment with different toppings like dried fruits, sprinkles, or coconut for a unique twist.
Variations
Flavor Combinations
You can make this treat even tastier with some fun flavor twists. Here are a couple of my favorites:
– Salted Caramel Chocolate Covered Pretzel Bark: Add a drizzle of caramel sauce over the bark before it hardens. Sprinkle some sea salt on top for a sweet and salty mix. The contrast of flavors will amaze you!
– Peanut Butter Chocolate Pretzel Bark: Mix in creamy peanut butter with the dark chocolate. This adds richness and a nutty flavor. You can also sprinkle some chopped peanuts on top for extra crunch.
Seasonal Themes
Food can reflect the season. Here are some ideas to make your bark festive:
– Holiday-themed modifications: Use colorful sprinkles to match the season. For Easter, go for pastel colors. For Christmas, use red and green sprinkles to make it festive.
– Chocolate Covered Pretzel Bark for parties: This treat is great for gatherings. You can shape it into fun forms or add sprinkles that match your party theme.
Healthier Alternatives
If you want a healthier version, you can make a few smart swaps:
– Using dark chocolate with a higher cocoa content: Choose dark chocolate with at least 70% cocoa. It has less sugar and more antioxidants, making it a better choice.
– Substituting nuts or using sugar-free chocolate: You can swap out regular chocolate for sugar-free options. Also, use nuts like almonds or walnuts for a nutritious crunch, or skip the nuts if you prefer.
Storage Info
Recommended Storage Duration
You can store chocolate covered pretzel bark in the fridge for up to two weeks. If you keep it at room temperature, it lasts about a week. Always place it in an airtight container to keep it fresh. This helps avoid moisture, which can spoil the bark.
Freezing Instructions
Yes, you can freeze chocolate covered pretzel bark. Wrap it tightly in plastic wrap. Then, place it in a freezer-safe bag. It will stay good for about three months. When you’re ready to eat it, let it thaw in the fridge overnight. This way, it keeps its taste and texture.
Signs of Spoilage
To check if the pretzel bark has gone bad, look for these signs:
– Change in color: If it looks dull or gray.
– Odor: If it smells off or sour.
– Texture: If it feels sticky or has a strange texture.
If you notice any of these signs, it’s best to throw it away.
FAQs
Can I make chocolate covered pretzel bark in advance?
Yes, you can make chocolate covered pretzel bark in advance. It stores well for up to two weeks. Just keep it in an airtight container. This way, you have a tasty treat ready when you want it.
What type of chocolate is best for melting?
Dark chocolate chips work best for melting. They have a smooth texture and rich taste. You can also use milk chocolate or white chocolate. Each type gives a unique flavor to your bark.
How do I add flavors or mix-ins to the pretzel bark?
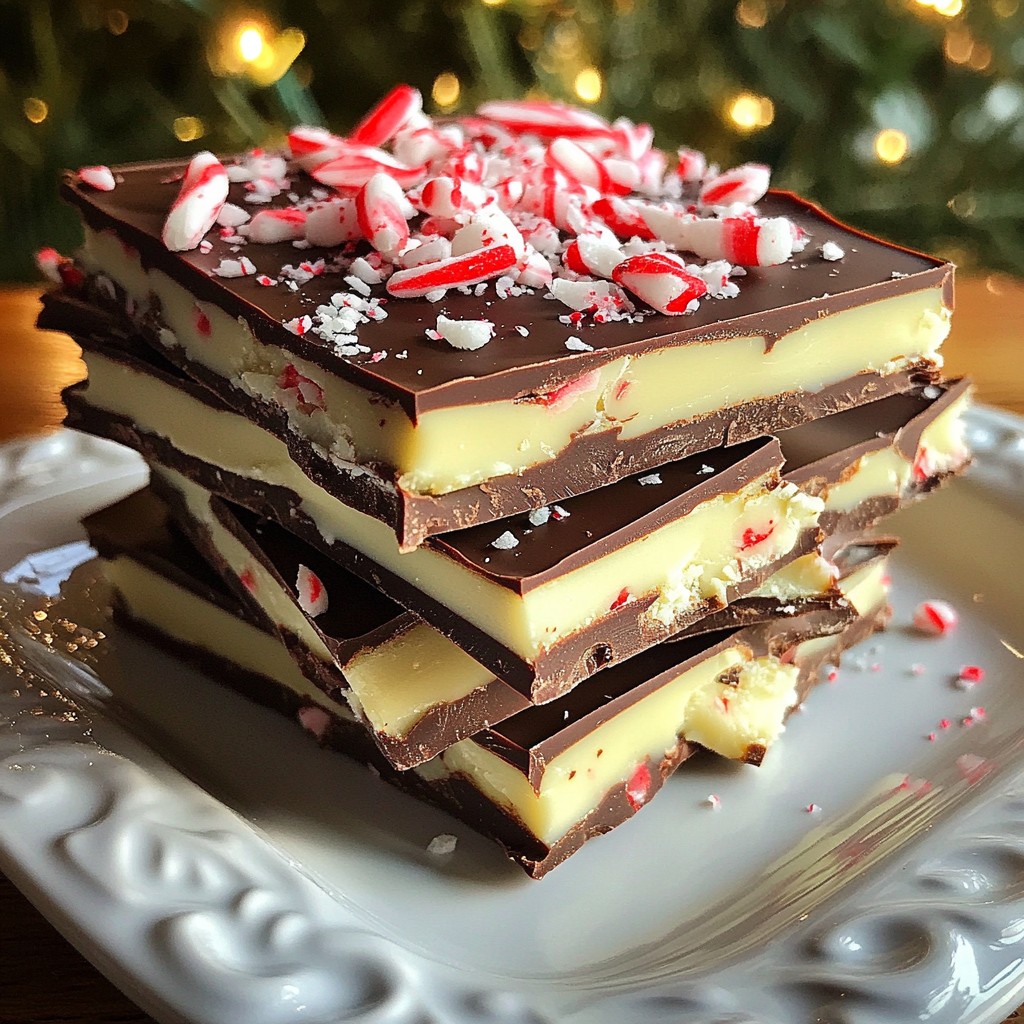
You can add flavors by mixing in different ingredients. Try crushed candy canes for minty bark. Dried fruit, like cranberries, adds sweetness. You can also use flavored nuts for more taste.
Is it possible to make this recipe without nuts?
Absolutely! You can skip the nuts if you prefer. Just leave them out and enjoy the pretzel and chocolate flavors. The bark will still taste great without them.
What can I do if my chocolate isn’t melting properly?
If your chocolate isn’t melting, check the heat. Microwave in shorter bursts to avoid burning. Stir often to help it melt evenly. If it still won’t melt, add a tiny bit of oil to help smooth it out.
You learned how to make chocolate covered pretzel bark. We covered all the ingredients, steps, and tips to create this tasty treat. Remember, you can customize it with different nuts or flavors. Store it well, so it stays fresh for sharing or enjoying later. Whether for parties or gifts, this bark is sure to impress. Now, get creative and make your own version! Enjoy your sweet adventur