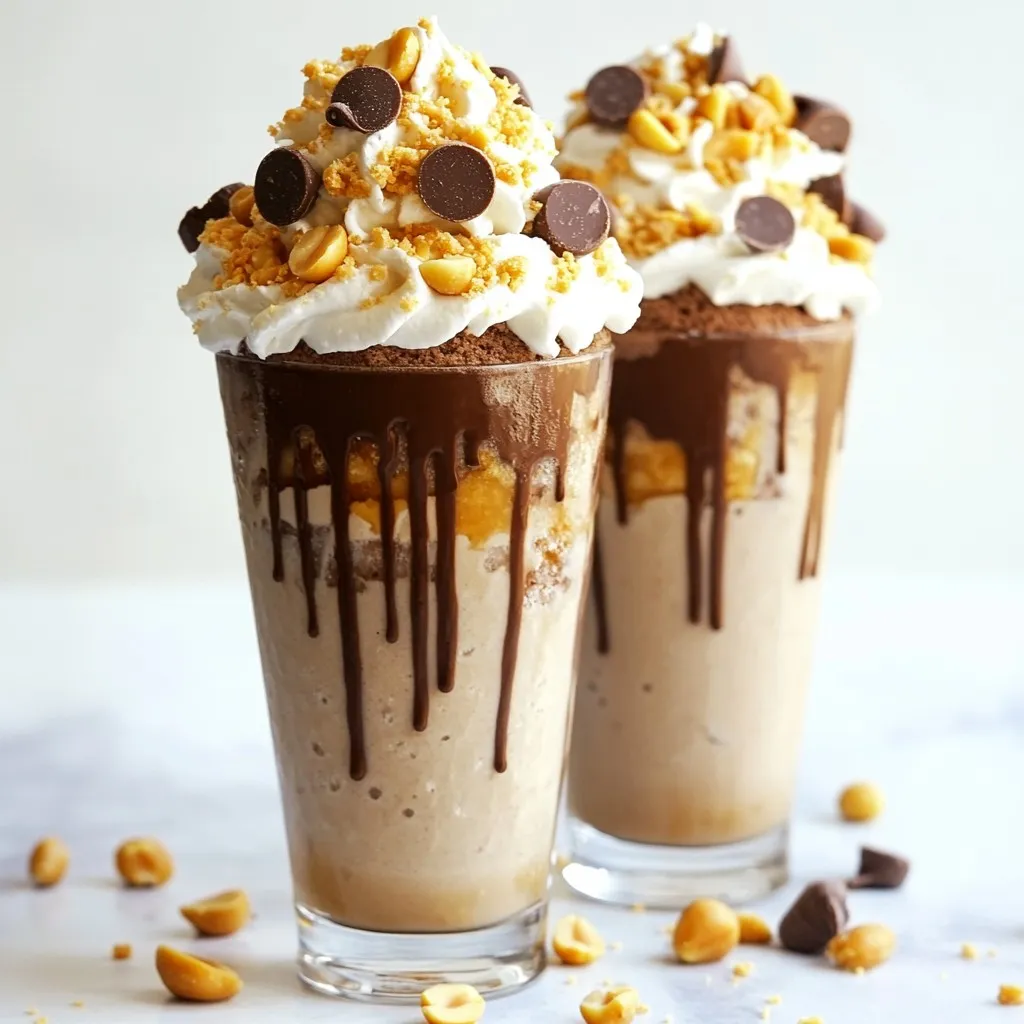
Craving something sweet and creamy? The Chocolate Peanut Butter Cupcake Milkshake Delight is your answer! This drink blends rich chocolate cupcakes, creamy ice cream, and smooth peanut butter for a tasty treat. It’s easy to make and perfect for any occasion. Whether you’re a seasoned chef or a kitchen newbie, this milkshake will wow your taste buds. Get ready to sip on bliss and learn how to make it!
Why I Love This Recipe
- Decadent Flavor Combination: The rich chocolate and creamy peanut butter blend together perfectly, creating a milkshake that is indulgent and satisfying.
- Easy to Make: With just a few simple ingredients, this milkshake comes together in minutes, making it a quick treat for any occasion.
- Customizable: You can easily adjust the sweetness and thickness by adding more chocolate syrup or milk, tailoring it to your taste preferences.
- Fun Presentation: Garnishing with whipped cream, mini chocolate chips, and crushed peanuts makes this milkshake not only delicious but visually appealing as well.
Ingredients
Main Ingredients
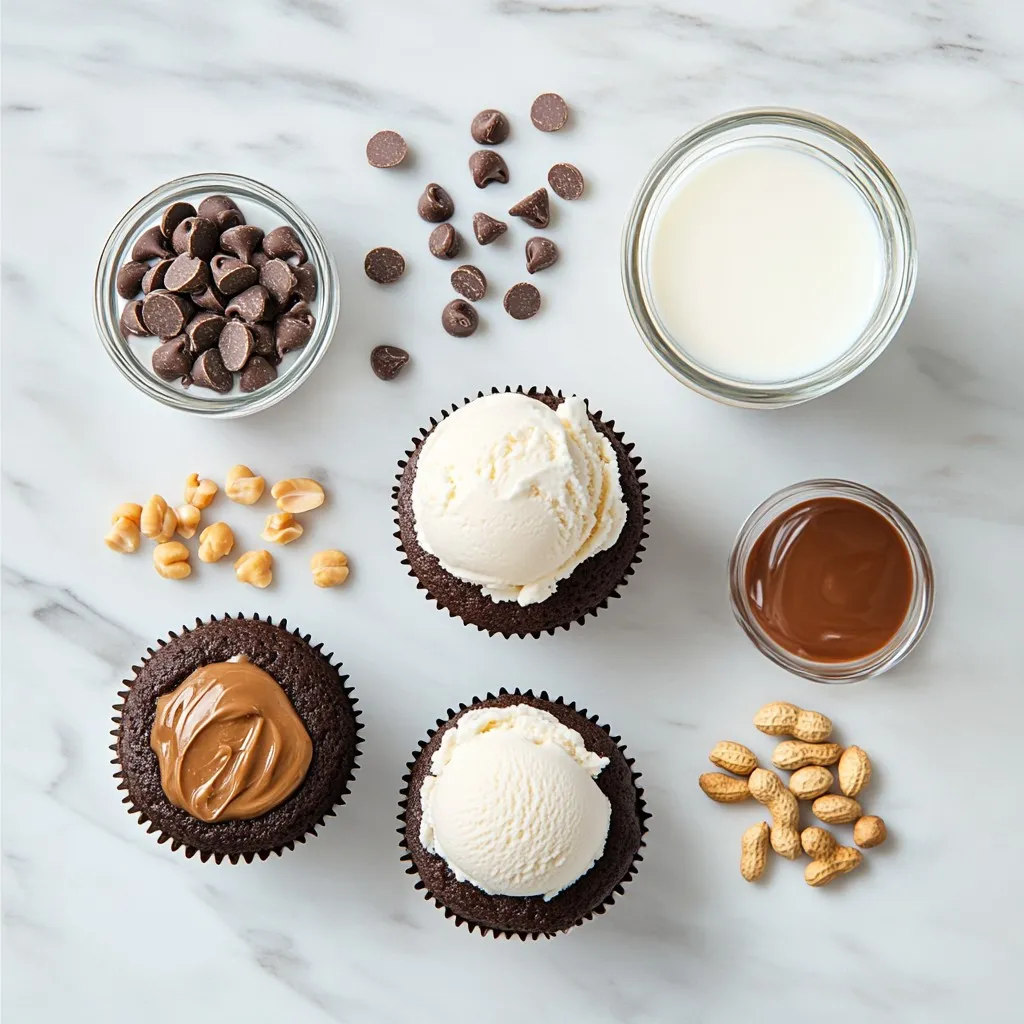
– 2 chocolate cupcakes (store-bought or homemade)
– 1 cup vanilla ice cream
– 1 cup milk (whole or your choice)
– 2 tablespoons creamy peanut butter
– 2 tablespoons chocolate syrup
Toppings
– Whipped cream for topping
– Mini chocolate chips for garnish
– Crushed peanuts for garnish
– Reserved cupcake crumbs for extra texture
The main ingredients make this milkshake rich and creamy. Start with two chocolate cupcakes. You can use store-bought ones, or bake your own. The cupcakes add a great chocolate flavor.
Next, grab one cup of vanilla ice cream. This will give the shake a nice, thick texture. If you want to try different flavors, you can switch it up! Use chocolate ice cream for more chocolate taste or even cookies and cream for a fun twist.
You will also need one cup of milk. Whole milk works best, but use any milk you prefer. If you want a lighter shake, try almond or oat milk.
Two tablespoons of creamy peanut butter will add a nutty flavor. It blends well with chocolate. You can also use crunchy peanut butter for a fun twist!
Lastly, two tablespoons of chocolate syrup add sweetness and depth. You can adjust how much you use based on your taste.
For the toppings, whipped cream is a must! It adds creaminess on top. Mini chocolate chips and crushed peanuts make great garnishes. The cupcake crumbs you saved add an extra touch. This shake is all about texture and layers. Enjoy experimenting with these ingredients!
Step-by-Step Instructions
Preparing the Cupcakes
– First, crumble the chocolate cupcakes into small bits.
– Make sure to save a few crumbs for later use.
Crumbling the cupcakes is fun and easy. Just use your hands or a fork. You want small pieces, not dust. Saving some crumbs adds a nice touch to your shake.
Blending the Ingredients
– Next, combine the crumbled cupcakes, vanilla ice cream, milk, creamy peanut butter, and chocolate syrup in a blender.
– Blend on high until smooth, adding more milk if it’s too thick.
Blending is where the magic happens! You want a thick, creamy texture. If it feels too heavy, just add a little more milk. Taste the mix to see if you want it sweeter. More chocolate syrup can boost the flavor.
Assembling the Milkshake
– Pour the milkshake into tall glasses.
– Top each glass with whipped cream and sprinkle mini chocolate chips and crushed peanuts on top.
Pouring the milkshake is the best part! Fill the glasses high for a big treat. The whipped cream makes it look fancy. Don’t forget to add those mini chocolate chips and crushed peanuts for crunch! Lastly, sprinkle the saved cupcake crumbs on top for a fun finish.
Tips & Tricks
Achieving the Perfect Consistency
To make your milkshake just right, start with the milk. If it’s too thick, add more milk slowly. I like to use whole milk for a creamy taste. You can choose low-fat or almond milk too. If you want it sweeter, stir in a little chocolate syrup. Taste as you go. This way, you get the sweetness just how you like it.
Presentation Suggestions
For serving, think about fun glassware. Clear glasses show off the layers of the milkshake. You can use mason jars or tall tumblers for a cute look. Add colorful straws for extra fun. A striped or polka-dotted straw can make it pop!
Flavor Enhancements
Toppings can make your milkshake special. Try adding extra whipped cream on top. Mini chocolate chips or crushed peanuts add crunch. You can also sprinkle some cupcake crumbs for a nice finish. If you want to mix it up, add a scoop of banana or caramel. This gives your milkshake a new twist!
Pro Tips
- Use Cold Ingredients: Make sure your ice cream and milk are cold to ensure a creamy texture for your milkshake.
- Experiment with Flavors: Feel free to add different flavored ice creams or extra ingredients like bananas or caramel for a unique twist.
- Garnish Creatively: Use different toppings like crushed Oreos or sprinkles to enhance the visual appeal of your milkshake.
- Blend to Perfection: If your milkshake is too thick, add milk gradually to reach your desired consistency without losing flavor.
Variations
Alternative Ice Cream Flavors
You can change up the ice cream to mix flavors. Try using chocolate fudge ice cream for a richer taste. Cookies and cream ice cream adds a fun crunch and creaminess. If you want a dairy-free version, choose coconut or almond milk ice cream. Both options keep it creamy without dairy.
Different Cupcake Options
While chocolate cupcakes are great, you can swap them out. Vanilla cupcakes offer a lighter taste and let the milkshake shine. Red velvet cupcakes bring a nice color and a hint of cocoa. For gluten-free options, look for gluten-free cupcakes in stores or bake your own. They taste great and keep everyone happy.
Adding Extra Ingredients
Get creative by adding other flavors. A ripe banana can make the milkshake extra creamy and sweet. Drizzling in caramel adds a rich, buttery flavor. If you’re not a fan of peanut butter, use almond or cashew butter instead. Each nut butter gives a new twist to this milkshake delight. Enjoy exploring these variations!
Storage Info
Storing Leftover Milkshake
To keep your leftover milkshake fresh, use an airtight container. Glass jars work great, but plastic containers are fine too. Make sure to seal it tightly. Your milkshake will last about 24 hours in the fridge. After that, it may lose its creamy texture.
Freezing Instructions
If you want to save the milkshake for later, you can freeze it. Pour the milkshake into a freezer-safe container. Leave some space at the top. The milkshake can stay frozen for up to one month.
When you’re ready to enjoy it, take it out and thaw it in the fridge. This can take a few hours, so plan ahead. Once it’s thawed, stir it well before serving. You might need to add a splash of milk to get the right texture again.
FAQs
Can I make this milkshake ahead of time?
Yes, you can make this milkshake ahead of time. Just blend the ingredients and store it in the fridge. Use a sealed container to keep it fresh. When you are ready to serve, blend it again to restore its creamy texture. It tastes best when fresh, so try to enjoy it within a day or two.
What type of milk works best?
You have many choices for milk! Whole milk gives a rich taste. If you want a lighter shake, use low-fat or almond milk. Oat milk works well too. Each type of milk gives a different flavor, so pick what you love best.
How can I make this recipe healthier?
To make this milkshake healthier, you can use Greek yogurt instead of ice cream. This swap cuts sugar and adds protein. You can also use a sugar-free syrup or reduce the amount of chocolate syrup. Adding a banana can add natural sweetness and creaminess. Enjoy your treat while keeping it light!
You now know how to make a delicious chocolate cupcake milkshake. We covered the key ingredients, step-by-step instructions, and useful tips. You can play with flavors, swap ingredients, and even store leftovers. This recipe is fun and easy, perfect for any sweet tooth. Enjoy making this tasty treat, and share it with friends and family. It’s a delightful way to cool off and satisfy your cravings. Don’t hesitate to try different variations and make it your ow