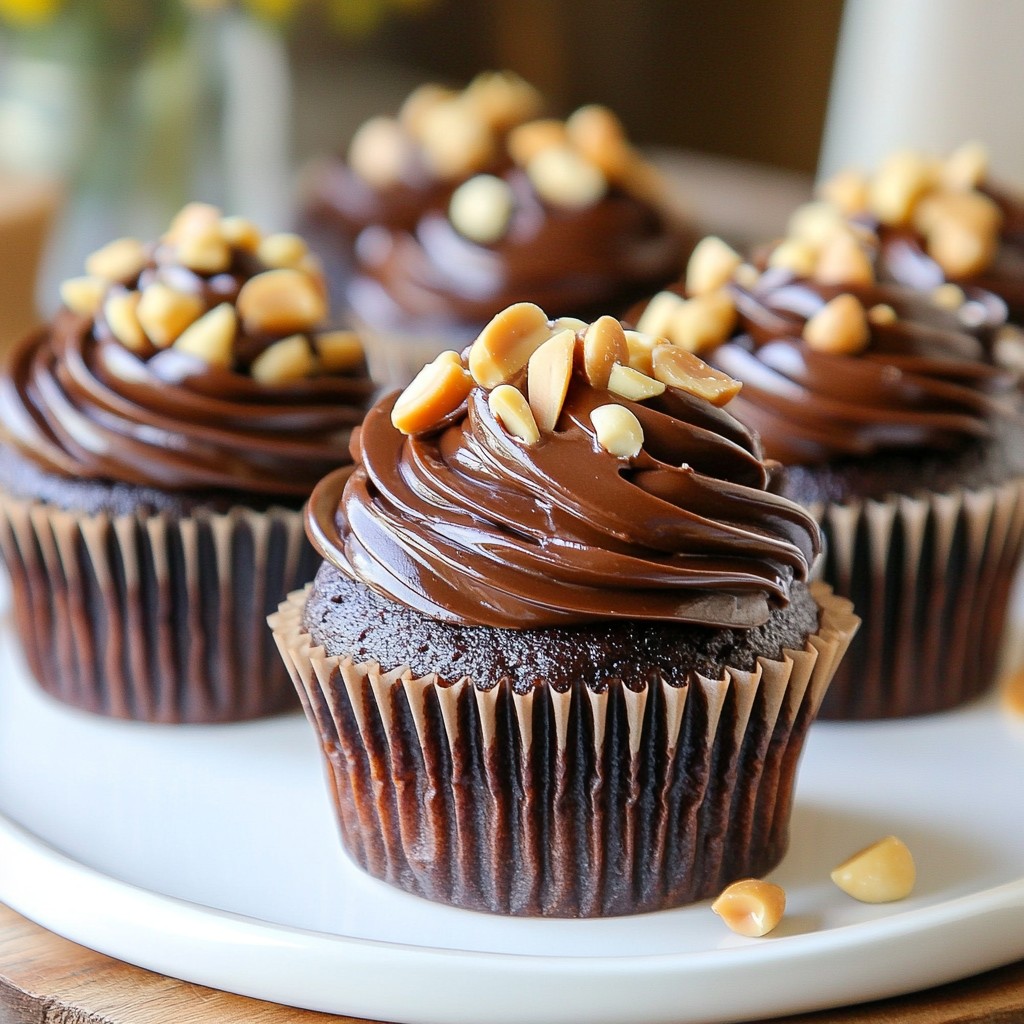
Get ready to indulge in a sweet delight! My Chocolate Peanut Butter Cupcakes are rich, fluffy, and bursting with flavor. Perfect for any occasion, these treats combine luscious chocolate and creamy peanut butter in every bite. In this post, I'll share my favorite ingredients, step-by-step instructions, and tips to make them just right. Let’s create the ultimate cupcake experience together!
Why I Love This Recipe
- Decadent Flavor: The combination of rich chocolate and creamy peanut butter creates a divine flavor that is hard to resist.
- Easy to Make: This recipe requires simple ingredients and straightforward steps, making it perfect for bakers of all skill levels.
- Perfect for Any Occasion: Whether it's a birthday party, a family gathering, or just a treat for yourself, these cupcakes are always a hit!
- Customizable Toppings: You can easily personalize these cupcakes with different toppings like nuts, sprinkles, or even a dollop of whipped cream.
Ingredients
Comprehensive List of Ingredients
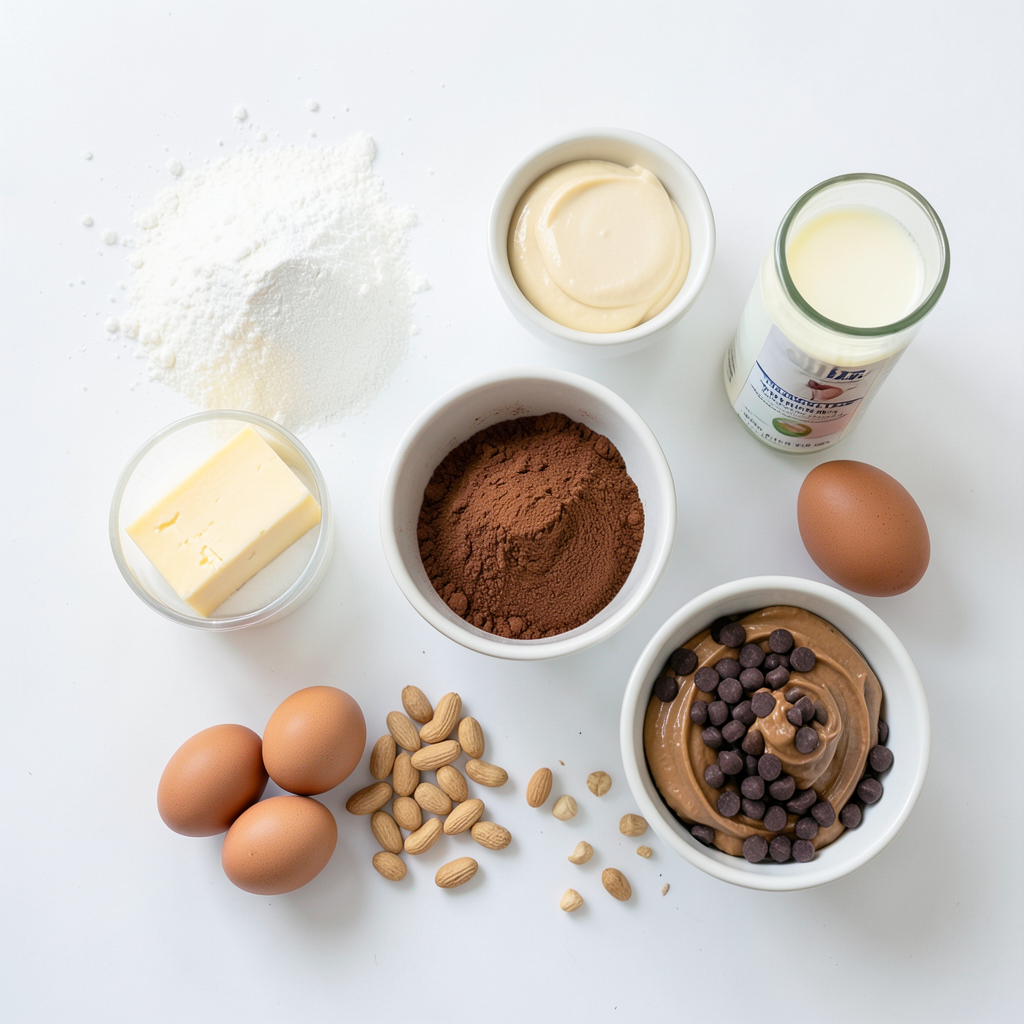
To make these lovely chocolate peanut butter cupcakes, you will need:
- 1 cup all-purpose flour
- 1 cup granulated sugar
- 1/2 cup unsweetened cocoa powder
- 1 tsp baking powder
- 1/2 tsp baking soda
- 1/4 tsp salt
- 1/2 cup unsalted butter, melted
- 2 large eggs
- 1/2 cup whole milk
- 1 tsp vanilla extract
- 1/2 cup creamy peanut butter
- 1/4 cup chocolate chips (for topping)
- 1/4 cup chopped peanuts (for garnish)
Measurement Tips for Accuracy
Getting the right measurements is key for perfect cupcakes. Here are some tips:
- Use a dry measuring cup for flour and sugar.
- Spoon flour into the cup and level it off with a knife. Avoid packing it down.
- For cocoa powder, do the same as with flour.
- Use a liquid measuring cup for milk and melted butter, ensuring you read the measurement at eye level.
- Always check the expiration dates on your baking powder and baking soda. Fresh ingredients give the best rise.
Substitutions for Dietary Preferences
You can easily adjust the recipe to meet different dietary needs:
- Gluten-Free: Substitute all-purpose flour with a gluten-free blend.
- Dairy-Free: Use almond milk or oat milk and coconut oil instead of butter.
- Nut-Free: Replace peanut butter with sunbutter or a similar nut-free spread.
- Egg-Free: Use flax eggs or applesauce as an egg replacer, using 1/4 cup for each egg.
These swaps can help everyone enjoy your tasty chocolate peanut butter cupcakes!
Step-by-Step Instructions
Prepping Your Oven and Muffin Tin
Start by preheating your oven to 350°F (175°C). This step is key for even baking. Next, take a muffin tin and line it with cupcake liners. This helps the cupcakes pop out easily after baking.
Mixing Dry Ingredients Properly
In a large mixing bowl, whisk together the following dry ingredients:
- 1 cup all-purpose flour
- 1 cup granulated sugar
- 1/2 cup unsweetened cocoa powder
- 1 tsp baking powder
- 1/2 tsp baking soda
- 1/4 tsp salt
Make sure they are well mixed. This blend gives the cupcakes their rich flavor and fluffy texture.
Combining Wet Ingredients for Best Results
In another bowl, mix the wet ingredients until smooth:
- 1/2 cup unsalted butter, melted
- 2 large eggs
- 1/2 cup whole milk
- 1 tsp vanilla extract
Pour the melted butter in slowly so it doesn’t cook the eggs. This mixture adds moisture and depth to your cupcakes.
Creating Peanut Butter Swirls in the Batter
Now, combine the wet and dry mixtures. Pour the wet mix into the dry bowl and stir gently. Just mix until you see no dry flour. A few lumps are okay.
Next, add 1/2 cup creamy peanut butter. Gently fold it in, creating swirls. This makes each bite a delightful surprise of chocolate and peanut butter.
Baking Time and Toothpick Test
Divide the batter evenly among the cupcake liners, filling each about 2/3 full. Bake in your preheated oven for about 18-20 minutes. To check if they are done, insert a toothpick into the center. If it comes out clean, they are ready.
Once baked, let the cupcakes cool in the tin for 5 minutes. After that, move them to a wire rack to cool completely. Enjoy the rich aroma while they cool!
Tips & Tricks
Achieving Moist and Fluffy Cupcakes
To make moist and fluffy cupcakes, start with the right ingredients. Use fresh baking powder and soda. Check their expiration dates for best results. Mixing the wet and dry ingredients properly matters too. I recommend mixing them just until combined. Overmixing can lead to dense cupcakes. Aim for a few lumps in the batter; they are okay!
Another key to moisture is the butter. Use unsalted butter and melt it before adding. This adds rich flavor and helps keep the cupcakes soft. Don't forget the milk! Whole milk adds a creamy texture that improves the cupcake’s fluffiness.
Lastly, let the cupcakes cool properly. Cooling them on a wire rack lets air flow around them. This keeps them from getting soggy.
How to Perfectly Melt Chocolate for Topping
Melting chocolate can be tricky, but it’s easy once you know how. Use a microwave-safe bowl for melting chocolate chips. Start by microwaving them in short bursts of 20 seconds. After each burst, stir the chocolate well. This helps it melt evenly.
Be patient! If you rush, the chocolate can burn. If you notice a few lumps, keep stirring. The heat from the bowl will help melt the remaining pieces.
You can also melt chocolate using a double boiler. Fill a pot with water and let it simmer. Place a heat-safe bowl on top. Add your chocolate chips to the bowl and stir until smooth. Both methods work great!
Presentation and Serving Suggestions
To serve your cupcakes, choose a colorful plate for a fun look. After drizzling the melted chocolate on top, go the extra mile. Add a small dollop of whipped cream for a creamy touch.
For crunch, sprinkle chopped peanuts over the chocolate. This adds texture and enhances the peanut butter flavor. If you want to impress guests, use decorative cupcake liners. These small details make your cupcakes stand out.
Enjoy these cupcakes fresh! They taste best the same day. If you have leftovers, store them in a cool place.
Pro Tips
- Use Room Temperature Ingredients: Make sure your eggs and milk are at room temperature before mixing. This helps create a smoother batter and better texture in your cupcakes.
- Don’t Overmix the Batter: When combining the wet and dry ingredients, mix until just combined. Overmixing can lead to dense cupcakes.
- Check for Doneness: Perform the toothpick test to check if your cupcakes are done. Insert a toothpick in the center; it should come out clean or with a few moist crumbs.
- Customize Your Toppings: Feel free to get creative with toppings! You can add crushed pretzels, a sprinkle of sea salt, or even a drizzle of caramel for added flavor.
Variations
Alternate Flavor Combinations
You can change the flavors in these cupcakes to keep things fun. Try adding mint extract to the batter for a fresh twist. You can also mix in some coffee to enhance the chocolate taste. Another option is to use dark chocolate cocoa powder instead of regular cocoa for a richer flavor. If you want a fruity kick, add mashed bananas or chopped strawberries into the mix.
Creative Toppings and Decorations
Toppings can take your cupcakes to the next level. Instead of chocolate chips, use crushed Oreos or sprinkles for a fun look. You can also top them with mini marshmallows for a s'mores vibe. Consider a drizzle of caramel sauce along with the chocolate for a sweet twist. If you want something crunchy, try adding crushed pretzels or even bacon bits for a unique flavor contrast.
Gluten-Free and Vegan Adaptations
You can make these cupcakes gluten-free easily. Just swap the all-purpose flour with a gluten-free blend. Make sure the blend has xanthan gum for the best texture. For a vegan version, replace the eggs with flax eggs. Mix one tablespoon of ground flaxseed with three tablespoons of water and let it sit until it thickens. Use almond milk or coconut milk instead of whole milk. With these changes, you can enjoy delicious cupcakes that fit your diet.
Storage Information
How to Store Leftover Cupcakes
To keep your chocolate peanut butter cupcakes fresh, place them in an airtight container. You can stack them if needed, but use parchment paper between layers. Store the container in a cool, dry place. This keeps the cupcakes soft for about three days. If you want them to last longer, consider refrigeration. Just know that chilling might change their texture a bit.
Freezing Tips for Long-Term Storage
Freezing is a great option for long-term storage. First, let the cupcakes cool completely. This step is key to avoid soggy treats. Wrap each cupcake tightly in plastic wrap. Then, place them in a freezer bag or container. Label them with the date. They can last up to three months in the freezer. When you're ready to enjoy, just thaw them in the fridge overnight.
Best Ways to Reheat Cupcakes
To bring your cupcakes back to life, reheat them gently. Preheat your oven to 350°F (175°C). Place the cupcakes on a baking sheet and cover them with foil. Heat for about 10 minutes. This warms them without drying them out. If you're in a hurry, the microwave works too. Heat each cupcake for about 15-20 seconds, but check often. You want them warm, not hot. Enjoy your tasty treats!
FAQs
Can I make these cupcakes ahead of time?
Yes, you can make these cupcakes ahead of time. Bake them and let them cool fully. Store them in an airtight container at room temperature for up to three days. You can also freeze them for later. Just remember to wrap them well.
What is the best way to store chocolate peanut butter cupcakes?
The best way to store these cupcakes is in an airtight container. Keep them at room temperature. If you live in a hot area, store them in the fridge. Just make sure to let them sit out for a bit before serving.
How do I know when the cupcakes are done baking?
To check if the cupcakes are done, use a toothpick. Insert it into the center of a cupcake. If it comes out clean or with a few crumbs, they are ready. If the toothpick has wet batter on it, bake them a little longer.
Can I use natural peanut butter instead of creamy?
You can use natural peanut butter, but it may change the texture. Natural peanut butter is runnier and less sweet. If you prefer it, just know the cupcakes might be a bit different.
What are other recipes that pair well with chocolate and peanut butter?
Many recipes pair well with chocolate and peanut butter. Here are a few ideas:
- Chocolate peanut butter cookies
- Peanut butter brownies
- Chocolate peanut butter smoothie
- Chocolate peanut butter dip for fruits
These treats will satisfy your cravings for that rich, nutty flavor!
In this post, we covered how to make delicious chocolate peanut butter cupcakes. We discussed essential ingredients, accurate measurements, and suitable substitutions. I shared step-by-step instructions, tips for moist cupcakes, and fun variations to try. Remember to store leftovers properly and consider freezing them for later. With these methods, you can enjoy fresh-tasting cupcakes anytime. Baking can be simple and fun, so get creative and enjoy your cupcakes!