Craving a dessert that combines rich chocolate and creamy peanut butter? Look no further! These Chocolate Peanut Butter Lava Cakes offer a gooey, indulgent surprise in every bite. With just a few simple ingredients, I’ll guide you through making these irresistible treats perfect for any occasion. Get ready to impress friends and family with a dessert that’s both easy to bake and hard to resist! Let’s dive in!
Ingredients
Main Ingredients for Chocolate Peanut Butter Lava Cakes
– 1 cup semi-sweet chocolate chips
– ½ cup unsalted butter
– 1 cup powdered sugar
– 2 large eggs
– 2 egg yolks
– 1 teaspoon vanilla extract
– ½ cup all-purpose flour
– ½ teaspoon salt
– 4 tablespoons creamy peanut butter
– 4 tablespoons additional chocolate chips (for filling)
These ingredients come together to create a rich and gooey dessert. The semi-sweet chocolate chips bring that deep chocolate flavor. Unsalted butter adds richness, while powdered sugar gives sweetness.
The eggs and yolks help the cakes rise and create a soft texture. Vanilla extract adds warmth, enhancing the overall taste. All-purpose flour gives structure, and salt balances the sweetness.
The creamy peanut butter and extra chocolate chips make the center melt-in-your-mouth delicious. Each bite bursts with flavor. When you mix these ingredients, you are setting the stage for a special treat.
Make sure you have everything ready. This way, you can focus on the fun of baking. Trust me; the smell of these cakes baking will make your mouth water.
Step-by-Step Instructions
Prepping the Oven and Ramekins
First, preheat your oven to 425°F (220°C). This high heat helps create the perfect lava center. Next, grease four ramekins with butter. Then, lightly dust them with cocoa powder. This step helps the cakes slide out easily later.
Creating the Chocolate Mixture
In a microwave-safe bowl, add 1 cup of semi-sweet chocolate chips and ½ cup of unsalted butter. Microwave this mix in 30-second bursts. Stir between each burst until smooth and melted. Let it cool slightly, then whisk in 1 cup of powdered sugar. This gives the cake its sweet base.
Combining Ingredients for the Batter
Now, add 2 large eggs and 2 egg yolks to the chocolate mix. Whisk them together until blended. Stir in 1 teaspoon of vanilla extract for extra flavor. Gently fold in ½ cup of all-purpose flour and ½ teaspoon of salt. Be careful not to overmix; we want it fluffy.
Assembling the Lava Cakes
Divide half the batter among the ramekins. Fill them about halfway. In each ramekin, drop 1 tablespoon of creamy peanut butter and 1 tablespoon of extra chocolate chips. Then, cover these with the remaining batter. This layering creates the gooey center.
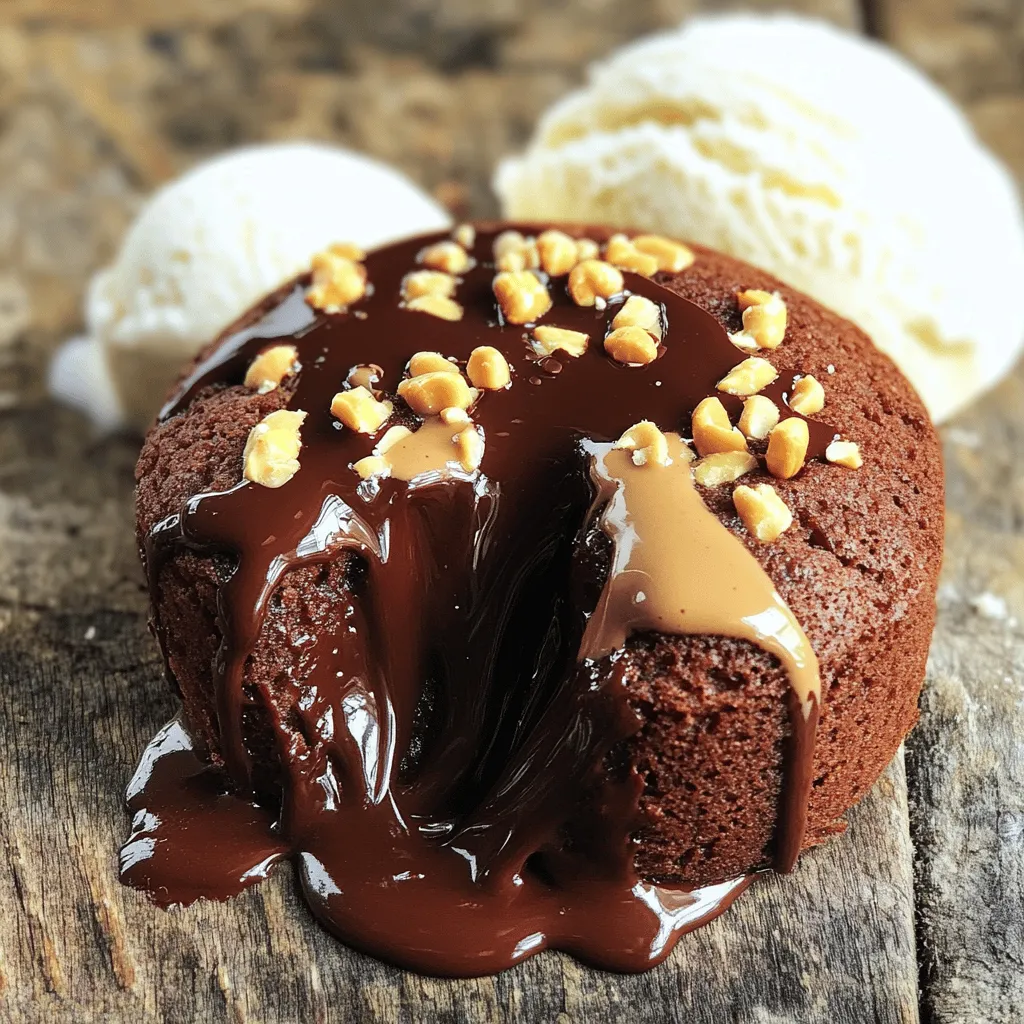
Baking and Serving
Place the ramekins on a baking sheet and bake for 12-14 minutes. The edges should be firm, but the center must remain soft. After baking, let the cakes cool for 1 minute. Carefully run a knife around the edges to loosen them. Invert each ramekin onto a plate to release the lava cake. Enjoy your warm treat!
Tips & Tricks
Achieving the Perfect Lava Cake Consistency
To get the best lava cake, baking time is key. Set your oven to 425°F (220°C). Bake the cakes for about 12 to 14 minutes. Look for firm edges but a soft center. When you pull them out, they should jiggle just a bit.
To test for doneness, gently shake the ramekin. If the center wobbles, it’s ready. Remember, underbaking gives you the gooey center we all love.
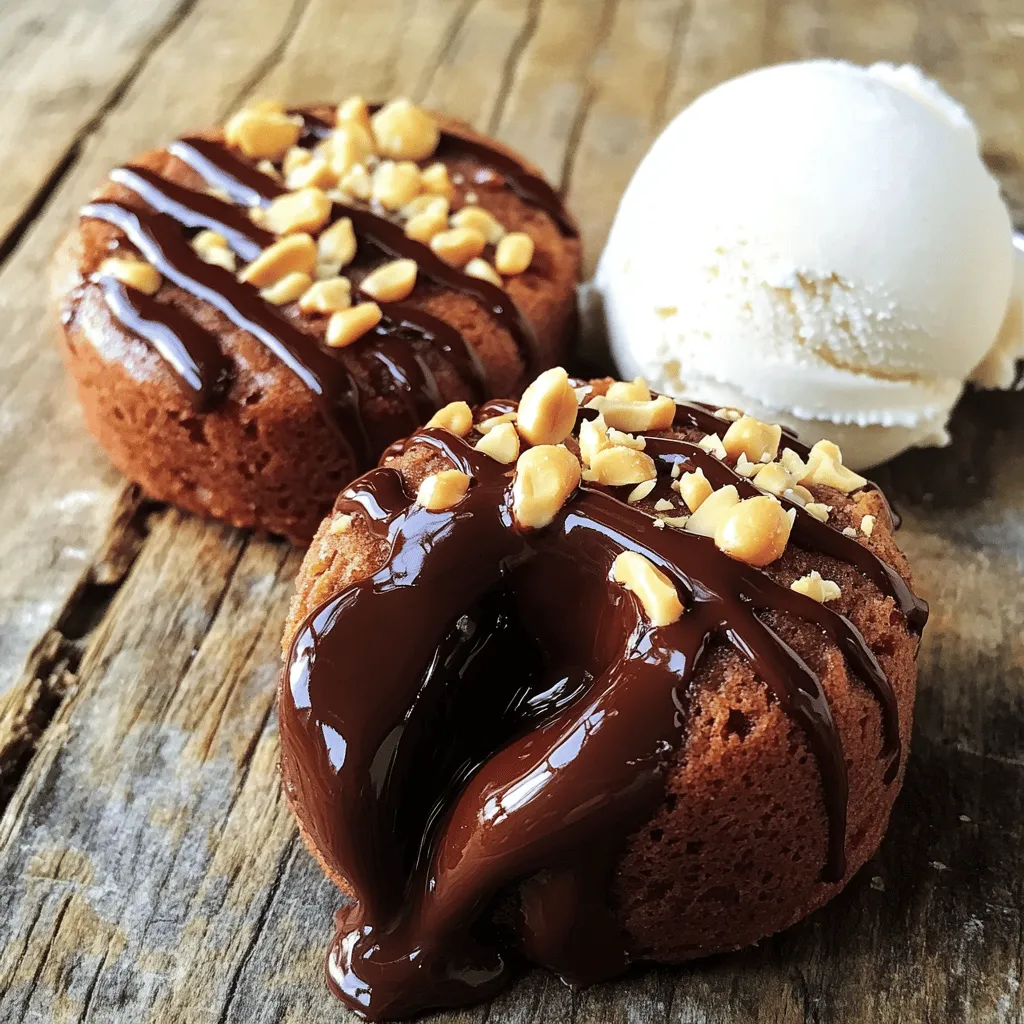
Presentation Suggestions
Serve these lava cakes warm. Place a scoop of vanilla ice cream on each plate. Drizzle some melted chocolate over the top. This adds a rich finish.
For a special touch, sprinkle crushed peanuts and a bit of sea salt. This contrast makes each bite even more tasty.
Common Mistakes to Avoid
Overmixing the batter is a common error. This can make the cakes dense. Mix just until you don’t see any flour.
Another mistake is not preheating the oven. Preheating helps the cakes rise properly. If the oven is not hot enough, the cakes won’t cook right. Always check your oven before you start baking!
Variations
Dietary Substitutions
You can easily make these lava cakes fit your diet. For a gluten-free version, try using almond flour or coconut flour instead of all-purpose flour. Both options give a nice texture without gluten. If you want a vegan-friendly recipe, use flax eggs. Simply mix 1 tablespoon of ground flaxseed with 2.5 tablespoons of water for each egg. Use coconut oil instead of butter and dairy-free chocolate chips. These swaps keep the rich flavor while making it plant-based.
Flavor Combinations
Want to switch up the taste? Add spices like cinnamon or a bit of espresso powder to the batter. These flavors pair well with chocolate and can give a nice kick. You can also try different fillings. Instead of peanut butter, try caramel or fresh berries. Each filling adds a unique twist to these lava cakes and keeps them exciting.
Different Serving Styles
You don’t have to stick to the standard ramekin style. Mini lava cakes are fun and perfect for parties. Just use smaller ramekins or muffin tins. For a fancy touch, create lava cake parfaits. Layer the cake with whipped cream and fresh fruit in a glass. This way, you get to enjoy the lava cake with a fruity twist!
Storage Info
Best Storage Practices
– Refrigeration Tips: Store your chocolate peanut butter lava cakes in the fridge. Use an airtight container to keep them fresh. They stay good for about 3 days. Enjoy them chilled, or reheat for that warm, gooey center.
– Freezing for Longer Shelf Life: For longer storage, you can freeze these treats. Wrap each lava cake in plastic wrap and then place them in a freezer bag. They will keep well for up to 2 months. When you need a sweet fix, just thaw them in the fridge overnight.
Reheating Instructions
– Proper Methods to Reheat for Best Results: To reheat your lava cakes, use the oven. Preheat it to 350°F (175°C). Place the cakes on a baking sheet and heat for about 10 minutes. This method helps maintain that delicious lava center.
– Avoiding Overcooking During Reheating: Keep an eye on them while they heat. You don’t want to overcook the cakes. Check them at the 8-minute mark to ensure they stay soft and gooey inside. Enjoy your warm, rich dessert!
FAQs
How do I know when my lava cakes are done?
To check if your lava cakes are done, look for a few key signs. The edges should be firm while the center remains soft. You can gently shake the ramekin. If the center jiggles a bit, it is ready. Keep an eye on the time; usually, they need 12-14 minutes in the oven. Remember, a little underbaking gives you that perfect lava effect!
Can I make these lava cakes ahead of time?
Yes, you can prepare the batter ahead of time. After mixing, store it in the fridge for up to a day. When you are ready to bake, pour the batter into the ramekins and bake as directed. This makes it easy to enjoy fresh lava cakes anytime!
What can I substitute for unsalted butter?
If you need a substitute for unsalted butter, you can use coconut oil or vegetable oil. Both can work well in this recipe. However, the flavor might change a bit. Coconut oil can add a hint of sweetness. Stick with a ratio of 1:1 for best results.
Is it possible to make these without eggs?
Yes, you can make lava cakes without eggs! Try using applesauce or mashed bananas as a substitute. For each egg, use 1/4 cup of applesauce or 1/2 banana. This will keep your cakes moist and help bind the ingredients together.
How long can I store leftover lava cakes?
Leftover lava cakes can be stored in the fridge for 2-3 days. Just cover them well to keep them fresh. If you want to store them longer, freeze them for up to a month. When you are ready to eat, thaw and reheat in the oven for that warm, gooey center.
You learned the simple steps to make delicious chocolate peanut butter lava cakes. With the right blend of ingredients and techniques, you’ll impress anyone with your baking. Remember to focus on timing and avoid common pitfalls like overmixing. You can also customize this treat to suit different diets. Whether you try a new flavor or serve it in style, enjoy every bite. Now, it’s time to bake and share your sweet creation!