Looking for a delicious and easy breakfast? You need to try my Chocolate Peanut Butter Overnight Oats recipe! It’s packed with flavor, quick to prepare, and perfect for busy mornings. Just mix simple ingredients, let them chill overnight, and enjoy a tasty meal that fuels your day. Let’s dive into the easy steps to make this delightful treat that combines chocolate and peanut butter in a healthy way!
Ingredients
Main Ingredients for Chocolate Peanut Butter Overnight Oats
– 1/2 cup rolled oats
– 1 tablespoon cocoa powder
– 1 tablespoon peanut butter
– 1 cup almond milk (or milk of choice)
– 1 tablespoon maple syrup (or honey)
– 1/2 teaspoon vanilla extract
– A pinch of salt
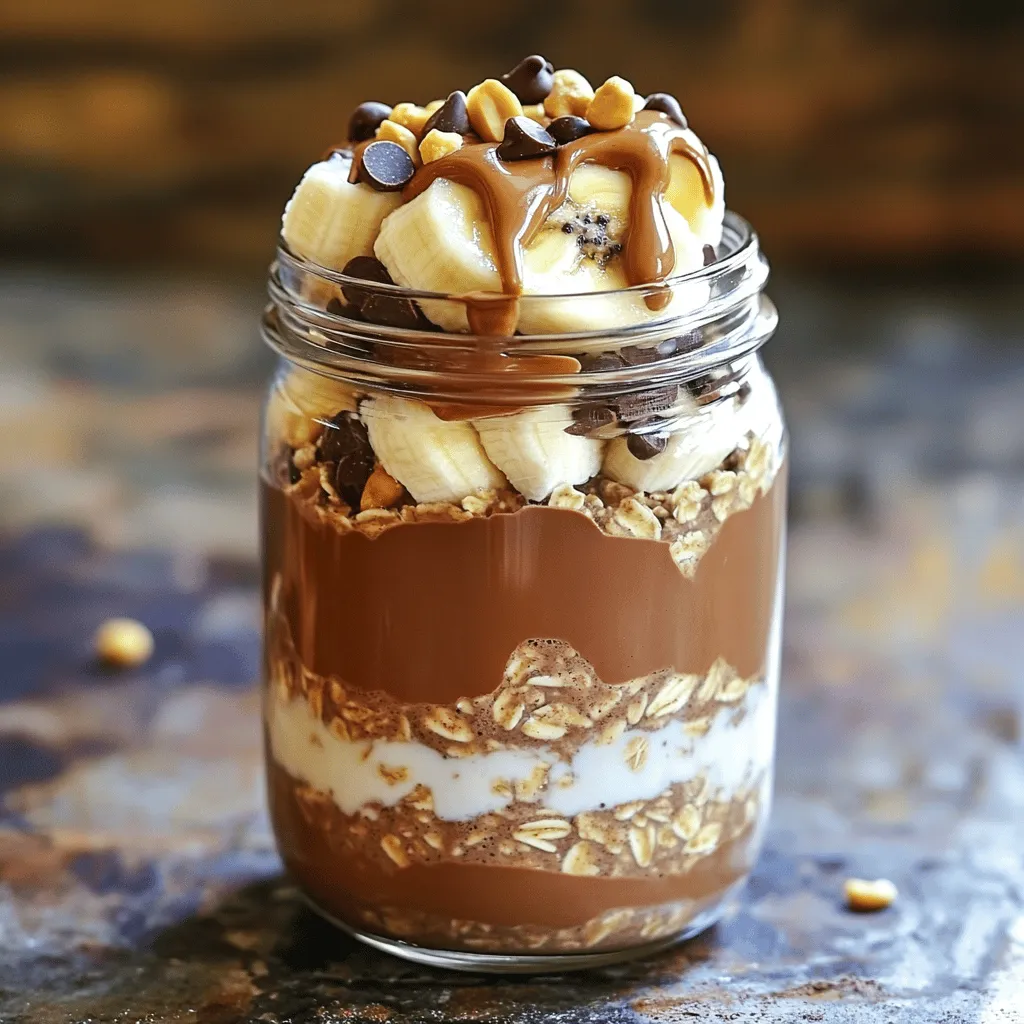
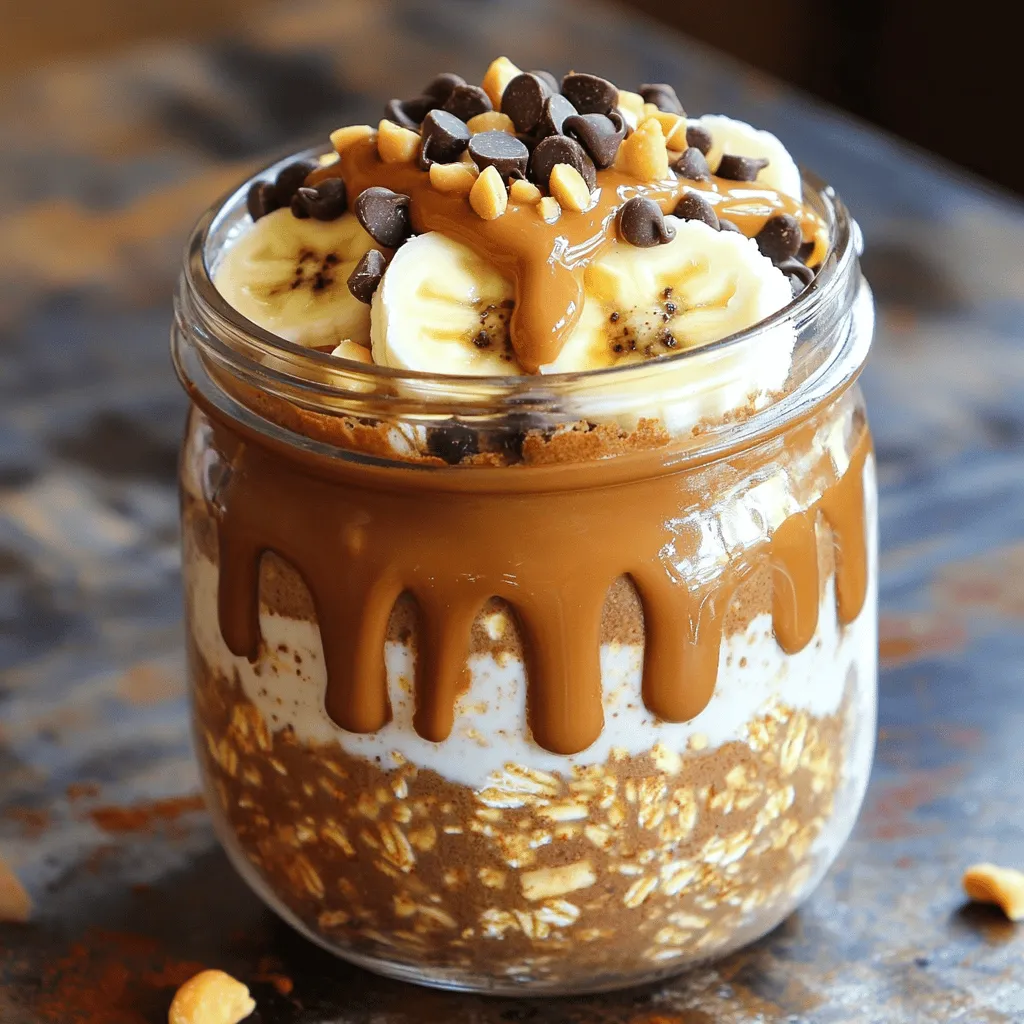
The main ingredients form the base of your chocolate peanut butter overnight oats. Rolled oats are key. They soak up the almond milk and get soft overnight. Cocoa powder adds rich chocolate flavor. Peanut butter brings creaminess and nutty taste. Maple syrup or honey sweetens the dish naturally. A splash of vanilla enhances all the flavors. Lastly, a pinch of salt balances the sweetness.
Suggested Toppings
– Sliced bananas
– Chocolate chips
– Crushed peanuts
– Berries
Toppings make your oats even more fun! Sliced bananas add sweetness and creaminess. Chocolate chips give an extra chocolatey bite. Crushed peanuts add crunch and extra flavor. Fresh berries bring a burst of color and freshness. You can mix and match to find your favorite combinations. These toppings not only taste great, but they also make your oats look pretty.It’s a simple way to enjoy a delicious breakfast!
Step-by-Step Instructions
Preparation Steps
1. In a medium bowl, combine 1/2 cup rolled oats and 1 tablespoon cocoa powder. Mix well.
2. In another bowl or measuring cup, mix 1 cup almond milk, 1 tablespoon peanut butter, 1 tablespoon maple syrup, 1/2 teaspoon vanilla extract, and a pinch of salt until smooth.
3. Pour this liquid over the dry oat mixture. Stir until everything is well combined.
Refrigeration Process
1. Transfer the mixture into a jar or an airtight container. Make sure it is sealed tight.
2. Refrigerate overnight or for at least 4 hours. This allows the oats to soak up the liquid and soften.
Serving Instructions
1. When ready to eat, stir the oats well.
2. Add your favorite toppings, like sliced bananas, chocolate chips, crushed peanuts, or berries.
Tips & Tricks
Perfecting Your Overnight Oats
To get the right texture, you can add more milk. If you want your oats thicker, use less milk. Experiment to find what you love. You can also swap ingredients. Try using almond butter instead of peanut butter. You can even change up the sweetener. Honey or agave syrup works great too.
Meal Prep Suggestions
Making several jars at once saves time. You can prepare them for the week ahead.Use small jars for easy transport. This way, you can grab one on busy mornings.
Flavor Enhancements
Want to add a twist? Try adding spices like cinnamon or nutmeg. These spices bring warmth and depth to your oats. You can also experiment with sweeteners. If you like things sweeter, add a bit more maple syrup or honey. The options are endless!
Variations
Substitute Ingredients
You can switch up the nut butter if you want. Almond and cashew butters taste great too. They add a different twist and keep the oats creamy. For milk, try oat or coconut milk. These options work well for a dairy-free version. They also give a nice flavor boost.
Flavor Combinations
Adding fruits makes the oats even better. Strawberries and raspberries give a fresh taste. You can toss in some sliced bananas too. If you want crunch, add nuts or seeds. Chopped almonds or sunflower seeds work well. They make each bite exciting and fun.
Vegan & Gluten-Free Adjustments
To keep it vegan, check that your ingredients are certified. Use maple syrup instead of honey. If you’re gluten-free, make sure your oats are labeled as such. This way, everyone can enjoy this tasty treat!
Storage Info
Refrigeration Guidelines
Chocolate Peanut Butter Overnight Oats stay fresh in the fridge for up to five days. Store them in a sealed jar or container. Look for any changes in smell or texture. If the oats smell off or have a strange color, it’s best to toss them. Always check for signs of spoilage before eating.
Freezing Instructions
Yes, you can freeze overnight oats! They freeze well for about three months. Use an airtight container to prevent freezer burn. To thaw, move the jar to the fridge overnight. You can also warm them in the microwave. Just add a splash of milk to help with the texture.
Reheating Tips
To warm up the oats, place them in a microwave-safe bowl. Heat for 30 seconds, then stir. If they seem too thick, add a little milk. You can also warm them on the stove over low heat. Stir often to avoid sticking. Enjoy your warm oats with your favorite toppings!
FAQs
How do I make vegan Chocolate Peanut Butter Overnight Oats?
To make vegan Chocolate Peanut Butter Overnight Oats, you need to swap a few ingredients. Use plant-based milk like almond or oat milk. For sweeteners, maple syrup works great. You can also try agave syrup. These substitutes keep the recipe creamy and sweet without dairy.
Can I use quick oats instead of rolled oats?
Yes, you can use quick oats. They cook faster and absorb liquid quickly. However, they can become mushy. Rolled oats give a thicker texture. They hold their shape better and provide a chewier bite. Choose based on your texture preference.
What can I add for extra protein?
To boost protein, try adding a scoop of protein powder. Choose your favorite flavor, like chocolate or vanilla. You can also mix in Greek yogurt for creaminess. Nuts, seeds, or nut butter also add protein. These options make your oats more filling and nutritious.
In this blog post, we explored how to make delicious Chocolate Peanut Butter Overnight Oats. You learned the main ingredients and the step-by-step process. We shared tips to perfect your oats and suggested easy meal prep ideas. You can also try various toppings and flavor combinations. Remember to store your oats properly for the best taste. Enjoy experimenting with this fun recipe. It makes healthy eating easy and tasty!


