Chocolate Peanut Butter Pumpkin Fudge No-Bake Delight

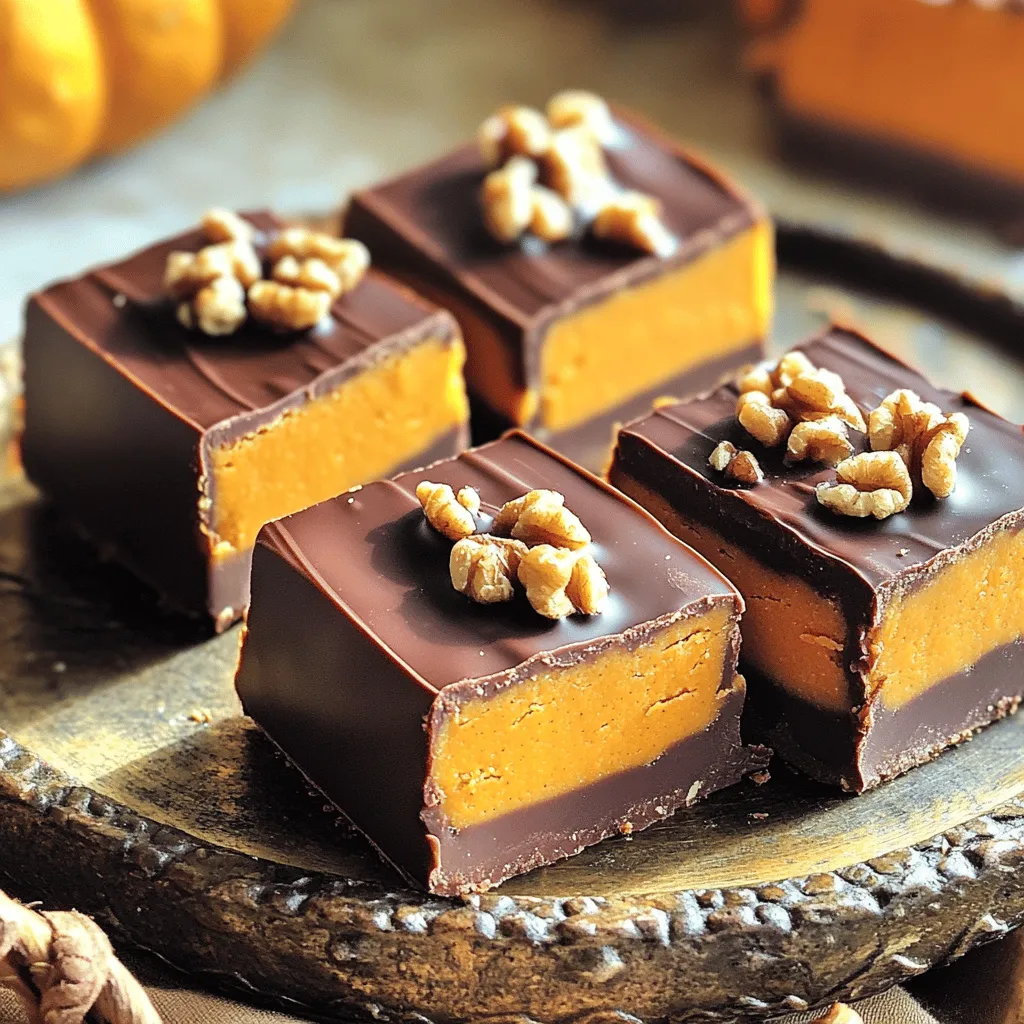
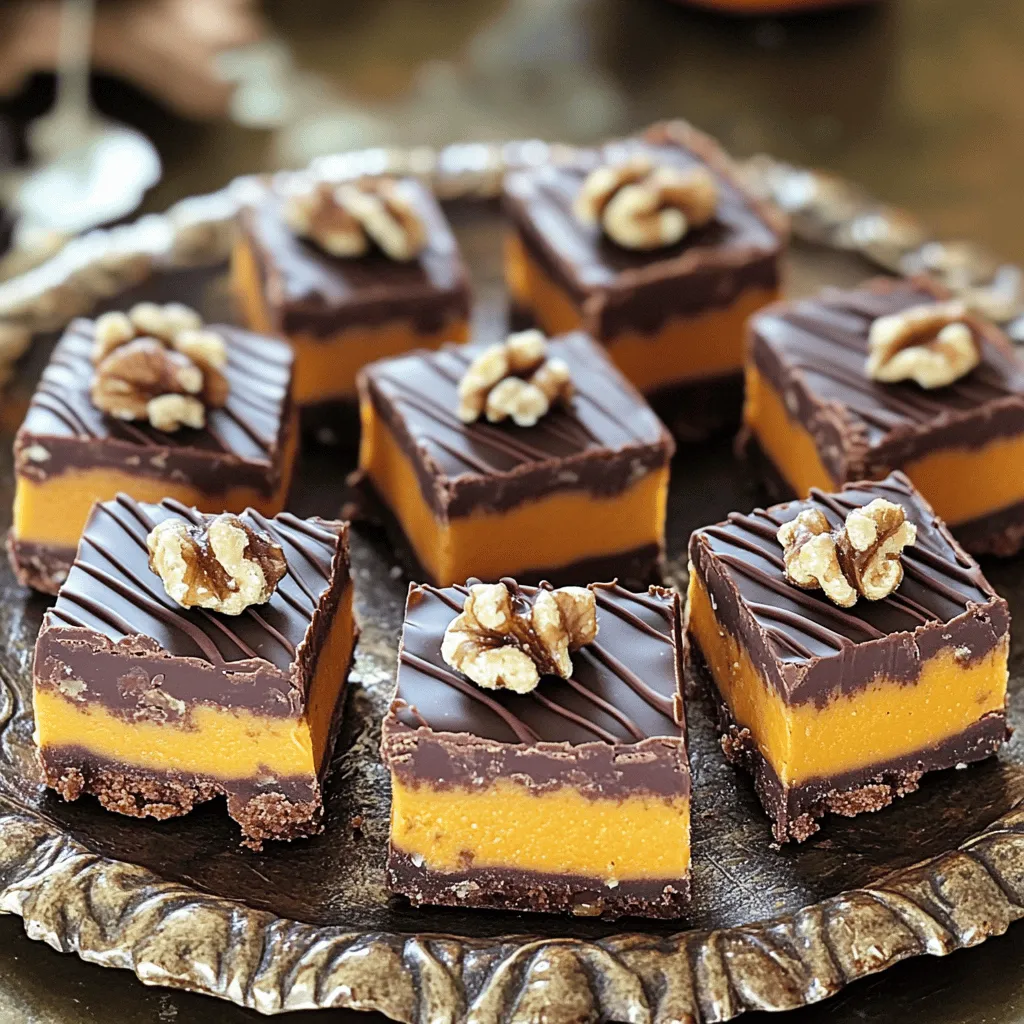
Indulge in the rich flavors of fall with my easy Chocolate Peanut Butter Pumpkin Fudge! This no-bake delight brings together creamy peanut butter, sweet pumpkin, and smooth chocolate in a treat that’s perfect for any season. Whether you’re a novice in the kitchen or a seasoned pro, you can whip up this simple dessert in no time. Join me as we explore the ingredients and steps to create this delicious fudge that’ll impress family and friends!
Ingredients
List of Ingredients
To make Chocolate Peanut Butter Pumpkin Fudge, you will need:
– 1 cup creamy peanut butter
– 1 cup canned pumpkin puree
– 1/2 cup maple syrup
– 1 teaspoon vanilla extract
– 1 cup cocoa powder
– 1/2 teaspoon cinnamon
– 1/4 teaspoon nutmeg
– 1/4 teaspoon sea salt
– 1/2 cup dark chocolate chips
– 1/4 cup chopped walnuts or pecans (optional)
These ingredients blend to create a creamy and rich fudge. Each ingredient brings its own flavor and texture.
For customization, consider these optional ingredients:
– Use almond butter instead of peanut butter for a nut-free option.
– Add a pinch of sea salt on top for extra flavor.
– Swap dark chocolate chips for white chocolate for a different taste.
Feel free to mix and match based on your taste! Each tweak can make the fudge special to you.
Step-by-Step Instructions
Preparation Process
1. Start by taking a large mixing bowl.
2. Combine 1 cup of creamy peanut butter, 1 cup of canned pumpkin puree, and 1/2 cup of maple syrup.
3. Mix these ingredients well until they blend together smoothly.
4. Next, add 1 teaspoon of vanilla extract, 1 cup of cocoa powder, 1/2 teaspoon of cinnamon, 1/4 teaspoon of nutmeg, and 1/4 teaspoon of sea salt.
5. Stir this mixture until it is fully combined and smooth.
6. If you like, fold in 1/2 cup of dark chocolate chips and 1/4 cup of chopped walnuts or pecans. This adds nice texture and taste.
Assembly and Setting
1. Prepare an 8×8-inch square baking dish.
2. Line it with parchment paper, allowing some overhang. This helps later when we remove the fudge.
3. Pour the fudge mixture into the lined dish.
4. Use a spatula to spread it evenly.
5. Smooth the top and press down lightly to compact it.
6. Now, place the dish in the refrigerator for at least 2 hours.
7. This helps the fudge set and become firm.
8. When it’s ready, lift the fudge out using the parchment paper.
9. Cut it into small squares to enjoy!
Tips & Tricks
Perfecting the Texture
To get smooth fudge, start with creamy peanut butter. Mix it well with pumpkin puree and maple syrup. Use a sturdy spatula to combine. If it feels lumpy, keep stirring. You want a silky texture.
After mixing, press the fudge into the dish firmly. This step is key. It helps the fudge hold its shape. Use the spatula to spread it evenly. A little effort here goes a long way.
Customization Advice
You can swap ingredients to fit your needs. For a nut-free version, use sunbutter. If you want a vegan option, replace the maple syrup with agave nectar.
Feel free to enhance the flavor too. Add a pinch of chili powder for heat. Or mix in a teaspoon of instant coffee for depth. You can also try different nuts. Pecans or almonds work great.

Variations
Alternative Flavor Combinations
You can switch up the flavors in your fudge with ease. Try using almond butter instead of peanut butter. This adds a nice nutty twist. Cashew butter is another great choice. It brings a creamy and sweet flavor.
You can also play with spices. Add ginger for a warm and spicy kick. Try cardamom for a unique twist. You can even mix in a pinch of chili powder for heat. It makes the fudge exciting and fun.
Seasonal & Holiday Versions
Make your fudge special for holidays. For Halloween, add orange food coloring. This gives it a spooky vibe. You can also top it with candy corn for a festive touch.
For Thanksgiving, mix in some chopped pecans. They add crunch and flavor. You can also sprinkle cinnamon and nutmeg on top. This makes it feel cozy and inviting.
These variations allow you to enjoy fudge all year long. The options are endless, and you can get creative!
Storage Info
Best Practices for Storing Fudge
Store your fudge in an airtight container. This keeps it fresh and tasty. You can use a glass jar or a plastic container with a tight lid. Make sure the fudge is fully cooled before sealing. This step helps prevent moisture buildup.
For the best taste and texture, eat the fudge within one week. If you keep it longer, it may lose some flavor. However, if you store it right, it can last up to two weeks.
Freezing Instructions
If you want to keep your fudge longer, freezing is a great option. Cut the fudge into squares before freezing. Place the squares in a single layer on a baking sheet. Make sure they do not touch each other. Freeze them for about two hours until solid.
After freezing, transfer the squares to an airtight container or zip-top bag. Label the container with the date. You can freeze the fudge for up to three months without losing flavor.
To enjoy the fudge later, simply take out the pieces you want. Let them thaw in the fridge overnight for the best results. If you’re in a hurry, you can leave them out at room temperature for a few hours.
FAQs
Common Questions about No-Bake Fudge
Can I use natural peanut butter instead of creamy?
Yes, you can use natural peanut butter. It may change the texture a bit. Natural peanut butter has oil on top. Stir it well before using. The fudge can be less creamy, but still tasty.
How can I make this recipe vegan-friendly?
To make it vegan, use maple syrup. Instead of chocolate chips, use dairy-free chocolate. Ensure your peanut butter is vegan too. This way, everyone can enjoy it without any animal products.
Troubleshooting Tips
What to do if the fudge doesn’t set properly?
If your fudge is too soft, it may need more time in the fridge. Place it back in and chill longer. If it’s still soft after that, try adding more cocoa powder. This can help firm it up.
How to fix a too-sweet fudge?
If the fudge tastes too sweet, add a pinch of salt. This can balance the sweetness. You might also mix in more cocoa powder or nuts. Both add flavor and reduce the sweet taste.
In this post, we explored how to make Chocolate Peanut Butter Pumpkin Fudge. We covered ingredients, detailed instructions, and tips for perfect texture. You can even customize this treat with different flavors or dietary needs. Remember to store your fudge correctly for lasting freshness. Enjoy experimenting with your creations! With these steps, you can make fudge that impresses your friends and family. Dive in, and let your kitchen be your place of fun and flavor! Happy fudging!


![To make a tasty no-bake strawberry cheesecake, you need a few key ingredients: - 200g digestive biscuits, crushed - 100g unsalted butter, melted - 400g cream cheese, softened - 100g powdered sugar - 1 teaspoon vanilla extract - 250ml heavy cream - 300g fresh strawberries, hulled and sliced - 100g strawberry jam These ingredients work together to create a rich and creamy dessert. The digestive biscuits form a crunchy base, while the cream cheese and heavy cream give it a smooth texture. You can customize your cheesecake with a few optional ingredients: - Fresh mint leaves for garnish - Additional fruit toppings like blueberries or raspberries - A splash of lemon juice for a tangy flavor - Chocolate shavings for a sweet touch These extras allow you to add your personal flair to the cheesecake. If you need substitutions, here are some ideas: - Use graham crackers instead of digestive biscuits for the base. - Swap cream cheese with Greek yogurt for a lighter option. - Try coconut cream instead of heavy cream for a dairy-free version. - Use honey instead of powdered sugar for a natural sweetener. These alternatives can make the recipe fit your needs while still tasting great. For the full recipe, check the detailed steps to create this delightful dessert. To start, gather your ingredients. You need crushed digestive biscuits and melted butter. In a mixing bowl, combine these two. Mix until you see a texture that looks like wet sand. Next, take a 9-inch springform pan. Press the biscuit mixture firmly into the bottom. Make sure it is even. This will be the base of your cheesecake. After that, refrigerate the pan for about 10 minutes. This helps the base to set nicely. Now, let’s make that creamy filling. In a new bowl, add softened cream cheese, powdered sugar, and vanilla extract. Beat these together until they become smooth and creamy. In another bowl, whip the heavy cream. Keep whipping until stiff peaks form. This means it will hold its shape well. Now, gently fold the whipped cream into the cream cheese mixture. Do this carefully so the filling stays light and airy. Once your filling is ready, pour it over the chilled biscuit base. Spread it evenly with a spatula. Now, let’s add some color. Arrange the sliced strawberries on top of the cheesecake. You can be creative with this step! In a small saucepan, melt the strawberry jam over low heat. Once it is runny, let it cool a little. Drizzle the jam over the strawberries for a shiny finish. Finally, cover your cheesecake with plastic wrap. Refrigerate it for at least 4 hours, or even overnight. This waiting time helps it set perfectly. For the full recipe, check the earlier section. When making a no-bake strawberry cheesecake, a few common mistakes can spoil your treat. First, don’t skip chilling the biscuit base. It needs to set before adding the filling. Second, make sure your cream cheese is fully softened. Cold cream cheese can create lumps in your mixture. Lastly, don’t rush the whipping of the heavy cream. Whip it until stiff peaks form for the best texture. To get a creamy and smooth texture, follow these steps. Mix the cream cheese, powdered sugar, and vanilla extract until it’s really smooth. Then, whip the heavy cream separately until it’s nice and fluffy. When you fold the whipped cream into the cream cheese mix, do it gently. This keeps air in the mixture, making it light and fluffy. Serving your cheesecake can be fun and creative. Cut slices and place them on pretty dessert plates. You can add fresh mint leaves on top for a pop of color. For extra sweetness, drizzle more strawberry jam over the slices. You can also serve it with a side of fresh strawberries. This adds a nice touch and makes the dessert look even better. For the full recipe, refer to the earlier sections. {{image_2}} You can change up the fruity flavor of your cheesecake. Swap strawberries for other berries like blueberries or raspberries. You can also use peaches, mangoes, or even kiwi. Just chop the fruit and layer it on top or mix it into the filling. This makes your dessert colorful and fun. Want a richer taste? Try adding chocolate or caramel. For chocolate, mix in cocoa powder or melted chocolate into the cream cheese. Drizzle caramel sauce on top for a sweet touch. Both options give your cheesecake a new twist that chocolate lovers will adore. If you need a gluten-free option, use gluten-free cookies for the base. Many brands offer tasty gluten-free biscuits. Check the label to be sure. This way, everyone can enjoy this delicious treat without worry. Make sure to use gluten-free cream cheese and whipped cream too. For the full recipe, check out the [Full Recipe]. To keep your No-Bake Strawberry Cheesecake fresh, store it in the fridge. Use an airtight container to prevent any odors from mixing in. If you don’t have one, cover the cheesecake tightly with plastic wrap. This keeps it safe and tasty. Your cheesecake stays fresh in the fridge for about 3 to 5 days. After that, the texture may change, and the flavor might fade. Keep an eye on any signs of spoilage, like a sour smell or discoloration. Yes, you can freeze No-Bake Strawberry Cheesecake. Wrap it well in plastic wrap and then foil. This keeps out air and prevents freezer burn. It can last up to 3 months in the freezer. When ready to eat, thaw it in the fridge for a few hours. Enjoy the creamy goodness! For the full recipe, check out the details above. Baked cheesecakes use heat to set the filling. This process gives a dense, rich texture. No-bake cheesecakes rely on cold temperatures to firm up. They often taste lighter and creamier. Baked cheesecakes need time in the oven, while no-bake ones chill in the fridge. This makes no-bake cheesecakes quicker to prepare. To make your cheesecake firmer, try these tips: - Use full-fat cream cheese. This adds richness and firmness. - Add gelatin to the filling. Dissolve it in water and mix it in. - Chill the cheesecake longer. Let it set overnight for the best results. - Avoid overmixing the cream cheese. This keeps air out and helps it firm up. Yes, you can use frozen strawberries. Just thaw them first and drain excess liquid. The flavor will still be great, but the texture may change slightly. Fresh strawberries give a firmer bite and vibrant look. For best results, try to use fresh strawberries in the recipe. For the full recipe, check the main article. No-bake strawberry cheesecake is easy and fun to make. We explored key ingredients, like strawberries and cream cheese, and even how to customize them. I shared step-by-step instructions to help you prepare the base, filling, and assembly. Tips on avoiding common mistakes will guide you to the perfect texture. With various topping options, you can get creative. Finally, proper storage keeps your cheesecake fresh longer. Remember, this dessert is versatile, so don't hesitate to experiment. Enjoy every bite of your delicious creation!](https://dailydishly.com/wp-content/uploads/2025/06/5274bd3f-8d96-4968-97f1-1841490db53b-768x768.webp)