Cilantro Lime Rice Bowls Fresh and Flavorful Delight

Are you ready to elevate your meal game with a burst of fresh flavors? Cilantro lime rice bowls are not just easy to make; they are also vibrant, nutritious, and satisfying. You’ll love how the zesty lime, fresh cilantro, and colorful veggies come together. Let’s dive into this delicious recipe that is perfect for any occasion, whether it’s a cozy dinner or a meal prep win!
Why I Love This Recipe
- Fresh and Vibrant Flavors: This recipe combines the zesty taste of lime with the freshness of cilantro, creating a bright and delicious flavor profile that is perfect for any meal.
- Quick and Easy Preparation: With only a few simple steps and minimal cooking time, you can whip up these bowls in just 30 minutes, making it a great option for busy weeknights.
- Customizable Toppings: This recipe allows you to add your favorite toppings, whether it’s spicy jalapeños or creamy avocado, giving you the freedom to personalize each bowl to your liking.
- Nutritious and Filling: Packed with protein from black beans and healthy fats from avocado, this dish is not only satisfying but also nourishing, making it a feel-good meal.
Ingredients
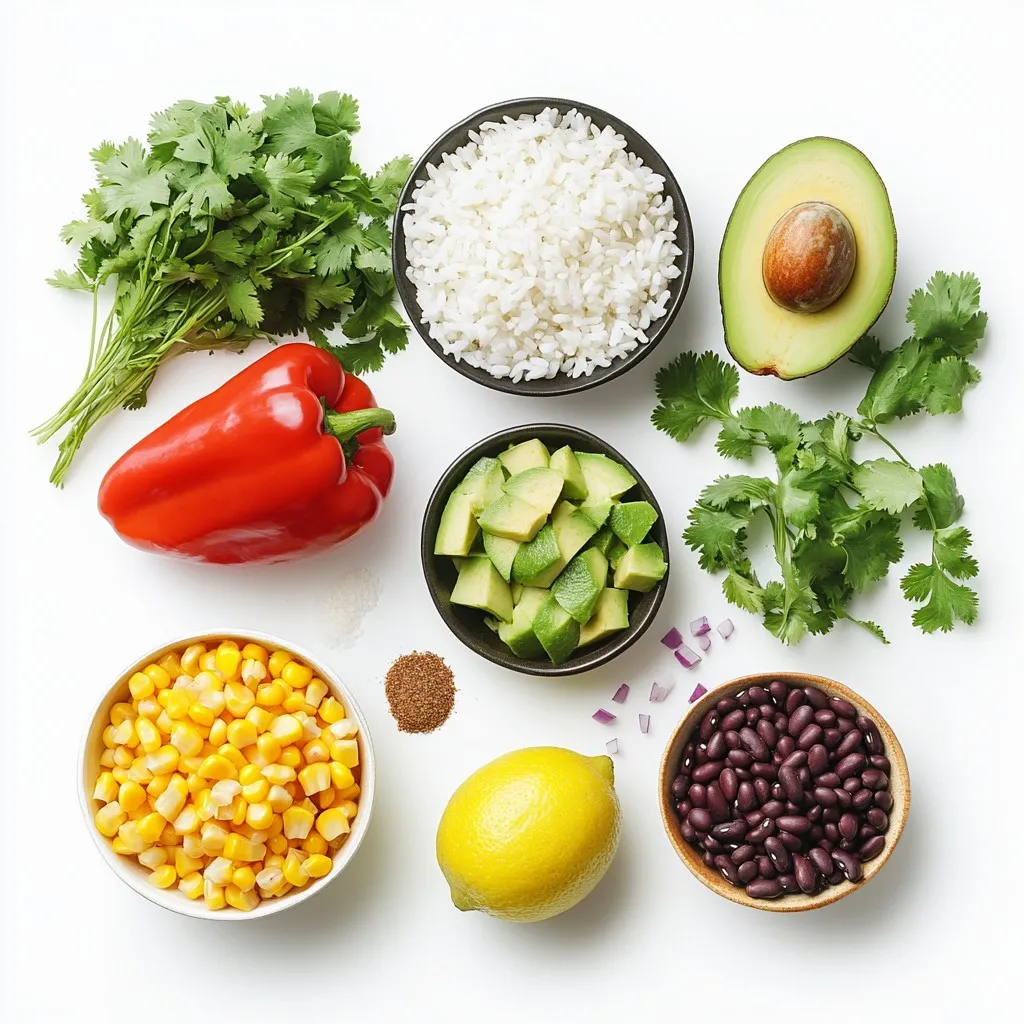
List of Main Ingredients
– 1 cup jasmine rice
– 2 cups vegetable broth
– Zest of 1 lime
– Juice of 2 limes
– 1 cup fresh cilantro, chopped
– 1 can black beans, rinsed and drained
– 1 red bell pepper, diced
– 1 avocado, sliced
– 1 small red onion, thinly sliced
– 1 cup corn (fresh or frozen)
– 1 teaspoon cumin
– 1 teaspoon garlic powder
– Salt and pepper to taste
In making my Cilantro Lime Rice Bowls, I love using jasmine rice. It has a soft and fragrant quality that elevates the dish. Vegetable broth adds depth and flavor to the rice, making it more than just a side. The lime zest and juice bring brightness and tanginess, which is key to this recipe.
Fresh cilantro is a must for that vibrant flavor. Black beans add protein and a nice texture. I always choose a red bell pepper for its sweetness and color. Avocado adds creaminess, and red onion gives a slight crunch. Corn, whether fresh or frozen, adds a pop of sweetness. Lastly, cumin and garlic powder enhance the overall flavor profile, making every bite delicious.
Optional Toppings
– Sliced jalapeños
– Sour cream
– Feta cheese
For extra fun, I suggest toppings like sliced jalapeños for heat. Sour cream adds creaminess that balances the spice. Feta cheese can give a salty kick, making the meal even more satisfying. Feel free to mix and match these toppings to suit your taste!

Step-by-Step Instructions
Preparing the Rice
– First, rinse 1 cup of jasmine rice under cold water. This step helps remove excess starch.
– Next, bring 2 cups of vegetable broth to a boil in a medium pot. Add the rinsed rice.
– Reduce the heat to low, cover, and simmer for 15-18 minutes. The rice should be tender when done.
Fluffing and Flavoring
– Once the rice is cooked, remove it from heat. Let it sit for 5 minutes before fluffing.
– Stir in the zest of 1 lime and the juice of 2 limes. This adds bright flavor.
– Mix in 1 cup of chopped fresh cilantro, saving some for later.
Sautéing Vegetables
– Heat a drizzle of oil in a skillet over medium heat.
– Add 1 diced red bell pepper and 1 cup of corn. Sauté for about 5 minutes.
– Season with 1 teaspoon of cumin and 1 teaspoon of garlic powder. Add salt and pepper to taste.
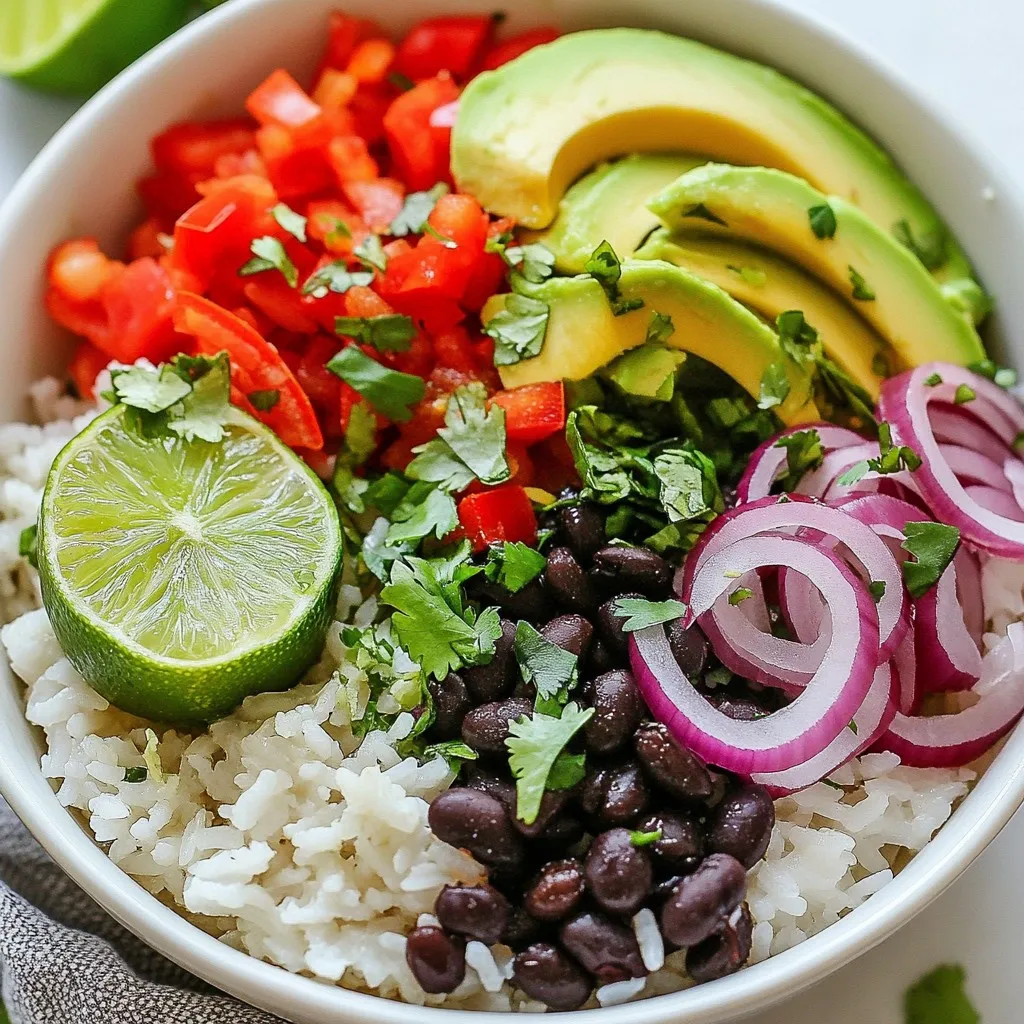
Assembling the Bowl
– Start with a generous scoop of cilantro lime rice at the base of your bowl.
– Next, add a layer of black beans from a can, rinsed and drained.
– Top with the sautéed bell pepper and corn mixture, followed by sliced avocado and thinly sliced red onion.
– Finally, sprinkle the remaining cilantro on top. Add optional toppings like sliced jalapeños or sour cream for extra flavor.
Tips & Tricks
Enhancing Flavor
To make your Cilantro Lime Rice Bowls really pop, focus on seasoning. Start with salt and pepper. They bring out the best in your dish. Use fresh lime juice for a bright zing. Lime zest adds depth too. Always use fresh ingredients when you can. Fresh cilantro and veggies make a huge difference. They offer vibrant flavor and color.
Cooking Rice Perfectly
Cooking fluffy rice is key. Rinse the jasmine rice until the water runs clear. This removes excess starch. Cook the rice in vegetable broth for added flavor. If you use brown rice, adjust the cooking time. Brown rice needs more water and longer to cook. For a quicker option, try basmati rice, which cooks faster than jasmine.
Presentation Ideas
A great bowl needs a good look. Start with a scoop of cilantro lime rice at the base. Layer the black beans and the sautéed veggies next. Add sliced avocado and onion on top. For extra flair, sprinkle cilantro over everything. Use colorful toppings like sliced jalapeños or feta cheese. This not only tastes great but looks beautiful too.
Pro Tips
- Rinse the Rice: Rinsing the jasmine rice under cold water is crucial for achieving fluffy rice. It removes excess starch, preventing it from becoming gummy during cooking.
- Flavor Infusion: For an extra burst of flavor, consider adding chopped garlic or shallots to the vegetable broth before boiling it for the rice.
- Customize Your Bowl: Feel free to add your favorite vegetables or proteins, such as grilled chicken or shrimp, to make the rice bowl even heartier.
- Perfectly Ripened Avocado: To ensure your avocado is perfectly ripe for slicing, gently press on the skin; if it gives slightly, it’s ready to eat!

Variations
Protein Options
You can add protein to your cilantro lime rice bowl for extra flavor and nutrition. Grilled chicken or shrimp make great choices. They pair well with the fresh tastes of lime and cilantro. Simply season the protein with salt, cumin, and lime juice before cooking.
If you prefer plant-based proteins, try adding tofu or tempeh. You can marinate them in lime juice, garlic, and spices for a tasty kick. Chickpeas also work well and add a nice texture.
Dietary Modifications
This recipe is easy to modify for different diets. For a vegan option, just skip any dairy toppings like sour cream or feta cheese. The rice and beans provide plenty of protein.
If you need a gluten-free dish, this recipe fits perfectly! All ingredients are gluten-free. For those watching carbs, you can use cauliflower rice instead of jasmine rice. It will still taste great with the lime and cilantro flavors.
Flavor Enhancements
Want to spice up your rice bowls? Add spices like paprika or chili powder for a bolder taste. Just sprinkle them into the rice or sautéed veggies.
You can also experiment with different herbs. Basil or mint can add a fresh twist. Try mixing in these herbs to see what flavors you enjoy most. Each change makes your cilantro lime rice bowl unique and exciting!
Storage Info
Storing Leftovers
To keep your cilantro lime rice bowls fresh, store leftovers in airtight containers. This helps prevent moisture loss and keeps the flavors intact. In the fridge, they last up to 3 days. For longer storage, freeze the rice and toppings separately. They can stay good for about 2 months in the freezer.
Reheating Tips
When you reheat your rice bowls, do it gently to keep the texture nice. The best method is to use the microwave with a splash of water. Cover the bowl to trap steam and heat in 1-minute intervals. Stir in between to make sure everything heats evenly. Always check the temperature; it should be at least 165°F to be safe.
FAQs
What can I substitute for jasmine rice?
You can use brown rice or quinoa instead of jasmine rice. Brown rice adds a nutty flavor and more fiber. Quinoa is a protein-packed option that cooks quickly. Both choices work well in this recipe. Just adjust cooking times. Brown rice takes longer to cook, while quinoa cooks faster.
Can I make this recipe ahead of time?
Yes, you can make this dish ahead of time. Cook the rice and veggies, then store them separately. Keep the rice in an airtight container in the fridge for up to four days. The veggies also store well. To save time, prep the toppings too. You can assemble your bowls when you’re ready to eat.
How can I make this dish spicier?
To add spice, try sliced jalapeños or diced serrano peppers. You can mix in chili powder or cayenne pepper for heat. Start with a small amount and adjust to your taste. You can also use spicy black beans for an extra kick. Enjoy exploring different levels of heat in your bowls!
This bowl combines jasmine rice, fresh veggies, and spices for a tasty dish. You learned to prepare and customize the meal, plus storage tips for leftovers. You can even adapt it for different diets. Remember, fresh ingredients boost flavor and color. Enjoy experimenting with toppings and protein choices. With these tips, you can make a delicious and healthy bowl anytime. Happy cookin

Cilantro Lime Rice Bowls
Ingredients
- 1 cup jasmine rice
- 2 cups vegetable broth
- 1 unit zest of lime
- 2 units juice of limes
- 1 cup fresh cilantro, chopped
- 1 can black beans, rinsed and drained
- 1 unit red bell pepper, diced
- 1 unit avocado, sliced
- 1 small red onion, thinly sliced
- 1 cup corn (fresh or frozen)
- 1 teaspoon cumin
- 1 teaspoon garlic powder
- to taste unit salt and pepper
- optional unit sliced jalapeños
- optional unit sour cream
- optional unit feta cheese
Instructions
- Rinse the jasmine rice under cold water until the water runs clear to remove excess starch.
- In a medium pot, bring the vegetable broth to a boil. Add the rinsed rice and reduce the heat to low. Cover and simmer for 15-18 minutes, or until the rice is tender and the broth is absorbed.
- Once the rice is done, remove it from heat and let it sit for 5 minutes. Then, fluff it with a fork and stir in lime zest, lime juice, and half of the chopped cilantro. Set aside.
- In a skillet, heat a drizzle of olive oil over medium heat. Add the diced red bell pepper and corn, sautéing for about 5 minutes until the bell pepper is soft. Season with cumin, garlic powder, salt, and pepper. Remove from heat.
- To assemble the bowls, start with a generous scoop of cilantro lime rice at the base. Top with black beans, sautéed bell pepper and corn mixture, sliced avocado, and red onion.
- Sprinkle the remaining cilantro on top and add any optional toppings like jalapeños, sour cream, or feta cheese for added flavor.
- Serve immediately and enjoy your vibrant and fresh Cilantro Lime Rice Bowl!


![- 8 oz rice noodles - 1 cup red bell pepper, julienned - 1 cup yellow bell pepper, julienned - 1 cup cucumber, julienned - 1 cup purple cabbage, shredded - 1 cup carrots, grated - 1 cup edamame (shelled) - 1/4 cup fresh cilantro, chopped - 1/4 cup green onions, sliced For the Peanut Sauce: - 1/2 cup creamy peanut butter - 3 tablespoons soy sauce (or tamari for a gluten-free option) - 2 tablespoons lime juice - 1 tablespoon maple syrup (or honey) - 1 tablespoon sesame oil - 1 garlic clove, minced - 1 teaspoon grated fresh ginger - 1-2 tablespoons water (to thin the sauce, as needed) Each serving has about 250 calories. This salad is packed with nutrients. It offers protein and fiber from the noodles and veggies. The peanut sauce adds healthy fats and flavor. Each bite is both tasty and good for you. If you need gluten-free options, use rice noodles and tamari. For vegan alternatives, swap honey for maple syrup. You can also add tofu for extra protein. This salad can fit many diets while still being delicious. You can find the full recipe for Rainbow Thai Peanut Noodle Salad [Full Recipe]. To start, bring a large pot of water to a boil. Use enough water to let the noodles float freely. Once boiling, add 8 oz of rice noodles. Cook them for about 3 to 5 minutes, or until they are firm but tender. Keep an eye on them! After they are cooked, drain them in a colander. Rinse the noodles with cold water. This stops the cooking and keeps the noodles from sticking together. Set them aside while you prep the veggies. While the noodles cook, wash and cut the vegetables. To make it easy, julienne the red and yellow bell peppers. Use a sharp knife for clean cuts. Slice the cucumber and shred the purple cabbage. Grate the carrots too. Aim for uniform pieces so they mix well. Once cut, place all the veggies in a large mixing bowl. This keeps everything together for the next step. You can also add the edamame for extra protein. Now, let’s make the peanut sauce! In a medium bowl, mix 1/2 cup of creamy peanut butter, 3 tablespoons of soy sauce, and 2 tablespoons of lime juice. Add 1 tablespoon of maple syrup for a touch of sweetness. Next, add 1 tablespoon of sesame oil, 1 minced garlic clove, and 1 teaspoon of grated ginger. Whisk these ingredients together until smooth. If the sauce feels thick, add 1-2 tablespoons of water. This helps thin it out to your liking. Now, pour this yummy sauce over the noodles and veggies. Toss gently to coat everything evenly. The flavors will blend beautifully together. For more details, check the Full Recipe. To cook noodles al dente, bring water to a boil. Add rice noodles and cook for about 4-6 minutes. Stir often to prevent sticking. Once done, drain and rinse under cold water. This stops cooking and keeps noodles firm. For crunchy vegetables, cut them just before serving. This keeps their crispness. Use a sharp knife for even slices. Julienne the peppers and cucumber. Shred the cabbage and grate the carrots. Keep them colorful for a vibrant dish. Boost flavor with spices and condiments. A pinch of red pepper flakes gives heat. Add a splash of fish sauce for depth. If you love citrus, lime zest brightens the dish. Fresh herbs make a big difference. Cilantro adds a fresh taste. You can try mint or basil for a twist. Chop herbs finely and mix them in just before serving. Serving bowls set the stage for a great meal. Use larger bowls for family-style serving. For individual plates, choose clear glass bowls. This shows off the colorful layers. Garnishing techniques can elevate your dish. Sprinkle extra cilantro on top for a pop of green. Add chopped peanuts for crunch. Arrange salad in colorful layers for a beautiful view. A rainbow of colors always catches the eye. {{image_2}} You can make this salad heartier by adding protein. Chicken is a great choice. Just grill or sauté it, then slice it thin. Tofu is another option. It soaks up the peanut sauce well. You can also try shrimp or beans for a different flavor. Each adds a nice touch to the Rainbow Thai Peanut Noodle Salad. Switching up the peanut sauce can give your salad new life. You can try a sesame sauce for a nutty twist. Just blend sesame paste with soy sauce and lime juice. For a sweeter flavor, teriyaki sauce works well too. It brings a rich taste that pairs nicely with the fresh veggies. Using seasonal vegetables can enhance your salad's freshness. In summer, add ripe tomatoes or corn for sweetness. Fall brings squash or roasted peppers for warmth. Winter might call for hearty greens like kale. Each season offers unique flavors. Tailoring your recipe helps keep it exciting all year long. For the full recipe, check out the detailed steps to make this dish shine. To store leftovers of your Rainbow Thai Peanut Noodle Salad, put it in the fridge. Use an airtight container to keep it fresh. Glass containers work great because they don’t hold onto smells. If you use plastic, make sure it’s food-safe and BPA-free. You can freeze the salad, but it is best to freeze only the noodles and sauce. Keep the veggies separate. They don't freeze well and lose their crunch. To thaw, move the noodles and sauce to the fridge overnight. When ready to eat, heat the noodles gently and mix in fresh veggies. This keeps everything bright and tasty. In the fridge, the salad lasts about 3 to 5 days. Check for signs of spoilage before eating. If the veggies look wilted or the sauce smells off, it’s best to toss it. Freshness is key for this vibrant dish! What is the best type of noodles for this salad? The best noodles are rice noodles. They are light and soak up the sauce. You can also use soba or whole grain noodles if you prefer. Just remember to cook them until they are al dente. This keeps them from getting too mushy in the salad. Can I make the salad in advance? Yes, you can make the salad ahead of time. It tastes better after chilling for a bit. Prepare it up to a day in advance and store it in the fridge. Just keep the sauce separate if you want the noodles to stay firm. What to do if the sauce is too thick? If your sauce is too thick, add a tablespoon of water. Mix it well, and check again. You can repeat this until it reaches the right consistency. A smooth sauce coats the salad nicely. How to fix overly soggy noodles? To fix soggy noodles, rinse them in cold water. This stops the cooking process and helps firm them up. If they still seem too soft, use them in soups or stir-fries instead. What can I serve with Rainbow Thai Peanut Noodle Salad? This salad pairs well with grilled chicken or shrimp. You can also serve it with spring rolls for a light meal. Add a side of fresh fruit for a sweet touch. Can this dish be served warm? Yes, you can serve this dish warm. Just toss the salad right after mixing it. However, I recommend chilling it first to enhance the flavors. For the full recipe, check out the details provided above. This blog post covered key ingredients for Rainbow Thai Peanut Noodle Salad, including rice noodles, fresh veggies, and tasty peanut sauce. I shared nutritional info, substitutions for dietary needs, and step-by-step cooking instructions. We also explored tips to enhance texture and flavor, various protein additions, and creative presentation ideas. Overall, this salad is versatile and easy to make, perfect for any occasion. Keep it fresh, store leftovers properly, and don't hesitate to try new variations. Enjoy crafting your delicious, colorful dish!](https://dailydishly.com/wp-content/uploads/2025/07/2e038f5f-8562-408c-ae38-174aa7e62a42-768x768.webp)


![To make Tomato Basil Feta Pasta, gather these items: - 400g pasta (penne or fusilli) - 300g cherry tomatoes, halved - 200g feta cheese, crumbled - 1/2 cup fresh basil leaves, chopped - 3 cloves garlic, minced - 1/4 cup olive oil - 1 teaspoon red pepper flakes (optional) - Salt and pepper to taste - Grated Parmesan cheese for serving (optional) You can swap some ingredients if needed. Here are some ideas: - Use whole wheat or gluten-free pasta instead of regular pasta. - Swap cherry tomatoes with diced regular tomatoes. - If feta is hard to find, try goat cheese for a different taste. - For a dairy-free option, use a plant-based feta cheese. - Instead of fresh basil, use dried basil, but use less since it is stronger. Fresh ingredients make a big difference in this dish. Here are some tips: - Look for firm cherry tomatoes with bright color and no bruises. - Choose basil leaves that are vibrant green and not wilted or brown. - Smell the tomatoes; they should have a sweet, fresh scent. - When buying garlic, select bulbs that are firm and dry, with no soft spots. - Always check the feta cheese for freshness; it should be creamy and not crumbly. This recipe brings vibrant flavors together, making it a real treat. For the full recipe, check out the provided link. To start, fill a large pot with water and add salt. Bring the water to a boil. Once boiling, add 400g of pasta, like penne or fusilli. Cook it for about 8-10 minutes until it’s al dente. Al dente means the pasta is firm but not hard. After cooking, save 1 cup of the pasta water. Then, drain the pasta in a colander and set it aside. In a large bowl, mix together 300g of halved cherry tomatoes and 200g of crumbled feta cheese. Add 3 cloves of minced garlic for flavor. Pour in 1/4 cup of olive oil to give it richness. If you like some heat, toss in 1 teaspoon of red pepper flakes. Season the mixture with salt and pepper to taste. This blend will create a fresh and tasty base for your pasta. Now, add the cooked pasta to the bowl with the tomato mixture. Toss everything together gently. Make sure that the pasta is well coated with the olive oil and feta. If the pasta seems dry, pour in some of the reserved pasta water, 1-2 tablespoons at a time. Stir until you reach a creamy texture. Finally, fold in 1/2 cup of chopped fresh basil leaves. This will add a bright flavor just before serving. Enjoy your Tomato Basil Feta Pasta! For the full recipe, check the details above. To get that perfect creamy texture, start by saving some pasta water. After cooking your pasta, reserve about one cup of the water before draining. This water has starch that helps bind the sauce. When you mix the pasta with the tomato and feta mixture, add the reserved water a little at a time. Keep mixing until you reach the creaminess you want. This trick makes your dish rich and smooth. Presentation matters. It can make your meal feel special. After plating your pasta, add some fresh basil leaves on top. This adds color and a fresh aroma. You can also sprinkle grated Parmesan cheese for a touch of elegance. Use a few whole cherry tomatoes for a pop of color. These small steps make a big difference in how your dish looks. One common mistake is overcooking the pasta. Always cook it al dente. This keeps the pasta firm and helps it hold the sauce better. Another mistake is not reserving enough pasta water. If you skip this step, your dish may end up dry. Finally, avoid adding all the basil too early. Fold it in just before serving. This keeps its bright flavor and fresh look. By watching these details, you will make a delicious Tomato Basil Feta Pasta every time. {{image_2}} You can easily add protein to this dish. Grilled chicken works well. Simply cook it, slice it, and mix it in. Shrimp also adds great flavor. Sauté shrimp in olive oil until pink, then toss with the pasta. Both options make the meal more filling and nutritious. For a vegetarian twist, try adding more veggies. Spinach, bell peppers, or zucchini brighten up the dish. You can also add olives for a salty kick. Capers or artichokes bring a unique taste. Each addition gives the pasta a new flavor and texture. You can change this dish with the seasons. In summer, use fresh heirloom tomatoes for sweetness. Fall calls for roasted butternut squash. In winter, add kale or Brussels sprouts for a hearty touch. Each season offers fresh produce to keep your pasta exciting and delicious. To keep your Tomato Basil Feta Pasta fresh, store it in an airtight container. Let it cool first. This helps avoid steam build-up, which can make the pasta soggy. Place the container in the fridge. It will stay good for about three days. Make sure to label it with the date. This way, you can keep track of how long it has been stored. When it's time to eat your leftovers, reheat the pasta carefully. The best way is to use a skillet. Add a splash of water or olive oil to the pan. Heat it on low to medium heat. Stir gently to mix the sauce and pasta. This keeps the dish moist and tasty. You can also use the microwave, but cover it with a damp paper towel. This traps steam and keeps the pasta from drying out. If you want to save your dish for later, freezing works well. First, let the pasta cool completely. Then, divide it into single servings. Use freezer-safe bags or containers to store it. Remember to squeeze out as much air as possible. This helps prevent freezer burn. Your pasta can last up to three months in the freezer. When you're ready to eat, thaw it in the fridge overnight before reheating. This keeps the texture nice and the flavors intact. For the full recipe, check out the details above. Yes, you can use various pasta types. Penne and fusilli work well, but you can try spaghetti or farfalle. The key is to choose a pasta that holds sauce well. Each type gives a slightly different texture, making your meal unique. To make Tomato Basil Feta Pasta gluten-free, choose gluten-free pasta. Many brands offer rice or corn-based options. Follow the cooking instructions on the package. The rest of the ingredients are naturally gluten-free, so you can enjoy this dish without worry. This dish pairs well with many options. You can serve it with a light salad or garlic bread. Roasted vegetables also complement the flavors nicely. For protein, grilled chicken or shrimp works well. You might also enjoy a glass of white wine with this meal. For the full recipe, check out the [Full Recipe]. To wrap it up, we covered key ingredients, cooking steps, and tips for your dish. I shared helpful advice on selecting fresh produce and avoiding mistakes. You also learned about variations and how to store leftovers. This dish offers great flavors and easy options. Cooking should be fun and delicious. Experiment with ingredients and enjoy your tasty creation!](https://dailydishly.com/wp-content/uploads/2025/07/0b4f4c47-66c7-4839-80f3-1b898db998c4-768x768.webp)
![For my roasted veggie tacos, I love using a mix of colorful veggies. Here’s what I suggest: - 1 zucchini, diced - 1 red bell pepper, diced - 1 yellow bell pepper, diced - 1 red onion, diced - 1 cup cherry tomatoes, halved These veggies not only taste great, but they also look vibrant. You can easily swap in your favorites. To make these tacos truly flavorful, I use some simple seasonings: - 2 tablespoons olive oil - 1 teaspoon ground cumin - 1 teaspoon smoked paprika - Salt and pepper to taste These spices bring out the best flavors in the veggies. The olive oil helps them roast perfectly. Once your tacos are ready, it's time for the fun part: the toppings! I recommend: - 8 small corn tortillas - 1 avocado, sliced - Fresh cilantro, for garnish - Lime wedges, for serving The creamy avocado and fresh cilantro add a nice touch. Squeezing lime over the tacos gives them a bright finish. For the full recipe, check out the detailed cooking steps! Start by preheating your oven to 425°F (220°C). This high heat helps the veggies roast well. You want them to be soft and slightly charred. Next, gather your vegetables. You will need: - 1 zucchini, diced - 1 red bell pepper, diced - 1 yellow bell pepper, diced - 1 red onion, diced - 1 cup cherry tomatoes, halved In a large bowl, toss all the diced veggies together. This ensures they mix well. Drizzle 2 tablespoons of olive oil over the vegetables. Then, add: - 1 teaspoon ground cumin - 1 teaspoon smoked paprika - Salt and pepper to taste Mix everything together until the veggies are well coated. Spread them out on a baking sheet in a single layer. Roast for 20 to 25 minutes. Stir halfway through to make sure they cook evenly. While the veggies roast, heat 8 small corn tortillas in a dry skillet. Warm them for about 30 seconds on each side. This makes them soft and easy to fold. Once the veggies are ready, take them out of the oven. To make your tacos, place a generous spoonful of roasted veggies on each tortilla. Top with slices of avocado and sprinkle fresh cilantro on top. Serve with lime wedges on the side for that extra zing. For the full recipe, check [Full Recipe]. For great roasted veggie tacos, pick vegetables that roast well. I love using: - Zucchini - Bell peppers - Red onion - Cherry tomatoes These veggies bring color and flavor. You can also try mushrooms or eggplant. The key is to cut them into similar sizes. This ensures even cooking. Spices can change the whole taco game. I often use: - Ground cumin - Smoked paprika - Salt and pepper These add a nice warmth. For a kick, try chili powder or cayenne pepper. You can also mix in garlic powder or onion powder for depth. Feel free to experiment based on your taste! Tortillas are the base of your tacos. Small corn tortillas work best. They are soft and tasty. You can also use flour tortillas if you prefer. For a fun twist, try lettuce wraps for a low-carb option. Just make sure your tortillas are warm. This makes them easier to fold and eat. For the complete dish, check out the Full Recipe. {{image_2}} You can add proteins to your roasted veggie tacos for more flavor. Chicken, beef, or shrimp work well. If you want a plant-based option, try black beans or chickpeas. Just cook them separately, then mix them with the roasted veggies in your taco. This adds texture and makes the meal more filling. These tacos are easy to make vegan and gluten-free. Use corn tortillas, which are naturally gluten-free. For a vegan twist, skip any dairy toppings. You can use plant-based sour cream or cashew cream instead. This way, everyone can enjoy these tasty tacos without worry. Toppings can change the whole taco experience. You can use fresh salsa or a spicy sauce for a kick. Try pickled onions for tangy flavor. If you like crunch, add shredded cabbage. For creaminess, avocado is a perfect choice. Experiment with different toppings to find your favorite combination. For the full recipe, check out the Roasted Veggie Tacos instructions above. To keep your leftover tacos fresh, place them in an airtight container. This helps prevent sogginess. Store them in the fridge for up to three days. If you have extra roasted veggies, keep them separate. You can use them in salads or wraps later. When you want to eat your tacos again, reheating is easy. You can use a skillet or the microwave. If you use a skillet, heat it over medium heat. Place the tacos in the skillet for about two minutes on each side. For the microwave, warm them for about 30 seconds. Make sure they are hot all the way through. You can freeze the roasted veggies for later use. Store them in a freezer-safe bag. Press out as much air as possible before sealing. They will last for about three months in the freezer. To use them, thaw overnight in the fridge and then reheat. Enjoy your tasty roasted veggie tacos again with minimal work! For the complete recipe, check out the Full Recipe above. I love using a mix of colorful veggies. Zucchini, bell peppers, red onions, and cherry tomatoes work best. These vegetables roast well and bring great flavors. You can also try corn, mushrooms, or sweet potatoes for variety. Each veggie adds its own taste and texture. Roasted veggie tacos stay fresh for about three to four days in the fridge. Make sure to store them in an airtight container. The veggies may lose some crunch, but they will still taste good. Just reheat them before eating for the best flavor. Yes, you can prepare the veggies a day ahead. Chop them and store them in the fridge. This saves time on taco night. You can also roast them in advance and keep them in the fridge. Just warm them up before serving. Roasted veggie tacos pair well with many sides. I recommend serving them with fresh guacamole, salsa, or a zesty salad. You can also add rice or beans for a hearty meal. A side of tortilla chips adds a nice crunch too. For the full recipe, check out the Roasted Veggie Tacos section! Roasted veggie tacos are a great way to enjoy healthy, tasty meals. We covered the best ingredients, from fresh vegetables to tasty seasonings. You now have step-by-step instructions for making these delicious tacos at home. Plus, you learned useful tips for storage and variations to suit your needs. Remember, cooking should be fun and easy. Try different vegetables and toppings to make it your own. Enjoy your taco journey!](https://dailydishly.com/wp-content/uploads/2025/07/2cc26e34-4f45-47fb-a3bd-ef05b980d92e-768x768.webp)