Who can resist the warm, sweet aroma of Cinnamon Sugar Pretzel Bites? These little delights are perfect for snack time or a cozy movie night. In this guide, I’ll share simple ingredients, step-by-step instructions, and tips to make the best pretzel bites ever. Whether you want a tasty treat or a fun cooking project, you’re in the right place. Let’s dive into this delicious recipe together!
Ingredients
Key Ingredients for Cinnamon Sugar Pretzel Bites
To make these tasty bites, you need some key ingredients. Here’s what you’ll need:
– 1 cup warm water (110°F)
– 1 packet (2 1/4 teaspoons) active dry yeast
– 2 tablespoons granulated sugar
– 3 cups all-purpose flour
– 1 teaspoon salt
– 1/4 cup baking soda
– 1/2 cup unsalted butter, melted
– 1/2 cup granulated sugar (for coating)
– 2 teaspoons ground cinnamon
– Coarse sea salt (for sprinkling)
These ingredients work together to create a soft, chewy pretzel. The warm water helps the yeast activate. The sugar feeds the yeast, making the dough rise. The flour gives the pretzel its structure, while the baking soda adds a nice flavor.
Optional Ingredients for Dipping Sauces
While the pretzel bites are delicious on their own, you can dip them for extra fun. Here are some great options:
– Warm vanilla glaze
– Chocolate sauce
– Cream cheese dip
– Caramel sauce
These dips can make your snack even sweeter. They add flavors that complement the cinnamon sugar.
Substitutions and Alternatives
If you’re missing an ingredient, don’t worry! Here are some easy swaps:
– You can use instant yeast instead of active dry yeast. Just skip the proofing step.
– For a gluten-free option, try using gluten-free flour.
– If you want a dairy-free version, use coconut oil instead of butter.
– You can replace granulated sugar with brown sugar for a deeper flavor.
These substitutions help you adapt the recipe to your needs. With these options, you can still enjoy cinnamon sugar pretzel bites!
Step-by-Step Instructions
Preparing the Dough
To start, gather your ingredients. You need warm water, active dry yeast, sugar, flour, and salt. In a bowl, mix the warm water, yeast, and 2 tablespoons of sugar. Wait about 5 minutes until it foams. This shows the yeast is alive. Then, in a large bowl, combine the flour and salt. Pour in the yeast mix and stir until a dough forms.
Shaping the Pretzel Bites
Once your dough is ready, knead it on a floured surface for about 5 minutes. It should feel smooth and stretchy. Now place the dough in a greased bowl. Cover it, and let it rise for about 1 hour. It will double in size. After it rises, punch the dough down. Divide it into eight pieces. Roll each piece into a rope, about 1/2 inch thick. Cut these ropes into 1-inch pieces. You now have bite-sized pretzel pieces!
Boiling and Baking the Pretzel Bites
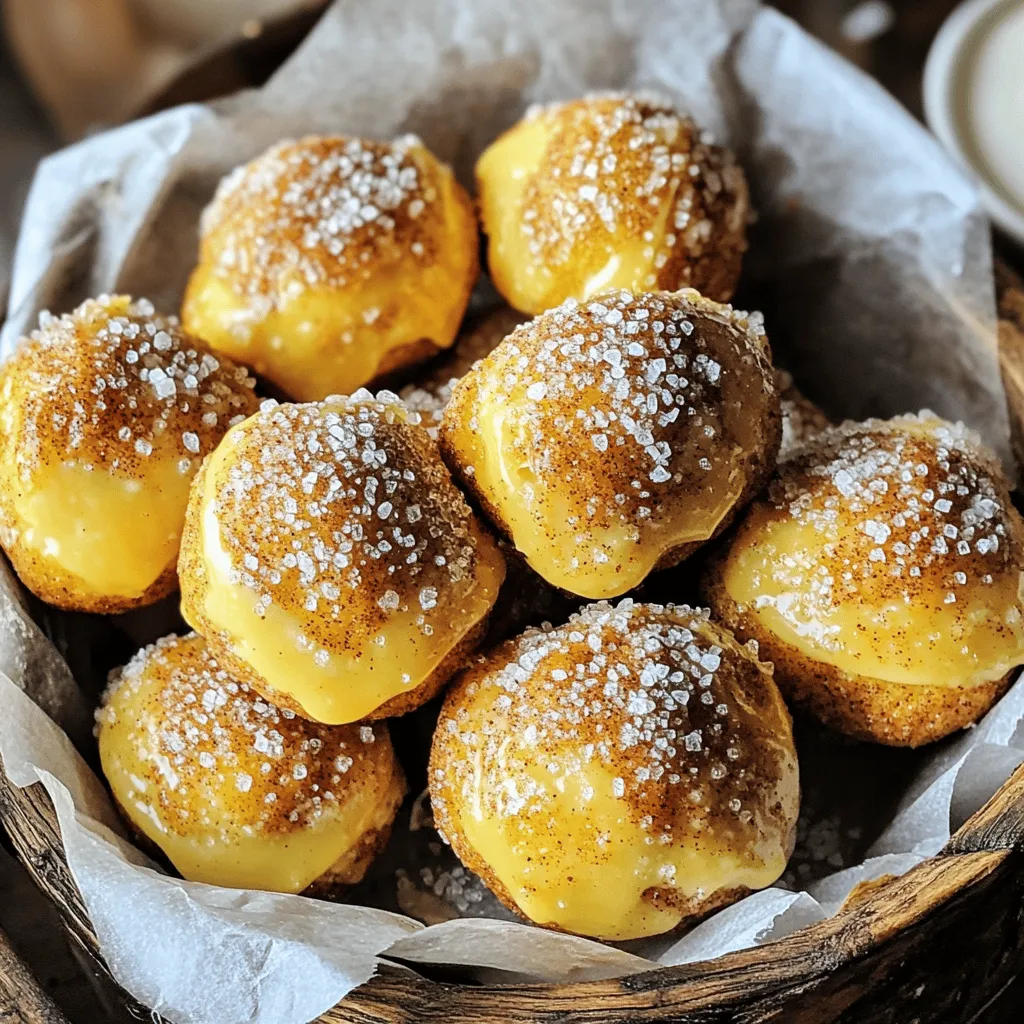
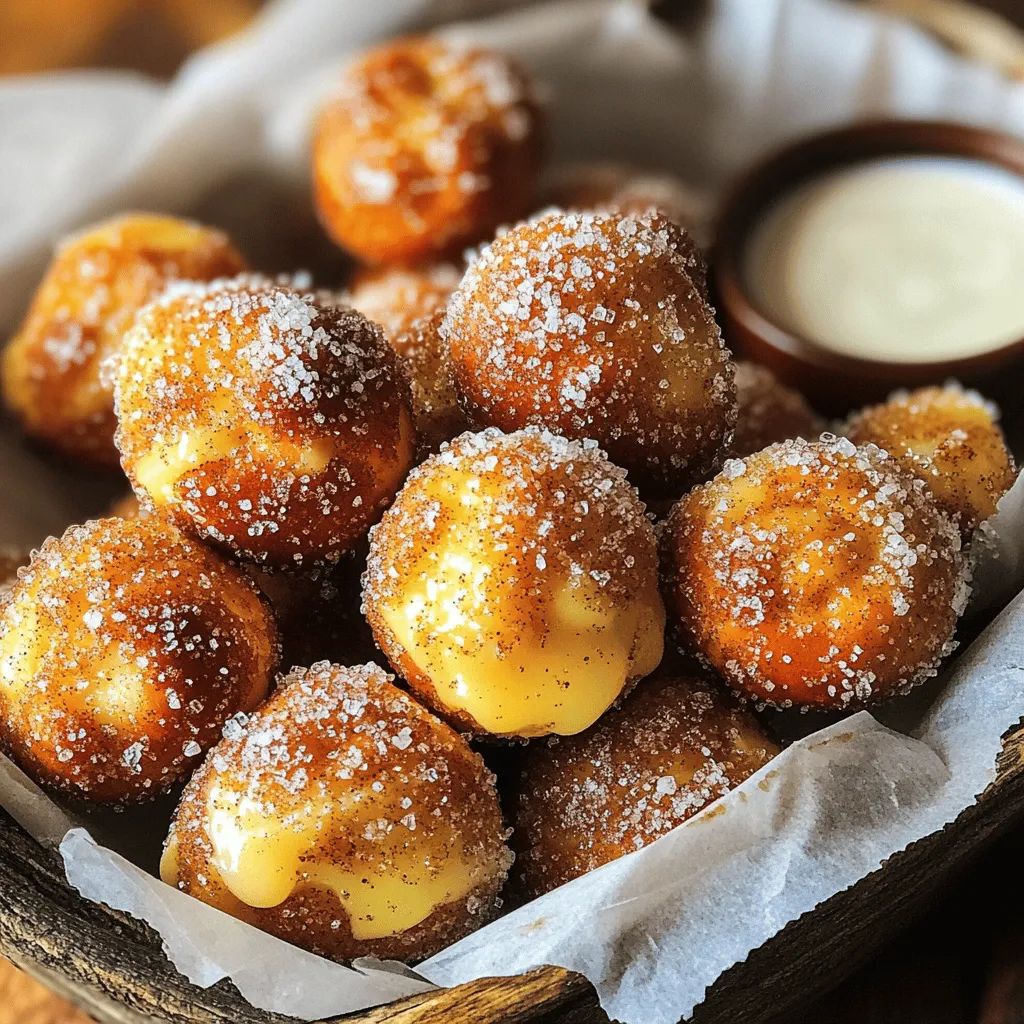
Prepare your boiling water next. In a large pot, bring 10 cups of water and 1/4 cup of baking soda to a boil. Drop your pretzel bites into the boiling water for about 30 seconds. This step gives them that chewy texture. Use a slotted spoon to remove them and place them on a lined baking sheet. Brush the tops with melted butter. Now, mix 1/2 cup of sugar and 2 teaspoons of cinnamon in a small bowl. Sprinkle this mix generously over the pretzel bites. Add a pinch of coarse sea salt on top of each one. Bake them in a preheated oven at 425°F for 12-15 minutes until they are golden brown. Allow them to cool slightly before serving.
Tips & Tricks
Tips for Perfectly Chewy Pretzel Bites
To make your pretzel bites chewy, knead the dough well. This adds strength to the dough. Let it rise in a warm spot. This helps the dough grow and get fluffy. When you shape the bites, keep them uniform in size. This ensures even cooking.
Timing and Temperature Insights
Preheat your oven to 425°F (220°C) to help them bake quickly. Boil the pretzel bites for 30 seconds. This step gives them a nice crust. Keep an eye on them while baking. You want a golden brown color, which usually takes 12-15 minutes.
Common Mistakes to Avoid
Don’t skip the boiling step. It’s key for that classic pretzel texture. Make sure your water is boiling before adding the bites. Use the right amount of baking soda in the water. Too much can make them taste bitter. Lastly, don’t forget the toppings! Sprinkle that cinnamon sugar mix generously for a sweet finish.
Variations
Flavor Variations for the Dough
You can change the dough’s flavor to keep things fun. Try adding 1 teaspoon of vanilla extract for a sweet twist. For a savory touch, mix in some garlic powder or Italian herbs. You can even use whole wheat flour for a nuttier taste. Each change brings a new flavor to your pretzel bites.
Different Coating Options
While cinnamon sugar is classic, you can explore other coatings. Use powdered sugar mixed with lemon zest for a refreshing treat. You can also try a spicy mix of chili powder and sugar for a fun kick. For chocolate lovers, dip the pretzel bites in melted chocolate after baking. Each option adds a unique flair to your snack.
Serving Suggestions and Dips
Serve your cinnamon sugar pretzel bites warm for the best taste. A basket lined with parchment paper makes them look great. Pair them with a small dish of warm vanilla glaze for dipping. If you want something richer, chocolate sauce is perfect. You can also serve them with cream cheese frosting for a fun twist. Each dip enhances the sweetness of the bites.
Storage Info
How to Store Leftover Pretzel Bites
Store any leftover pretzel bites in an airtight container. This keeps them fresh. You can place them at room temperature for one day. If you want to keep them longer, refrigerate them. They will last about three to four days in the fridge. Just make sure the container is sealed well to avoid drying.
Reheating Tips
When you’re ready to eat the leftover bites, reheating is easy. Preheat your oven to 350°F (175°C). Place the pretzel bites on a baking sheet. Heat them for about 5-10 minutes. This helps restore their soft texture. If you want a crispy outside, you can broil them for one minute at the end.
Freezing for Later Use
Freezing is a great option if you want to save your pretzel bites. First, let them cool completely. Then, place them in a single layer on a baking sheet. Freeze them for about an hour. Once frozen, transfer them to a freezer bag. They can stay in the freezer for up to three months. When you’re ready to enjoy, just reheat straight from the freezer. This way, you can indulge in warm, cinnamon sugar goodness anytime!
FAQs
Can I use instant yeast instead of active dry yeast?
Yes, you can use instant yeast. Instant yeast works faster and does not need proofing. You can mix it directly with your dry ingredients. Use the same amount as the active dry yeast in the recipe. This change makes the process quicker and easier.
How can I make these pretzel bites vegan?
To make these pretzel bites vegan, swap out the butter for a plant-based alternative. You can use coconut oil or a vegan margarine. For the dough, ensure your sugar is vegan, as some sugars are processed with bone char.
Where can I buy premade cinnamon sugar pretzel bites?
You can find premade cinnamon sugar pretzel bites at many grocery stores. Look in the frozen or snack aisle. Some specialty bakeries also sell them fresh. If you want to enjoy them warm and soft, try local food markets or fairs.
Cinnamon sugar pretzel bites are easy to make and fun to enjoy. We covered key ingredients, step-by-step instructions, and helpful tips. You learned how to shape, boil, and bake perfect bites. Remember the common mistakes to avoid, and try different flavors and dips. Store leftovers properly for later, and now you’re ready to impress friends and family with your tasty snacks. Enjoy creating these delicious treats and savor every bite!


