Cinnamon Sugar Pretzel Bites Tasty and Simple Snack

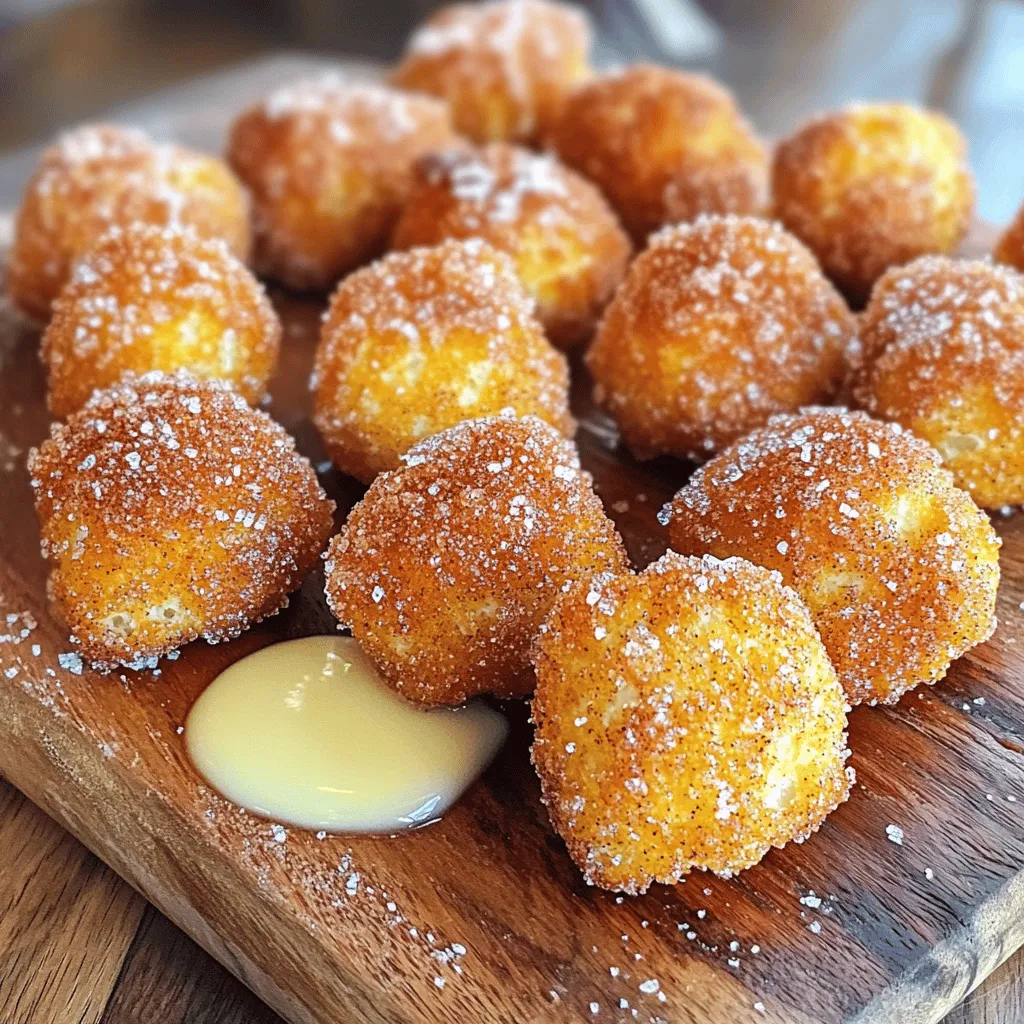
Craving a sweet snack that’s easy to make? Look no further! Cinnamon sugar pretzel bites are simple, tasty, and perfect for any occasion. With just a few basic ingredients and quick steps, you can whip up these delicious treats in no time. Whether you enjoy them fresh out of the oven or paired with a favorite dip, these bites will surely impress your family and friends. Let’s dive into this delightful recipe!
Ingredients
Detailed Ingredient List
– 1 ½ cups warm water
– 2 ¼ teaspoons active dry yeast
– 2 tablespoons granulated sugar
– 1 teaspoon salt
– 4 cups all-purpose flour
– ½ teaspoon baking soda
– ¼ cup unsalted butter, melted
– ½ cup granulated sugar (for coating)
– 2 teaspoons ground cinnamon
– Coarse sea salt (for sprinkling)
To start making your cinnamon sugar pretzel bites, gather all the ingredients. Warm water helps activate the yeast. You need active dry yeast for the dough to rise. Granulated sugar adds a touch of sweetness. Salt is key for flavor. All-purpose flour gives the dough structure. Baking soda helps in boiling the bites. Melted butter adds richness. The cinnamon and sugar mixture creates that sweet topping. Coarse sea salt gives a nice contrast to the sweetness.
Ingredient Substitutions
If you want to swap ingredients, here are some good options:
– Use brown sugar instead of granulated sugar for a deeper flavor.
– Maple syrup can also work in place of sugar.
– For a gluten-free option, try using gluten-free flour blends.
These swaps can make the recipe fit your needs while still tasting great.
Special Equipment Needed
You will need a few items to make this recipe easier:
– Mixing bowl: This is where you will combine your ingredients.
– Slotted spoon: This helps you remove pretzel bites from water.
– Parchment paper: Use this to line the baking sheet for easy cleanup.
Having the right tools will make your cooking experience smooth and fun!
Step-by-Step Instructions
Preparation Steps
1. Activate the yeast: Start by mixing 1 ½ cups of warm water with 2 ¼ teaspoons of active dry yeast and 2 tablespoons of granulated sugar. Wait about 5 minutes until it gets frothy. This step wakes up the yeast.
2. Prepare the dough: Next, add 1 teaspoon of salt and 4 cups of all-purpose flour into the yeast mix. Stir with a wooden spoon or dough hook. Keep mixing until the dough pulls away from the bowl. Knead the dough on a floured surface for about 5 minutes. It should feel smooth and elastic. Put the dough in a greased bowl, cover with a damp cloth, and let it rise in a warm spot for about 1 hour. It should double in size.
Boiling and Baking the Pretzel Bites
1. Boil in baking soda water: While the dough rises, preheat your oven to 425°F. In a medium saucepan, boil 10 cups of water and mix in ½ teaspoon of baking soda. This step helps create the pretzel’s unique flavor.
2. Baking process and temperature: Once the dough has risen, punch it down and roll it into a long rope, about 1 inch thick. Cut the rope into 1-inch pieces. Boil these pieces in the baking soda water for about 30 seconds. Use a slotted spoon to remove them and place them on a lined baking sheet. Bake them for 12-15 minutes until they are golden brown.
Final Touches
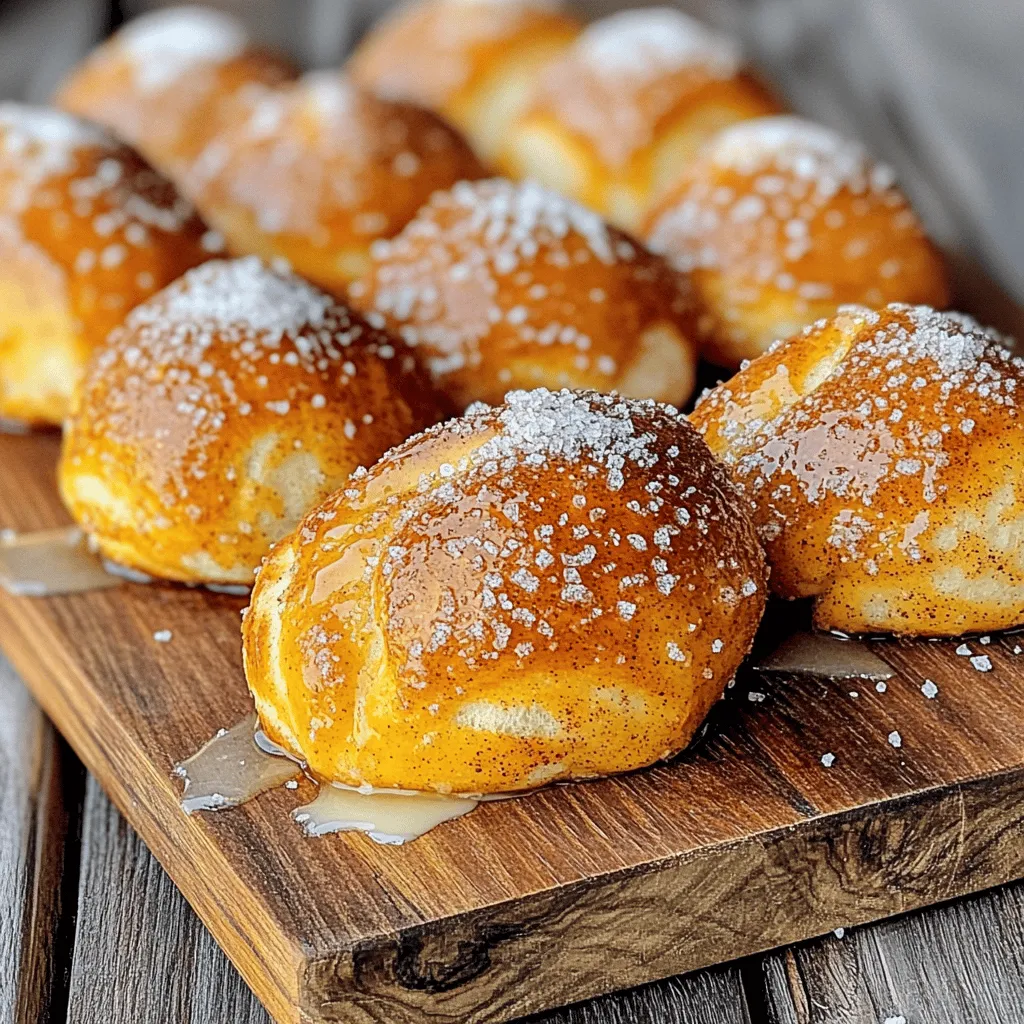
1. Coating with cinnamon sugar: After baking, brush the pretzel bites with ¼ cup of melted butter. Mix ½ cup of granulated sugar with 2 teaspoons of ground cinnamon. Sprinkle this mixture over the warm pretzel bites, along with a pinch of coarse sea salt for extra flavor.
2. Serving suggestions: Serve these pretzel bites warm. They go great with a sweet dip, like chocolate or caramel. You can also enjoy them plain or with a sprinkle of extra cinnamon sugar.
Tips & Tricks
Tips for Perfect Pretzel Bites
– Ensuring the right dough consistency: Your dough should be soft but not sticky. If it sticks to your hands, add a bit more flour. If it feels dry, a little water helps. The perfect dough makes great bites.
– Importance of letting the dough rise: Allowing the dough to rise is key. This step makes your pretzel bites fluffy and light. Cover the dough with a cloth and let it sit in a warm spot. Wait for it to double in size, about one hour.
Common Mistakes to Avoid
– Over-boiling the pretzel bites: Boil your bites for just 30 seconds. If you boil them too long, they become tough. Keep an eye on the clock to get that perfect texture.
– Skipping the butter brush: Don’t forget to brush the melted butter on top right after baking. This adds flavor and helps the cinnamon sugar stick. It’s a small step that makes a big difference.
Serving and Presentation Tips
– Best ways to serve: Serve your pretzel bites warm. They taste best fresh! Pair them with dips like cream cheese or chocolate sauce for extra flavor. Kids love the fun of dipping!
– Creative serving options: Try serving them in a cute basket lined with parchment paper. You can even sprinkle some extra cinnamon sugar on top for a wow factor. This makes your snack look as good as it tastes!

Variations
Different Sweet Toppings
You can get creative with sweet toppings for your cinnamon sugar pretzel bites. Try adding chocolate or caramel drizzles for a rich touch. Just melt your favorite chocolate or caramel and drizzle it over the bites after baking. This makes them extra special! You can also sprinkle colorful sprinkles on top for a fun, festive look. Kids love this addition, and it makes for a great party snack.
Savory Alternatives
If you prefer savory snacks, think about making cheese-stuffed pretzel bites. Just add cheese to the dough before shaping it into bites. You can also infuse the dough with herbs like rosemary or thyme. This adds a nice flavor twist. These savory options are perfect for those who want a different taste from the classic sweet version.
Dipping Sauce Ideas
Dipping sauces can elevate your cinnamon sugar pretzel bites. Consider warm chocolate sauce or creamy caramel sauce for a sweet experience. If you want something different, try a tangy cream cheese dip. You can make a simple dip by mixing cream cheese with a little sugar and vanilla. This balance of flavors makes each bite delightful. Don’t forget to experiment with your favorite sauces to find the perfect match!
Storage Info
How to Store Leftovers
To keep your cinnamon sugar pretzel bites fresh, follow these simple steps:
– Place leftover bites in an airtight container.
– Store them in the fridge for up to 3 days.
– Ensure they cool down completely before sealing.
If you want to keep them longer, consider freezing them.
Reheating Instructions
Reheating pretzel bites can be tricky. You want them soft, not hard. Here’s how to do it:
– Preheat your oven to 350°F (175°C).
– Place the bites on a baking sheet.
– Cover them with aluminum foil to keep moisture in.
– Heat for about 5-10 minutes.
This method helps avoid dryness. You can also microwave them for 15-20 seconds, but they may become chewy.
Freezing Options
Freezing your cinnamon sugar pretzel bites is easy:
– Let them cool completely.
– Place them in a single layer on a baking sheet.
– Freeze for 1-2 hours until hard, then transfer to a freezer bag.
– Seal tightly and label with the date.
For reheating, simply take them out and let them thaw in the fridge overnight. Heat them in the oven as mentioned above to restore their softness.
FAQs
How do you make cinnamon sugar pretzel bites from scratch?
To make cinnamon sugar pretzel bites, follow these steps:
1. Mix warm water, yeast, and sugar. Let it sit for five minutes.
2. Add salt and flour, mixing until the dough pulls from the bowl.
3. Knead the dough until it is smooth. Let it rise for one hour.
4. Boil water and baking soda. Cut the dough into bite-sized pieces.
5. Boil each piece for 30 seconds. Place them on a baking sheet.
6. Brush with melted butter, sprinkle with cinnamon sugar, and bake until golden.
This simple process creates delicious bites that everyone loves.
Can cinnamon sugar pretzel bites be made ahead of time?
Yes, you can make cinnamon sugar pretzel bites ahead of time. Prepare the dough and let it rise. After cutting the dough, you can freeze the bites. Place them in a single layer on a baking sheet and freeze until firm. Transfer them to a bag and store in the freezer. When ready to bake, boil them straight from the freezer.
What is the best way to reheat pretzel bites?
To reheat pretzel bites, preheat your oven to 350°F. Place them on a baking sheet and cover them with aluminum foil. Heat for about 10-15 minutes. This method keeps them soft and warm. You can also use a microwave, but they may become chewy.
Where can I buy cinnamon sugar pretzel bites?
You can find cinnamon sugar pretzel bites at local bakeries, snack shops, or food markets. Many grocery stores carry frozen versions. Online, check sites like Amazon or specialty food stores. They often have ready-to-bake options.
Are cinnamon sugar pretzel bites vegan?
Cinnamon sugar pretzel bites can be made vegan with a few swaps. Use plant-based butter instead of unsalted butter. Ensure the sugar is vegan-friendly. The dough itself is naturally vegan, as it doesn’t contain eggs or dairy.Enjoy making these treats!
In this article, we explored how to make delicious cinnamon sugar pretzel bites. You learned about the key ingredients, cooking steps, and helpful tips for perfect bites. Remember, the right dough and a good rise are key for success. Avoid over-boiling and make sure to brush with butter for that golden touch. Whether you choose sweet or savory variations, these bites are sure to please. Store leftovers well and reheat them to warm perfection. Enjoy the joy of making and serving these tasty treats!


![- 1 can (15 oz) chickpeas, drained and rinsed - 1/2 cup sun-dried tomatoes, chopped - 1/4 cup red onion, finely chopped - 1/2 cucumber, diced Chickpeas are the star of this salad. They add protein and fiber. Sun-dried tomatoes bring a burst of flavor and a bit of sweetness. Fresh veggies, like cucumber and red onion, add crunch and color. Together, they make a hearty base. - 2 tablespoons olive oil - 1 tablespoon lemon juice - 1 teaspoon dried oregano - Salt and pepper to taste The dressing is simple yet full of taste. Olive oil adds richness, while lemon juice gives a bright kick. Oregano adds an earthy note. Salt and pepper round out the flavors nicely. - 1/4 cup feta cheese, crumbled - 2 tablespoons fresh parsley, chopped Feta cheese adds a creamy, tangy element. Fresh herbs like parsley give a burst of freshness. You can add these if you want more flavor and texture. If you want the full recipe, check it out [Full Recipe]. - Combine Key Ingredients Start by taking a large mixing bowl. Add one can of drained and rinsed chickpeas. Then, toss in half a cup of chopped sun-dried tomatoes. Next, add a quarter cup of finely chopped red onion and half a diced cucumber. Finally, sprinkle in a quarter cup of crumbled feta cheese. - Whisk the Dressing In a small bowl, mix two tablespoons of olive oil with one tablespoon of lemon juice. Then, add one teaspoon of dried oregano. Season with salt and pepper to taste. Whisk these ingredients together until well combined. This dressing is key to bringing out the flavors. - Toss Ingredients Together Pour the dressing over the salad mix. Gently toss everything together to coat the ingredients evenly. Be careful not to mash the chickpeas or feta. You want everything to stay nice and whole. - Letting Flavors Meld Once tossed, let the salad sit for at least 15 minutes. This time helps the flavors blend. You can cover it and set it aside. It will taste even better after it rests. - Chilled or Room Temperature You can serve this salad chilled or at room temperature. Both options work well. It makes a great side dish or a light lunch. Enjoy the freshness of the sun-dried tomatoes and the crunch of the cucumber. You can save time by preparing ingredients in advance. Chop the cucumbers, red onions, and sun-dried tomatoes the day before. Store them in airtight containers in your fridge. This way, when you're ready to make the salad, it’s quick and easy. You can also mix the dressing ahead of time. Just give it a good shake before using it. To boost flavor, let the salad marinate. After mixing all the ingredients, cover the bowl. Place it in the fridge for at least 30 minutes. This waiting time helps the flavors blend well. You can also add some balsamic vinegar to the dressing for a deeper taste. Seasoning matters! Use fresh herbs like basil or mint for a bright taste. You can also try adding a pinch of red pepper flakes for a bit of heat. Always taste the salad before serving. Adjust salt and pepper to suit your liking. If you prefer a creamier salad, add more feta cheese or a dollop of Greek yogurt. For a lighter version, reduce the olive oil. You can also add more lemon juice for extra zing. Feel free to adjust the chickpeas too; add more for a heartier salad. {{image_2}} You can boost your Sun-Dried Tomato Chickpea Salad by adding proteins. One great choice is grilled chicken. Just cook the chicken until it’s golden and slice it thin. Add the slices right on top of your salad. This makes it heartier and perfect for lunch. Another option is incorporating tuna. Drain a can of tuna and mix it in. The tuna adds a nice flavor and a bit of richness. Both options give you a tasty way to enjoy the salad. For a vegetarian twist, try non-dairy cheese options. There are many brands that mimic feta well. Crumble it on top like regular feta. This keeps the creaminess without dairy. If you prefer a vegan version, consider other legumes. Black beans or kidney beans work well. They add protein and fiber while keeping the salad filling and delicious. As the seasons change, you can mix in fresh veggies. In summer, consider adding bell peppers. They add crunch and color. You can also toss in cherry tomatoes for extra sweetness. For fall, think about adding roasted squash or sweet potatoes. These ingredients bring warmth and earthiness to the salad. Each season offers new flavors to explore in your Sun-Dried Tomato Chickpea Salad. How long will it last? This salad stays fresh in the fridge for about three days. Make sure to store it in an airtight container. This keeps the flavors locked in and the veggies crisp. Can I freeze the salad? I do not recommend freezing this salad. The fresh veggies and feta do not hold up well after freezing. If you freeze it, the texture will change, and it may become mushy. What are the best practices for serving leftovers? You can enjoy this salad cold right from the fridge. If you prefer it warm, gently heat it in the microwave for about 30 seconds. Stir it well to ensure even heating. Just remember, warm is nice, but cold is better for this dish! To make this salad, you start with simple steps. The full recipe shows you how. First, gather your ingredients. You need chickpeas, sun-dried tomatoes, red onion, cucumber, and feta cheese. 1. In a bowl, mix the chickpeas, sun-dried tomatoes, diced cucumber, red onion, and feta cheese. 2. For the dressing, whisk olive oil, lemon juice, dried oregano, salt, and pepper in a small bowl. 3. Pour this dressing over the salad and mix gently. 4. Add chopped parsley and toss once more. 5. Let it sit for at least 15 minutes. This helps the flavors blend. You can serve it cold or at room temp. Yes, you can use dried chickpeas! However, you need to prepare them first. - Soak the dried chickpeas overnight in water. This helps them soften. - The next day, drain and rinse them. - Cook them in boiling water for about 1 to 1.5 hours until they are tender. - Once cooked, drain and cool them before using in your salad. This salad pairs well with many dishes. Here are some ideas: - Serve it alongside grilled chicken for a protein boost. - Pair it with some crusty bread for a tasty meal. - Enjoy it as a side with fish or a light pasta dish. - It also works great as a filling for wraps or pita pockets. Feel free to mix and match! In this post, we explored the sun-dried tomato chickpea salad. We looked at key ingredients, like chickpeas and fresh veggies. We also discussed making a tasty dressing with olive oil and lemon juice. You learned how to prepare and assemble the salad, plus tips for flavor and storage. This salad is both simple and flexible. You can customize it to your taste. Enjoy your delicious creation!](https://dailydishly.com/wp-content/uploads/2025/07/f0fe0f85-1842-4358-ad7f-ac591425fdaf-768x768.webp)
![- 1 large head of cauliflower - 3 tablespoons olive oil - 1 cup grated Parmesan cheese - 2 teaspoons garlic powder - 1 teaspoon onion powder - 1 teaspoon smoked paprika - Salt and black pepper to taste - Fresh parsley, chopped Gathering the right ingredients is key to making Parmesan roasted cauliflower. Start with one large head of cauliflower. Cut it into small florets. This shape helps the cauliflower cook evenly and get that crispy texture we love. Next, you'll need three tablespoons of olive oil. It adds healthy fat and helps the cheese stick. You'll also need one cup of grated Parmesan cheese. This cheese gives a salty, nutty flavor. Now, let’s talk seasonings. You’ll want two teaspoons of garlic powder for that aromatic kick. One teaspoon of onion powder adds sweetness. Smoked paprika, at one teaspoon, brings a nice depth of flavor. Don’t forget salt and black pepper to taste. These simple seasonings make the dish shine. Finally, fresh parsley will be your garnish. It adds color and a fresh taste. This ingredient list is simple but powerful. You can find the full recipe for more details on prep and baking. Enjoy your cooking! 1. First, preheat your oven to 425°F (220°C). This heat helps the cauliflower become crispy. 2. Next, line a baking sheet with parchment paper. This makes for easy cleanup. 3. In a large bowl, toss the cauliflower florets with 3 tablespoons of olive oil. Make sure every piece is coated well. 1. In a small bowl, combine 1 cup of grated Parmesan cheese, 2 teaspoons of garlic powder, 1 teaspoon of onion powder, and 1 teaspoon of smoked paprika. 2. Add salt and black pepper to taste. Mix well to combine all the flavors. 3. Sprinkle the Parmesan mixture over the cauliflower. Toss until each floret is evenly coated with the seasoning mix. 1. Spread the seasoned cauliflower in a single layer on your prepared baking sheet. 2. Roast in the oven for 25-30 minutes. Flip the cauliflower halfway through cooking. This ensures even browning. 3. Once the cauliflower is golden brown and tender, remove it from the oven. Let it cool slightly. 4. For a final touch, garnish with fresh chopped parsley before serving. For the complete details, check the [Full Recipe]. To get crispy cauliflower, start by cutting the florets into similar sizes. This helps them cook evenly. Toss the florets with olive oil until they are well coated. Use enough oil to help with crisping but don’t drown them. For perfect tenderness, roast the cauliflower at 425°F (220°C). This high heat gets a nice brown color while keeping the inside soft. Flip the florets halfway through cooking for even browning. Use a nice serving platter to show off your roasted cauliflower. A sprinkle of fresh parsley adds a pop of color. Drizzle a little olive oil on top for extra shine and flavor. This dish pairs well with grilled chicken or fish. It also goes great with a hearty salad for a fresh meal. Sometimes, cauliflower can get soggy. Avoid this by not overcrowding the baking sheet. If they are too close, steam builds up, which makes them soft. If the edges burn, check your oven temperature. You might need to lower it slightly. For more flavor, try adding lemon zest or a squeeze of lemon juice before serving. This brightens up the dish beautifully. {{image_2}} You can spice things up with chili flakes for a kick. This simple addition makes a bold flavor. You can also try herbs like thyme or rosemary. These fresh herbs add a nice touch and depth. If you want a twist, try using cheddar or goat cheese. These options bring a new taste to the dish. For those who prefer dairy-free, there are great vegan cheeses. These can mimic the creamy texture of Parmesan. Feel free to mix in other veggies like broccoli or bell peppers. This adds color and nutrition to your meal. You can also toss in nuts or seeds for extra crunch. Almonds or sunflower seeds work well here. You can customize this dish to fit your taste and diet. For the full recipe, check out the detailed instructions above. To keep your Parmesan roasted cauliflower fresh, store it in an airtight container. This helps lock in moisture and flavor. You can use glass or plastic containers with tight lids. Make sure the cauliflower is completely cool before sealing it. If you want to keep it extra fresh, place a paper towel inside the container. This absorbs extra moisture. The best way to reheat your leftovers is in the oven. Preheat the oven to 350°F (175°C). Place the cauliflower on a baking sheet and heat for about 10-15 minutes. This keeps the cauliflower crispy. You can also use an air fryer for a quicker option. Just set it to 350°F and heat for about 5-7 minutes. If you want to freeze the cauliflower, store it in a freezer-safe bag. It can last up to 3 months. Just remember to let it cool completely before freezing. Your Parmesan roasted cauliflower lasts about 3-5 days in the fridge. Always check for signs of spoilage. Look for a slimy texture or an off smell. If you notice either, it’s best to toss it out. Enjoy your dish while it's fresh for the best taste! For more details, check the full recipe. You can use several alternatives for Parmesan cheese. Here are some great options: - Nutritional yeast for a cheesy flavor and vegan diet. - Pecorino Romano for a similar taste with a sharper bite. - Grana Padano, which is less salty and creamy. These substitutes work well in the Parmesan Roasted Cauliflower recipe. Just keep in mind the flavor may change slightly. Yes, you can prep this dish in advance! Here are some tips: - Cut the cauliflower into florets and store them in the fridge. - Mix the seasoning and cheese ahead of time. - Combine the cauliflower and seasoning just before roasting for the best flavor. This way, you save time and still enjoy a fresh, crunchy dish! Absolutely! Grilling adds a nice smoky flavor. Here’s how to do it: 1. Preheat your grill to medium-high heat. 2. Toss the seasoned cauliflower in a grill-safe basket or on skewers. 3. Grill for about 10-15 minutes, turning occasionally until tender and charred. This method gives you a tasty twist on the original recipe! You can easily lighten up this dish. Consider these changes: - Use less Parmesan cheese or a lower-fat version. - Swap olive oil for a cooking spray or reduce the amount used. - Add more veggies like bell peppers or zucchini for volume without many calories. These tweaks help you enjoy a delicious and healthy Parmesan Roasted Cauliflower! For the full recipe, check out the detailed cooking instructions. This blog post covered how to make Parmesan Roasted Cauliflower. We explored the main ingredients, seasonings, and garnishes needed for the dish. I also provided a step-by-step guide for preparation and roasting. Plus, I shared cooking tips and flavor variations to elevate your meal. In summary, with proper storage and reheating tips, you can enjoy this dish multiple times. Experiment with alternatives and enjoy the crispy, cheesy goodness of roasted cauliflower!](https://dailydishly.com/wp-content/uploads/2025/06/1026dd12-7014-4148-8186-1edda0f6a7e3-768x768.webp)
