Cinnamon Sugar Sweet Potato Donuts Easy Recipe
. Yes, you can use butternut squash or regular potatoes, but the flavor will change. Sweet potatoes add a nice sweetness and texture that other potatoes may lack. Use a flax egg or applesauce as a vegan alternative. A flax egg is made by mixing one tablespoon of ground flaxseed with two and a half tablespoons of water. Let it sit until it thickens. Swap half the flour for whole wheat flour or reduce sugar for a lighter option. You can also add mashed bananas or applesauce to cut down on sugar and add moisture. You can use a muffin tin; adjust the baking time accordingly. Muffins will take a little longer to bake than donuts, so check them after 15 minutes. Ensure donuts are completely cool before coating to avoid melting the sugar. Brush them with melted butter first. This helps the sugar stick well and gives a nice finish. For the full recipe, check the complete list of ingredients and steps to make these delightful treats! These sweet potato donuts are easy and fun to make. You need simple ingredients and a few steps. Start with mixing dry and wet ingredients, then bake your treats. Remember to experiment with flavors and toppings to find your favorite combo. Store any extras to enjoy later. Whether for breakfast or a snack, these donuts are a tasty choice. Have fun baking and sharing them!](https://dailydishly.com/wp-content/uploads/2025/07/04b40064-aac7-4876-84c8-c93335adf97c.webp)
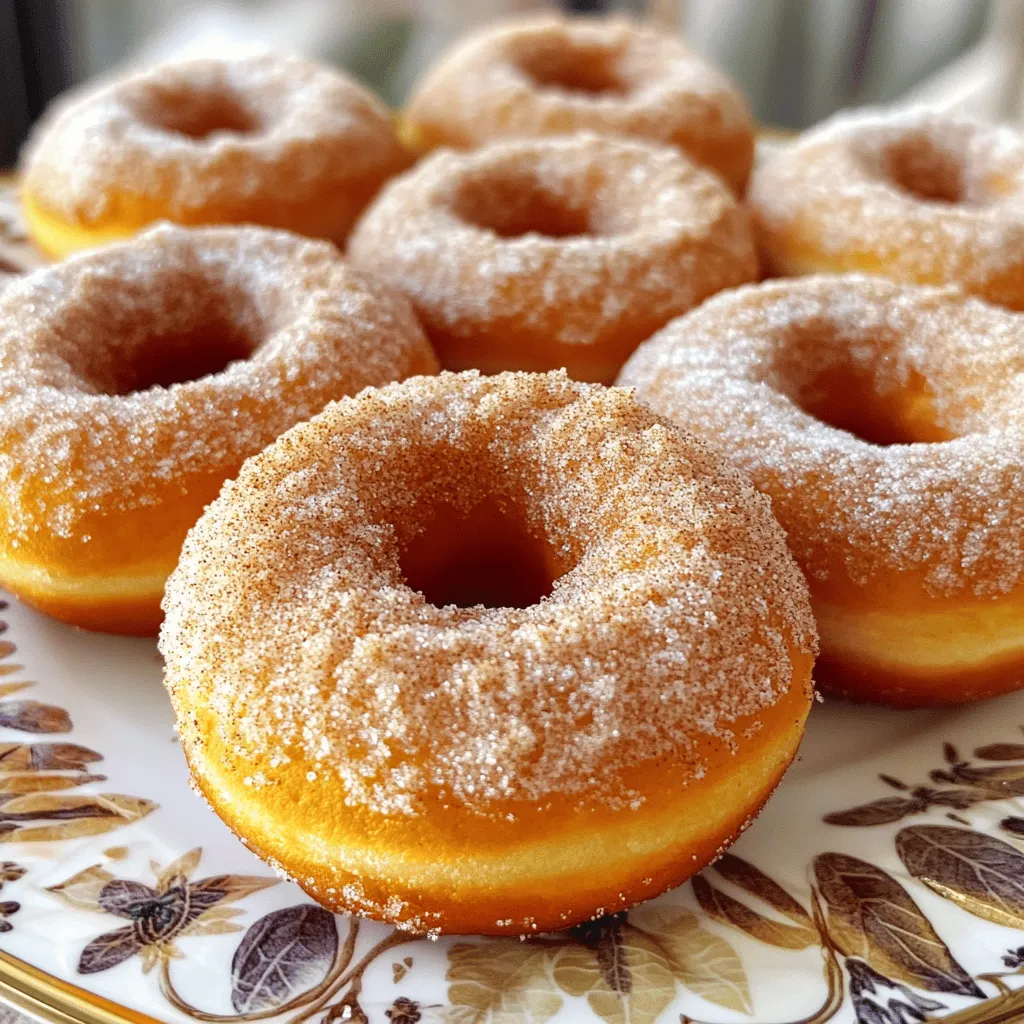
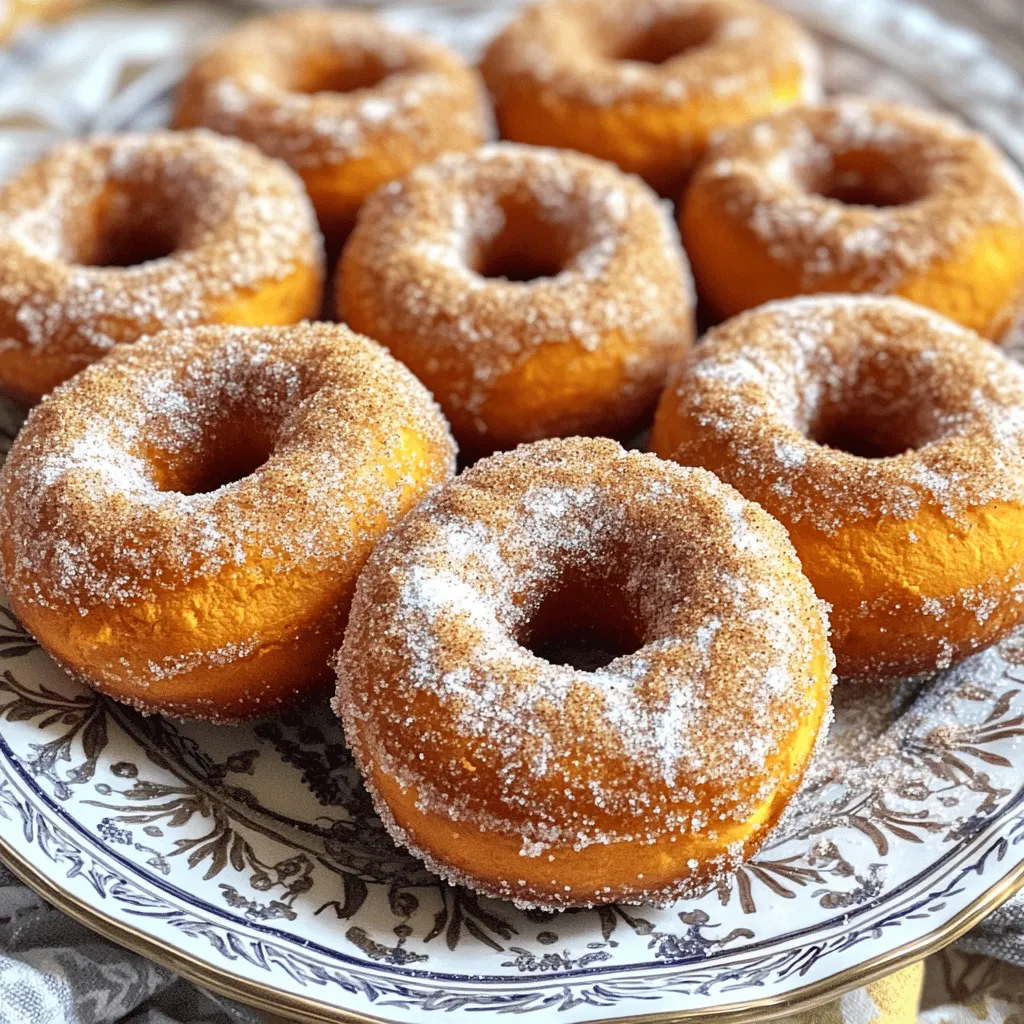
Looking for a tasty treat that’s easy to make? These cinnamon sugar sweet potato donuts are perfect! With the warm flavors of cinnamon and nutmeg, they’re delightful for breakfast or a snack. Plus, they’re baked, not fried, giving you a healthier option. Let’s dive into this simple recipe and bring a bit of sweetness to your day! Your taste buds will thank you!
Ingredients
Complete List of Ingredients
– 1 medium sweet potato (about 1 cup, cooked and mashed)
– 1 ½ cups all-purpose flour
– 1 teaspoon baking powder
– ½ teaspoon baking soda
– ½ teaspoon ground cinnamon
– ¼ teaspoon ground nutmeg
– ¼ teaspoon salt
– ½ cup granulated sugar
– 1 large egg
– ¼ cup milk (dairy or non-dairy)
– ¼ cup unsalted butter, melted
– 1 teaspoon vanilla extract
– ¼ cup granulated sugar (for coating)
– 1 tablespoon ground cinnamon (for coating)
The star of this recipe is the sweet potato. It gives the donuts a lovely texture and natural sweetness. You want to use a medium sweet potato, about one cup once it’s cooked and mashed.
Next, we need flour to give the donuts structure. One and a half cups of all-purpose flour works best. Baking powder and baking soda help the donuts rise. You will use one teaspoon of baking powder and half a teaspoon of baking soda.
For flavor, we add spices. Half a teaspoon of ground cinnamon and a quarter teaspoon of ground nutmeg give these donuts warmth. A quarter teaspoon of salt enhances all the flavors.
To sweeten, we’ll use half a cup of granulated sugar in the batter. Then, one large egg helps bind everything together.
For moisture, we need a quarter cup of milk. You can use either dairy or non-dairy milk, depending on your choice.
Melted butter is key for richness, so add a quarter cup of unsalted butter. We also need one teaspoon of vanilla extract for a touch of sweetness.
Finally, prepare the cinnamon sugar coating. You will need a quarter cup of granulated sugar mixed with one tablespoon of ground cinnamon. This will give your donuts that classic cinnamon sugar crust.
Step-by-Step Instructions
Prepping the Oven and Pan
Preheat your oven to 375°F (190°C). This helps your donuts bake evenly. Next, lightly grease or spray a donut pan. This step keeps them from sticking.
Mixing Dry Ingredients
In a bowl, combine the following dry ingredients:
– 1 ½ cups all-purpose flour
– 1 teaspoon baking powder
– ½ teaspoon baking soda
– ½ teaspoon ground cinnamon
– ¼ teaspoon ground nutmeg
– ¼ teaspoon salt
Whisk these together until well combined. This mix provides the base for your donuts.
Preparing the Wet Ingredients
In another large bowl, mix the granulated sugar with 1 medium sweet potato, which should be cooked and mashed. Stir until smooth. Next, add these wet ingredients:
– 1 large egg
– ¼ cup milk (dairy or non-dairy)
– ¼ cup unsalted butter, melted
– 1 teaspoon vanilla extract
Mix all these until you have a smooth batter. This combination gives flavor and moisture to your donuts.
Combining Ingredients
Gradually fold the dry mix into the wet mixture. Do this until just combined. Be careful not to overmix; it can make your donuts dense.
Filling the Donut Pan
Use a piping bag or ziplock bag to fill each donut cavity. Fill them about ¾ full. This gives them room to rise without overflowing.
Baking the Donuts
Bake the donuts for 12-15 minutes. Use a toothpick to check if they are done. If it comes out clean, they are ready. Let them cool in the pan for about 5 minutes. After that, transfer them to a wire rack to cool completely.
Tips & Tricks
Achieving the Best Texture
To get the fluffiest donuts, avoid overmixing the batter. When you combine the wet and dry ingredients, mix just enough until you see no dry flour. This keeps your donuts light and airy. If you mix too much, they may turn out dense and heavy.
Flavor Enhancements
For extra flavor, consider adding a pinch of nutmeg or a splash of vanilla extract. Nutmeg pairs well with cinnamon and gives a warm, cozy taste. Vanilla adds a sweet note that brightens the overall flavor. You can also try mixing in a little orange zest for a fresh twist.
Serving Suggestions
Serve these delicious donuts warm with a cup of coffee or tea. The heat from the donuts pairs well with the warmth of the drink. You can also enjoy them as a sweet snack or a fun breakfast treat. Consider adding a sprinkle of powdered sugar on top for a pretty finish.

Variations
Adding Other Flavors
You can make your donuts even more fun by adding flavors. Try mixing in pumpkin spice for a warm, autumn taste. If you love chocolate, add chocolate chips to the batter. Both options pair well with sweet potato. They bring a twist that keeps every bite exciting.
Glazing Options
If you want an extra sweet touch, think about glazing your donuts. A maple glaze is a great choice. It adds a rich flavor that complements the sweet potato. You can also dip the donuts in melted chocolate. This will create a delicious treat that can please any sweet tooth.
Gluten-Free Adaptation
For those who need gluten-free options, you can still enjoy these donuts. Just substitute all-purpose flour with a gluten-free flour blend. This simple swap allows everyone to join in the fun. Just make sure to check the blend for a light and fluffy texture.
Storage Info
Short-Term Storage
Store your donuts in an airtight container at room temperature for up to 3 days. This keeps them soft and fresh.
Long-Term Storage
If you want to keep them longer, freeze donuts in a zip-top bag for up to 3 months. Thaw them in the fridge before serving. This method preserves their taste and texture.
Reheating Suggestions
For a fresh-baked taste, warm the donuts in the microwave for 10-15 seconds. This simple step brings back their soft, warm goodness. Enjoy your cinnamon sugar sweet potato donuts anytime!
FAQs
Can I use a different type of potato?
Yes, you can use butternut squash or regular potatoes, but the flavor will change. Sweet potatoes add a nice sweetness and texture that other potatoes may lack.
What can I substitute for eggs?
Use a flax egg or applesauce as a vegan alternative. A flax egg is made by mixing one tablespoon of ground flaxseed with two and a half tablespoons of water. Let it sit until it thickens.
How do I make the donuts healthier?
Swap half the flour for whole wheat flour or reduce sugar for a lighter option. You can also add mashed bananas or applesauce to cut down on sugar and add moisture.
What to do if I don’t have a donut pan?
You can use a muffin tin; adjust the baking time accordingly. Muffins will take a little longer to bake than donuts, so check them after 15 minutes.
How can I achieve the best cinnamon sugar coating?
Ensure donuts are completely cool before coating to avoid melting the sugar. Brush them with melted butter first. This helps the sugar stick well and gives a nice finish.
These sweet potato donuts are easy and fun to make. You need simple ingredients and a few steps. Start with mixing dry and wet ingredients, then bake your treats. Remember to experiment with flavors and toppings to find your favorite combo. Store any extras to enjoy later. Whether for breakfast or a snack, these donuts are a tasty choice. Have fun baking and sharing them!
. Yes, you can use butternut squash or regular potatoes, but the flavor will change. Sweet potatoes add a nice sweetness and texture that other potatoes may lack. Use a flax egg or applesauce as a vegan alternative. A flax egg is made by mixing one tablespoon of ground flaxseed with two and a half tablespoons of water. Let it sit until it thickens. Swap half the flour for whole wheat flour or reduce sugar for a lighter option. You can also add mashed bananas or applesauce to cut down on sugar and add moisture. You can use a muffin tin; adjust the baking time accordingly. Muffins will take a little longer to bake than donuts, so check them after 15 minutes. Ensure donuts are completely cool before coating to avoid melting the sugar. Brush them with melted butter first. This helps the sugar stick well and gives a nice finish. For the full recipe, check the complete list of ingredients and steps to make these delightful treats! These sweet potato donuts are easy and fun to make. You need simple ingredients and a few steps. Start with mixing dry and wet ingredients, then bake your treats. Remember to experiment with flavors and toppings to find your favorite combo. Store any extras to enjoy later. Whether for breakfast or a snack, these donuts are a tasty choice. Have fun baking and sharing them!](https://dailydishly.com/wp-content/uploads/2025/07/04b40064-aac7-4876-84c8-c93335adf97c-300x300.webp)


![To make a tasty no-bake strawberry cheesecake, you need a few key ingredients: - 200g digestive biscuits, crushed - 100g unsalted butter, melted - 400g cream cheese, softened - 100g powdered sugar - 1 teaspoon vanilla extract - 250ml heavy cream - 300g fresh strawberries, hulled and sliced - 100g strawberry jam These ingredients work together to create a rich and creamy dessert. The digestive biscuits form a crunchy base, while the cream cheese and heavy cream give it a smooth texture. You can customize your cheesecake with a few optional ingredients: - Fresh mint leaves for garnish - Additional fruit toppings like blueberries or raspberries - A splash of lemon juice for a tangy flavor - Chocolate shavings for a sweet touch These extras allow you to add your personal flair to the cheesecake. If you need substitutions, here are some ideas: - Use graham crackers instead of digestive biscuits for the base. - Swap cream cheese with Greek yogurt for a lighter option. - Try coconut cream instead of heavy cream for a dairy-free version. - Use honey instead of powdered sugar for a natural sweetener. These alternatives can make the recipe fit your needs while still tasting great. For the full recipe, check the detailed steps to create this delightful dessert. To start, gather your ingredients. You need crushed digestive biscuits and melted butter. In a mixing bowl, combine these two. Mix until you see a texture that looks like wet sand. Next, take a 9-inch springform pan. Press the biscuit mixture firmly into the bottom. Make sure it is even. This will be the base of your cheesecake. After that, refrigerate the pan for about 10 minutes. This helps the base to set nicely. Now, let’s make that creamy filling. In a new bowl, add softened cream cheese, powdered sugar, and vanilla extract. Beat these together until they become smooth and creamy. In another bowl, whip the heavy cream. Keep whipping until stiff peaks form. This means it will hold its shape well. Now, gently fold the whipped cream into the cream cheese mixture. Do this carefully so the filling stays light and airy. Once your filling is ready, pour it over the chilled biscuit base. Spread it evenly with a spatula. Now, let’s add some color. Arrange the sliced strawberries on top of the cheesecake. You can be creative with this step! In a small saucepan, melt the strawberry jam over low heat. Once it is runny, let it cool a little. Drizzle the jam over the strawberries for a shiny finish. Finally, cover your cheesecake with plastic wrap. Refrigerate it for at least 4 hours, or even overnight. This waiting time helps it set perfectly. For the full recipe, check the earlier section. When making a no-bake strawberry cheesecake, a few common mistakes can spoil your treat. First, don’t skip chilling the biscuit base. It needs to set before adding the filling. Second, make sure your cream cheese is fully softened. Cold cream cheese can create lumps in your mixture. Lastly, don’t rush the whipping of the heavy cream. Whip it until stiff peaks form for the best texture. To get a creamy and smooth texture, follow these steps. Mix the cream cheese, powdered sugar, and vanilla extract until it’s really smooth. Then, whip the heavy cream separately until it’s nice and fluffy. When you fold the whipped cream into the cream cheese mix, do it gently. This keeps air in the mixture, making it light and fluffy. Serving your cheesecake can be fun and creative. Cut slices and place them on pretty dessert plates. You can add fresh mint leaves on top for a pop of color. For extra sweetness, drizzle more strawberry jam over the slices. You can also serve it with a side of fresh strawberries. This adds a nice touch and makes the dessert look even better. For the full recipe, refer to the earlier sections. {{image_2}} You can change up the fruity flavor of your cheesecake. Swap strawberries for other berries like blueberries or raspberries. You can also use peaches, mangoes, or even kiwi. Just chop the fruit and layer it on top or mix it into the filling. This makes your dessert colorful and fun. Want a richer taste? Try adding chocolate or caramel. For chocolate, mix in cocoa powder or melted chocolate into the cream cheese. Drizzle caramel sauce on top for a sweet touch. Both options give your cheesecake a new twist that chocolate lovers will adore. If you need a gluten-free option, use gluten-free cookies for the base. Many brands offer tasty gluten-free biscuits. Check the label to be sure. This way, everyone can enjoy this delicious treat without worry. Make sure to use gluten-free cream cheese and whipped cream too. For the full recipe, check out the [Full Recipe]. To keep your No-Bake Strawberry Cheesecake fresh, store it in the fridge. Use an airtight container to prevent any odors from mixing in. If you don’t have one, cover the cheesecake tightly with plastic wrap. This keeps it safe and tasty. Your cheesecake stays fresh in the fridge for about 3 to 5 days. After that, the texture may change, and the flavor might fade. Keep an eye on any signs of spoilage, like a sour smell or discoloration. Yes, you can freeze No-Bake Strawberry Cheesecake. Wrap it well in plastic wrap and then foil. This keeps out air and prevents freezer burn. It can last up to 3 months in the freezer. When ready to eat, thaw it in the fridge for a few hours. Enjoy the creamy goodness! For the full recipe, check out the details above. Baked cheesecakes use heat to set the filling. This process gives a dense, rich texture. No-bake cheesecakes rely on cold temperatures to firm up. They often taste lighter and creamier. Baked cheesecakes need time in the oven, while no-bake ones chill in the fridge. This makes no-bake cheesecakes quicker to prepare. To make your cheesecake firmer, try these tips: - Use full-fat cream cheese. This adds richness and firmness. - Add gelatin to the filling. Dissolve it in water and mix it in. - Chill the cheesecake longer. Let it set overnight for the best results. - Avoid overmixing the cream cheese. This keeps air out and helps it firm up. Yes, you can use frozen strawberries. Just thaw them first and drain excess liquid. The flavor will still be great, but the texture may change slightly. Fresh strawberries give a firmer bite and vibrant look. For best results, try to use fresh strawberries in the recipe. For the full recipe, check the main article. No-bake strawberry cheesecake is easy and fun to make. We explored key ingredients, like strawberries and cream cheese, and even how to customize them. I shared step-by-step instructions to help you prepare the base, filling, and assembly. Tips on avoiding common mistakes will guide you to the perfect texture. With various topping options, you can get creative. Finally, proper storage keeps your cheesecake fresh longer. Remember, this dessert is versatile, so don't hesitate to experiment. Enjoy every bite of your delicious creation!](https://dailydishly.com/wp-content/uploads/2025/06/5274bd3f-8d96-4968-97f1-1841490db53b-768x768.webp)


