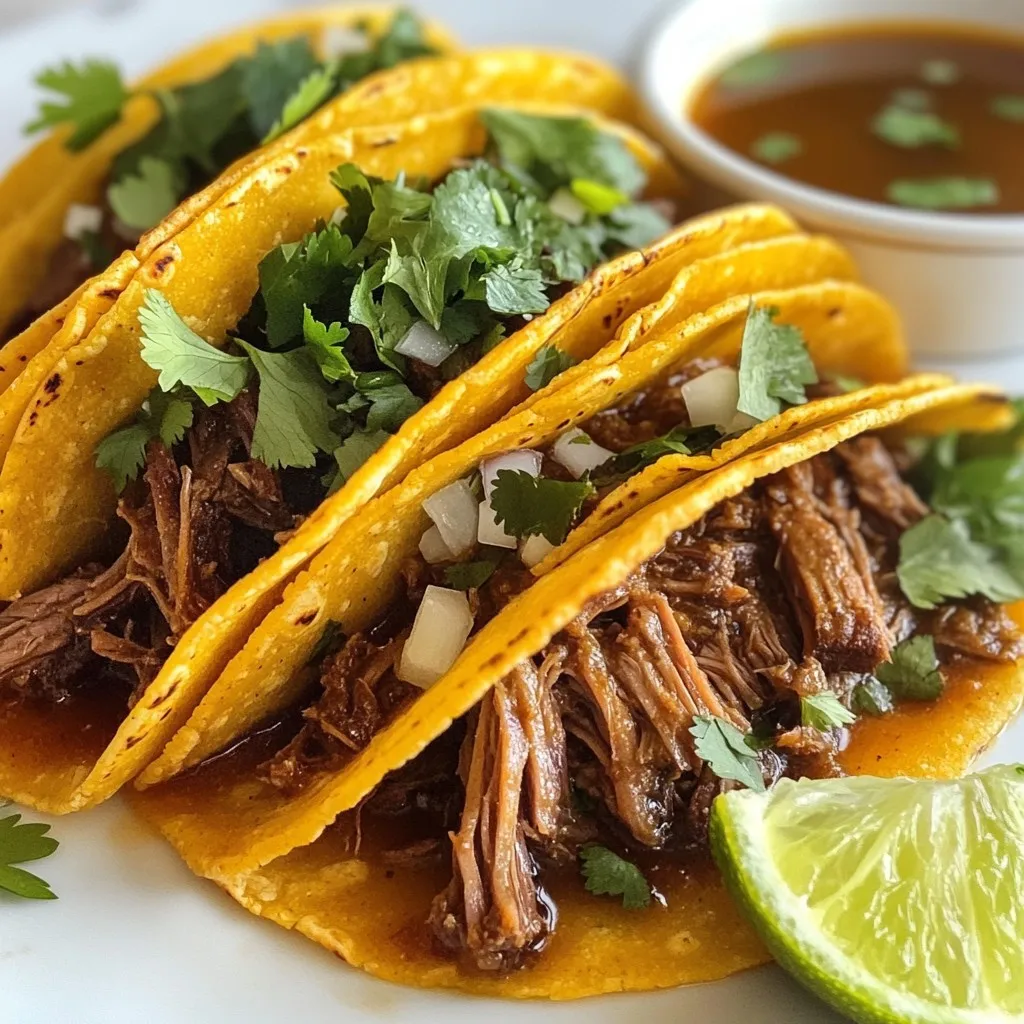
Are you ready to dive into the rich, savory world of Classic Birria Tacos? This beloved dish combines tender meat, bold flavors, and a delicious broth that makes every bite a delight. In this guide, I’ll walk you through easy steps to create these tacos at home. Plus, I’ll share tips and tricks to make sure they are just right. Get ready to impress your taste buds with this flavorful recipe!
Why I Love This Recipe
- Rich Flavors: This recipe brings together a blend of spices and chiles that creates a deep, savory flavor profile that is simply irresistible.
- Comfort Food: The tender, shredded beef enveloped in warm tortillas makes for a comforting meal, perfect for family gatherings or cozy nights in.
- Versatile: These tacos can be served with various toppings, allowing everyone to customize their meal to their liking.
- Tradition: This dish celebrates Mexican culinary heritage, making it a wonderful way to share and enjoy cultural traditions with loved ones.
Ingredients
Key Ingredients for Classic Birria Tacos
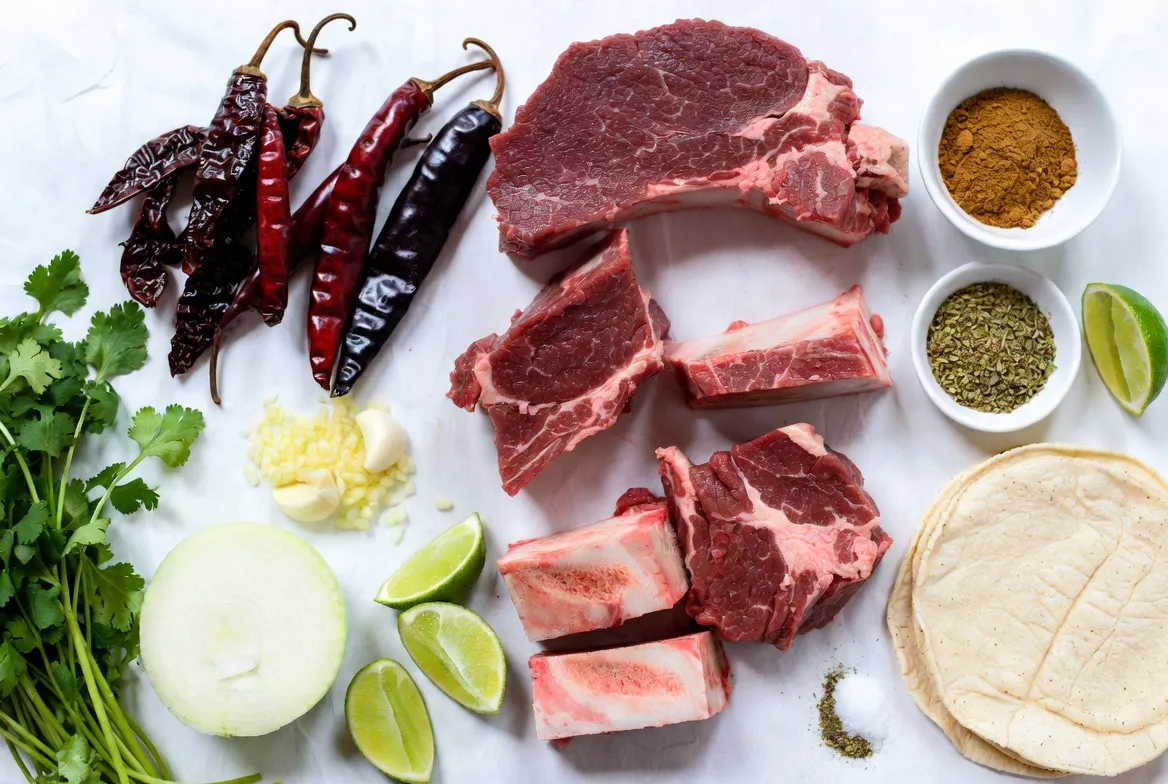
To make classic birria tacos, you need a few key ingredients. Here are the essentials:
– 2 lbs beef chuck roast, cut into chunks
– 1 lb short ribs
– 4 dried guajillo chiles, stems and seeds removed
– 2 dried ancho chiles, stems and seeds removed
– 4 cloves garlic, minced
– 1 onion, chopped
– 1 tablespoon cumin
– 1 tablespoon oregano
– 1 teaspoon cinnamon
– 4 cups beef broth
– 2 tablespoons apple cider vinegar
– Salt and pepper to taste
– Corn tortillas
These ingredients give your birria its rich flavor and tender texture. The two types of beef create a wonderful mix of taste. The dried chiles bring heat and depth.
Optional Garnishes
You can enhance your birria tacos with a few optional garnishes:
– Chopped cilantro
– Diced onion
– Lime wedges for serving
These toppings add freshness and brightness. A squeeze of lime can really lift the flavors.
Substitutions and Alternatives
If you need to make any changes, there are good options. You might use different cuts of meat, like brisket or pork. For a lighter version, try jackfruit for a vegetarian twist. If you can’t find guajillo or ancho chiles, use any dried chiles you like. Just remember, this will change the flavor.
These substitutions allow you to adjust based on what you have or prefer.
Step-by-Step Instructions
Prep the Chiles
First, toast the guajillo and ancho chiles in a dry skillet. Use medium heat for about 2-3 minutes. You want them to smell fragrant. After toasting, soak them in hot water for 20 minutes. This softens the chiles. Drain and blend them with 1 cup of beef broth until smooth. This blend adds rich flavor to the dish.
Sear the Meat
Next, heat a splash of oil in a large pot over medium-high heat. Season the beef chuck and short ribs with salt and pepper. Brown the meat on all sides for about 5-7 minutes. This step builds flavor. Once browned, remove the meat and set it aside.
Sauté Aromatics
In the same pot, add the chopped onion and minced garlic. Sauté them until soft and fragrant, about 3-4 minutes. This step brings out their natural sweetness and adds depth to your dish.
Combine Ingredients
Return the browned meat to the pot. Pour in the blended chile sauce, the remaining beef broth, apple cider vinegar, cumin, oregano, and cinnamon. Stir everything together well. This mix brings all the flavors together.
Simmer the Mixture
Bring the mixture to a simmer. Cover the pot and reduce the heat to low. Let it cook for about 2-3 hours. The meat needs to be tender and easily pulled apart. This slow cooking makes the meat juicy and full of flavor.
Shred the Meat
Once cooked, remove the meat from the pot. Use two forks to shred it. Return the shredded meat to the pot, mixing it well with the broth. This helps the meat soak up all the tasty juices.
Prepare Tacos
Warm the corn tortillas in a pan or over an open flame. Fill each tortilla with a generous amount of the birria meat. Don’t be shy; the more, the better!
Serve and Enjoy
Serve the tacos with a small bowl of the broth for dipping. Top each taco with chopped cilantro and diced onion. A squeeze of lime adds a nice touch. Enjoy the burst of flavors in every bite!
Tips & Tricks
Choosing the Right Meat
For the best birria tacos, I recommend using beef chuck roast and short ribs. These cuts have fat that adds flavor and keeps the meat tender. The fat melts while cooking, making the meat juicy and rich. If you want to try different meats, lamb or goat are also great options. Just remember, tougher cuts work best for this long-cooking method.
Perfecting the Flavor of the Broth
The broth is key to birria tacos. Start by toasting the dried guajillo and ancho chiles. This step brings out their rich flavor. After soaking, blend them with beef broth for a smooth sauce. The mix of cumin, oregano, and cinnamon gives the broth depth. Don’t forget to taste as you go! Adjust the salt and pepper to your liking.
Best Way to Warm Tortillas
Warming the corn tortillas makes a big difference. I like to heat them in a dry skillet over medium heat for about 30 seconds on each side. If you want a smoky taste, try warming them over an open flame. Just keep an eye on them to avoid burning. Warm tortillas make the tacos soft and tasty.
Recommended Dipping Style
Dip your tacos in the rich broth for the best experience. This adds flavor and keeps them moist. Serve each taco with a small bowl of broth on the side. You can also top with chopped cilantro and diced onion for extra flavor. Squeeze a fresh lime wedge over the top for a bright finish. Enjoy each bite!
Pro Tips
- Quality Ingredients: Use high-quality beef and fresh spices for the best flavor in your birria tacos.
- Chiles Matter: Toasting the chiles enhances their flavor, so don’t skip this step for a richer sauce.
- Slow and Low: The longer you simmer the meat, the more tender it becomes. Aim for at least 2-3 hours.
- Broth is Key: Serve the tacos with the broth for dipping; it adds moisture and depth to the flavor.
Variations
Vegetarian Birria Taco Options
You can enjoy birria tacos without meat. Use jackfruit or mushrooms to mimic the texture. Both options soak up flavors well. Use the same spices and broth for a rich taste. Cook them down until tender. You’ll get a savory bite that’s full of flavor.
Different Meats to Use
While beef is classic, you can try other meats. Pork is a great choice for a different taste. Goat meat also works well, giving a unique flavor. Chicken can be a lighter option, too. Each meat will soak up the spices, making it delicious.
Taco Presentation Ideas
Presentation makes your tacos even more fun. Stack your tacos on a colorful plate. Add a small bowl of broth for dipping. Garnish with fresh cilantro and diced onion on top. Serve lime wedges on the side for extra zest. This makes your meal not only tasty but also beautiful!
Storage Info
How to Store Leftover Birria
After enjoying your birria tacos, let any leftovers cool down. Place the meat and broth in separate airtight containers. This keeps the meat juicy and tasty. Store them in the fridge for up to three days. If you want to save them for longer, check out the freezing instructions below.
Freezing Instructions
To freeze your birria, first ensure it cools completely. Place the shredded meat and broth in freezer-safe bags. Remove as much air as possible. Label the bags with the date. This way, you’ll know when to use them. You can freeze the birria for up to three months. When you’re ready to use it, thaw it in the fridge overnight.
Reheating Tips for Best Flavor
When you’re ready to enjoy your birria again, reheat it gently. Pour the broth into a pot and add the meat. Heat it over low heat, stirring occasionally until warmed through. This helps keep the flavors intact. You can also reheat the meat in the microwave, but be careful not to overcook it. Serve with fresh tortillas and your favorite toppings for a delicious meal.
FAQs
What is Traditional Birria?
Traditional birria is a rich stew from Mexico. It often uses goat, but beef is popular too. The meat simmers in a mix of spices and chiles for hours. This makes it tender and full of flavor. People serve birria in tacos or in bowls with broth. It’s a dish that brings warmth and comfort to the table.
Can I make Birria Tacos in a slow cooker?
Yes, you can use a slow cooker for birria tacos. First, sear the meat on the stove. This adds great flavor. Then, place the meat in the slow cooker. Add the blended chiles, broth, and spices. Cook on low for 6-8 hours. The meat will be tender and easy to shred.
How spicy are Classic Birria Tacos?
Classic birria tacos have a mild to medium spice level. The guajillo and ancho chiles give flavor without too much heat. If you like it spicier, add more chiles or some jalapeños. You can adjust the heat to suit your taste.
What are the best toppings for birria tacos?
For birria tacos, you can use various toppings. Here are some great options:
– Chopped cilantro
– Diced onion
– Lime wedges
– Crumbled queso fresco
– Sliced radishes
These toppings add color and flavor, making your tacos even better.
How many servings does this recipe yield?
This recipe yields about six servings. Each taco is filled with tender meat and rich broth. You can easily adjust the recipe for more guests by doubling the ingredients. Enjoy sharing these tasty tacos with friends and family!
Classic Birria Tacos are rich in flavor and easy to make. We covered key ingredients, from meat choices to optional garnishes. I shared a step-by-step guide for perfect preparation, along with tips for the best taste. You learned about variations, storage options, and common questions.
Enjoy crafting your tacos with your own twist! Each bite takes you to new flavors and experiences. Dive in, experiment, and share with friends and family. Taste the fun of making Birria Tacos at hom


