Classic French Onion Soup Savory and Heartwarming Bowl

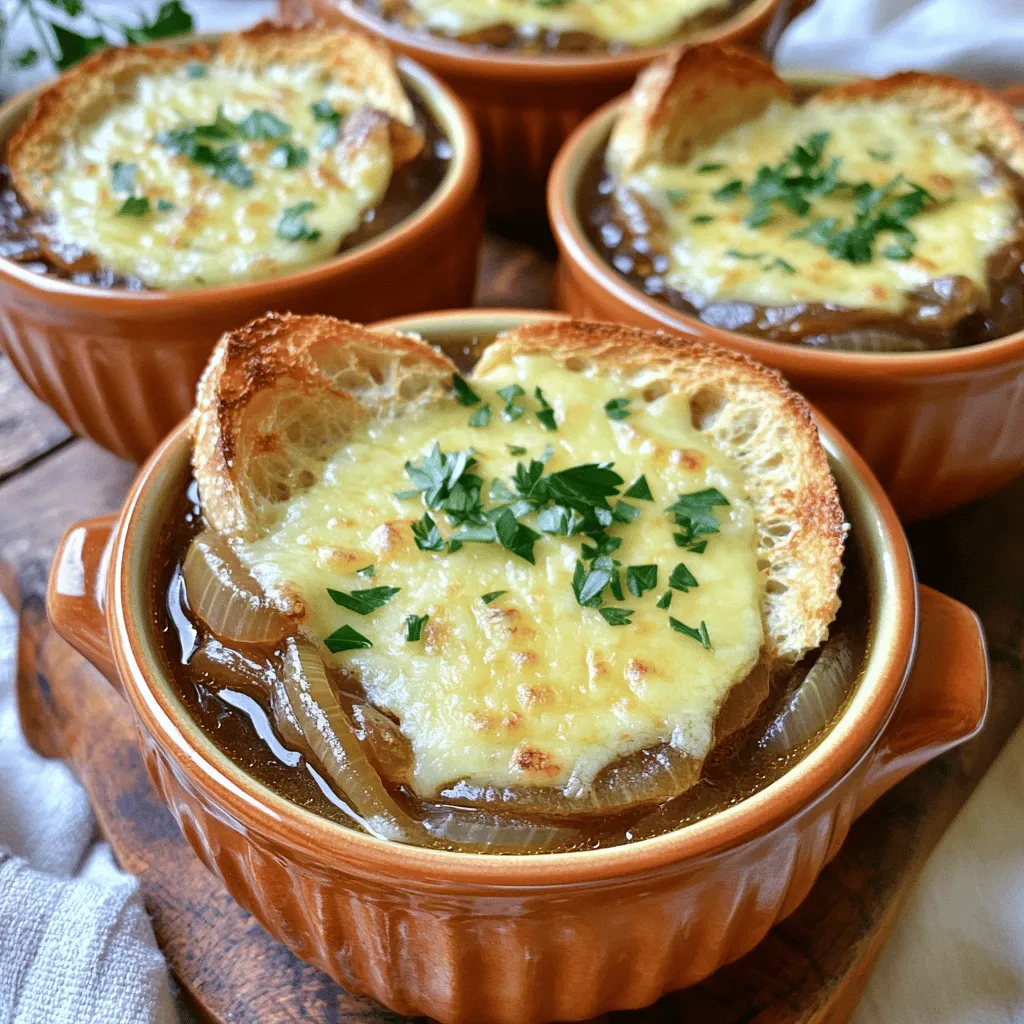
Warm, rich, and oh-so-satisfying, Classic French Onion Soup is a timeless dish that brings comfort to every table. With its golden, sweet onions and a drizzle of melted cheese, this soup warms the soul like a hug in a bowl. In this post, I will guide you through every step to create a restaurant-quality version at home. Let’s dive into the delicious details and get cooking!
Ingredients
Key Ingredients for Classic French Onion Soup
To make classic French onion soup, you need simple ingredients that create rich flavors. Here’s what you’ll need:
– 4 large yellow onions, thinly sliced
– 3 tablespoons unsalted butter
– 2 tablespoons olive oil
– 1 teaspoon sugar
– 4 cups beef broth (or vegetable broth for vegetarian option)
– 2 cups water
– 1 teaspoon dried thyme
– 1 loaf of crusty French baguette, sliced into thick pieces
– 2 cups shredded Gruyère cheese
– Salt and pepper to taste
– Fresh parsley, chopped (for garnish)
These core ingredients work together to form a warm and hearty bowl of soup.
Optional Ingredients for Added Flavor
You can enhance your soup with a few extra ingredients. Some great options include:
– A splash of white wine for acidity
– Fresh garlic for an aromatic touch
– Bay leaves for depth of flavor
– A pinch of red pepper flakes for heat
These additions can take your soup to a new level. Feel free to experiment!
Recommended Tools and Equipment
You will need specific tools to make this soup easy and enjoyable:
– A large heavy-bottomed pot for even cooking
– A wooden spoon for stirring
– An oven-safe bowl or ramekin for serving
– A baking sheet for toasting the bread
Having the right tools makes the cooking process smoother. Enjoy the experience of creating this classic dish!
Step-by-Step Instructions
Preparation Steps
Start by gathering all your ingredients. You need:
– 4 large yellow onions, thinly sliced
– 3 tablespoons unsalted butter
– 2 tablespoons olive oil
– 1 teaspoon sugar
– 4 cups beef broth (or vegetable broth for vegetarian option)
– 2 cups water
– 1 teaspoon dried thyme
– 1 loaf of crusty French baguette, sliced into thick pieces
– 2 cups shredded Gruyère cheese
– Salt and pepper to taste
– Fresh parsley, chopped (for garnish)
Now, peel and slice the onions. Thin slices give the best texture. Next, measure the butter and oil. This mix will help the onions cook evenly.
Cooking the Onions to Perfection
In a large pot, melt the butter and oil over medium heat. Add the sliced onions, stirring well to coat. Sprinkle the sugar over the onions. This helps with caramelizing. Cook slowly, stirring often, for 30 to 40 minutes. You want the onions to become soft and golden brown. Patience is key here. Once they reach that deep color, season with salt and pepper. The smell will be amazing!
Final Assembly and Broiling
Pour in the beef broth and water. Add the dried thyme. Bring this mix to a gentle boil, then lower the heat. Let it simmer for 20 minutes. This step allows all the flavors to blend. While waiting, preheat your oven to 425°F (220°C). Arrange the sliced baguette on a tray and toast it for 5 to 7 minutes until golden.
Once your soup is ready, ladle it into oven-safe bowls. Place a piece of toasted baguette on each. Top each with a generous amount of Gruyère cheese. Now, place the bowls under the broiler for 3 to 5 minutes. Watch closely as the cheese bubbles and turns golden. Carefully take the bowls out and garnish with fresh parsley. Your classic French onion soup is ready to warm your heart!
Tips & Tricks
Best Practices for Caramelizing Onions
To caramelize onions well, slice them thinly. Thin slices cook evenly. Use a heavy pot to avoid burning. Start with medium heat. Add butter and oil together. Wait until they melt, then add onions. Stir them often to coat. Sprinkle sugar to speed up caramelizing. Cook for 30 to 40 minutes. You want them golden and sweet. If they stick, lower the heat. Patience is key for deep flavor.
Achieving the Right Broth Flavor
A rich broth makes your soup shine. Use good-quality beef broth for deep taste. If you prefer vegetarian, vegetable broth works well. Mix in water to balance flavors. Dried thyme adds a nice herbal note. You can adjust salt and pepper to taste. Let the broth simmer gently to blend all ingredients. A 20-minute simmer works great for depth.
Serving Suggestions for Stylish Presentation
Presentation matters in making your soup stand out. Use oven-safe bowls for serving. Ladle the hot soup into each bowl. Place a slice of toasted baguette on top. Add a generous amount of Gruyère cheese over the bread. Broil until the cheese bubbles and turns brown. Garnish with fresh parsley before serving. For a rustic touch, place bowls on a wooden board. This makes a lovely dining experience.

Variations
Vegetarian Version of Classic French Onion Soup
You can easily make a vegetarian version of classic French onion soup. Just switch the beef broth with vegetable broth. This keeps the rich flavor while making it meat-free. You can still caramelize the onions in butter or use olive oil for a lighter touch. The key is to let the onions cook slowly. This brings out their natural sweetness.
Unique Add-ins and Flavor Twists
Want to spice up your soup? Try adding unique ingredients! You can mix in a splash of white wine for extra depth. A touch of balsamic vinegar can also elevate the flavor. For a kick, toss in some red pepper flakes. You can even add sautéed mushrooms for an earthy taste. Each addition brings a new twist to the classic recipe.
Alternative Cheeses for Topping
Gruyère cheese is a classic choice, but feel free to experiment. Try using Swiss cheese for a milder flavor. Mozzarella melts well and gives a nice stretch. For something bold, blue cheese adds a punch. You can even combine different cheeses for a rich topping. Just remember to sprinkle generously for that perfect cheesy crust!
Storage Info
How to Store Leftover Soup
You can store leftover soup in an airtight container. Let it cool down first. Then, place it in the fridge. It stays fresh for about 3 to 4 days. Make sure to label your container with the date. This helps you remember when you made it.
Freezing French Onion Soup
You can freeze French onion soup if you want to keep it longer. Use freezer-safe containers. Leave some space at the top, as the soup will expand when frozen. It can last for up to 3 months in the freezer. Just remember to label the container with the date.
Reheating Tips
To reheat the soup, pour it into a pot. Heat it on low to medium heat. Stir it often to prevent burning. If you like, you can add a splash of water or broth to thin it out. For a crispy topping, reheat your soup in the oven. Place it in an oven-safe bowl, add the bread and cheese, and broil until bubbly. Enjoy your warm, savory bowl of classic French onion soup!
FAQs
Can I make French Onion Soup in advance?
Yes, you can make French onion soup ahead of time. It tastes even better the next day! After cooking, let it cool. Store it in the fridge. When ready to serve, heat it on the stove. You may want to add more broth if it thickens. This soup stays fresh for up to three days.
What kind of cheese is best for French Onion Soup?
Gruyère cheese is the classic choice for French onion soup. It melts perfectly and adds rich flavor. You can also use Swiss cheese or a mix of both. For a twist, try adding a bit of Parmesan. Just remember, the cheese should be shredded for even melting.
How do I make a gluten-free version of this soup?
To make gluten-free French onion soup, use gluten-free bread. Ensure the beef broth is also gluten-free. Many brands offer gluten-free options.Your soup will still be tasty and comforting without gluten.
You now have a complete guide for making classic French onion soup. We covered key ingredients, optional flavors, and essential tools. The step-by-step instructions make it easy to cook and serve this dish. Don’t forget to check out my tips for caramelizing onions and adding your unique twist.
With practice, you will refine your skills and enjoy delicious results. French onion soup can impress at any gathering. Keep experimenting with flavors and presentations. You’ll create a dish that warms hearts and brings smiles.


![To make vegan lentil sloppy joes, these key ingredients are a must: - 1 cup green or brown lentils, rinsed - 1 small onion, finely chopped - 2 cloves garlic, minced - 1 red bell pepper, diced - 1 carrot, grated - 2 tablespoons tomato paste - 1 cup vegetable broth - 1 tablespoon soy sauce or tamari - 2 tablespoons maple syrup - 1 teaspoon smoked paprika - 1 teaspoon cumin - Salt and pepper to taste - 4 whole wheat burger buns - Fresh parsley, chopped (for garnish) These ingredients create a hearty, flavorful mix. The lentils give protein and fiber. The veggies add crunch and sweetness. You can also add these optional ingredients for a twist: - Jalapeños for heat - Mushrooms for umami - Corn for sweetness - Avocado for creaminess These ingredients can elevate your dish. Feel free to mix and match to find your favorite flavor. Lentils are a powerhouse of nutrition. They are high in protein, which is great for vegans. Here are some benefits: - High in Fiber: Helps with digestion and keeps you full. - Rich in Iron: Supports energy levels and overall health. - Low in Fat: A smart choice for heart health. - Packed with Vitamins: Includes B vitamins, which help with metabolism. Incorporating lentils into your meals is a smart move for your health. They make a tasty and nutritious base for this dish. You can find the full recipe above to get started on your tasty vegan adventure! Start by rinsing 1 cup of green or brown lentils. Put them in a medium pot. Add 3 cups of water. Bring the water to a boil. Then, lower the heat to a simmer. Cook the lentils for about 25 to 30 minutes. They should be tender when done. Once cooked, drain any extra water and set the lentils aside. This step is key for a hearty filling. Next, grab a large skillet. Heat a little water or vegetable broth over medium heat. Add the finely chopped onion and minced garlic. Cook them for about 3 to 4 minutes until they soften. Then, stir in the diced red bell pepper and grated carrot. Cook these veggies for another 5 minutes, until they start to soften. This mix adds great flavor and crunch. Now it's time to bring everything together. Add the cooked lentils to the skillet. Then, mix in 2 tablespoons of tomato paste, 1 cup of vegetable broth, and 1 tablespoon of soy sauce. Don’t forget 2 tablespoons of maple syrup for a touch of sweetness. Next, sprinkle in 1 teaspoon of smoked paprika and 1 teaspoon of cumin. Stir well to combine all the flavors. Let the mixture simmer for about 10 to 15 minutes. This will help it thicken nicely. Taste and season with salt and pepper as needed. For the complete recipe, refer to the [Full Recipe]. This dish will make your taste buds dance! To get a thick and hearty Sloppy Joe, you want to simmer the lentil mixture well. After adding all your ingredients, let it cook for about 10-15 minutes. Stir often to avoid sticking. If it gets too thick, add a splash of vegetable broth. This keeps it moist and tasty. The perfect texture is key for a great bite. You can make your Sloppy Joes your own! Try adding different spices, like chili powder or oregano. Want more heat? Add diced jalapeños or a splash of hot sauce. You can also swap the maple syrup for agave nectar. If you love smoky flavors, consider extra smoked paprika. Each twist brings a new flavor, making it fun to explore. Make cooking easier with a few tricks! Chop your veggies ahead of time. You can store them in the fridge for a few days. Also, cook a big batch of lentils and freeze some for later. This meal can be ready in about 30 minutes if you prep smart. For a quick assembly, toast the buns while the mixture simmers. Get the full recipe for more details on each step! {{image_2}} Want some heat? You can turn your lentil sloppy joes into a spicy treat. Add diced jalapeños or a splash of hot sauce to the mix. You can even swap smoked paprika for cayenne for more kick. Spice lovers will enjoy this twist. Adjust the heat to your taste. You can always add more later! If you need a gluten-free meal, don't worry! Use gluten-free buns instead of whole wheat. Many brands offer tasty options. Just check the label to be sure. You can also serve the lentil mix in lettuce wraps. This keeps it light and fresh. Enjoy the same great flavors without the gluten. Looking to cut carbs? Try serving the lentil mix over cauliflower rice. This gives you a tasty base without the bread. Another option is to use portobello mushrooms as buns. They add great flavor and texture. This way, you enjoy all the taste and still stay low-carb. For the full recipe, check out the instructions above. After making your vegan lentil sloppy joes, you can store leftovers easily. Let the mixture cool down first. Transfer it to an airtight container. It will stay fresh for 3 to 5 days in the fridge. Make sure to keep it separate from the buns. This keeps the buns from getting soggy. You can freeze the lentil mixture for later use. Put the cooled lentil mix in a freezer-safe container. It can last for up to 3 months in the freezer. When you're ready to eat, just thaw it in the fridge overnight. This way, you have a quick meal ready on busy days. To reheat, you can use a stovetop or microwave. If using the stovetop, place the lentil mix in a pan over low heat. Stir occasionally until it's hot. If using a microwave, put it in a microwave-safe bowl and heat in short bursts. Stir between each burst for even heating. Make sure to toast the buns again for that perfect crunch. You can enjoy your delicious vegan lentil sloppy joes just like the first time! For the full recipe, check out the previous section. I recommend using green or brown lentils for this recipe. These lentils hold their shape well when cooked. They also have a nice, earthy flavor that works great in sloppy joes. Red lentils can cook down too much and become mushy, so they are not ideal here. Yes, you can make this recipe ahead of time. The lentil mixture stores well in the fridge for up to five days. Just keep it in an airtight container. When you're ready to eat, simply reheat it on the stove or in the microwave. This makes it perfect for meal prep or busy weeknights. To make this dish less spicy, you can adjust the ingredients. Skip the smoked paprika if you find it too strong. You can also reduce the amount of garlic. Adding a little more maple syrup can balance the heat too, making it sweeter. Enjoy it mild or spicy, depending on your taste! For the full recipe, check out the complete guide on Vegan Lentil Sloppy Joes. In this blog post, we explored how to make tasty vegan lentil sloppy joes. We discussed key ingredients and their benefits, prepared the lentils, and combined everything into a delicious sauce. I shared tips for perfecting the dish and offered variations for spice and dietary needs. These sandwiches are easy to store and reheat. Whether you're new to cooking or a pro, this recipe is sure to impress. Enjoy the fun of cooking and savor the flavors you create!](https://dailydishly.com/wp-content/uploads/2025/07/15cadd50-421d-45eb-818a-a88ea76b441c-768x768.webp)


![To create this creamy delight, you need a few simple items: - 1 lb elbow macaroni - 4 cups water - 2 tablespoons unsalted butter - 1 teaspoon garlic powder - 1 teaspoon onion powder - ½ teaspoon smoked paprika - Salt and pepper to taste These ingredients form the base of the dish. The elbow macaroni cooks perfectly in the Instant Pot. The water helps to steam the pasta, making it tender and fluffy. You can boost the flavor of your mac and cheese with a few optional items: - Mustard powder - Hot sauce - Cooked bacon bits - Chopped green onions Adding mustard powder gives a nice tang. Hot sauce can add a kick, while cooked bacon bits provide a savory crunch. Green onions add freshness and brightness. For the creamiest mac and cheese, choose your cheeses wisely. I recommend: - 2 cups sharp cheddar cheese, shredded - 1 cup mozzarella cheese, shredded - ½ cup cream cheese, softened Sharp cheddar provides a bold flavor. Mozzarella makes it stretchy and creamy. Cream cheese adds richness, making every bite delightful. For the full recipe, check out the instructions above. First, gather all your ingredients. You need: - 1 lb elbow macaroni - 4 cups water - 2 tablespoons unsalted butter - 1 teaspoon garlic powder - 1 teaspoon onion powder - ½ teaspoon smoked paprika - Salt and pepper to taste - 2 cups sharp cheddar cheese, shredded - 1 cup mozzarella cheese, shredded - ½ cup cream cheese, softened - ½ cup whole milk Add the elbow macaroni and water to the Instant Pot. Then, mix in the butter, garlic powder, onion powder, smoked paprika, and a pinch of salt. Stir well to combine. This step is key for flavor. Now, close the lid of the Instant Pot. Set the valve to sealing. Select the manual setting and cook on high pressure for 4 minutes. This short cooking time works well! Once the timer goes off, do a quick release of the pressure. Be careful when you open the valve. After the pressure releases, carefully open the lid. It will smell amazing! Stir in the remaining tablespoon of butter, cheddar cheese, mozzarella cheese, cream cheese, and whole milk. Mix well until everything blends into a creamy dish. If it feels too thick, add a splash more milk to thin it out. Season with salt and pepper to your liking. Now you have a delicious, creamy mac and cheese! For the complete recipe, check out the [Full Recipe]. To make your mac and cheese super creamy, use a mix of cheeses. I suggest sharp cheddar for flavor and mozzarella for stretch. Cream cheese adds richness and smoothness. Always stir in your dairy after cooking the pasta. This keeps everything creamy and prevents lumps. One common mistake is overcooking the pasta. If you cook it too long, it can get mushy. Stick to the cooking time of four minutes. Another pitfall is not adding enough liquid. If your mac and cheese seems dry, add more milk slowly. Taste as you go to get the right creaminess. Serve your mac and cheese in fun, colorful bowls. This makes the dish pop! Top it with fresh parsley or chives for color. A sprinkle of extra cheese on top before serving also looks great. You can add crispy bacon bits or breadcrumbs for crunch. This makes your creamy mac and cheese even more delightful! {{image_2}} You can easily make your mac and cheese more filling by adding protein. Consider cooked chicken, bacon, or sausage. Just chop the meat into small pieces. Stir it into the pot with the cheese. This will make your dish hearty and flavorful. If you like some heat, try adding jalapeños or hot sauce. You can slice fresh jalapeños and mix them in. For a milder option, use pickled jalapeños. This adds a great kick to the creamy sauce. You can also drizzle hot sauce on top before serving for extra spice. For a vegetarian twist, add veggies like broccoli or spinach. Steam them first, then mix them in with the cheese. This not only adds color but also boosts nutrition. You can also use a blend of different cheeses to create unique flavors. Explore these variations to make your Instant Pot creamy mac and cheese truly your own! For the full recipe, check out the link above. To keep your mac and cheese fresh, place it in an airtight container. Make sure the container is clean and dry. You can store it in the fridge for up to three days. If you have a large batch, divide it into smaller portions. This helps it cool faster and stay fresh longer. When you are ready to enjoy your leftovers, reheating is key. Place the mac and cheese in a pot over low heat. Add a splash of milk to keep it creamy. Stir often until it is hot. You can also use the microwave. Heat it in 30-second intervals, stirring in between. This way, it warms evenly and does not dry out. If you want to save some for later, freezing works well. Let the mac and cheese cool completely before freezing. Use a freezer-safe container or bag. Remove as much air as possible to prevent freezer burn. It can last for up to three months in the freezer. When you’re ready to eat, thaw it in the fridge overnight and reheat as described above. For best results, add a bit more cheese or milk when reheating to restore its creaminess. For a full recipe of Instant Pot Creamy Mac and Cheese, check out the detailed instructions above. Yes, you can use gluten-free pasta. Just check the cooking time on the package. Gluten-free pasta may cook faster, so adjust the pressure cooking time to around 3 minutes. If you overcook it, the pasta can become mushy. To make it dairy-free, swap the cheese with plant-based options. Use dairy-free butter and cream. You can also try cashew cream for a rich texture. Nutritional yeast can add a cheesy flavor without dairy. Sharp cheddar is my favorite for its bold flavor. It melts well and adds creaminess. Mozzarella gives a nice stretch, while cream cheese adds richness. A mix of these cheeses works best for a creamy texture. Different pasta shapes need different cooking times. For example, penne or shells may need 5 minutes. Always check the pasta package for the right time. Remember, you want the pasta to be tender but not mushy. Making Instant Pot Creamy Mac and Cheese is easy. You learned about key ingredients and the best cheeses. I shared step-by-step cooking tips and ways to avoid common mistakes. You can add fun flavors and proteins for variety. Remember, store and reheat leftovers correctly for best taste. Enjoy your creamy mac and cheese journey! It’s a dish that brings joy to any meal.](https://dailydishly.com/wp-content/uploads/2025/07/aef5e05b-bf60-4c96-8d62-11668510c0c6-768x768.webp)