Looking for a quick, tasty treat that packs a healthy punch? You’re in the right place! These Coconut Chocolate Energy Bars blend the rich flavors of coconut and dark chocolate with the goodness of wholesome ingredients. Perfect for a post-workout snack or a midday boost, this recipe is all about easy preparation and satisfying flavors. Let’s dive into how to make these delicious bars today!
Why I Love This Recipe
- Healthy Ingredients: This recipe uses wholesome ingredients like rolled oats, almond butter, and coconut, making it a nutritious snack option.
- Quick and Easy: With a prep time of just 15 minutes, these energy bars can be made quickly, perfect for busy lifestyles.
- Customizable: You can easily swap out the nut butter or add different mix-ins like nuts or seeds to suit your taste.
- Deliciously Satisfying: The combination of coconut and dark chocolate creates a rich, satisfying flavor that will curb your sweet cravings.
Ingredients
Detailed List of Ingredients
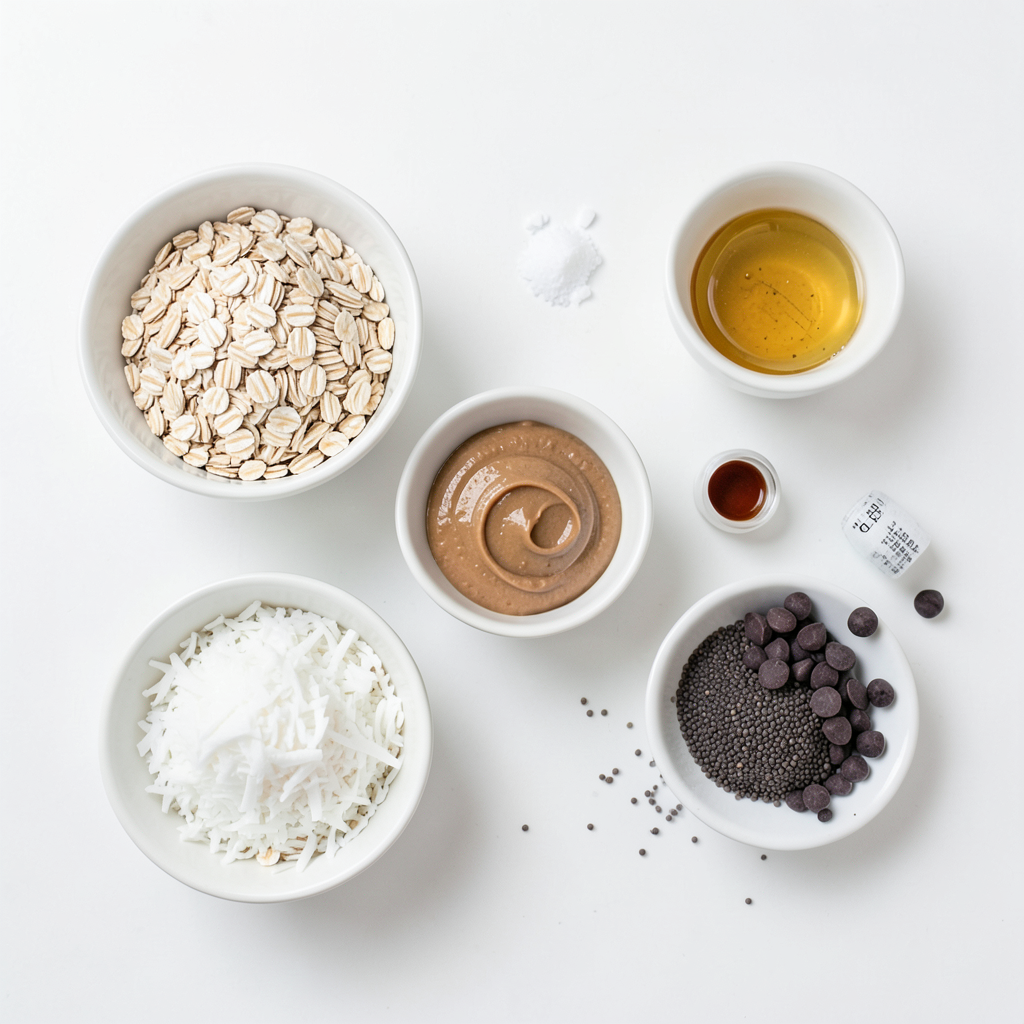
- 1 cup rolled oats
- ½ cup unsweetened shredded coconut
- ½ cup almond butter (or any nut butter of choice)
- ½ cup honey or maple syrup
- 1/3 cup dark chocolate chips
- 1/4 teaspoon salt
- 1 teaspoon vanilla extract
- 1 tablespoon chia seeds (optional)
Nutritional Information
Each serving has about:
- Calories: 150
- Protein: 4g
- Fats: 7g
- Carbs: 20g
- Fiber: 3g
- Sugar: 6g
Health Benefits of Key Ingredients
- Coconut: Provides healthy fats, supports heart health, and boosts energy.
- Dark Chocolate: Contains antioxidants that may improve heart health and mood.
- Almond Butter: Rich in protein and healthy fats, it helps keep you full.
These ingredients work together to make a snack that is both tasty and nutritious. You can enjoy the energy bars any time of day!
Step-by-Step Instructions
Preparation Overview
Mixing dry and wet ingredients separately is very important. When you mix them apart, it helps to keep the texture right. The dry mix will stay fluffy. This makes sure each bite of your energy bar is tasty and chewy.
Mixing Instructions
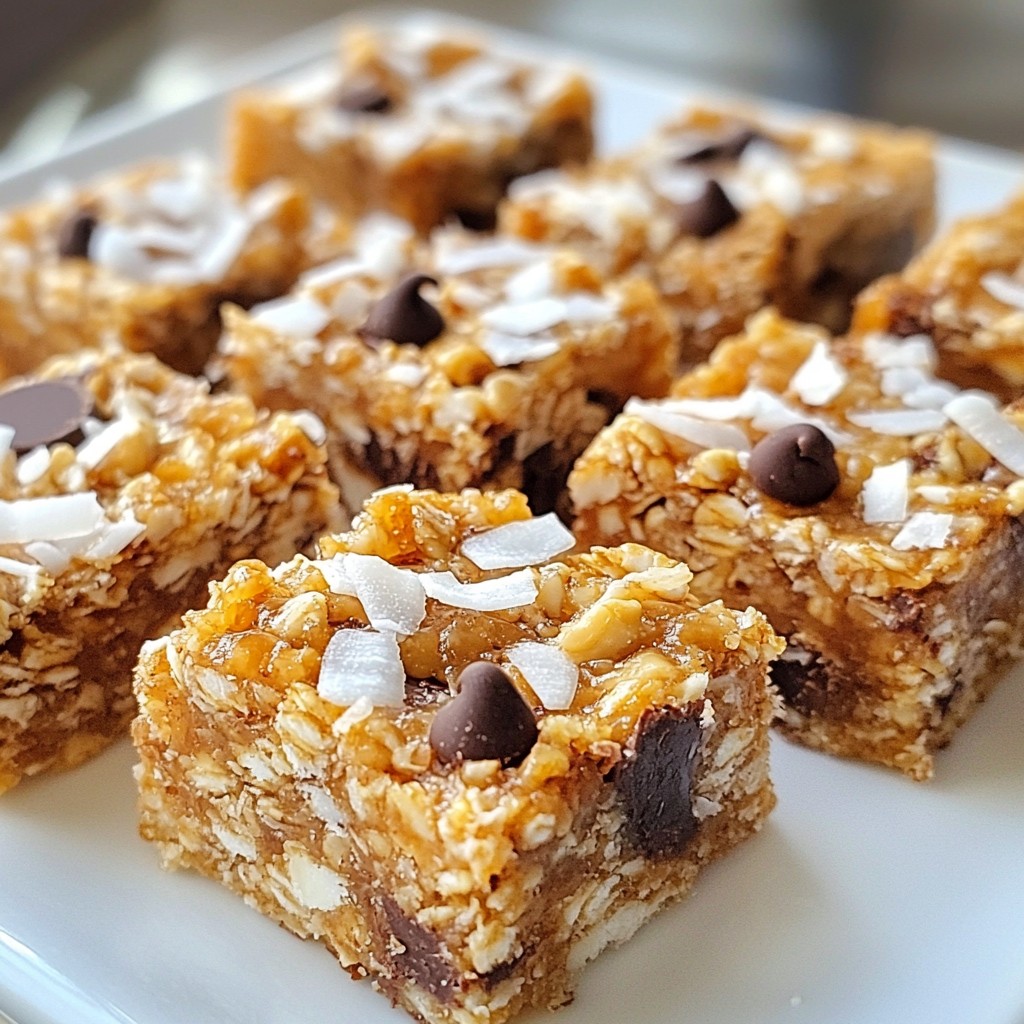
Start by adding your rolled oats, shredded coconut, and chia seeds into a large bowl. In another bowl, mix the almond butter and honey together. Heat this mix in the microwave for just a bit. When it’s warm, stir in the vanilla and salt. Now, pour this warm mix over your dry ingredients. Stir it well but gently. You want everything to blend without breaking the oats. Finally, add the dark chocolate chips and fold them in. This step makes sure you get chocolate in every bite.
Chilling and Cutting
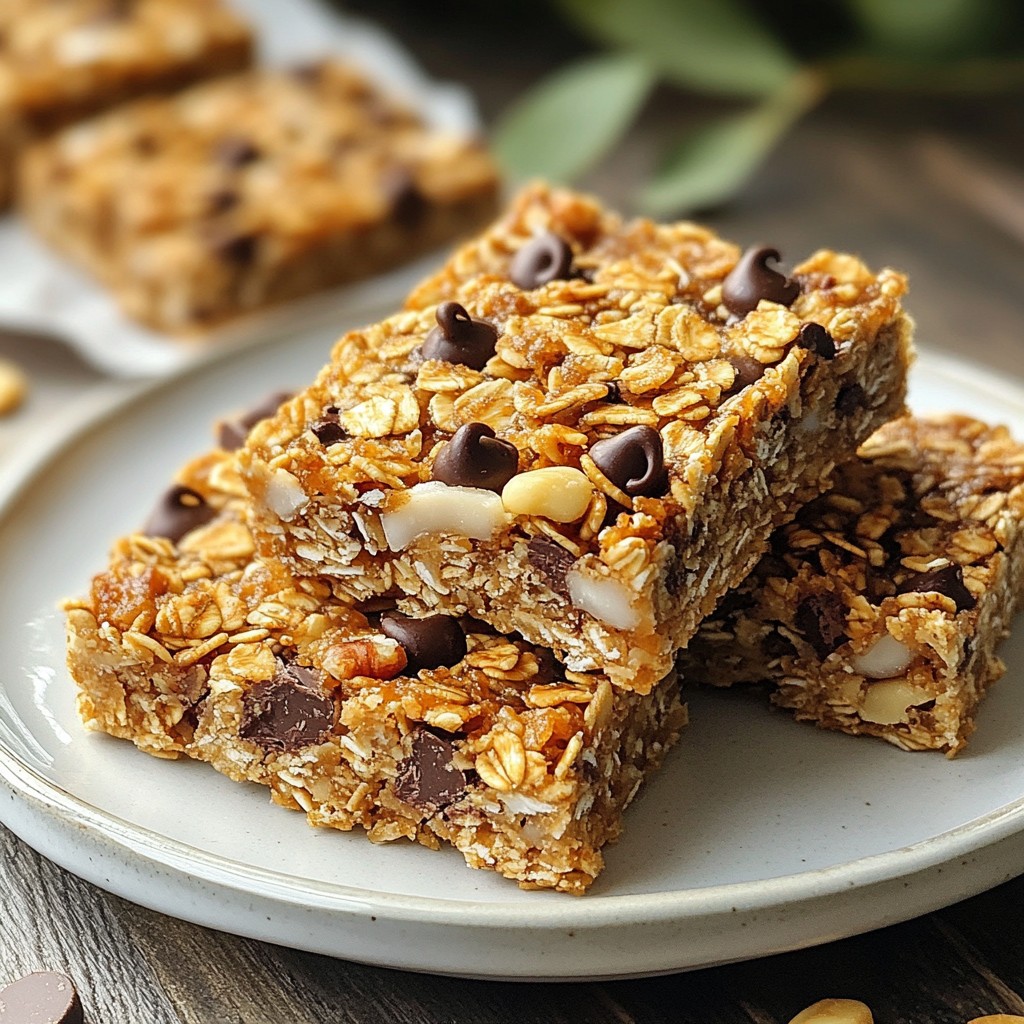
After mixing, you need to pack the mix into a lined baking dish. Press it down firmly to make it compact. This helps the bars hold their shape. Now, put the dish in the fridge for at least one hour. This chilling time makes the bars firm and easy to cut. When you’re ready, lift them out using the parchment paper. Use a sharp knife to cut them into squares or rectangles. This way, you’ll have perfect energy bars ready to enjoy!
Tips & Tricks
Storage Tips
To keep your coconut chocolate energy bars fresh, store them in an airtight container. Place parchment paper between layers to avoid sticking. If you want them to last longer, refrigerate them. They stay good for up to a week in the fridge. For longer storage, freeze the bars. They can last for up to three months in the freezer.
Enhancing Flavor and Texture
You can add extra ingredients to make your bars more special. Try adding a pinch of cinnamon for warmth. Dried fruits like cranberries or apricots can add sweetness and chewiness. You might also mix in nuts for crunch. If you like a bit of spice, consider adding a dash of cayenne pepper. This will give a nice kick!
Troubleshooting Common Issues
Sometimes the mixture can be too dry. If this happens, add a bit more almond butter or honey. You want the mix to stick together well. If it’s too sticky, try adding more oats or shredded coconut. This will help absorb some moisture. Always aim for a good balance between dry and wet for the best results.
Pro Tips
- Chill Thoroughly: Ensure the energy bars are chilled for at least an hour to achieve the perfect firmness and texture.
- Customize Your Nuts: Feel free to swap almond butter for peanut butter or sunflower seed butter for a different flavor profile.
- Add Some Crunch: Incorporate some chopped nuts or seeds for added texture and nutrition in your energy bars.
- Store Properly: Keep the energy bars in an airtight container in the fridge for up to two weeks for optimal freshness.
Variations
Flavor Variations
You can easily change the flavors of your coconut chocolate energy bars. Instead of almond butter, try peanut butter or cashew butter. Each nut butter brings its unique taste. For sweeteners, honey works great, but you can also use maple syrup or agave nectar. Want to add more fun? Toss in some dried fruit like cranberries or apricots. You can even add spices like cinnamon or cocoa powder for a richer flavor. The options are endless!
Dietary Adaptations
These energy bars can fit many diets. To make them vegan, just swap honey for maple syrup. If you're gluten-free, ensure your oats are certified gluten-free. For those with nut allergies, use sunflower seed butter instead of nut butter. This keeps the bars safe and tasty. You can also omit the chocolate chips or replace them with dairy-free options. Everyone can enjoy these bars!
Seasonal Variations
You can use seasonal ingredients to make your bars special. In the fall, add pumpkin puree and spices like nutmeg for a cozy flavor. During summer, mix in fresh berries or even a bit of lemon zest. Winter is perfect for warming spices like ginger or cloves. Each season brings fresh ideas, making your energy bars fun and exciting all year round!
Storage Info
How to Store Coconut Chocolate Energy Bars
To keep your energy bars fresh, use an airtight container. Glass or plastic containers work well. You can also wrap each bar in parchment paper. This helps protect them from moisture and keeps them tasty.
Shelf Life of Homemade Energy Bars
These energy bars can last up to a week in the fridge. For longer storage, freeze them. In the freezer, they can stay good for up to three months. Just remember to wrap them well to prevent freezer burn.
Portion Control Tips
For easy snacking, cut the bars into smaller pieces. This way, you grab a piece whenever you need a boost. You can also pack them in snack bags for on-the-go convenience. This helps you control portions and enjoy them anywhere.
FAQs
How long do these energy bars last?
These energy bars can last about one week in the fridge. Keep them in an airtight container to stay fresh. You can also freeze them for up to three months. Just wrap them tightly in plastic wrap before placing them in a freezer bag. When you're ready to eat, thaw them in the fridge overnight or leave them out for a few hours.
Can I substitute ingredients in this recipe?
Yes, you can easily swap ingredients. If you have nut allergies, use sunflower seed butter instead of almond butter. If you want a vegan option, replace honey with maple syrup. You can also use different sweeteners like agave nectar if you prefer. Feel free to change the chocolate chips to dark chocolate or even white chocolate. Just keep the ratios the same for best results.
Are coconut chocolate energy bars healthy?
Absolutely! These bars are packed with nutrients. Rolled oats provide fiber and energy. Coconut adds healthy fats and a yummy taste. Almond butter is rich in protein, which helps keep you full. Dark chocolate contains antioxidants and gives a sweet touch. This snack can boost your energy during workouts or busy days. Each bite gives you the fuel you need without added junk. Enjoy these bars guilt-free!
These coconut chocolate energy bars are easy to make and tasty. We discussed the key ingredients and their benefits. Mixing dry and wet ingredients separately is crucial for success. I shared tips for storing and enhancing flavor, so your bars stay fresh and exciting. You can also explore various flavor options and dietary needs. Following these tips ensures a delicious, homemade snack. These bars are a healthy choice packed with energy. Enjoy your cooking journey and the tasty results!