Coconut Mango Smoothie Bowl for a Refreshing Start

Looking for a bright, tasty start to your day? The Coconut Mango Smoothie Bowl is just what you need! Packed with flavor and easy to make, this recipe will lift your spirits. I’ll guide you through the simple steps to create a bowl that bursts with tropical goodness. Plus, you’ll learn tips for perfect texture and fun topping ideas. Let’s dive into this delicious adventure together!
Why I Love This Recipe
- Refreshing Flavor: This smoothie bowl combines the tropical sweetness of mango with creamy coconut, creating a refreshing treat perfect for warm days.
- Healthy Ingredients: Packed with fruits, yogurt, and coconut milk, this recipe is not only delicious but also nutritious, making it a great breakfast or snack option.
- Customizable Toppings: You can personalize your smoothie bowl with a variety of toppings like granola, nuts, or fresh fruits, allowing for endless combinations.
- Quick and Easy: With just a few simple steps and minimal prep time, this smoothie bowl is a hassle-free recipe that anyone can whip up in minutes.
Ingredients
List of Ingredients
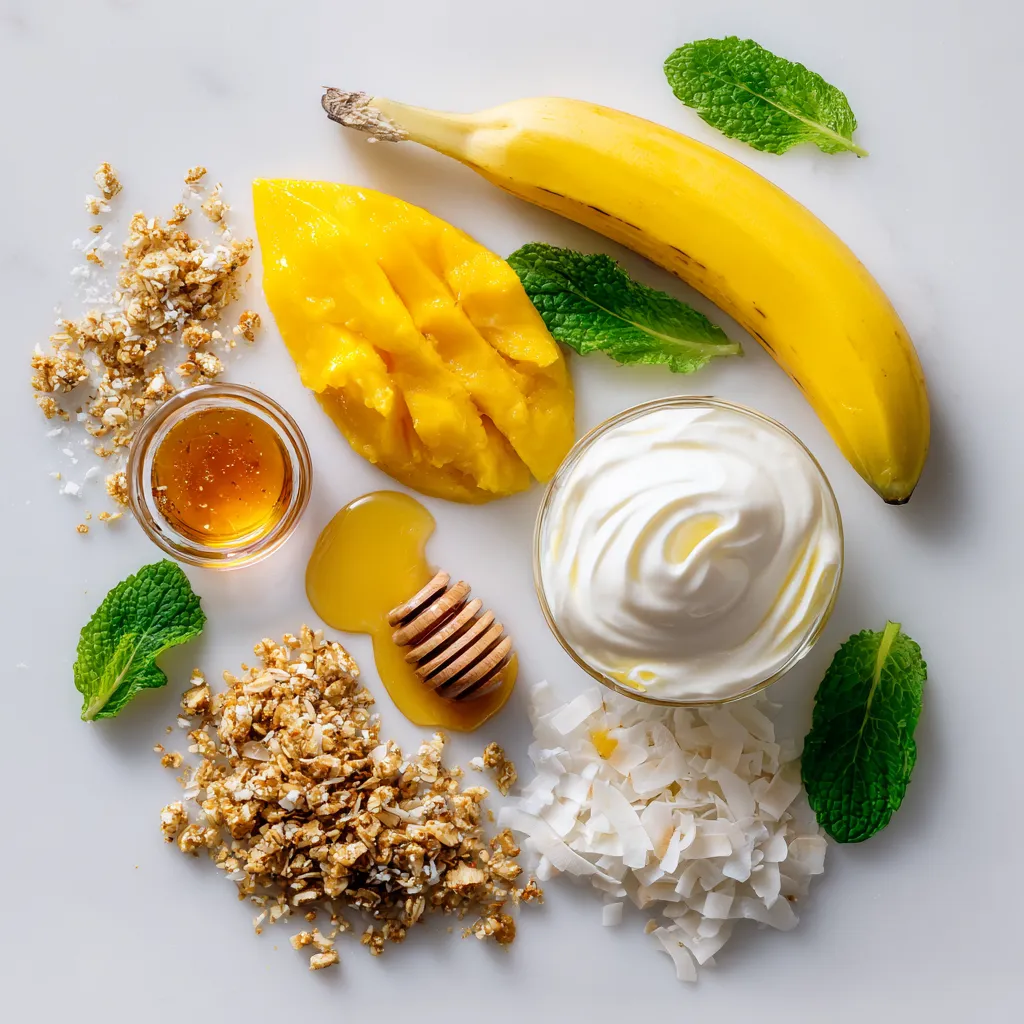
To make the coconut mango smoothie bowl, gather these simple ingredients:
– 1 cup frozen mango chunks
– 1 ripe banana
– 1/2 cup coconut milk
– 1/4 cup Greek yogurt (or dairy-free yogurt)
– 1 tablespoon honey or maple syrup (optional)
– 1/4 cup granola (for topping)
– 2 tablespoons shredded coconut (toasted if desired)
– Fresh mango slices (for garnish)
– Fresh mint leaves (for garnish)
Suggested Substitutions
You can swap some ingredients if needed:
– Use fresh mango if you don’t have frozen.
– Almond milk or oat milk can replace coconut milk.
– For yogurt, try cashew yogurt or silken tofu for a vegan option.
– Maple syrup works great if you want a vegan sweetener.
Nutritional Information
This smoothie bowl is not just tasty; it’s also healthy! Each serving has:
– Calories: Approximately 250
– Protein: About 6 grams
– Carbohydrates: Roughly 40 grams
– Fats: Around 8 grams
– Fiber: About 4 grams
This bowl offers energy and nutrients to kickstart your day!

Step-by-Step Instructions
Preparation of Ingredients
First, gather all your ingredients. You will need:
– 1 cup frozen mango chunks
– 1 ripe banana
– 1/2 cup coconut milk
– 1/4 cup Greek yogurt (or dairy-free yogurt)
– 1 tablespoon honey or maple syrup (optional)
Make sure your banana is ripe. This adds natural sweetness and creaminess. If you want, toast the shredded coconut for added flavor.
Blending Process
Next, add the frozen mango, banana, coconut milk, and Greek yogurt to your blender. Blend on high speed for about 30 seconds. You want it smooth and creamy. If the mix is too thick, add more coconut milk. Blend again until it’s just right. Taste the mixture. If you want it sweeter, add honey or maple syrup. Blend once more to mix.
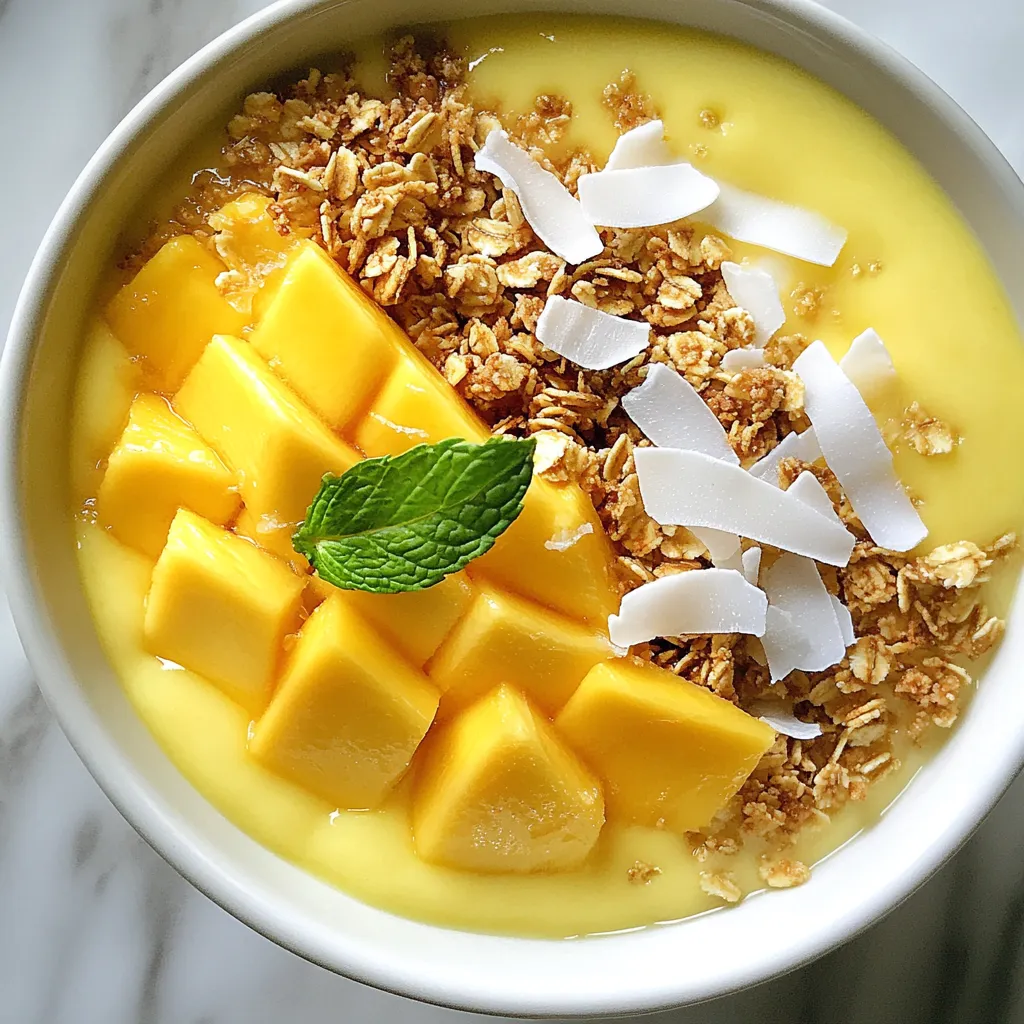
Assembling the Smoothie Bowl
Pour your smoothie into a bowl. Use the back of a spoon to smooth it out. Now for the fun part—toppings! Sprinkle granola and shredded coconut on top. Add fresh mango slices for color. Finish with mint leaves for a fresh touch. Enjoy your coconut mango smoothie bowl right away!
Tips & Tricks
Achieving the Perfect Texture
To get a smooth and creamy texture, use frozen mango chunks. They chill the drink and add thickness. Blend them with a ripe banana and coconut milk. If the mix is too thick, pour in a bit more coconut milk. Blend again until it’s just right.
Sweetness Adjustments
Taste your smoothie before serving. You might want it sweeter. Add honey or maple syrup if you like. Just one tablespoon can make a big difference. Blend again to mix in the sweetness.
Presentation Ideas
Make your smoothie bowl look pretty! Pour it into a bowl and use a spoon to smooth the top. Top it with granola and toasted coconut for crunch. Add fresh mango slices and mint leaves for color. This bowl is not just tasty; it’s a feast for the eyes!
Pro Tips
- Use Frozen Mango: Using frozen mango chunks not only makes the smoothie bowl cold and refreshing but also helps achieve a creamy texture without the need for ice.
- Ripeness Matters: A ripe banana will enhance the natural sweetness and creaminess of your smoothie bowl, so choose one with a few brown spots for optimal flavor.
- Texture Variations: For a thicker smoothie bowl, reduce the amount of coconut milk or add more frozen fruits. Adjust to your desired consistency for the perfect spoonable experience.
- Garnishing Tips: Feel free to get creative with toppings! Add nuts, seeds, or other fruits to customize your smoothie bowl and make it even more nutritious.

Variations
Fruit Variations
You can change the fruit in this smoothie bowl. Try using different frozen fruits. Pineapple, berries, or peaches work well. Each fruit gives a unique taste. If you like a tropical twist, add passion fruit or papaya. Mix and match fruits to find your favorite. You can also use fresh fruits for a different texture.
Dairy-Free Options
For a dairy-free version, use coconut yogurt instead of Greek yogurt. This keeps the creamy texture. Almond milk or oat milk can replace coconut milk. If you want a nut-free option, choose rice milk. Each milk adds its own flavor. You can still enjoy the same great taste without any dairy.
Topping Ideas
Toppings make your smoothie bowl fun and tasty. You can use granola for crunch. Fresh fruit slices add color and flavor. Try chia seeds or hemp seeds for extra nutrition. Shredded coconut adds a nice touch, too. If you want something different, sprinkle nuts or seeds on top. Fresh mint leaves brighten up the dish and make it look pretty.
Storage Info
How to Store Leftovers
To store your coconut mango smoothie bowl, place it in an airtight container. This keeps the flavors fresh. You can store it in the fridge for up to two days. If you notice any separation, just stir it before eating. It’s best to enjoy it fresh, but if you have extras, this method works well.
Freezing Options
If you want to freeze your smoothie bowl, pour it into ice cube trays or freezer-safe containers. Freeze it for up to one month. When you are ready to eat, let it thaw in the fridge. After thawing, you can blend it again if it needs a smoother texture. This makes it easy to enjoy later!
Reheating Instructions
You do not need to heat the smoothie bowl. It tastes best cold. If you prefer a slightly warmer dish, you can let it sit at room temperature for a few minutes. This way, you can enjoy it just how you like it without losing its refreshing taste.
FAQs
Can I use fresh mango instead of frozen?
Yes, you can use fresh mango. It will taste great! However, you must add ice. This helps keep the bowl cold and thick. Fresh mango adds a nice flavor. Just chop it up and blend.
Is this smoothie bowl vegan-friendly?
The base of this smoothie bowl is vegan if you swap the Greek yogurt. Use dairy-free yogurt instead. You can also skip the honey or use maple syrup for sweetness. This way, you keep it plant-based and delicious.
What can I use instead of Greek yogurt?
You have several options to replace Greek yogurt. You can use dairy-free yogurt like coconut or almond yogurt. Silken tofu is another great choice, adding creaminess. You can also try blended banana for a similar texture. Each option keeps the bowl yummy and smooth.
This blog post covers all you need for a delicious smoothie bowl. We explored ingredients, tips, and variations to make it just right. You learned how to prepare ingredients, blend them, and assemble the bowl. We even shared ideas for storage and answered common questions.
Now, it’s your turn. Experiment with flavors and make this bowl your own. Enjoy the process and the tasty result

Coconut Mango Smoothie Bowl
Ingredients
- 1 cup frozen mango chunks
- 1 ripe banana
- 0.5 cup coconut milk
- 0.25 cup Greek yogurt
- 1 tablespoon honey or maple syrup
- 0.25 cup granola
- 2 tablespoons shredded coconut
- as needed slices fresh mango
- as needed leaves fresh mint
Instructions
- In a blender, combine the frozen mango chunks, ripe banana, coconut milk, and Greek yogurt.
- Blend on high speed until the mixture is smooth and creamy. If the mixture is too thick, add a little more coconut milk until desired consistency is reached.
- Taste the smoothie base and add honey or maple syrup for extra sweetness if desired; blend again to combine.
- Pour the smoothie into a bowl and level it off with the back of a spoon to create a smooth surface.
- Decorate the top of the smoothie bowl with granola, shredded coconut, fresh mango slices, and mint leaves to make it visually appealing.
- Enjoy your delicious coconut mango smoothie bowl immediately with a spoon!


![To make the perfect Pistachio Cream Iced Latte, you need just a few key ingredients. Each one adds to the rich and refreshing flavor of this drink. - 1 cup brewed espresso or strong coffee: Start with a good quality coffee for the best taste. - 1 cup milk (dairy or non-dairy, your choice): You can use whole, almond, oat, or soy milk. Each adds a unique flavor. - 2 tablespoons pistachio paste: This is the star of the drink. Look for high-quality paste made from roasted pistachios. - 2 teaspoons vanilla extract: This adds warmth and depth to the drink. - 1-2 tablespoons honey or maple syrup (to taste): Sweeten your latte to your liking. Honey adds a floral note, while maple syrup gives a rich flavor. - Ice cubes: Essential for making this drink cold and refreshing. - Whipped cream (for topping): Adds a creamy, indulgent finish. - Chopped pistachios (for garnish): These add a nice crunch and extra flavor on top. This list ensures you have everything you need for a delicious iced latte. You can find the full recipe to guide you through each step. 1. Brew your espresso or strong coffee. Let it cool for a few minutes. 2. In a small bowl, mix 2 tablespoons of pistachio paste, 2 teaspoons of vanilla extract, and 1-2 tablespoons of honey or maple syrup. Stir until smooth. 3. Fill a glass halfway with ice cubes. 1. Pour the cooled espresso over the ice in the glass. 2. Add 1 cup of milk to the espresso and stir gently. 3. Incorporate the pistachio mixture, mixing well so all flavors blend. 1. Top your iced latte with a generous swirl of whipped cream. 2. Garnish with chopped pistachios for a crunchy finish. 3. For a nice touch, serve in a clear glass to show off the layers. Follow this Full Recipe to create your perfect Pistachio Cream Iced Latte and enjoy every sip! Getting the right ingredient ratios is key for your Pistachio Cream Iced Latte. Use one cup of brewed espresso and one cup of milk. This balance creates the perfect drink. If you want it sweeter, adjust the honey or maple syrup. Start with one tablespoon, then taste and add more if you like. You can prepare this iced latte in advance. Brew your espresso and let it cool. Mix the pistachio paste with vanilla and sweetener. Store this mix in the fridge for up to three days. Keep the milk and whipped cream separate until you are ready to serve. This way, your drink stays fresh and tasty. You can make your latte even better by adding flavors. Try almond or coconut milk for a twist. A pinch of cinnamon or nutmeg can bring warmth to the drink. You can also mix in flavored syrups like caramel or chocolate. Don't be afraid to experiment and find your favorite taste! {{image_2}} If you want a dairy-free iced latte, try using almond milk, oat milk, or coconut milk. Each of these options gives a unique flavor. Almond milk is light and nutty. Oat milk adds creaminess, while coconut milk brings a tropical twist. When using these alternatives, taste your drink. You might need to adjust the flavor balance. Non-dairy milks can be sweeter, so reduce the sweetener if needed. For a healthier option, use natural sweeteners like agave syrup or stevia. Both provide sweetness without added sugars. If you prefer a sugar-free drink, stevia is a great choice. Just remember, it's much sweeter than sugar. Start with a small amount and add more to taste. Adjusting your sweetness helps you enjoy your iced latte without guilt. Want to mix things up? Add chocolate or mocha notes for a richer taste. Simply stir in some cocoa powder or use chocolate syrup. You can also incorporate seasonal ingredients like pumpkin spice in the fall. This spice adds warmth and comfort. Feel free to explore different flavors. Each time you make this drink, you can create a new experience! For the full recipe, check the main article. To store your unused iced latte, pour it into a sealable container. Keep it in the fridge for up to two days. The milk can spoil quickly, so check for freshness before drinking. If you have leftover components like espresso or pistachio paste, store them separately. Brewed espresso lasts about three days in the fridge. Pistachio paste can stay fresh for a week if sealed tightly. If you want to refresh a previously made iced latte, try adding more ice or milk. This helps cool it down and revives its flavor. You can also blend it for a frosty drink. Discard leftovers if they sit in the fridge for more than two days. Always trust your senses; if it smells or tastes off, it's best to throw it away. To keep your pistachio paste fresh, seal it in an airtight container. Store it in a cool, dark place, like your pantry or the fridge. This way, it can last for about two weeks. For brewed coffee, keep it in a closed container in the fridge. It will last up to three days. Always remember, fresh ingredients lead to a better-tasting pistachio cream iced latte. For the full recipe and serving instructions, check out the [Full Recipe]. A Pistachio Cream Iced Latte is a delicious drink. It blends rich espresso, creamy milk, and sweet pistachio paste. This drink is cold and refreshing, perfect for warm days. The flavor is nutty and slightly sweet, with a hint of vanilla. The whipped cream on top adds a nice touch. You can enjoy this treat at home or in cafés. You can find a Pistachio Cream Iced Latte at many local cafes. Major chains may also offer this special drink. To order online, check popular coffee delivery apps. Many cafes list their drinks on their websites. You might discover new places that serve this tasty iced latte! Pistachios are packed with nutrients. They are high in protein and healthy fats. They provide fiber, vitamins, and minerals too. Eating pistachios can help lower cholesterol. They may also support heart health and weight management. Adding pistachios to your diet is a smart choice! This blog post covered everything you need to make a Pistachio Cream Iced Latte. We discussed ingredients, preparation steps, and tasty variations. You can customize this drink to fit your taste. Remember the tips for better storage and measuring. Krafting this coffee treat is easy, fun, and satisfying. Enjoy making your own iced lattes at home, and feel free to experiment. You’ll impress friends and family with your skills and flavor choices.](https://dailydishly.com/wp-content/uploads/2025/06/47671c70-a03d-466a-91fa-e600a5572696-768x768.webp)

![- 2 cups fresh strawberries, hulled and sliced - 1 ripe mango, peeled and diced Fresh fruits are the heart of this drink. The strawberries bring a sweet and tangy flavor. The ripe mango adds a rich creaminess. When choosing strawberries, look for bright red ones. They should feel firm and smell sweet. For mango, pick one that gives slightly when pressed. This means it's ripe and ready to eat. - 4 cups cold water - 2 tablespoons lime juice (freshly squeezed) - 2-3 tablespoons honey or agave syrup (adjust to taste) Water is key for making this drink refreshing. Cold water helps balance the sweetness of the fruits. The lime juice adds a splash of tartness. This brightens the flavors and makes it more exciting. Honey or agave syrup sweetens the drink. You can adjust the sweetness to your liking. Start with a little, then add more if needed. - Fresh mint leaves - Ice cubes Garnishes make your drink look pretty and taste better. Fresh mint leaves add a nice fragrance. They also give a cool touch to each sip. Ice cubes keep your drink chilled and refreshing. You can add them to the glass before pouring the agua fresca. For the full recipe, check out the [Full Recipe]. To start, you need to hull and slice the strawberries. Grab a sharp knife and cut off the green tops. Then, slice the strawberries into small pieces. This helps them blend better. Next, peel and dice the mango. Use a peeler to remove the skin. Cut around the large pit in the center. Dice the mango into small cubes. This will add a nice texture to your drink. Now, it’s time to blend the fruits. In a blender, combine the sliced strawberries and diced mango. Add 1 cup of cold water. Blend until smooth. The fruit should look like a thick puree. Next, strain the mixture. Use a fine mesh sieve placed over a large pitcher. Pour the blended fruit through the sieve. Press it down gently with a spatula. This removes any pulp and seeds, leaving you with a smooth drink. Now, let’s mix in the remaining ingredients. Add the other 3 cups of cold water to the pitcher. Stir in 2 tablespoons of lime juice and 2-3 tablespoons of honey or agave syrup. Taste it and adjust the sweetness to your liking. Mix the agua fresca well until all ingredients are combined. For serving, fill glasses with ice cubes. Pour the chilled drink over the ice. Garnish with fresh mint leaves for a refreshing touch. Enjoy this Strawberry Mango Agua Fresca as a perfect summer treat! For a complete guide, check out the Full Recipe. To make your Strawberry Mango Agua Fresca extra tasty, adjust the sweetness. You can use honey or agave syrup. Start with 2 tablespoons and taste it. If you want it sweeter, add more a little at a time. Choosing a ripe mango is key for the best flavor. Look for a mango that feels slightly soft when you press it. It should smell sweet near the stem. This will make your drink delicious and fresh. For the best look, use tall glasses. Clear glass shows off the bright colors of the drink. You can also use mason jars for a fun vibe. Pair your agua fresca with snacks or meals. It goes well with tacos, chips, or fresh fruit. This drink is perfect for summer gatherings or BBQs. It adds a refreshing touch to any meal. For the full recipe, check the [Full Recipe]. {{image_2}} You can make strawberry mango agua fresca even more exciting. Try adding other fruits. Pineapple adds a nice tropical twist. Watermelon brings a refreshing taste. Both fruits blend well with strawberries and mangoes. Herbs can also enhance flavor. Fresh basil adds a sweet, aromatic touch. Rosemary gives a unique, earthy note. Just add a few leaves when blending. Taste the mix and enjoy the new flavors. Sweetness is key to a great agua fresca. You can use sugar substitutes if needed. Try stevia or monk fruit for a healthier choice. These options let you cut calories without losing taste. If you want it less sweet, simply reduce honey or agave syrup. Start with just one tablespoon and taste. You can always add more if needed. For a sugar-free drink, skip sweeteners altogether. The natural fruit flavors shine through without them. For the full recipe, check out the instructions above. To keep your Strawberry Mango Agua Fresca fresh, store it in a pitcher with a lid. This helps to keep the flavors strong. If you have leftovers, it will last about 3 days in the refrigerator. Always give it a stir before serving again. The flavors may settle a bit. If you want to enjoy this drink later, you can freeze it. Pour the agua fresca into ice cube trays or freezer-safe bags. It is best to use the frozen cubes in smoothies. Just blend them with yogurt or more fruits for a refreshing treat. When you’re ready to drink, thaw the agua fresca overnight in the fridge. This way, you keep the taste fresh and lovely. For the full recipe, check out the details above! Yes, Strawberry Mango Agua Fresca is healthy. Each ingredient offers great benefits. - Strawberries are low in calories and high in vitamin C. They boost your immune system and keep your skin healthy. - Mangoes are rich in vitamins A and C. They help with digestion and improve eye health. - Lime juice adds vitamin C and helps in detoxifying the body. - Honey or agave syrup can provide energy and is often better than white sugar. This drink gives you a refreshing way to hydrate while enjoying these health benefits. Yes, you can use frozen fruits to make this drink. Frozen fruits save time and can be very handy. - Texture: Using frozen fruits may change the drink's texture. It can turn out thicker and creamier. - Flavor: The flavor may taste less fresh than using fresh fruits. However, it's still delicious and refreshing. If you want to use frozen fruits, just make sure to blend them well for a smooth drink. You can easily adjust the sweetness of your Strawberry Mango Agua Fresca. - Less honey or agave: Start with less sweetener. You can always add more if needed. - Add more lime juice: This enhances the flavor without adding sweetness. - Dilute with water: Mixing in more cold water can help tone down the sweetness, making it lighter. These tips will help you enjoy a balanced, refreshing drink just the way you like it! For the complete recipe, check the [Full Recipe]. In this article, we explored how to make Strawberry Mango Agua Fresca. We covered fresh fruits, liquid choices, and optional garnishes. I shared step-by-step instructions for preparing, blending, and serving the drink. You found tips for enhancing flavors and storing leftovers. Agua Fresca is not just tasty; it's a healthy choice too. Feel free to adjust sweetness to your liking. Whether you enjoy it as is or try different fruits, this drink is sure to refresh you. Enjoy your blends and the creativity they bring!](https://dailydishly.com/wp-content/uploads/2025/06/ebf6c9e8-bad3-4eed-abde-8934322eebd3-768x768.webp)