Craving a sweet treat that bursts with flavor? Discover the joy of making Cranberry Orange Shortbread Thumbprint Cookies! These cookies are a perfect blend of tart cranberries and zesty orange, making them a delightful addition to your baking repertoire. In this guide, I’ll walk you through each step, from gathering your ingredients to perfecting the baking process. Get ready to impress your friends and family with these simple yet tasty cookies!
Ingredients
Key Ingredients for Cranberry Orange Thumbprint Cookies
For these tasty cookies, gather these key items:
– 1 cup unsalted butter, softened
– 3/4 cup powdered sugar
– 2 cups all-purpose flour
– 1/4 teaspoon salt
– Zest of 1 orange
– 1 teaspoon vanilla extract
– 1 cup dried cranberries, chopped
– 1/2 cup orange marmalade
These ingredients blend to create a rich, buttery cookie. The orange zest adds a bright flavor. Dried cranberries bring a sweet and tart note, while orange marmalade fills the center with a fruity burst.
Optional Ingredients for Enhanced Flavor
To boost the taste, consider adding:
– 1/4 teaspoon ground cinnamon
Cinnamon gives a warm, cozy flavor. If you enjoy spices, this is a great choice. It pairs well with the orange and cranberry.
Equipment Needed for Baking
For baking these cookies, you’ll need:
– Mixing bowls
– Electric mixer or whisk
– Baking sheet
– Parchment paper
– Measuring cups and spoons
Having these tools ready helps the baking process go smoothly. The parchment paper makes for easy cleanup and helps the cookies bake evenly.
Step-by-Step Instructions
Preparing the Cookie Dough
Start by preheating your oven to 350°F (175°C). Line a baking sheet with parchment paper. In a large bowl, mix softened butter and powdered sugar. Beat them together until they look light and fluffy, about three to four minutes. Next, add the zest of one orange and vanilla extract. Stir until everything blends well.
In another bowl, whisk together two cups of flour, salt, and cinnamon if you choose to use it. Gradually add this dry mix into the butter mixture. Mix until just combined. Finally, fold in the chopped dried cranberries. This adds a nice burst of flavor to your dough.
Forming and Filling the Thumbprint Cookies
Now it’s time to shape the cookies. Take about a tablespoon of dough and roll it into a ball. Place this ball onto your prepared baking sheet, making sure to leave some space between each cookie. Using your thumb or the back of a teaspoon, press down gently in the center of each ball. This creates a small indentation for the filling.
Fill each thumbprint with about half a teaspoon of orange marmalade. This gives the cookies a sweet and tangy flavor that pairs perfectly with the cranberries.
Baking and Cooling Process
Bake your cookies in the preheated oven for 12 to 14 minutes. Look for slightly golden edges to know they are ready. Once done, remove the cookies from the oven. Let them cool on the baking sheet for a few minutes. After that, transfer them to a wire rack to cool completely. This cooling step is important, as it helps the cookies hold their shape and texture. Enjoy the sweet aroma filling your kitchen!
Tips & Tricks
Common Mistakes to Avoid
When baking Cranberry Orange Shortbread Thumbprint Cookies, be careful not to over-mix the dough. Over-mixing makes cookies tough and chewy. Also, don’t skip the chilling step. Chilling helps the cookies keep their shape. Lastly, use fresh ingredients. Old butter or flour can ruin the taste.
How to Achieve the Perfect Texture
For a soft and tender cookie, make sure your butter is softened, but not melted. Cream the butter and powdered sugar until light and fluffy. This step adds air and makes the cookies soft. When adding the flour, mix until just combined. This helps keep your cookies from being too dense.
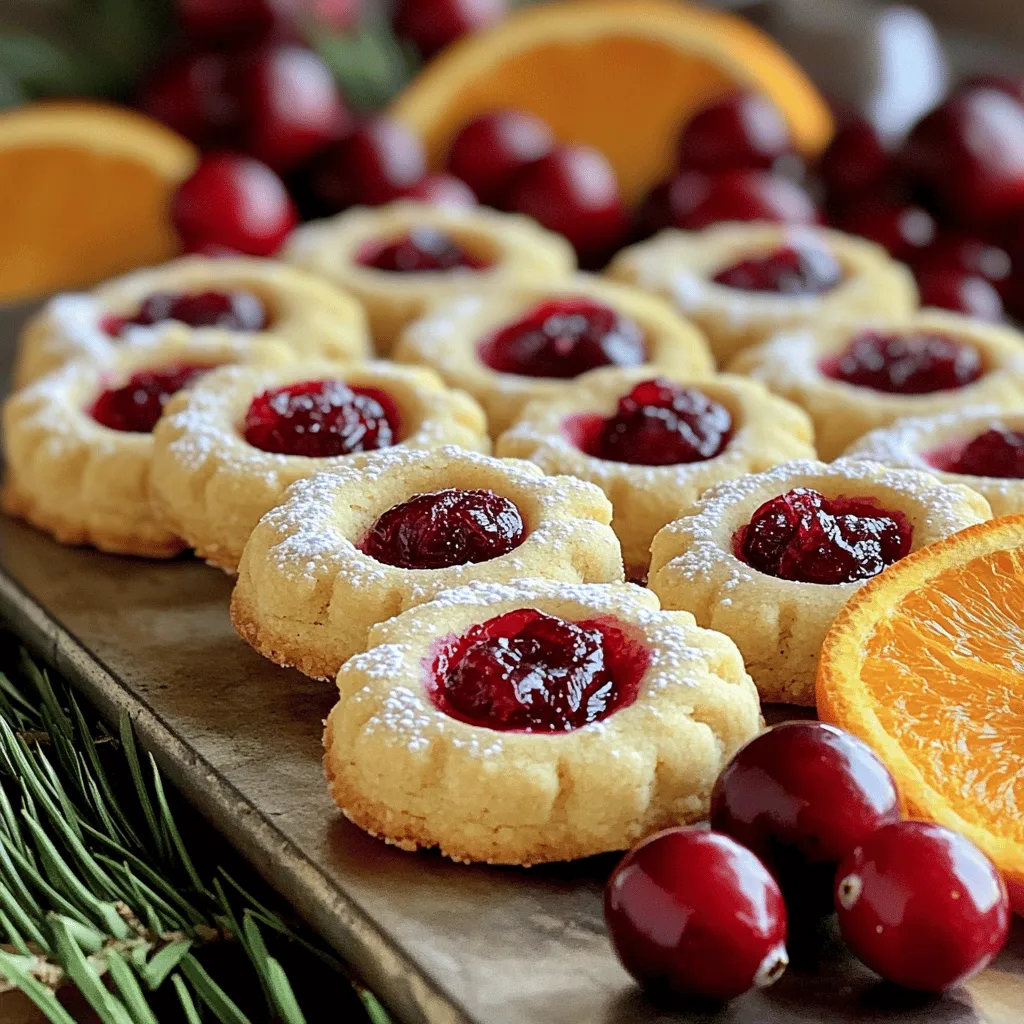
Serving Suggestions and Presentation Tips
To make your cookies shine, dust them with extra powdered sugar before serving. Place them on a pretty platter. Add fresh cranberries and orange slices for color and fun. This makes your cookies look festive and inviting. Think about pairing them with tea or coffee for a delightful treat.

Variations
Substitutions for Dietary Restrictions
If you have dietary needs, you can still enjoy these cookies. For a dairy-free option, use a plant-based butter. Coconut oil works well too. If you’re avoiding gluten, swap the all-purpose flour for a gluten-free blend. Make sure it contains xanthan gum for better texture. For those with a sugar restriction, you can use a sugar substitute like erythritol. Just keep in mind that the taste and texture may change a bit.
Flavor Variations and Add-Ins
These cookies are fun to play with! You can add different flavors for a twist. Try adding lemon zest for a brighter taste. You could also fold in some chopped nuts, like walnuts or pecans, for crunch. If you love chocolate, drizzle melted dark chocolate over the cooled cookies. Use white chocolate chips, or even a mix of both, to add a sweet surprise.
Seasonal Twist Ideas
Change up the flavors to match the seasons! In fall, you can add pumpkin spice to the dough. Just mix in a teaspoon of pumpkin spice when you add the dry ingredients. For winter, consider adding a hint of peppermint extract for a fresh taste. In the summer, fresh berries, like blueberries or raspberries, could make a tasty filling. Just mash them slightly before adding them to the cookie dough.
Storage Info
Best Practices for Storing Cookies
To keep your Cranberry Orange Shortbread Thumbprint Cookies fresh, store them in an airtight container. Use parchment paper between layers to prevent sticking. Keep them at room temperature for up to one week. If you want to keep them longer, refrigerating can help. Just be sure to seal them well to avoid drying out.
Freezing Instructions for Long-Term Storage
Freezing these cookies is easy and a great way to save them. First, let the cookies cool completely. Then, arrange them in a single layer on a baking sheet. Place them in the freezer for about an hour. This step prevents sticking. Once frozen, transfer the cookies to a freezer-safe bag. They can last for up to three months in the freezer.
How to Refresh Cookies After Storing
If your cookies lose some texture after storage, there’s a simple fix. Preheat your oven to 300°F (150°C). Place the cookies on a baking sheet for about 5 to 10 minutes. This warming will bring back their softness. Let them cool before serving again. Enjoy the fresh-baked taste!
FAQs
Can I use fresh cranberries instead of dried?
Yes, you can use fresh cranberries. However, fresh cranberries are tart. This can change the taste of your cookies. If using fresh, chop them and add a bit more sugar. This will help balance the tartness. Dried cranberries add sweetness and are softer. They work best in this recipe.
How do I make these cookies gluten-free?
To make these cookies gluten-free, swap all-purpose flour with gluten-free flour. Use a blend that works well for baking. You can also use almond flour or coconut flour. Just adjust the amount because these flours absorb moisture differently. Check the package for guidance on measurements.
What is the best way to store leftover cookies?
Store leftover cookies in an airtight container. Keep them at room temperature for up to a week. If you want them to last longer, freeze them. Place the cookies in a freezer-safe bag. They can stay fresh for up to three months. When you want to eat them, thaw at room temperature.
This article covered everything you need for delicious cranberry orange thumbprint cookies. We talked about key and optional ingredients, essential equipment, and followed step-by-step instructions. I provided tips to avoid mistakes and shared variations for your needs. Plus, I offered smart storage tricks to keep cookies fresh.
Baking can be fun and rewarding. Enjoy making these treats and share them with friends. Happy baking!


