Creamy Greek Yogurt Ranch Dip Zesty and Easy Recipe

Are you looking for a zesty dip that’s both creamy and easy to whip up? You’re in the right place! My Creamy Greek Yogurt Ranch Dip takes just a few simple ingredients and turns them into a tasty treat. Perfect for snacking or parties, it pairs wonderfully with fresh veggies. Let’s dive into this simple recipe that adds a healthy twist to your favorite ranch dip!
Ingredients
Main Ingredients
– 1 cup plain Greek yogurt
– 1/4 cup mayonnaise
– 1 tablespoon lemon juice
– 1 teaspoon garlic powder
– 1 teaspoon onion powder
Herbs and Seasonings
– 1 teaspoon dried dill
– 1 teaspoon dried parsley
– 1/2 teaspoon salt
– 1/4 teaspoon black pepper
– 1/4 teaspoon smoked paprika
Serving Suggestions
– Fresh vegetables for dipping such as carrots, celery, bell peppers, and cucumber
To make this creamy Greek yogurt ranch dip, gather your main ingredients first. I love using plain Greek yogurt because it gives a great texture and tang. The mayo adds that rich creaminess. Lemon juice gives a nice kick, and garlic and onion powders bring depth to the flavor.
Next, we add our herbs and seasonings. Dried dill and parsley provide freshness without being overpowering. The salt enhances all the flavors, while black pepper and smoked paprika add a bit of warmth and smokiness.
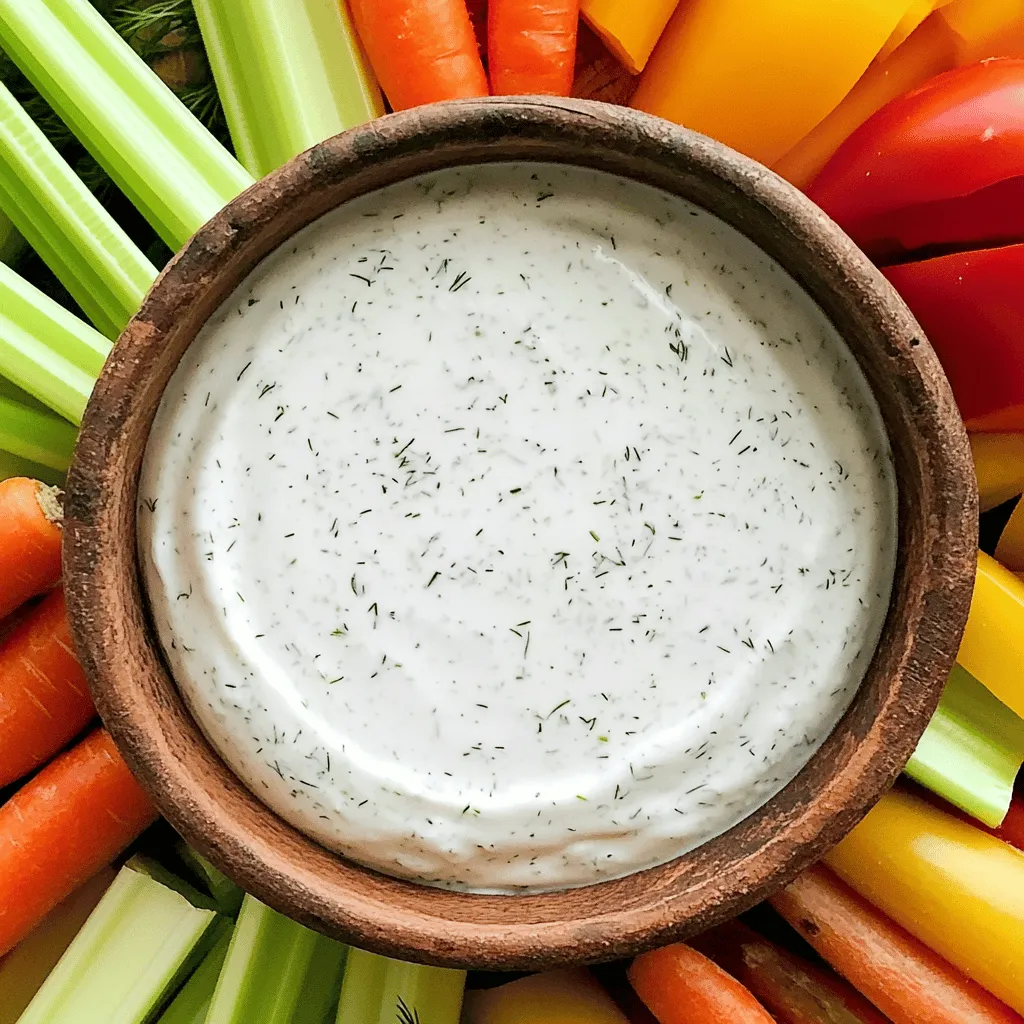
You can serve this dip with fresh veggies. Carrots, celery, bell peppers, and cucumbers are perfect choices. They add crunch and freshness.
Step-by-Step Instructions
Preparing the Base
To start, grab a mixing bowl. You will combine one cup of plain Greek yogurt with a quarter cup of mayonnaise. Use a whisk to mix until it is smooth. This base gives your dip a creamy texture.
Mixing in Seasonings
Next, it’s time to add some flavor! Pour in one tablespoon of lemon juice. Then, add one teaspoon each of garlic powder and onion powder. Sprinkle in one teaspoon of dried dill and one teaspoon of dried parsley. Don’t forget to add half a teaspoon of salt, a quarter teaspoon of black pepper, and a quarter teaspoon of smoked paprika.
Finalizing the Dip
Whisk all the ingredients together until everything is creamy and well combined. Taste your dip and adjust the seasoning if you want more flavor. Cover it with plastic wrap or put it in an airtight container. Let it chill in the fridge for at least 30 minutes. This helps the flavors blend nicely. When it’s ready, serve it with fresh-cut veggies for a dip that is zesty and delicious.
Tips & Tricks
Ensuring Creamy Texture
To get the right creamy texture, start with high-quality Greek yogurt. Using full-fat yogurt gives the dip a rich taste. Combine it with mayonnaise for extra creaminess. Mix them well in a bowl until smooth. If your dip seems too thick, add a little more lemon juice or a splash of water. This helps to reach the perfect consistency.
Flavor Enhancements
You can easily adjust the flavors in your dip. If you want it tangier, add more lemon juice. For a stronger taste, increase the garlic powder or onion powder. Fresh herbs can also boost flavor. Try adding chopped chives or cilantro for a fresh twist. Always taste the dip as you mix. This way, you can make it just right for your liking.
Presentation Ideas
Serving matters as much as taste. Use a colorful platter to display fresh veggies. Carrots, celery, and bell peppers look great. You can arrange them in a circle around a bowl of dip. For a fun touch, serve with pita chips or crackers too. Adding some sprigs of fresh herbs on top makes it look fancy. Remember, we eat with our eyes first!

Variations
Spice it Up
Want some heat in your dip? You can add sriracha or red pepper flakes. Start with a small amount. One teaspoon of sriracha gives a nice kick. If you prefer flakes, sprinkle in 1/4 teaspoon. Mix it well and taste. You can always add more if you like it hotter. This twist makes the dip exciting and bold.
Herb Substitutions
Using fresh herbs can change the flavor profile. Try fresh dill or parsley instead of dried. Use about three times the amount of fresh herbs. For example, use one tablespoon of fresh dill for one teaspoon dried. Chop them finely and mix them in. Fresh herbs bring a bright taste and aroma. They add a nice touch to your dip.
Alternative Base
If you want to change the base, sour cream works great. It gives a tangy flavor and creamy texture. You can even mix half Greek yogurt and half sour cream. This combo keeps it light but rich. Other dairy options like buttermilk also work well. Experiment with what you have on hand. Each base brings a different taste to the dip.
Storage Info
Optimal Storage Methods
To keep your creamy Greek yogurt ranch dip fresh, always use an airtight container. This helps stop air from getting in and keeps the dip tasty. If you don’t have a container, cover the bowl tightly with plastic wrap. Make sure the dip is cool before you store it. This helps keep the texture smooth and creamy.
Shelf Life
You can store this dip in the fridge for up to five days. Keep an eye on the smell and look. If it starts to change, it’s best to toss it. The flavors will blend nicely if you let it sit for a bit before serving after storage.
Freezing Tips
I do not recommend freezing this dip. Freezing can change the texture of the yogurt. It may become grainy when you thaw it. If you want to save some for later, consider making a smaller batch. This way, you can enjoy it fresh without worrying about freezing. If you still want to freeze it, pour it into a freezer-safe container. Leave some space at the top for expansion, then thaw it in the fridge before use.
FAQs
Can I skip the mayonnaise?
Yes, you can skip the mayonnaise. If you want a healthier dip, try using more Greek yogurt. You can also add a bit of olive oil for creaminess. This keeps the taste rich while cutting some fat.
What can I use instead of Greek yogurt?
If you don’t have Greek yogurt, use regular yogurt. It will change the texture slightly but still taste great. Non-dairy yogurt works too. Just make sure it’s plain to keep the ranch flavor.
How can I use this dip apart from a veggie dip?
You can use this dip in many fun ways! Spread it on sandwiches or wraps for added flavor. It’s also great as a topping for baked potatoes. You can even serve it with chips or crackers for a tasty snack.
This blog post shared a simple and tasty dip recipe. You learned the main ingredients, how to mix them, and tips for the perfect texture. I offered variations to spice things up and explained storage methods for freshness.
In the end, this dip adds fun to snacks and meals. You can easily adapt it to your taste. Enjoy making your own creamy dip!


![- 8 oz fusilli or rotini pasta - 1 cup cherry tomatoes, halved - 1 cup cucumber, diced - 1/2 cup red bell pepper, diced - 1/4 cup red onion, finely chopped - 1/2 cup Kalamata olives, pitted and sliced - 1/3 cup fresh basil leaves, torn - 1/4 cup crumbled feta cheese (optional) - 1/4 cup olive oil - 3 tablespoons fresh lemon juice - 1 teaspoon lemon zest - 1 teaspoon honey or maple syrup - Salt and pepper to taste In this Lemon Basil Pasta Salad, I use fresh and vibrant ingredients. The pasta holds the flavors well. I like using fusilli or rotini because they catch the dressing and veggies nicely. Cherry tomatoes add a pop of color and sweetness. They brighten the salad. Cucumbers bring a cool crunch. Red bell pepper adds sweetness and color too. The red onion gives a nice bite, while Kalamata olives add a salty touch. Fresh basil is the star here. Its aroma and flavor are amazing. I often tear the leaves to release their oils. If you want, you can add crumbled feta cheese for a creamy texture. For the dressing, I mix olive oil, fresh lemon juice, lemon zest, and honey or maple syrup. This blend makes the salad bright and zesty. I also add salt and pepper to balance the flavors. Remember, you can find the full recipe at the end of the article. This salad is not just tasty; it looks great too. It’s perfect for gatherings or a simple meal at home! Start by bringing a large pot of salted water to a boil. Use about 1 tablespoon of salt for every 4 quarts of water. Add the pasta once the water is boiling. Cook it according to the package instructions until it is al dente. This usually takes about 8 to 10 minutes. After it cooks, drain the pasta and rinse it under cold water. This helps cool it down quickly, so it won’t cook anymore. While the pasta cooks, chop your vegetables. Use a sharp knife for clean cuts. I like to slice the cherry tomatoes in half and dice the cucumber and bell pepper into small pieces. Finely chop the red onion to add a nice bite. In a large mixing bowl, combine the chopped cherry tomatoes, cucumber, red bell pepper, red onion, and Kalamata olives. This mix brings bright colors and flavors to your salad. In a small bowl, whisk together the olive oil, lemon juice, and lemon zest. Add honey or maple syrup for a touch of sweetness. A pinch of salt and pepper helps balance the flavors. Whisk until all the ingredients blend well. This dressing should be bright and tangy, perfect for your salad. Now, it’s time to mix everything. Add the cooled pasta to the vegetable bowl. Pour the dressing over the pasta and vegetables. Gently toss everything together so that the pasta and veggies are evenly coated. This ensures every bite is full of flavor. Lastly, fold in the torn basil leaves and crumbled feta cheese if you choose to include it. Cover the salad with plastic wrap and place it in the fridge. Let it chill for at least 30 minutes. This waiting time allows the flavors to meld together nicely. For covering, you can also use a large bowl with a lid. Chilling the salad enhances its taste and makes it refreshing when served. For the full recipe, check out the details above. Enjoy your Lemon Basil Pasta Salad! To get the best taste, store the pasta until you’re ready to mix. This keeps it from getting soggy. Rinse the pasta in cold water after cooking. This cools it down and stops the cooking. Adjusting seasoning is key. Always taste your salad before serving. If it needs more flavor, add salt, pepper, or lemon juice. A little extra lemon juice can brighten everything up. For a wow factor, garnish your salad with more fresh basil leaves. Thin lemon slices also add a nice touch. Serve the salad in a big, colorful bowl to catch the eye. Individual plates work well, too, for a personal touch. Pre-preparing ingredients can save time. Chop your veggies the day before. This makes cooking day easier. You can also make the dressing ahead of time. Store it in the fridge until you're ready to mix everything. For quick dressing options, try a simple mix of olive oil and lemon juice. This adds flavor fast and keeps it healthy. You can find the full recipe for Lemon Basil Pasta Salad [Full Recipe]. {{image_2}} You can change the vegetables in your Lemon Basil Pasta Salad. Consider using: - Zucchini, diced small - Spinach, chopped - Broccoli florets, blanched These swaps keep the dish fresh and exciting. You can also try different pasta shapes like: - Penne - Farfalle - Whole wheat pasta These changes can enhance the taste and texture of your salad. To make the salad more filling, add some proteins. Great options include: - Grilled chicken, diced - Shrimp, cooked and peeled - Chickpeas, drained and rinsed If you prefer vegetarian options, try: - Black beans - Edamame - Tofu, cubed and sautéed These additions make the dish heartier while keeping it flavorful. You can play with the dressing to fit your taste. For citrus variations, consider: - Lime juice instead of lemon - Orange juice for a sweet twist If you want a creamy dressing, try: - Greek yogurt mixed with lemon juice - A creamy vinaigrette made with tahini These alternatives can add new layers of flavor to your Lemon Basil Pasta Salad. For the full recipe, check out the detailed instructions above. Enjoy your cooking! To keep Lemon Basil Pasta Salad fresh, store it in an airtight container. This helps prevent drying out. Place the salad in the fridge right after serving. It will stay good for about 3 to 5 days. Keep an eye on the vegetables. If they start to look mushy, it's time to toss them. Yes, you can freeze this salad, but it's best to leave out the fresh herbs and cheese. These ingredients do not freeze well. If you want to freeze it, do so in a freezer-safe container. This way, you can enjoy it later. When you're ready to eat, thaw it in the fridge overnight. This keeps the flavors intact. When you reheat the salad, avoid using the microwave. This can make the pasta too mushy. Instead, let it come to room temperature on its own. You can also serve it cold straight from the fridge. If you want it warm, mix it with a little olive oil in a pan over low heat. This will keep the flavors bright and fresh. You can prepare this salad a day in advance. Store it in an airtight container. Keep it in the fridge. This way, the flavors blend well. When ready to serve, give it a quick toss. If it seems dry, add a bit more olive oil or lemon juice. This pasta salad pairs well with grilled chicken or fish. It also goes great with fresh bread or a side of fruit. You can serve it at picnics or barbecues. It makes a perfect light lunch or dinner. Yes, you can make it your own! Add your favorite veggies or proteins. Try roasted peppers or artichokes for extra flavor. You can even swap the feta for goat cheese. Make it suit your taste! Yes, you can make this salad gluten-free. Use gluten-free pasta like rice or quinoa pasta. These options work well. They will keep the dish delicious and light. The salad lasts about 3 days in the fridge. Store it in a tight container. The flavors will stay fresh, but the veggies may soften. Enjoy it within this time for the best taste. You can find the Full Recipe for more details. This blog post covers how to make a tasty Lemon Basil Pasta Salad. We discussed the best ingredients, how to prepare them, and smart tips for a perfect dish. With simple steps and easy variations, you can customize it to fit your taste. Remember, letting the salad chill enhances its flavor. Enjoy this dish at your next gathering! It’s fresh, easy, and packed with flavor, making it a hit for everyone. Dive in and experiment using your favorite ingredients!](https://dailydishly.com/wp-content/uploads/2025/07/2e0c17ed-3df4-4b24-b113-5392c2bd150f-768x768.webp)


