Creamy Mushroom Risotto Delightfully Rich Dish

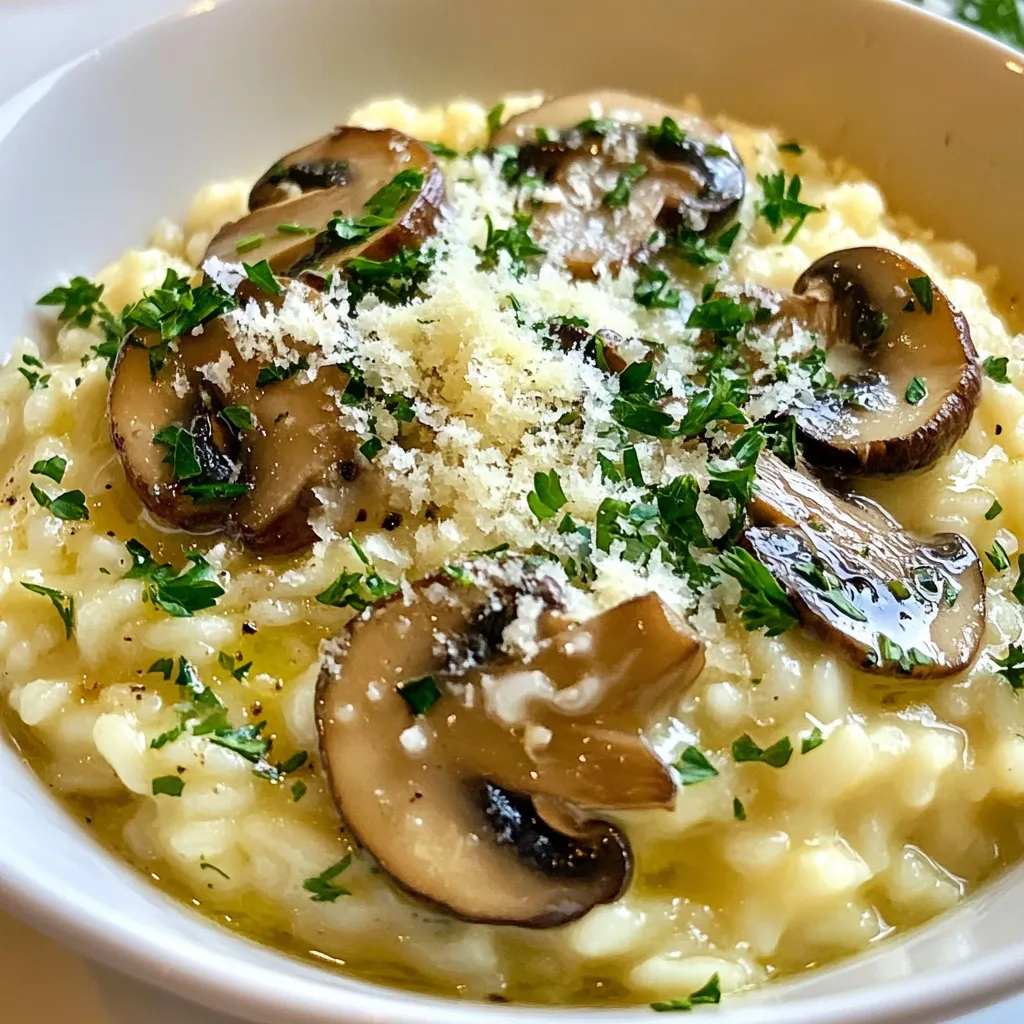
If you crave comfort food, creamy mushroom risotto is a must-try dish. This delightfully rich fare combines creamy textures with earthy mushroom flavors. In this post, I will guide you through every step, from choosing the perfect ingredients to serving suggestions. Whether you’re a beginner or a pro, you’ll create a dish that impresses. Let’s dive into the creamy goodness that will warm your soul!
Why I Love This Recipe
- Rich and Creamy Flavor: This risotto is indulgent with its creamy texture, enhanced by heavy cream and parmesan cheese, making each bite a comforting experience.
- Versatile Ingredients: You can easily switch up the mushrooms or add vegetables, allowing for endless variations to suit your taste preferences.
- Simple Cooking Technique: The process of slowly adding broth and stirring makes it a meditative cooking experience, perfect for those who enjoy hands-on meal preparation.
- Impressive Presentation: Served in shallow bowls and garnished with parsley and parmesan, this dish looks as good as it tastes, making it perfect for entertaining.
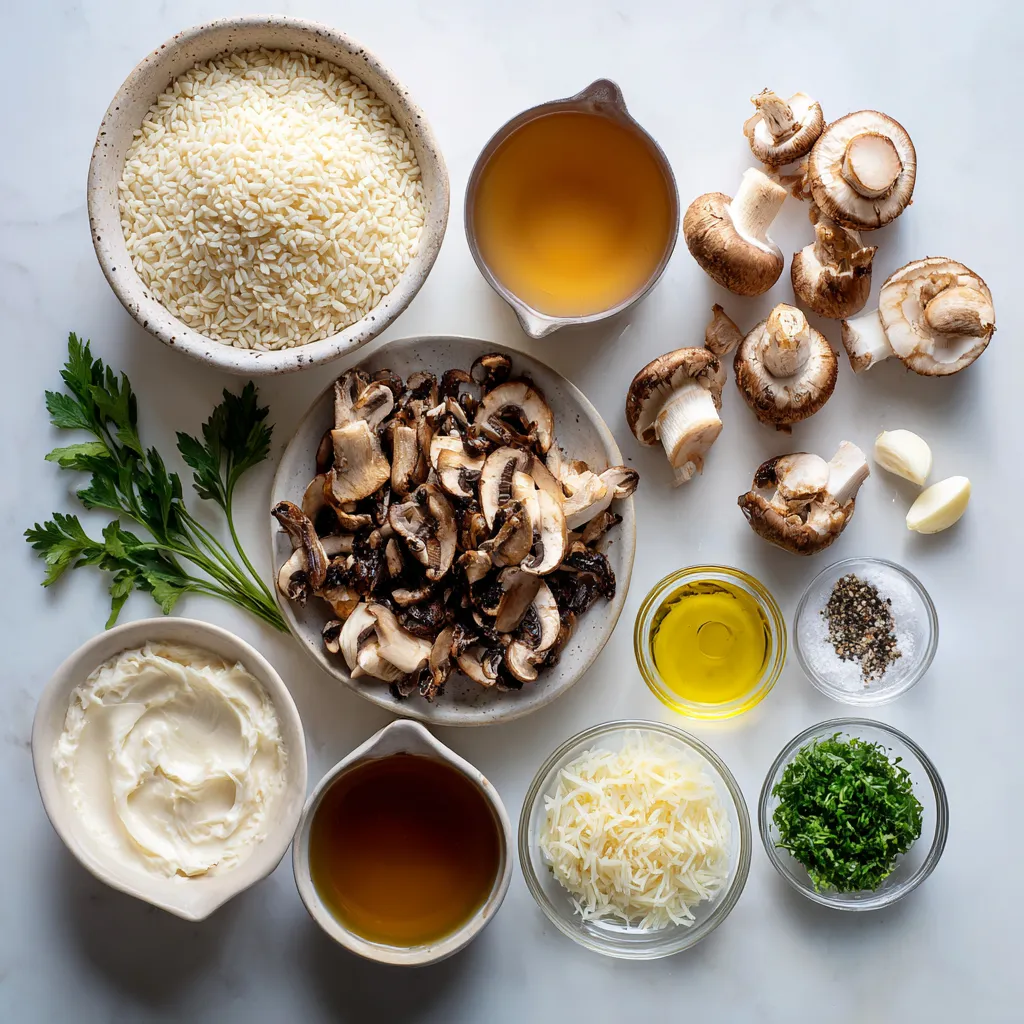
Ingredients
Main Ingredients
– 1 cup Arborio rice
– 1 cup mixed mushrooms (shiitake, cremini, and button), sliced
– 1/2 cup fresh parmesan cheese, grated
Additional Ingredients
– 4 cups vegetable broth (plus extra if needed)
– 1/4 cup heavy cream
– 2 tablespoons olive oil
Seasoning & Garnish
– 1 small onion, finely chopped
– 2 cloves garlic, minced
– Salt and pepper to taste
– Fresh parsley, chopped for garnish
The main ingredients in this creamy mushroom risotto are essential for a rich flavor. Arborio rice gives the dish its creamy texture. It has a high starch content that releases when you cook it. The mixed mushrooms add depth with their unique tastes. I love using shiitake, cremini, and button mushrooms together.
The additional ingredients are just as important. Vegetable broth is the base for your risotto. It infuses the rice with flavor. Heavy cream adds a luxurious touch. Olive oil helps sauté the aromatics and adds richness.
For seasoning and garnish, onion and garlic bring out the flavors. Salt and pepper enhance the taste. Fresh parsley adds a pop of color and freshness. These ingredients create a delightful dish that you will want to make again and again!

Step-by-Step Instructions
Prepping the Broth
First, heat the vegetable broth in a saucepan over medium heat. You want it warm but not boiling. Keeping the broth warm helps the rice cook evenly.
Sautéing the Aromatics
In a large skillet, heat two tablespoons of olive oil over medium heat. Add one finely chopped onion. Cook until it turns translucent, about three to four minutes. Then, stir in two minced garlic cloves and cook for one more minute. This step fills the dish with a nice aroma.
Cooking the Mushrooms
Next, add one cup of sliced mixed mushrooms, which can include shiitake, cremini, and button. Sauté the mushrooms until they are tender and golden, about five minutes. Season with salt and pepper to enhance their flavor.
Preparing the Risotto
Once the mushrooms are cooked, add one cup of Arborio rice to the skillet. Stir for about two minutes. This toasting step helps the rice absorb the flavors. Now, begin adding the warm broth, one ladle at a time. Stir often and wait until most of the liquid is absorbed before adding more. Continue this for about 18 to 20 minutes. The rice should be al dente and creamy by the end.
Finishing Touches
When the rice is at the right consistency, remove the skillet from the heat. Stir in a quarter cup of heavy cream and half a cup of grated parmesan cheese. Adjust the seasoning with salt and pepper if needed. Let your risotto rest for a couple of minutes before serving.
Tips & Tricks
Cooking Tips
To get the perfect risotto, focus on the rice. Use Arborio rice for its creamy texture. When you add broth, do it slowly. Add one ladle at a time. Wait for the rice to soak up the liquid before adding more. Stir often to help the rice release its starches. This gives risotto its creamy feel.
Serving Suggestions
For a beautiful presentation, use shallow bowls. Serve the risotto hot and creamy. Top it with extra parmesan cheese for flavor. Sprinkle chopped parsley for color. A drizzle of olive oil adds shine and richness.
Common Mistakes to Avoid
One big mistake is overcooking the rice. If you cook it too long, it becomes mushy. Keep an eye on it and stop when it’s creamy yet firm. Another mistake is not using enough broth. If you add too little, the rice will dry out. Always have extra broth ready to keep the risotto moist.
Pro Tips
- Use Fresh Ingredients: Always opt for fresh mushrooms and homemade vegetable broth if possible. They enhance the flavor and overall quality of your risotto.
- Stir Constantly: Stirring the risotto frequently helps release the starches from the rice, creating that creamy texture you desire.
- Don’t Rush the Broth: Add the vegetable broth gradually and wait for the liquid to be mostly absorbed before adding more. This ensures the rice cooks evenly and becomes perfectly creamy.
- Rest Before Serving: Let the risotto rest for a couple of minutes before serving. This allows the flavors to meld together and enhances the overall taste.

Variations
Ingredient Swaps
You can make risotto your own. If you want a dairy-free dish, try using coconut milk instead of heavy cream. This keeps it rich while adding a unique flavor. For cheese lovers, a vegan parmesan works well too.
When it comes to mushrooms, feel free to mix it up! Try using only shiitake or cremini mushrooms. You can even add some portobello for a meatier bite. Each type brings its own taste and texture.
Flavor Enhancements
To boost flavor, add herbs like thyme or rosemary. These herbs bring a fresh aroma and deepen the taste. Simply stir them in while cooking the mushrooms. Adding white wine can also elevate the dish. Use a dry white wine for a balanced flavor. Pour in a splash after cooking the mushrooms, letting it cook down before adding rice.
Serving Pairings
Pair your risotto with sides for a full meal. Garlic bread is a classic choice and adds a nice crunch. A fresh salad with greens and a light vinaigrette also works well.
If you enjoy wine, try a crisp white wine like Pinot Grigio. Its lightness complements the creamy risotto. For red wine lovers, a light Pinot Noir can be a great match too. Enjoy experimenting with these variations!
Storage Info
Refrigerating Leftovers
To store risotto, let it cool for a bit. Transfer it to an airtight container. This keeps it fresh and prevents drying out. You can store it in the fridge for up to three days. If you want to keep it longer, consider freezing.
Freezing Instructions
To freeze risotto, place it in a freezer-safe container. Leave some space at the top for expansion. It can last up to two months in the freezer. When ready to eat, thaw it in the fridge overnight. Reheat it in a pan over low heat, adding a splash of broth or water to restore creaminess.
Meal Prep Ideas
You can make risotto ahead of time. Just prepare it up to the final steps. Store it in the fridge, and finish cooking when you’re ready to serve. Leftover risotto is great for arancini or stuffed peppers. You can also mix it into soups for a hearty meal.
FAQs
How long does risotto last in the fridge?
Risotto can last in the fridge for about three days. To store it, place it in an airtight container. This keeps it fresh and safe to eat later. Make sure it cools down first before sealing. When you reheat it, add a splash of broth to keep it creamy.
Can I make risotto ahead of time?
You can prepare risotto ahead but not fully cook it. Cook the rice until it’s almost done, then cool it. Store it in the fridge for up to a day. When you’re ready to eat, add more broth and finish cooking. This way, it stays creamy and delicious.
What to do if my risotto is too dry?
If your risotto is too dry, add more broth slowly. Stir well as you add the broth. This helps get the right creamy texture back. Keep stirring until it’s perfect. If you need more flavor, you can also mix in a bit of olive oil or butter.
You now have all the key steps to make a perfect risotto. Remember the essential ingredients, like Arborio rice and fresh mushrooms. Follow the cooking tips to get that creamy texture. Avoid common mistakes, and feel free to try variations and swaps for different flavors. Store any leftovers properly, so you can enjoy risotto later. With practice, you’ll impress everyone with your skills. Enjoy cooking this delicious dis

Creamy Mushroom Risotto
Ingredients
- 1 cup Arborio rice
- 4 cups vegetable broth
- 1 cup mixed mushrooms (shiitake, cremini, and button), sliced
- 1 small onion, finely chopped
- 2 cloves garlic, minced
- 1/2 cup fresh parmesan cheese, grated
- 1/4 cup heavy cream
- 2 tablespoons olive oil
- to taste salt
- to taste pepper
- for garnish fresh parsley, chopped
Instructions
- Heat the vegetable broth in a saucepan over medium heat. Keep it warm but not boiling.
- In a large skillet, heat the olive oil over medium heat. Add the chopped onion and sauté until translucent, about 3-4 minutes.
- Stir in the minced garlic and cook for an additional minute until fragrant.
- Add the sliced mushrooms to the skillet and cook until they are tender and golden, about 5 minutes. Season with salt and pepper.
- Once the mushrooms are cooked, add the Arborio rice to the skillet. Stir for about 2 minutes, allowing the rice to lightly toast and absorb the flavors.
- Begin adding the warm vegetable broth, one ladle at a time, stirring frequently. Wait until most of the liquid is absorbed before adding more broth. Continue this process for about 18-20 minutes, or until the rice is al dente and creamy.
- Once the rice reaches the desired consistency, remove it from the heat and stir in the heavy cream and grated parmesan cheese. Adjust seasoning with salt and pepper if necessary.
- Allow the risotto to rest for a couple of minutes before serving.


![- Chicken breast - Marinade components: - 3 tablespoons olive oil - Zest and juice of 2 lemons - 3 cloves garlic, minced - 1 teaspoon dried oregano - 1 teaspoon dried thyme - Salt and pepper to taste The main star here is chicken breast. It is lean and cooks quickly. It absorbs flavors well, making it perfect for skewers. The marinade combines olive oil, lemon, garlic, and herbs. This mix adds brightness and depth to the chicken. The lemon zest and juice bring a fresh, tangy taste. - 1 bell pepper, cut into 1-inch pieces - 1 red onion, cut into wedges Bell pepper and red onion bring color and sweetness. They also add crunch to each bite. I love alternating them with the chicken on the skewers. This adds variety and makes the skewers look nice. - Wooden or metal skewers - Grill or grill pan You will need skewers for this recipe. If you use wooden skewers, soak them in water for 30 minutes. This prevents burning on the grill. A grill or grill pan is also essential. It gives the skewers that nice char and smoky flavor. For the full recipe, refer to the instructions provided. To begin, mix the marinade ingredients in a large bowl. You will need: - 3 tablespoons olive oil - Zest and juice of 2 lemons - 3 cloves garlic, minced - 1 teaspoon dried oregano - 1 teaspoon dried thyme - Salt and pepper to taste Whisk these items until they blend well. The marinade is vital for flavor. Marinate the chicken for at least 30 minutes. If you have time, let it sit for 2 hours. This helps the chicken absorb all the tasty flavors. Next, prepare the skewers. If you use wooden skewers, soak them in water for 30 minutes. This step helps prevent them from burning while grilling. Now, it’s time to thread the chicken and veggies. Take the marinated chicken and thread it onto the skewer. Add pieces of bell pepper and onion. Alternate between chicken and veggies. This mix not only looks great but also adds flavor. Before grilling, preheat your grill or grill pan to medium-high heat. This ensures even cooking. Grill the skewers for about 10 to 12 minutes. Turn them occasionally to get nice char marks. Use a meat thermometer to check if the chicken has reached 165°F (75°C). This step is crucial for food safety. Once cooked, take the skewers off the grill. Let them rest for a few minutes before serving. You can drizzle them with any leftover marinade for extra flavor. Enjoy your Greek Lemon Chicken Skewers! For the full recipe, check out the details above. To make your chicken full of flavor, marinate it well. I like to mix olive oil, lemon zest, lemon juice, garlic, and herbs. This blend really boosts the taste. Aim to marinate the chicken for at least 30 minutes. For even more flavor, you can go for up to 2 hours. Just don’t leave it in too long, or the acid from the lemon can make it mushy. To get those perfect grill marks, heat your grill to medium-high. This gives the chicken a nice char. Place the skewers on the grill and turn them every few minutes. This helps cook the chicken evenly. Keep an eye on the time; grill them for about 10 to 12 minutes. The chicken should reach an internal temperature of 165°F (75°C). This ensures it’s safe to eat and juicy. For a great presentation, serve the skewers on a nice platter. Add lemon wedges and sprinkle some fresh parsley on top. It looks colorful and inviting. I also suggest serving tzatziki sauce on the side for dipping. It adds a cool, creamy contrast to the warm chicken. Check out the Full Recipe for more detailed instructions! {{image_2}} If you want to switch things up, you can use other proteins. Pork and shrimp are great options. They both soak up the lemony marinade well. For shrimp, just adjust the cooking time to avoid overcooking. You can also change the vegetables on your skewers. Try zucchini, mushrooms, or cherry tomatoes. Each veggie brings its own flavor and texture. Mixing these will keep your dish fresh every time. To boost flavor, add more herbs and spices. Fresh parsley or dill can add a nice touch. You could also sprinkle some paprika for a mild kick. Changing the marinade can also create new flavors. For a spicy twist, add red pepper flakes. You could even try a yogurt-based marinade for a creamy contrast. These tweaks can take your Greek Lemon Chicken Skewers to a new level. You have options for cooking these skewers. Grilling is popular, but broiling works well too. Broiling gives a nice char and cooks the chicken quickly. If you prefer, you can bake the skewers in the oven. Set it to 400°F (200°C) and cook for about 15-20 minutes. This method is great for making skewers indoors, especially on rainy days. For the full recipe, visit the link above. Enjoy exploring these variations! To keep your Greek Lemon Chicken Skewers fresh, store them in the fridge. Place the skewers in an airtight container. This will help keep them from drying out. Consume the leftovers within 3 days for the best taste. If you want to store them longer, consider freezing. Wrap each skewer in plastic wrap, then place them in a freezer bag. This method can keep them good for up to three months. Remember to label the bag with the date. When you're ready to eat your leftovers, reheating is key. I suggest using an oven for the best results. Preheat your oven to 350°F (175°C). Place the skewers on a baking sheet and cover them with foil. This keeps the moisture in while they heat. Bake for about 10-15 minutes or until warm. You can also use a microwave for quick reheating. Place the skewers on a microwave-safe plate. Cover them with a damp paper towel to keep the chicken moist. Heat in short bursts of 30 seconds. Check often to avoid overcooking. Enjoy your Greek Lemon Chicken Skewers warm, just like fresh off the grill! For the full recipe, click [Full Recipe]. I suggest marinating the chicken for at least 30 minutes. This time gives the chicken a nice flavor boost. If you can, try marinating for up to 2 hours. The longer it sits in the marinade, the more the flavors mix in. You will taste the lemon, garlic, and herbs in every bite. To avoid burning, make sure to soak wooden skewers for 30 minutes. This step helps prevent charring. When grilling, keep the heat medium to medium-high. Turn the skewers often to cook evenly. Watch the chicken closely. Cook until the internal temperature reaches 165°F (75°C). This way, you enjoy juicy chicken without burnt bits. Yes, you can prepare Greek Lemon Chicken Skewers ahead of time. Marinate the chicken a few hours before grilling. You can also assemble the skewers in advance. Store them in the fridge until you're ready to grill. This makes meal prep easy and quick, leaving you more time to enjoy your meal. For the complete recipe, check out the Full Recipe. In this post, I shared how to make Greek Lemon Chicken Skewers. We covered the main ingredients like chicken, marinade, and vegetables. I walked you through steps for marinade prep, skewer assembly, and grilling. I also offered tips for flavor and cooking techniques. Lastly, we explored storage and reheat options for leftovers. Now you have all the tools to grill skewers like a pro. Enjoy your tasty creations!](https://dailydishly.com/wp-content/uploads/2025/07/9e2cfe4b-078f-41fe-970c-814b799e8851-768x768.webp)


