Creamy Roasted Red Pepper Pasta Tasty Weeknight Meal

Looking for a quick, tasty meal that impresses? Try my creamy roasted red pepper pasta! It’s simple, rich in flavor, and perfect for busy weeknights. With just a few fresh ingredients, you can whip up a delightful dish that everyone will love. Stay tuned as I guide you through each step, tips, and even some fun variations. Let’s make dinner exciting again!
Why I Love This Recipe
- Rich Flavor: The roasted red peppers add a deep, smoky sweetness that elevates the dish and makes every bite memorable.
- Quick and Easy: This recipe can be prepared in about 40 minutes, making it perfect for a weeknight dinner without sacrificing flavor.
- Dairy-Free Option: With the option to use coconut cream and nutritional yeast, this pasta is accessible for those following a vegan or dairy-free diet.
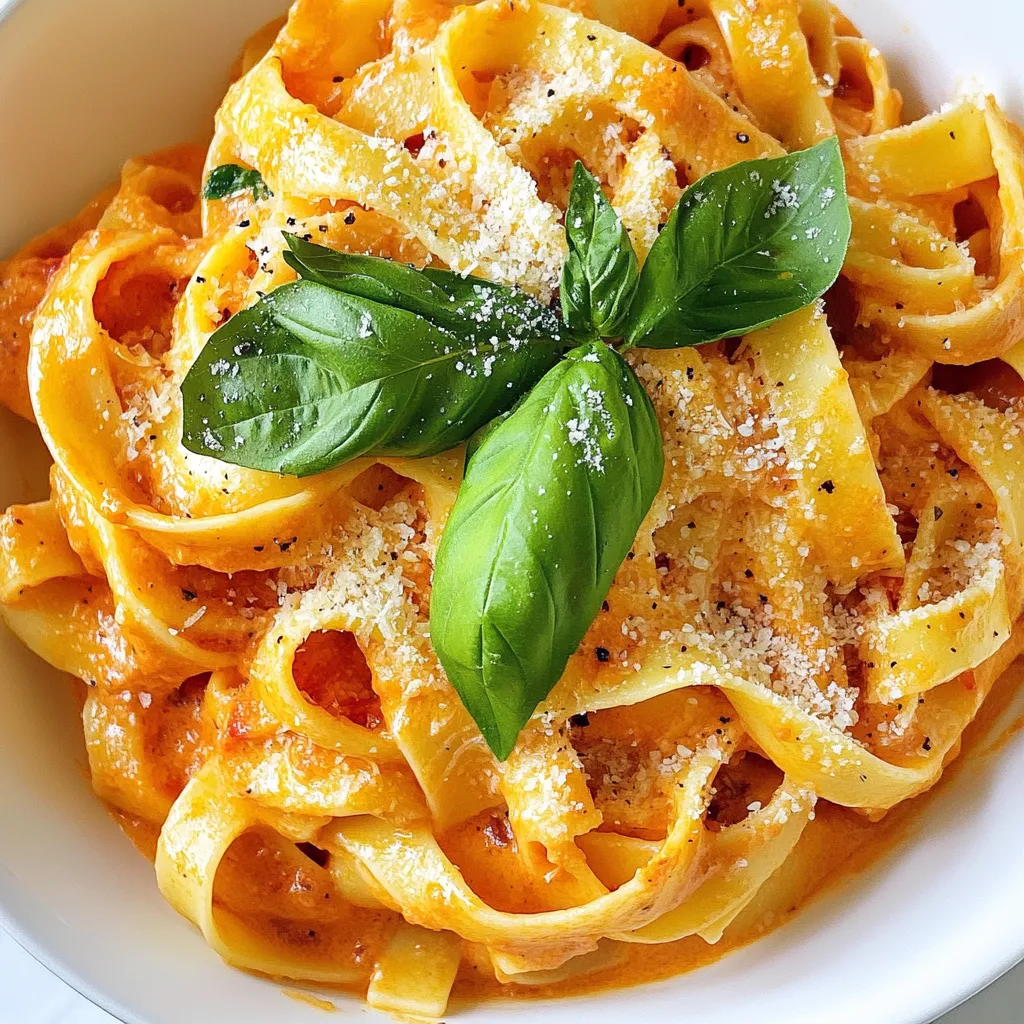
- Fresh and Vibrant: The garnish of fresh basil not only adds color but also enhances the overall freshness of the dish.
Ingredients
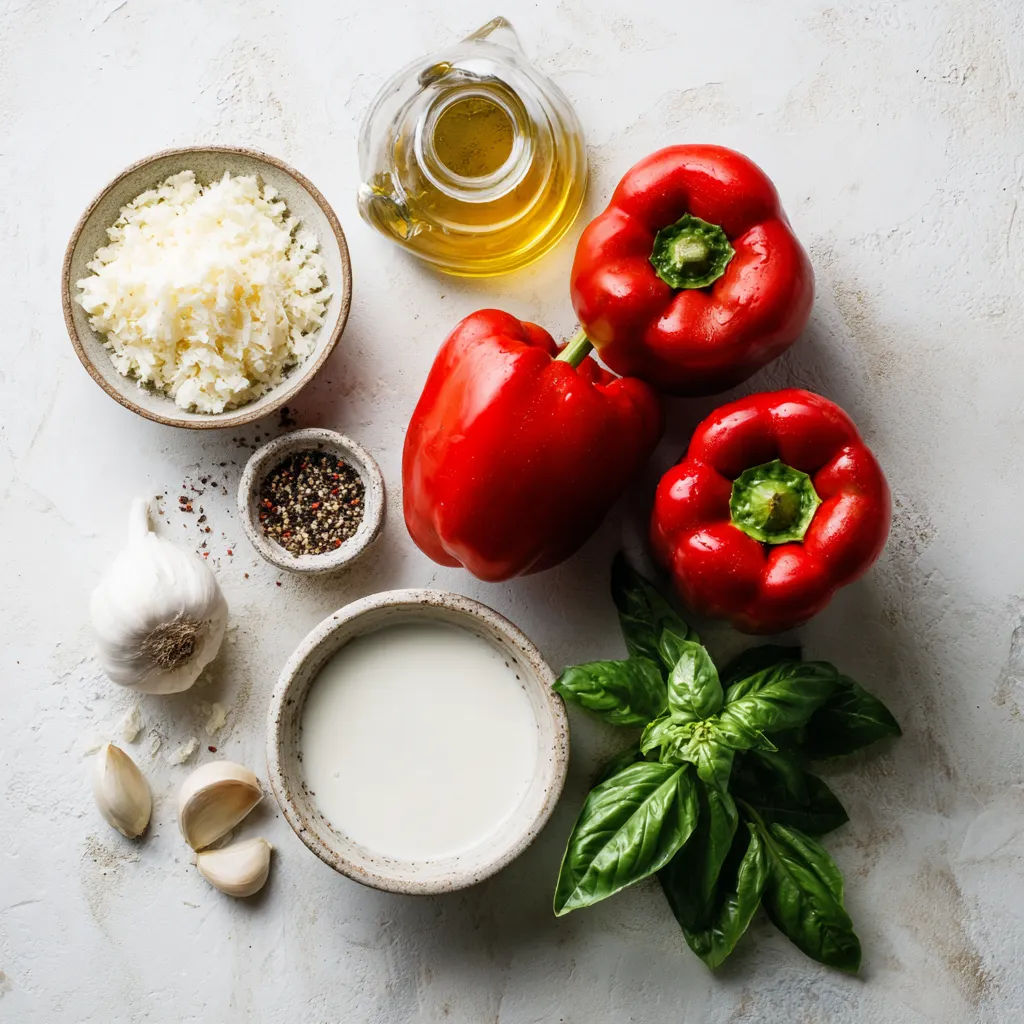
To make creamy roasted red pepper pasta, you need a few simple ingredients. Here’s what you will need:
– 12 oz pasta (fettuccine or penne works great)
– 2 large roasted red bell peppers
– 1/2 cup heavy cream or coconut cream
– 3 cloves garlic (minced)
– 1/4 cup grated Parmesan cheese or nutritional yeast
– 2 tablespoons olive oil
– 1 teaspoon Italian seasoning
– Salt and pepper to taste
– Fresh basil leaves for garnish
Each ingredient plays a key role in the dish. The pasta serves as the base, while the roasted red peppers add a sweet and smoky flavor. Cream gives the sauce its rich, velvety texture. Garlic adds depth, and Parmesan brings umami. Olive oil helps in cooking the sauce, and Italian seasoning ties the flavors together.
Salt and pepper enhance the overall taste, while fresh basil leaves add a pop of color and freshness when serving. This combination creates a dish that is not just tasty but also comforting and satisfying.

Step-by-Step Instructions
Roasting the Red Peppers
To roast red peppers, first, place them on a baking sheet. Broil them in the oven until they are charred, which takes about 20 minutes. Turn them often for even roasting. Once done, put the peppers in a bowl and cover it with plastic wrap. Let them steam for 10 minutes. This helps the skins come off easily. After steaming, peel the skins, remove the seeds, and chop the peppers roughly. This adds a sweet and smoky flavor to your pasta.
Cooking the Pasta
Boil a large pot of salted water. Add the pasta and cook it until it is al dente. This usually takes about 8 to 10 minutes, but check the package for exact times. Al dente means the pasta is firm to the bite, which is perfect for this dish. Remember to reserve about 1 cup of the pasta water before you drain it. This water will help the sauce mix well with the pasta.
Preparing the Red Pepper Sauce
For a smooth sauce, blend the roasted red peppers, heavy cream, minced garlic, and grated Parmesan cheese together. Add the Italian seasoning, salt, and pepper to taste. Blend until it is creamy. The heavy cream gives richness, while the garlic adds depth. If the sauce is too thick, you can add some reserved pasta water to get the right consistency. Aim for a sauce that is thick enough to coat the pasta well.
Combining Pasta and Sauce
In a large skillet, heat olive oil over medium heat. Pour the blended red pepper sauce into the skillet and warm it for 2 to 3 minutes. Then, add the drained pasta to the skillet. Toss the pasta gently to coat it evenly with the sauce. This step is key for flavor. Serve the pasta right away, garnished with fresh basil leaves and extra grated Parmesan if you like. Enjoy your creamy roasted red pepper pasta!
Tips & Tricks
Perfecting the Sauce
To get the right sauce thickness, save some pasta water. This water has starch and helps the sauce stick. If your sauce feels too thick, add the pasta water a little at a time. It will make the sauce creamy and smooth.
You can also boost the flavor with spices or herbs. Try adding a pinch of red pepper flakes for heat or fresh thyme for a nice touch. Taste the sauce and see what you like best.
Cooking the Pasta
Timing is key when you cook pasta. Start boiling the water while making the sauce. This way, your pasta will be ready just as your sauce finishes cooking.
To prevent pasta from sticking, stir it often in the boiling water. Use enough salt in the water; it helps flavor the pasta as it cooks.
Garnishing
Garnish makes your meal look great. When using fresh basil, tear the leaves instead of cutting them. This keeps their flavor strong and bright.
For extra flavor and a nice look, add more grated cheese on top. It adds a creamy finish and makes your plate fun to serve.
Pro Tips
- Roast Peppers for Depth: Roasting the red bell peppers not only enhances their sweetness but also adds a smoky flavor that elevates your sauce.
- Reserve Pasta Water: Always save some pasta cooking water before draining. It’s starchy and can help adjust the consistency of your sauce perfectly.
- Blend for Smoothness: Ensure your sauce is blended until completely smooth for a creamy texture that clings beautifully to the pasta.
- Fresh Herbs for Freshness: Garnishing with fresh basil not only adds color but also a burst of fresh flavor that brightens the dish.

Variations
Dietary Alternatives
You can easily make this dish dairy-free. Use plant-based cream instead of heavy cream. Coconut cream works great and adds a nice flavor. For cheese lovers, use nutritional yeast instead of Parmesan. It gives a cheesy taste without dairy.
Ingredient Substitutions
Feel free to switch up the pasta. Fettuccine or penne works well, but you can try spaghetti or even gluten-free pasta. For seasonings, consider adding smoked paprika or red pepper flakes to enhance the flavor. You can also toss in some spinach or sun-dried tomatoes for extra taste and color.
Adding Protein
Want to make your pasta heartier? Add grilled chicken or shrimp for extra protein. Cook them separately and toss them in before serving. If you prefer a vegetarian option, chickpeas or tofu are excellent choices. They add protein and keep the dish filling.
Storage Info
Refrigeration
To store leftovers, place the pasta in an airtight container. Make sure to cool it down first. This will keep it fresh and tasty. You can keep it in the fridge for up to three days. After that, it may lose its flavor and texture. Always check for any signs of spoilage before eating.
Freezing
To freeze creamy roasted red pepper pasta, first, let it cool completely. Then, transfer it to a freezer-safe container. Make sure to leave some space at the top for expansion. You can freeze it for up to three months.
When you are ready to eat, thaw it in the fridge overnight. To reheat, warm it gently in a skillet on low heat. Add a splash of reserved pasta water to regain creaminess. Stir often to avoid burning the sauce. Enjoy your pasta just like when it was fresh!
FAQs
What can I substitute for heavy cream?
You can use coconut cream as a dairy-free option. It adds a nice richness. Almond milk or oat milk can work too, but they are thinner. You should add a bit of cornstarch to thicken those options. Using these can change the flavor a little. Always taste as you go to find what you like best.
How can I make this pasta gluten-free?
To make this dish gluten-free, choose a gluten-free pasta brand. Some good options are Barilla Gluten-Free or Banza Chickpea Pasta. These brands hold up well during cooking. They blend nicely with the creamy sauce. Check labels to ensure they are safe for your diet.
Can I use store-bought roasted red peppers?
Yes, you can use store-bought roasted red peppers. They save time and effort. However, they might lack the smoky flavor of fresh-roasted peppers. Look for brands with no added sugars or preservatives for a fresher taste. Always rinse them before using to reduce excess salt.
How long does creamy roasted red pepper pasta last in the fridge?
This pasta can last up to three days in the fridge. Store it in an airtight container to keep it fresh. Reheat gently on the stove, adding a splash of water if needed. Always check for any off-smells or mold before eating leftovers.
This recipe for creamy roasted red pepper pasta delivers flavor and ease. You learned how to roast peppers, cook pasta perfectly, and make a smooth sauce. I also shared tips for storage and variations to suit your diet. You can impress anyone with this dish. Feel free to customize it to your taste. Enjoy every bite of this delicious mea

Creamy Roasted Red Pepper Pasta
Ingredients
- 12 oz pasta (fettuccine or penne)
- 2 large red bell peppers, roasted and peeled
- 0.5 cup heavy cream or coconut cream
- 3 cloves garlic, minced
- 0.25 cup grated Parmesan cheese or nutritional yeast
- 2 tablespoons olive oil
- 1 teaspoon Italian seasoning
- to taste salt and pepper
- for garnish fresh basil leaves
Instructions
- Start by roasting the red bell peppers. You can do this by placing them on a baking sheet and broiling them in the oven until charred (about 20 minutes), turning occasionally. Once done, place them in a bowl, cover with plastic wrap, and let steam for 10 minutes. This will help loosen the skins. After that, peel off the skins, remove the seeds, and roughly chop the peppers.
- In a large pot of salted boiling water, cook the pasta according to package instructions until al dente. Reserve about 1 cup of pasta water, then drain the rest and set aside.
- In a blender or food processor, combine the roasted red peppers, heavy cream, minced garlic, Parmesan cheese, Italian seasoning, salt, and pepper. Blend until smooth and creamy.
- In a large skillet, heat the olive oil over medium heat. Add the blended red pepper sauce to the skillet and cook for 2-3 minutes to warm through. If the sauce is too thick, add some reserved pasta water to reach your desired consistency.
- Add the drained pasta to the skillet and toss to coat the pasta evenly with the sauce.
- Serve immediately, garnished with fresh basil leaves and additional grated Parmesan on top if desired.


![To make Garlic Butter Shrimp and Asparagus, you need just a few simple ingredients. Each one adds flavor and texture to the dish. Here’s what you’ll need: - 1 pound large shrimp, peeled and deveined - 1 bunch asparagus, trimmed and cut into 2-inch pieces - 4 tablespoons unsalted butter - 4 cloves garlic, minced - 1 teaspoon red pepper flakes (optional) - Zest of 1 lemon - 2 tablespoons fresh lemon juice - Salt and pepper, to taste - Fresh parsley, chopped (for garnish) These ingredients come together to create a tasty weeknight meal. The shrimp provides protein, and asparagus adds crunch. The garlic and butter give it a rich flavor. Lemon zest and juice brighten the dish, while parsley adds a fresh touch. When you gather these ingredients, think about the freshness. Fresh shrimp and asparagus make a big difference. Use good quality butter for the best taste. You can find the full recipe in the section above. - Melt butter and sauté garlic. - Cook shrimp until pink. - Add asparagus and remaining butter. To start, I melt two tablespoons of butter in a large skillet over medium heat. Once the butter is hot, I add minced garlic. I sauté it for about one minute until it smells great. Next, I add the shrimp to the skillet in a single layer. I season them with salt, pepper, and red pepper flakes if I want some heat. I cook the shrimp for 2-3 minutes, flipping them halfway, until they turn pink. After the shrimp nearly cooks through, I push them to one side of the skillet. I then add asparagus to the other side. I add the last two tablespoons of butter to the asparagus. I stir it to coat the pieces in butter. I let it cook for 4-5 minutes until the asparagus is tender but still crisp. I stir occasionally to make sure everything cooks evenly. - Mix shrimp with asparagus. - Incorporate lemon zest and juice. - Adjust seasoning to taste. Once the shrimp and asparagus are both cooked, I mix them together in the skillet. I then add lemon zest and lemon juice for brightness. This step makes the dish pop with flavor. I toss everything to combine well and cook for another minute until heated through. Finally, I taste the dish and adjust the seasoning with more salt and pepper if needed. - Recommended heat levels. - Cooking times for optimal texture. For best results, I keep the heat at medium to cook the shrimp and asparagus evenly. Cooking shrimp takes about 2-3 minutes until it turns pink. For asparagus, I recommend around 4-5 minutes. This timing keeps the vegetables crisp-tender. If you follow these steps, your Garlic Butter Shrimp and Asparagus will be a tasty weeknight dish that everyone loves. You can find the Full Recipe for more details. To know when shrimp is done, look for a pink color. The shrimp should curl into a C shape. If it’s straight, it is overcooked. Aim for 2-3 minutes on each side. This keeps shrimp juicy and tender. Use a timer to avoid guesswork. For crisp-tender asparagus, cook for about 4-5 minutes. It should be bright green and still firm. Start with fresh asparagus. Trim the ends for better texture. You can snap them off using your hands. This method removes the tough part easily. Try adding fresh herbs like basil or thyme for extra taste. You can also sprinkle some lemon zest on top for brightness. Serve the dish on a colorful plate. Garnish with parsley for a pop of color. This makes your meal more appealing and fun to eat. For the full recipe, check the link above. {{image_2}} You can switch shrimp for chicken or tofu. Chicken gives a hearty feel. Tofu is great for a meatless meal. If using chicken, cut it into bite-sized pieces. Cook it for about 6-8 minutes until fully cooked. If using tofu, use firm tofu and cook it for about 5-7 minutes. This keeps it crispy and delicious. Feel free to add other veggies to your dish. Bell peppers and snap peas work well. They add color and crunch. You can also use mushrooms or zucchini. Just remember to adjust cooking times. For bell peppers, add them with the shrimp. Cook for about 3-4 minutes. For snap peas, toss them in with the asparagus. Cook for 2-3 minutes for a nice bite. Try adding different herbs or spices for a new flavor. Basil or thyme can give a nice twist. You can also add some lemon pepper for extra zing. Using flavored oils or butters can change the taste too. Garlic-infused oil adds depth, while lemon butter gives a fresh touch. Experimenting can make this dish exciting every time you cook it! For the complete recipe, check out the [Full Recipe]. To keep Garlic Butter Shrimp and Asparagus fresh, place leftovers in an airtight container. This helps lock in moisture and flavor. Store the dish in the fridge, where it will last for 2-3 days. If you want to enjoy it later, make sure to refrigerate it as soon as possible after cooking. You can freeze this dish, but keep in mind that shrimp can change texture. To freeze, place the cooled dish in a freezer-safe container. Be sure to remove as much air as possible. It will keep well for about 2-3 months. When you are ready to eat it, thaw it overnight in the fridge. When reheating your Garlic Butter Shrimp and Asparagus, I recommend these methods: - Microwave: Place it in a microwave-safe dish. Heat in short bursts, stirring in between, to avoid uneven cooking. - Stovetop: Heat in a skillet over low heat. Stir gently until warmed through. - Oven: Preheat the oven to 350°F. Place the dish in an oven-safe pan and cover with foil. Heat for about 15-20 minutes. These methods help keep your shrimp and asparagus tasty and enjoyable! Yes, you can use frozen shrimp. In fact, frozen shrimp can be just as good as fresh! To use frozen shrimp, you’ll want to thaw them first. Place them in the fridge overnight or run them under cold water for a quick thaw. After thawing, pat them dry. This helps the shrimp cook evenly and avoids excess water in your dish. Fresh shrimp should look moist and glossy. Look for a slight sheen on the shells. The flesh should be firm and not slimy. If you notice a strong fishy smell, it’s best to avoid that shrimp. Fresh shrimp should smell mild and sweet, like the ocean. You have many tasty options! Garlic Butter Shrimp and Asparagus pairs well with: - Rice - Quinoa - Pasta - Crusty bread You can also serve it with a fresh salad or steamed vegetables for a healthy side. Yes, this dish is perfect for meal prep. You can cook a big batch and store it in the fridge. Just keep the shrimp and asparagus in an airtight container. They will stay fresh for about three days. When you're ready to eat, reheat it in the microwave or on the stove. This dish also tastes great warm or at room temperature. For the full recipe, check out the details above! This blog post covered the essentials for making Garlic Butter Shrimp and Asparagus. You learned about the ingredients, step-by-step prep, and cooking tips. I provided variations to customize your dish and storage guidelines for leftovers. Remember, cooking shrimp is all about timing, and fresh ingredients make a big difference. I hope these tips help you create a meal that's tasty and memorable. Enjoy your cooking adventure!](https://dailydishly.com/wp-content/uploads/2025/06/c728854f-8c75-4a77-a1c9-2cca00683957-768x768.webp)


