Creamy Roasted Red Pepper Soup Rich and Flavorful Delight
, check out all the steps to create this delicious dish! {{image_2}} You can change the soup’s flavor with different bell pepper colors. Yellow or orange peppers add sweetness. Green peppers give a sharper taste. Each color brings its own twist to the soup. If you want to swap coconut milk, you can use other dairy. Heavy cream makes the soup rich and creamy. For a lighter option, try low-fat milk or yogurt. Each choice brings a unique texture and flavor. Want to make the soup heartier? You can add protein easily. Cooked chicken adds a nice touch. Simply shred or dice it before adding to the soup. If you prefer a plant-based option, try beans. Cannellini or chickpeas blend well with the flavors. They add protein while keeping the dish light. Do you like heat? Add chili peppers for a spicy kick. Jalapeños or serranos can give your soup a nice warmth. Start with a small amount and add more as needed. For extra flavor, consider using different herbs. Fresh thyme or cilantro can brighten the taste. Mixing up herbs adds layers to the soup's flavor. After enjoying your creamy roasted red pepper soup, storing leftovers properly helps keep it fresh. - Refrigerating tips: Let the soup cool to room temperature. Pour it into an airtight container. Store it in the fridge for up to four days. - Freezing for long-term storage: If you want to keep it longer, you can freeze it. Use a freezer-safe container or freezer bags. Leave some space at the top, as the soup will expand when frozen. It should last for about three months in the freezer. Reheating your soup correctly restores its rich flavor. - Best methods to reheat: The stovetop is the best option for reheating. Pour the soup into a pot and heat it over medium heat. Stir often to prevent sticking. You can also use a microwave. Place the soup in a microwave-safe bowl and heat in 30-second intervals, stirring in between. - Maintaining texture and flavor: To keep the soup creamy, add a splash of coconut milk or heavy cream while reheating. This will help it regain its smooth texture. Knowing how long your soup lasts is key to enjoying it safely. - The soup stays good in the fridge for about four days. If frozen, it can remain safe for up to three months. Always check for any off smells or changes in texture before eating. Yes, you can make this soup vegan. To do this, substitute the heavy cream with coconut milk. This keeps the soup rich and creamy. You can also use any plant-based milk if you prefer. For the broth, just stick with vegetable broth. This makes sure your soup stays vegan-friendly. This soup pairs well with many sides. Here are a few ideas: - Grilled cheese sandwiches - Crusty bread or baguette - A fresh garden salad - Garlic bread These dishes complement the soup's rich flavor. Absolutely! You can prepare this soup ahead of time. Here are some tips: - Preparing in advance: Make the soup and let it cool completely. Store it in airtight containers in the fridge. It will stay fresh for about 5 days. - Storing: You can also freeze the soup. Just use freezer-safe containers. It will last up to 3 months. - Reheating: To reheat, warm the soup on the stove. Stir occasionally to keep it smooth. You can also microwave it in a bowl. Heat in short intervals, stirring in between. For the complete detailed recipe, check [here](#). This blog post shared a simple and tasty recipe for Creamy Roasted Red Pepper Soup. We covered the ingredients, preparation, and cooking steps, along with tips for perfecting your dish. Remember, you can swap ingredients and enhance flavors to fit your taste. Proper storage will help keep leftovers fresh. Lastly, this soup is great for meal prep! Enjoy experimenting with this recipe and savor every bowl. You have the tools to create a delicious meal.](https://dailydishly.com/wp-content/uploads/2025/07/498509b4-248c-4237-8f09-48024388df2b.webp)
Welcome to the world of Creamy Roasted Red Pepper Soup! If you crave a dish that’s rich and bursting with flavor, you’re in the right place. This soup is perfect for cozy nights and impressing guests. I’ll show you how to create a creamy, savory delight using simple ingredients and step-by-step instructions. Prepare to warm your soul with every spoonful! Let’s dive in and discover how to make this tasty treasure.
Ingredients
List of Ingredients
– 4 large red bell peppers
– 1 medium onion, chopped
– 3 cloves garlic, minced
– 2 cups vegetable broth
– 1 cup coconut milk (or heavy cream)
– 1 teaspoon smoked paprika
– 1 teaspoon dried basil
– Salt and pepper to taste
– 2 tablespoons olive oil
– Fresh basil leaves for garnish
The ingredients for creamy roasted red pepper soup are simple but full of flavor. The star of this dish is the red bell pepper. Its sweetness shines through when roasted. The onion and garlic add depth and aroma. You can choose between coconut milk or heavy cream to bring creaminess.
Nutritional Information
This soup is rich in vitamins and nutrients. Each serving has about 200 calories. It offers a good balance of carbohydrates, fats, and proteins.
– Calories per serving: Approximately 200
– Macronutrients breakdown:
– Carbohydrates: 20g
– Protein: 3g
– Fat: 12g
Key ingredients provide health benefits. Red bell peppers are high in vitamin C. They also contain antioxidants that help fight disease. Garlic supports a healthy immune system. Using vegetable broth keeps it low in calories while adding flavor.
Step-by-Step Instructions
Preparation of Ingredients
1. Start by preheating your oven to 400°F (200°C). This helps the red peppers roast evenly.
2. Take your red bell peppers and cut them in half. Remove the seeds and stems. Place them cut-side down on a baking sheet.
3. Chop the onion into small pieces. Mince the garlic cloves finely to release their flavor.
Cooking Process
1. Roast the red peppers for about 25-30 minutes. Look for the skin to blister and the peppers to soften.
2. While the peppers roast, heat a large pot over medium heat. Add one tablespoon of olive oil and then add the chopped onion. Sauté until the onion is soft and clear, about 5 minutes.
3. Next, add the minced garlic to the pot. Cook for one more minute until you smell the garlic.
Blending and Serving
1. Once the peppers are done roasting, let them cool for a bit. Peel off the skins and chop the flesh into small pieces.
2. Add the roasted red pepper pieces to the pot. Pour in the vegetable broth, smoked paprika, and dried basil. Bring the mix to a boil. Then, reduce the heat and let it simmer for 10 minutes.
3. Use an immersion blender to blend the soup until it is smooth. If you don’t have one, carefully pour the soup into a regular blender. Blend in small batches if needed.
4. Stir in the coconut milk or heavy cream. Taste and add salt and pepper as needed. Heat the soup for a few more minutes.
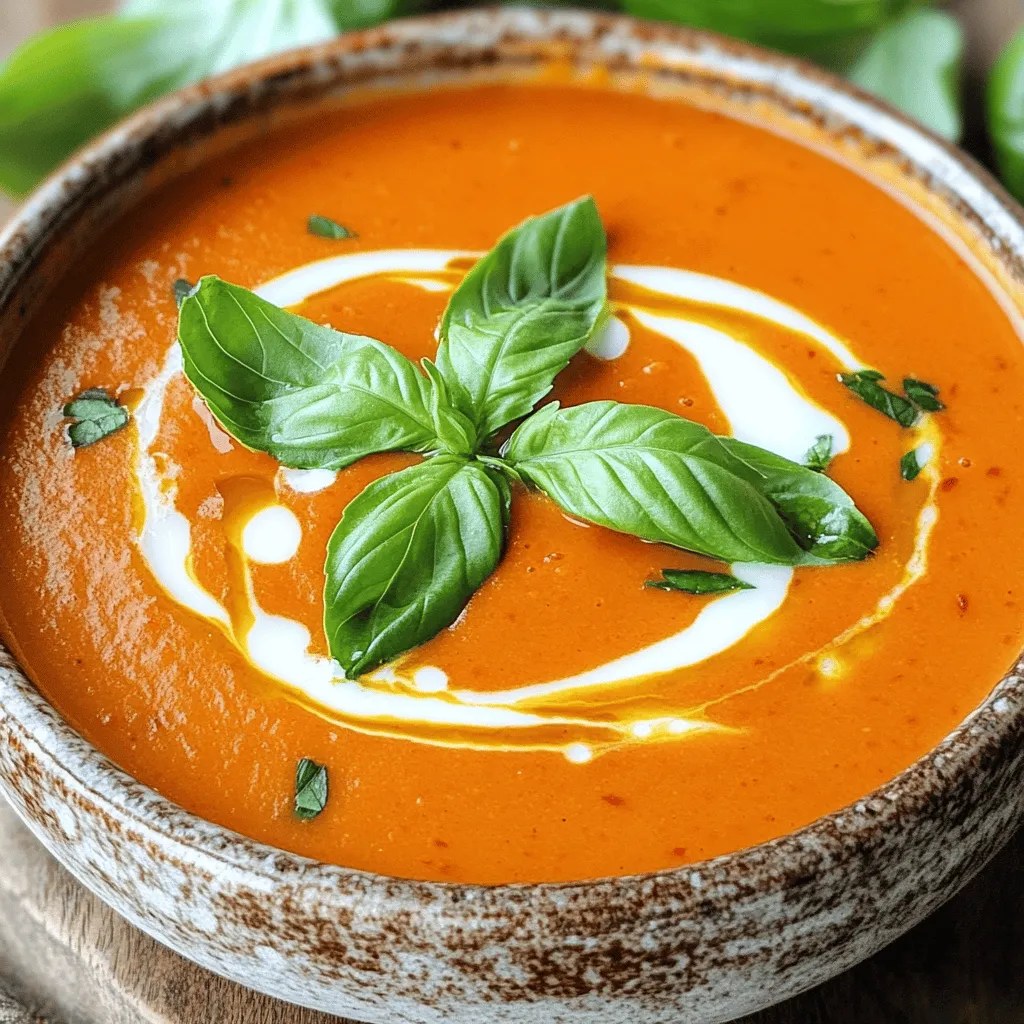
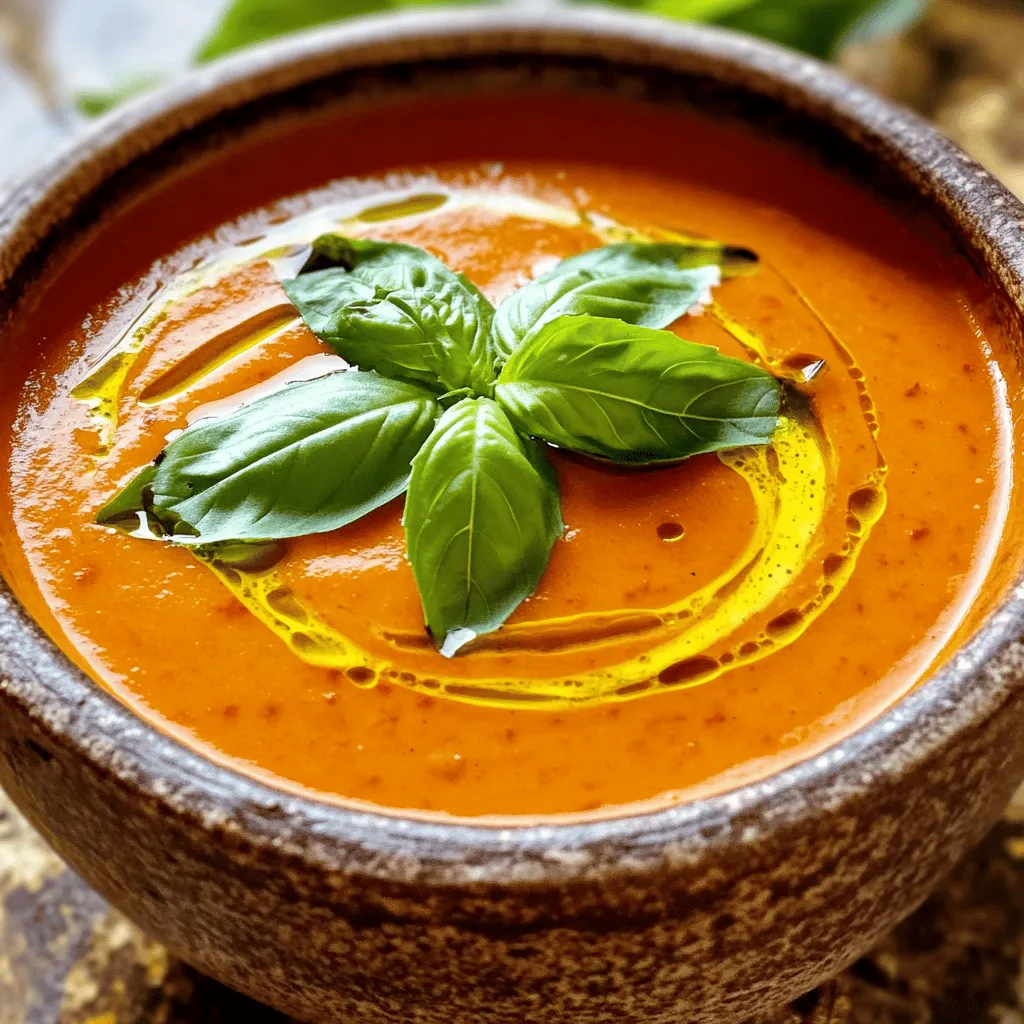
5. Serve the soup hot, garnished with fresh basil leaves. Enjoy this rich and flavorful delight!
Tips & Tricks
Perfect Roasting Technique
When roasting peppers, look for a few signs. The skin should blister and turn dark. The peppers should feel soft when you poke them. If you want to roast them in other ways, try using a grill or stovetop. On a grill, place the peppers directly over the flames. For stovetop, use a skillet and turn them until the skin chars.
Enhancing Flavor
Spices and herbs can really boost the taste of your soup. I love adding a pinch of cayenne for some heat. You can also try fresh thyme or rosemary for a different twist. To make the soup creamier, consider using heavy cream or Greek yogurt. Both will add richness and depth.
Common Mistakes to Avoid
Overcooking garlic can ruin your soup. Garlic should be soft and fragrant, not brown. Keep an eye on it while cooking. Another mistake is under-seasoning. It’s easy to forget salt and pepper. Always taste your soup before serving. Adjust the seasoning as needed for the best flavor.

Variations
Ingredient Swaps
You can change the soup’s flavor with different bell pepper colors. Yellow or orange peppers add sweetness. Green peppers give a sharper taste. Each color brings its own twist to the soup.
If you want to swap coconut milk, you can use other dairy. Heavy cream makes the soup rich and creamy. For a lighter option, try low-fat milk or yogurt. Each choice brings a unique texture and flavor.
Adding Protein
Want to make the soup heartier? You can add protein easily. Cooked chicken adds a nice touch. Simply shred or dice it before adding to the soup.
If you prefer a plant-based option, try beans. Cannellini or chickpeas blend well with the flavors. They add protein while keeping the dish light.
Spice it Up
Do you like heat? Add chili peppers for a spicy kick. Jalapeños or serranos can give your soup a nice warmth. Start with a small amount and add more as needed.
For extra flavor, consider using different herbs. Fresh thyme or cilantro can brighten the taste. Mixing up herbs adds layers to the soup’s flavor.
Storage Info
How to Store Leftovers
After enjoying your creamy roasted red pepper soup, storing leftovers properly helps keep it fresh.
– Refrigerating tips: Let the soup cool to room temperature. Pour it into an airtight container. Store it in the fridge for up to four days.
– Freezing for long-term storage: If you want to keep it longer, you can freeze it. Use a freezer-safe container or freezer bags. Leave some space at the top, as the soup will expand when frozen. It should last for about three months in the freezer.
Reheating Instructions
Reheating your soup correctly restores its rich flavor.
– Best methods to reheat: The stovetop is the best option for reheating. Pour the soup into a pot and heat it over medium heat. Stir often to prevent sticking. You can also use a microwave. Place the soup in a microwave-safe bowl and heat in 30-second intervals, stirring in between.
– Maintaining texture and flavor: To keep the soup creamy, add a splash of coconut milk or heavy cream while reheating. This will help it regain its smooth texture.
Shelf Life
Knowing how long your soup lasts is key to enjoying it safely.
– The soup stays good in the fridge for about four days. If frozen, it can remain safe for up to three months. Always check for any off smells or changes in texture before eating.
FAQs
Can I make this soup vegan?
Yes, you can make this soup vegan. To do this, substitute the heavy cream with coconut milk. This keeps the soup rich and creamy. You can also use any plant-based milk if you prefer. For the broth, just stick with vegetable broth. This makes sure your soup stays vegan-friendly.
What can I pair with Creamy Roasted Red Pepper Soup?
This soup pairs well with many sides. Here are a few ideas:
– Grilled cheese sandwiches
– Crusty bread or baguette
– A fresh garden salad
– Garlic bread
These dishes complement the soup’s rich flavor.
Is this soup suitable for meal prep?
Absolutely! You can prepare this soup ahead of time. Here are some tips:
– Preparing in advance: Make the soup and let it cool completely. Store it in airtight containers in the fridge. It will stay fresh for about 5 days.
– Storing: You can also freeze the soup. Just use freezer-safe containers. It will last up to 3 months.
– Reheating: To reheat, warm the soup on the stove. Stir occasionally to keep it smooth. You can also microwave it in a bowl. Heat in short intervals, stirring in between.
This blog post shared a simple and tasty recipe for Creamy Roasted Red Pepper Soup. We covered the ingredients, preparation, and cooking steps, along with tips for perfecting your dish. Remember, you can swap ingredients and enhance flavors to fit your taste. Proper storage will help keep leftovers fresh. Lastly, this soup is great for meal prep! Enjoy experimenting with this recipe and savor every bowl. You have the tools to create a delicious meal.
, check out all the steps to create this delicious dish! {{image_2}} You can change the soup’s flavor with different bell pepper colors. Yellow or orange peppers add sweetness. Green peppers give a sharper taste. Each color brings its own twist to the soup. If you want to swap coconut milk, you can use other dairy. Heavy cream makes the soup rich and creamy. For a lighter option, try low-fat milk or yogurt. Each choice brings a unique texture and flavor. Want to make the soup heartier? You can add protein easily. Cooked chicken adds a nice touch. Simply shred or dice it before adding to the soup. If you prefer a plant-based option, try beans. Cannellini or chickpeas blend well with the flavors. They add protein while keeping the dish light. Do you like heat? Add chili peppers for a spicy kick. Jalapeños or serranos can give your soup a nice warmth. Start with a small amount and add more as needed. For extra flavor, consider using different herbs. Fresh thyme or cilantro can brighten the taste. Mixing up herbs adds layers to the soup's flavor. After enjoying your creamy roasted red pepper soup, storing leftovers properly helps keep it fresh. - Refrigerating tips: Let the soup cool to room temperature. Pour it into an airtight container. Store it in the fridge for up to four days. - Freezing for long-term storage: If you want to keep it longer, you can freeze it. Use a freezer-safe container or freezer bags. Leave some space at the top, as the soup will expand when frozen. It should last for about three months in the freezer. Reheating your soup correctly restores its rich flavor. - Best methods to reheat: The stovetop is the best option for reheating. Pour the soup into a pot and heat it over medium heat. Stir often to prevent sticking. You can also use a microwave. Place the soup in a microwave-safe bowl and heat in 30-second intervals, stirring in between. - Maintaining texture and flavor: To keep the soup creamy, add a splash of coconut milk or heavy cream while reheating. This will help it regain its smooth texture. Knowing how long your soup lasts is key to enjoying it safely. - The soup stays good in the fridge for about four days. If frozen, it can remain safe for up to three months. Always check for any off smells or changes in texture before eating. Yes, you can make this soup vegan. To do this, substitute the heavy cream with coconut milk. This keeps the soup rich and creamy. You can also use any plant-based milk if you prefer. For the broth, just stick with vegetable broth. This makes sure your soup stays vegan-friendly. This soup pairs well with many sides. Here are a few ideas: - Grilled cheese sandwiches - Crusty bread or baguette - A fresh garden salad - Garlic bread These dishes complement the soup's rich flavor. Absolutely! You can prepare this soup ahead of time. Here are some tips: - Preparing in advance: Make the soup and let it cool completely. Store it in airtight containers in the fridge. It will stay fresh for about 5 days. - Storing: You can also freeze the soup. Just use freezer-safe containers. It will last up to 3 months. - Reheating: To reheat, warm the soup on the stove. Stir occasionally to keep it smooth. You can also microwave it in a bowl. Heat in short intervals, stirring in between. For the complete detailed recipe, check [here](#). This blog post shared a simple and tasty recipe for Creamy Roasted Red Pepper Soup. We covered the ingredients, preparation, and cooking steps, along with tips for perfecting your dish. Remember, you can swap ingredients and enhance flavors to fit your taste. Proper storage will help keep leftovers fresh. Lastly, this soup is great for meal prep! Enjoy experimenting with this recipe and savor every bowl. You have the tools to create a delicious meal.](https://dailydishly.com/wp-content/uploads/2025/07/498509b4-248c-4237-8f09-48024388df2b-300x300.webp)


![- 4 chicken thighs, bone-in and skin-on - 1/4 cup honey - 4 cloves garlic, minced - 2 tablespoons soy sauce (or tamari for gluten-free) - 1 tablespoon apple cider vinegar - 1 tablespoon olive oil - 1 teaspoon grated fresh ginger - 1/2 teaspoon black pepper - Chopped green onions - Sesame seeds The main ingredients in this dish are simple yet powerful. Chicken thighs offer rich flavor and juicy texture. Honey adds sweetness that balances the savory notes. Garlic brings a punch that enhances every bite. The additional ingredients work together to create a delicious marinade. Soy sauce adds umami depth, while apple cider vinegar brings brightness. Olive oil helps keep the chicken moist during cooking. For seasoning, fresh ginger adds warmth. Black pepper gives a slight kick. The green onions and sesame seeds make for a lovely garnish, adding color and crunch. You can find the complete process in the Full Recipe. These ingredients blend to create a honey garlic glaze that makes this chicken dish truly special. Preparing the marinade To start, grab a medium bowl. Whisk together the honey, minced garlic, soy sauce, apple cider vinegar, olive oil, grated ginger, black pepper, and a small pinch of salt. Mix until all ingredients blend well. This sauce will give your chicken a sweet and savory flavor. Marinating the chicken Next, take your chicken thighs and place them in a zip-lock bag or shallow dish. Pour the marinade over the chicken, making sure each piece gets coated. Seal the bag or cover the dish. Refrigerate for at least one hour. For deeper flavor, marinate overnight. Preheating the oven While the chicken marinates, preheat your oven to 400°F (200°C). A hot oven helps the chicken cook evenly and crisp the skin. Baking the chicken After marinating, remove the chicken from the marinade. Don’t throw the marinade away; you will use it later. Place the chicken thighs skin side up on a baking tray lined with parchment paper. Bake in the preheated oven for 30-35 minutes. The chicken is ready when it reaches an internal temperature of 165°F (74°C) and the skin is crispy. Cooking the sauce While your chicken bakes, pour the reserved marinade into a small saucepan. Heat it over medium heat. Let it simmer for about 5-7 minutes until it thickens slightly. This will be your delicious glaze. Glazing and serving When the chicken is done, brush the thickened glaze over the thighs. Return the tray to the oven for another 5 minutes to caramelize the glaze. Once done, remove and sprinkle with chopped green onions and sesame seeds. Let the chicken rest for a few minutes before serving. Enjoy your Honey Garlic Glazed Chicken Thighs! For the full recipe, check the earlier section. - The best time to marinate chicken thighs is at least one hour. For deeper flavor, marinate overnight. - Use a zip-lock bag for even coating. Squeeze out air to let the marinade soak in well. - To get crispy skin, bake the chicken thighs skin side up. This allows the fat to render and crisp up. - Check the internal temperature with a meat thermometer. It should reach 165°F (74°C) for safe eating. - Pair your honey garlic glazed chicken with steamed rice or roasted vegetables. - For a nice look, garnish with chopped green onions and sesame seeds. This adds color and crunch. For the full recipe, refer to the instructions above. Enjoy your cooking! {{image_2}} You can switch up the protein in this dish. Chicken breast works well if you want less fat. For a plant-based option, try tofu. Just press it to remove excess water and cut it into cubes. You can also change the sweetener. If you want a lower sugar option, use maple syrup or agave nectar. These alternatives blend nicely with the other flavors. Make this dish even better by adding spices or herbs. Try ginger or chili flakes for a kick. Fresh herbs like cilantro or basil can bring a nice twist too. You can also play with acids. Lime juice adds a bright flavor, while balsamic vinegar gives a sweet tang. Try adding a splash during cooking for a new taste. Grilling the chicken gives it a smoky flavor. Just marinate as usual and grill over medium heat. It takes about 20 minutes, and you’ll get nice grill marks. If you own an Instant Pot, you can use it for this recipe too. Cook the marinated chicken on high for 10 minutes, then let it naturally release. This method keeps the chicken super juicy. For the full recipe, check out the complete instructions and details. To keep your honey garlic glazed chicken thighs fresh, store them in the fridge. Place the cooked chicken in an airtight container. It can last up to 3 days in the refrigerator. If you want to store it longer, consider freezing it. Wrap the chicken tightly in plastic wrap, then place it in a freezer-safe bag. This way, it can stay good for up to 3 months. When it's time to enjoy leftovers, reheating can be simple. The best way to reheat is in the oven. Set your oven to 350°F (175°C). Place the chicken on a baking sheet and cover it with foil. This helps keep the chicken moist. Heat it for about 15-20 minutes or until it's warm. You can also use a microwave, but use a lower power setting to avoid drying it out. Cover the chicken with a damp paper towel to keep moisture in. You can store your honey garlic glazed chicken thighs safely for a few days. In the fridge, they stay good for 3 days. In the freezer, they last for 3 months. Signs of spoilage include a strange smell, changes in color, or a slimy texture. Always check before eating to stay safe. For more details on how to make this dish, check the Full Recipe. Can I use boneless chicken thighs? Yes, you can use boneless chicken thighs. They will cook faster than bone-in thighs. Check the internal temperature to ensure they reach 165°F (74°C). How to make the glaze thicker? To thicken the glaze, simmer it longer. Cook it on medium heat until it reduces and becomes syrupy. You can also add a cornstarch slurry for extra thickness. How to make it gluten-free? Use tamari instead of soy sauce. Tamari is a gluten-free option that tastes great. Can I add vegetables to the dish? Yes, you can add vegetables. Try bell peppers, broccoli, or carrots. Toss them on the baking tray with the chicken. How many servings does this recipe yield? This recipe makes four servings. It’s perfect for a small family meal. Can I double the recipe for a larger group? Yes, you can double the recipe. Just ensure your baking tray has enough space. You may need to adjust cooking time slightly. For the complete recipe, check out the [Full Recipe]. This recipe uses simple ingredients like chicken thighs, honey, and garlic. You learned how to prepare and cook tasty chicken with an easy glaze. I shared tips to help with marinating and cooking for the best results. Feel free to explore variations and enjoy leftovers too. Try different flavors and cooking methods. Cooking should be fun and personal. Use your taste to create amazing meals. Enjoy making this dish with friends and family!](https://dailydishly.com/wp-content/uploads/2025/07/b9cba3e0-ee7f-4dbf-9eac-9b8411a1c4fd-768x768.webp)

