Creamy Spinach Ricotta Gnocchi Flavorful Comfort Dish

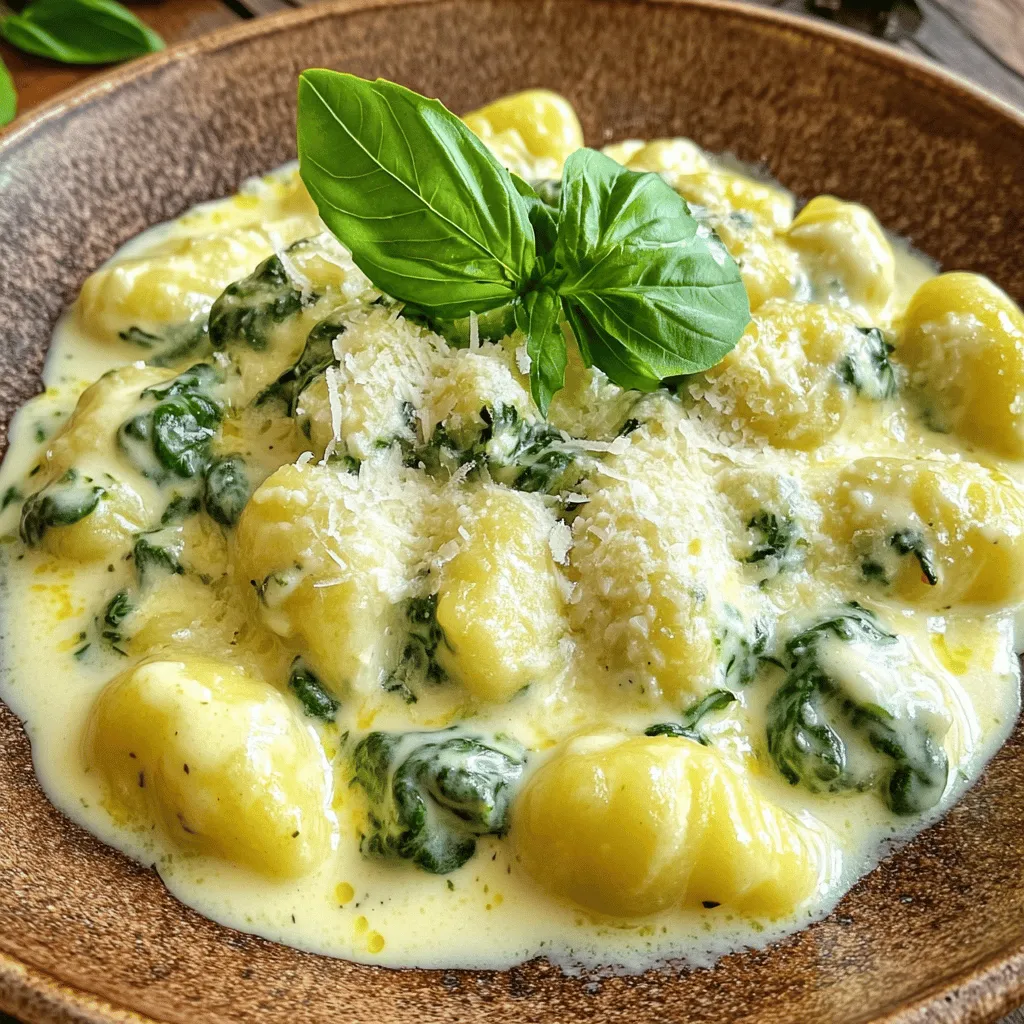
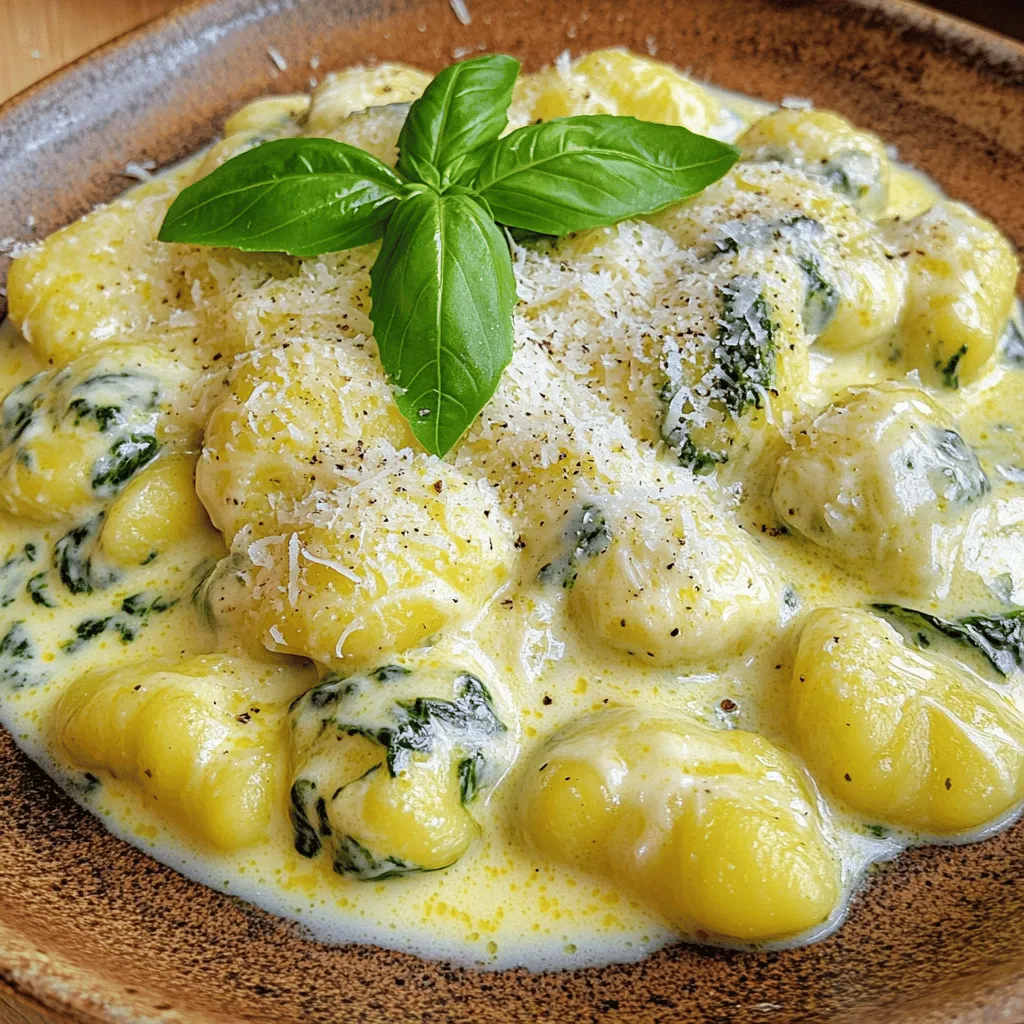
If you’re searching for a cozy meal that delights the senses, look no further! This Creamy Spinach Ricotta Gnocchi is your answer to flavorful comfort. With fresh spinach and creamy ricotta wrapped in soft pillows of gnocchi, it’s a dish you can’t resist. Get ready to impress your family or treat yourself with simple ingredients and easy steps. Let’s dive into making this deliciously rich meal!
Ingredients
To make creamy spinach ricotta gnocchi, you’ll need these simple ingredients:
– 2 cups fresh spinach, chopped
– 1 cup ricotta cheese
– 1 cup all-purpose flour (plus extra for dusting)
– 1 large egg
– 1/4 teaspoon nutmeg
– Salt and pepper to taste
– 1 tablespoon olive oil
– 1 cup heavy cream
– 1/2 cup grated Parmesan cheese
– Fresh basil leaves for garnish
Each ingredient plays a key role in creating a rich and comforting dish. The fresh spinach gives a nice color and a healthy twist. Ricotta cheese adds creaminess. The flour helps bind everything so you can shape the gnocchi.
The egg is essential for adding richness and helps the dough hold together. Nutmeg adds a warm flavor that enhances the dish. Olive oil provides a nice base for your sauce, while heavy cream adds that luscious, velvety texture. Finally, Parmesan adds a salty depth that makes each bite delicious.
You can also choose garnish options like fresh basil leaves. They bring a fresh flavor and a pop of color to your plate. Enjoy these ingredients as you create your delightful meal!
Step-by-Step Instructions
Preparing the Spinach
Start by cooking the spinach. In a skillet, add the chopped spinach and a splash of water. Heat it over medium heat. Cook until the spinach wilts, which takes about 2-3 minutes. Once it’s done, remove it from the heat and let it cool.
Next, squeeze out excess moisture. After cooling, take the spinach and press it firmly with your hands or use a clean cloth. This step is key to avoid watery gnocchi. Finally, chop the spinach finely to ensure it mixes well in the dough.
Making the Gnocchi Dough
Now it’s time to make the gnocchi dough. In a large bowl, mix the ricotta cheese, chopped spinach, egg, nutmeg, and a pinch of salt and pepper. Stir until everything is well blended.
Gradually add the flour, about 1/4 cup at a time. Mix it in gently. Be careful not to overwork the dough. You want it soft but not sticky. If it feels too wet, add a bit more flour.
Shaping the Gnocchi
To shape the gnocchi, first, divide the dough into four equal parts. On a lightly floured surface, roll each part into a rope. Aim for a thickness of about 1/2 inch.
Next, cut the rope into 1-inch pieces. If you like, roll each piece over the tines of a fork. This creates ridges that help hold the sauce better.
Cooking the Gnocchi
Bring a large pot of salted water to a boil. Carefully drop the gnocchi in, but do it in batches. Watch them closely. Once they float to the surface, they are done. This usually takes about 2-3 minutes. Use a slotted spoon to remove them and set them aside.
Making the Cream Sauce
In the same skillet used for the spinach, add olive oil over medium heat. Pour in the heavy cream and bring it to a gentle simmer. Stir in the grated Parmesan cheese until it melts completely.
Season the sauce with salt and pepper to make it flavorful. Taste it to make sure it’s just right.
Combining Gnocchi and Sauce
Now it’s time to combine the gnocchi with the sauce. Gently toss the cooked gnocchi in the creamy sauce. Make sure each piece gets coated well. Let it simmer for another minute on low heat. This helps the gnocchi soak up the tasty flavors.
Serving Suggestions
When serving, plate the creamy spinach ricotta gnocchi in a nice bowl. For a touch of color, garnish with fresh basil leaves. You can also add extra grated Parmesan on top for added flavor. Enjoy your comforting dish!
Tips & Tricks
Perfecting the Gnocchi
To avoid mushy dough, always use the right amount of flour. Start with one cup of flour and add more gradually. If the dough feels sticky, add a bit more flour. Knead the dough gently and don’t overwork it.
When shaping the gnocchi, keep your surface floured. Roll the dough into ropes about half an inch thick. Cut them into one-inch pieces. Use a fork to create ridges on each piece for better sauce adherence.
Improving the Cream Sauce
You can change the flavor of the sauce easily. Add garlic or shallots for extra depth. A pinch of red pepper flakes gives a nice kick. Lemon zest brightens the dish, making it fresh and lively.
If you want to switch cheeses, try mascarpone or cream cheese. Both create a rich, creamy texture. For a stronger taste, use aged cheddar or goat cheese.
Cooking Techniques
To avoid sticky gnocchi, ensure your water is boiling before adding them. Cook them in small batches. This keeps them from clumping together.
When cooking in batches, remove the cooked gnocchi with a slotted spoon. Place them on a plate lined with parchment paper. This prevents them from sticking while you cook the rest.

Variations
Adding Proteins
You might want to add proteins to your creamy spinach ricotta gnocchi. If you enjoy meat, consider adding cooked chicken or shrimp. These options bring a hearty flavor that pairs well with the creamy sauce.
For a vegetarian twist, try adding chickpeas or lentils. They boost protein and keep the dish filling. You can also sprinkle in some cooked quinoa for a nutty flavor.
Flavor Enhancements
To elevate the taste, think about herbs and spices. Fresh basil, thyme, or oregano can add a lovely aroma. A pinch of red pepper flakes gives a nice kick, too.
Cheese can also change the flavor. Try adding feta for a tangy twist or mozzarella for a creamy melt. Mixing cheeses can lead to a unique taste that excites your palate.
Vegetable Mix-Ins
Mixing in more vegetables keeps the dish fresh and vibrant. You can add roasted bell peppers, zucchini, or mushrooms for extra texture.
Seasonal vegetables are a fun choice, too. In spring, add peas or asparagus. In fall, consider pumpkin or butternut squash. These swaps keep your gnocchi interesting and colorful all year round.
Storage Info
Refrigeration
To store leftover creamy spinach ricotta gnocchi, place it in an airtight container. This keeps the dish fresh. It will last in the fridge for about 3 days. Before serving, check for any off smells or changes in texture.
Freezing
You can freeze gnocchi for later use. First, spread uncooked gnocchi on a baking sheet and freeze them for 1-2 hours. Then, transfer them to a freezer bag. This way, they won’t stick together. Frozen gnocchi can last up to 2 months. When you’re ready to eat, cook them straight from the freezer.
Reheating Techniques
To reheat gnocchi, the stovetop is best. Heat a little cream or sauce in a pan. Add the gnocchi and heat until warm. This method keeps their soft texture. If using a microwave, place gnocchi in a bowl with a splash of water. Heat in short bursts, stirring often, to avoid drying them out.
FAQs
Can I use frozen spinach instead of fresh?
Yes, you can use frozen spinach. Just thaw it first and squeeze out the water. This helps keep your gnocchi from getting too watery. Frozen spinach is a great time-saver, too. Just remember to chop it finely after thawing.
How do I know when gnocchi is cooked?
You will know the gnocchi is cooked when they float to the top of the water. This usually takes about 2-3 minutes. Once they rise, give them a minute more to ensure they are fully cooked. Use a slotted spoon to remove them gently.
What can I substitute for ricotta cheese?
If you need a substitute for ricotta, use cottage cheese or cream cheese. Both will work well in this recipe. Just blend them until smooth to mimic the texture of ricotta. You can also try using mascarpone for a richer flavor.
Is there a gluten-free option for this recipe?
Yes, you can make this dish gluten-free. Use gluten-free flour in place of all-purpose flour. Many brands have blends that work well for gnocchi. Just be sure to check the package for the right measurements as they can differ.
Can I make the gnocchi ahead of time?
Absolutely! You can prepare the gnocchi ahead of time and store them in the fridge. Just place them in a single layer on a baking sheet and freeze. Once frozen, transfer them to a bag. When you’re ready, cook them straight from the freezer.
This blog post covered how to make delicious spinach ricotta gnocchi from scratch. We discussed key ingredients, step-by-step instructions for preparing the gnocchi, and tips for improving both the gnocchi and cream sauce. I shared variations to add proteins and flavors, as well as essential storage and reheating tips.
Making gnocchi can be easy and fun. With practice, you can master this comforting dish and impress your friends and family. Enjoy creating your own version and savor every bite!


![To make Greek Lemon Chicken Soup, you need fresh and simple ingredients. These give the soup its bright flavor and comforting feel. Here’s the list of what you’ll need: - 1 lb boneless, skinless chicken breasts - 6 cups chicken broth - 1 medium onion, chopped - 2 cloves garlic, minced - 1 cup carrots, diced - 1 cup celery, diced - 1 cup orzo pasta or rice - 3 large eggs - 1/3 cup fresh lemon juice (about 2-3 lemons) - 1 teaspoon dried oregano - Salt and pepper to taste - Fresh dill, for garnish These ingredients come together to create a soup that warms the soul. The chicken offers protein, while the vegetables add nutrients and texture. The lemon juice gives it a zesty kick. I always stress the importance of fresh ingredients. They make the soup vibrant and full of flavor. Using orzo or rice helps to make the soup hearty. You can choose according to your preference. Eggs add creaminess without heavy cream, keeping the dish light. Don’t skip the fresh dill; it adds a wonderful aroma and flavor. For the full recipe and step-by-step instructions, check out the section labeled "Full Recipe." - Boil chicken in broth. Place 1 lb of boneless, skinless chicken breasts in 6 cups of chicken broth. Bring it to a boil over medium-high heat. Let the chicken simmer for 15 to 20 minutes, until it’s cooked through. - Remove and shred. Once done, take the chicken out and let it cool a bit. Use two forks to shred it into bite-sized pieces. Set this chicken aside for later. - Add onion, garlic, carrots, and celery. In the same pot with the broth, add 1 medium chopped onion, 2 minced garlic cloves, 1 cup diced carrots, and 1 cup diced celery. - Cook until tender. Stir and let the veggies cook for about 10 minutes, until they become tender and fragrant. - Stir in orzo or rice. After the veggies soften, add 1 cup of orzo pasta or rice. Cook it according to the package instructions, usually around 8 to 10 minutes. - Whisk eggs and lemon juice. In a bowl, whisk together 3 large eggs and 1/3 cup of fresh lemon juice until well mixed. - Temper eggs with hot broth. Once the orzo is ready, reduce the heat to low. Gradually add a ladle of the hot broth to the egg mixture while whisking constantly. This step helps prevent the eggs from scrambling. - Add to the pot, return chicken. Slowly pour the tempered egg mixture back into the pot while stirring. Add the shredded chicken back in, along with 1 teaspoon of dried oregano, salt, and pepper to taste. Let the soup warm through for 3 to 5 minutes. This method brings every flavor together in a cozy bowl of Greek Lemon Chicken Soup. You can find the complete recipe [Full Recipe]. How to prevent eggs from scrambling To keep the eggs from scrambling, you must temper them first. Start by whisking together the eggs and lemon juice in a bowl. Slowly add a ladle of hot broth from the pot into this bowl. Whisk continuously while pouring. This warms the eggs without cooking them. Once the mixture is warm, pour it back into the pot while stirring. This method helps create a smooth texture. Achieving the right consistency The soup should be creamy but still light. If it feels too thick, add more broth until it reaches your desired consistency. If you prefer a thicker soup, let it simmer a bit longer to reduce. Just remember to stir often to prevent sticking. The orzo or rice will also absorb some broth, so adjust as needed. Best accompaniments for Greek Lemon Chicken Soup This soup pairs well with a simple side salad or crusty bread. A fresh Greek salad with tomatoes, cucumbers, and feta adds a nice crunch. You can also serve it with warm pita or toasted baguette slices. These sides enhance the meal and round out the flavors. Presentation tips with dill and lemon zest For a beautiful presentation, ladle the soup into bowls. Garnish each bowl with a sprig of fresh dill. Add a twist of lemon zest on top for color and flavor. A slice of lemon on the side brightens up the dish. This not only looks great but also adds a burst of fresh taste. {{image_2}} To make Greek Lemon Chicken Soup vegan or vegetarian, you can switch out the chicken. Use tofu, tempeh, or chickpeas instead. For broth, swap chicken broth with vegetable broth. This keeps the same warm flavor while being plant-based. Instead of orzo, you can use quinoa or rice noodles. These options add a nice texture and soak up the soup’s flavor well. They are also gluten-free, which is great for many diets. If you don’t have orzo, any small pasta works. You can try ditalini, small shells, or even farro. Each gives a unique twist to the dish. For vegetables, consider adding sweet corn, peas, or bell peppers. These add color and a hint of sweetness. You can also try kale or spinach for a nutritious boost. Mixing different veggies keeps the soup exciting and tasty. For the full recipe, check out the detailed cooking steps. To keep your Greek Lemon Chicken Soup fresh, follow these steps: - Refrigeration tips: Let the soup cool to room temperature. Transfer it to an airtight container. It’s best to store it in the fridge for up to 3 days. - Freezing instructions: For longer storage, freeze the soup. Use a freezer-safe container, leaving some space at the top for expansion. It can stay frozen for up to 3 months. When you want to enjoy your soup again, reheating is key. Here’s how to do it right: - Best methods for reheating soup: Use the stovetop for even heating. Place the soup in a pot over medium heat, stirring often. You can also use the microwave, but do it in short bursts to prevent hot spots. - Tips for maintaining flavor and texture: Add a splash of chicken broth or water while reheating. This keeps the soup from getting too thick and helps refresh the flavors. How can I make Greek Lemon Chicken Soup gluten-free? To make this soup gluten-free, simply replace orzo with gluten-free pasta or rice. This swap keeps the soup tasty and light. What is the origin of Greek Lemon Chicken Soup? This comforting dish, known as Avgolemono, comes from Greece. It blends chicken, lemon, and eggs, creating a rich flavor. Can I use leftover chicken for this recipe? Absolutely! Leftover chicken adds great flavor. Just shred it and add it to the soup when you combine ingredients. How long does this soup last in the refrigerator? Greek Lemon Chicken Soup lasts about three to four days in the fridge. Store it in an airtight container for best results. What are the nutritional benefits of this soup? This soup is rich in protein from chicken and eggs. It also offers vitamins from vegetables and lemon's vitamin C. Can I make this soup in a slow cooker or instant pot? Yes, you can! For a slow cooker, cook on low for 6-8 hours. For an instant pot, use the soup setting for about 20 minutes. Be sure to follow the Full Recipe for best results. This blog post walked you through making Greek Lemon Chicken Soup. We covered the key ingredients, from chicken and broth to fresh lemon juice. You learned how to prepare the chicken and cook the veggies. I shared tips to perfect the soup and ideas for serving it. Variations and proper storage techniques were also highlighted. This soup is not only tasty but also easy to make. Whether you stick to the classic recipe or try a twist, enjoy every warm bowl!](https://dailydishly.com/wp-content/uploads/2025/06/65f566a6-d6b5-4832-8417-ad5d991989df-768x768.webp)


![To create this creamy delight, you need a few simple items: - 1 lb elbow macaroni - 4 cups water - 2 tablespoons unsalted butter - 1 teaspoon garlic powder - 1 teaspoon onion powder - ½ teaspoon smoked paprika - Salt and pepper to taste These ingredients form the base of the dish. The elbow macaroni cooks perfectly in the Instant Pot. The water helps to steam the pasta, making it tender and fluffy. You can boost the flavor of your mac and cheese with a few optional items: - Mustard powder - Hot sauce - Cooked bacon bits - Chopped green onions Adding mustard powder gives a nice tang. Hot sauce can add a kick, while cooked bacon bits provide a savory crunch. Green onions add freshness and brightness. For the creamiest mac and cheese, choose your cheeses wisely. I recommend: - 2 cups sharp cheddar cheese, shredded - 1 cup mozzarella cheese, shredded - ½ cup cream cheese, softened Sharp cheddar provides a bold flavor. Mozzarella makes it stretchy and creamy. Cream cheese adds richness, making every bite delightful. For the full recipe, check out the instructions above. First, gather all your ingredients. You need: - 1 lb elbow macaroni - 4 cups water - 2 tablespoons unsalted butter - 1 teaspoon garlic powder - 1 teaspoon onion powder - ½ teaspoon smoked paprika - Salt and pepper to taste - 2 cups sharp cheddar cheese, shredded - 1 cup mozzarella cheese, shredded - ½ cup cream cheese, softened - ½ cup whole milk Add the elbow macaroni and water to the Instant Pot. Then, mix in the butter, garlic powder, onion powder, smoked paprika, and a pinch of salt. Stir well to combine. This step is key for flavor. Now, close the lid of the Instant Pot. Set the valve to sealing. Select the manual setting and cook on high pressure for 4 minutes. This short cooking time works well! Once the timer goes off, do a quick release of the pressure. Be careful when you open the valve. After the pressure releases, carefully open the lid. It will smell amazing! Stir in the remaining tablespoon of butter, cheddar cheese, mozzarella cheese, cream cheese, and whole milk. Mix well until everything blends into a creamy dish. If it feels too thick, add a splash more milk to thin it out. Season with salt and pepper to your liking. Now you have a delicious, creamy mac and cheese! For the complete recipe, check out the [Full Recipe]. To make your mac and cheese super creamy, use a mix of cheeses. I suggest sharp cheddar for flavor and mozzarella for stretch. Cream cheese adds richness and smoothness. Always stir in your dairy after cooking the pasta. This keeps everything creamy and prevents lumps. One common mistake is overcooking the pasta. If you cook it too long, it can get mushy. Stick to the cooking time of four minutes. Another pitfall is not adding enough liquid. If your mac and cheese seems dry, add more milk slowly. Taste as you go to get the right creaminess. Serve your mac and cheese in fun, colorful bowls. This makes the dish pop! Top it with fresh parsley or chives for color. A sprinkle of extra cheese on top before serving also looks great. You can add crispy bacon bits or breadcrumbs for crunch. This makes your creamy mac and cheese even more delightful! {{image_2}} You can easily make your mac and cheese more filling by adding protein. Consider cooked chicken, bacon, or sausage. Just chop the meat into small pieces. Stir it into the pot with the cheese. This will make your dish hearty and flavorful. If you like some heat, try adding jalapeños or hot sauce. You can slice fresh jalapeños and mix them in. For a milder option, use pickled jalapeños. This adds a great kick to the creamy sauce. You can also drizzle hot sauce on top before serving for extra spice. For a vegetarian twist, add veggies like broccoli or spinach. Steam them first, then mix them in with the cheese. This not only adds color but also boosts nutrition. You can also use a blend of different cheeses to create unique flavors. Explore these variations to make your Instant Pot creamy mac and cheese truly your own! For the full recipe, check out the link above. To keep your mac and cheese fresh, place it in an airtight container. Make sure the container is clean and dry. You can store it in the fridge for up to three days. If you have a large batch, divide it into smaller portions. This helps it cool faster and stay fresh longer. When you are ready to enjoy your leftovers, reheating is key. Place the mac and cheese in a pot over low heat. Add a splash of milk to keep it creamy. Stir often until it is hot. You can also use the microwave. Heat it in 30-second intervals, stirring in between. This way, it warms evenly and does not dry out. If you want to save some for later, freezing works well. Let the mac and cheese cool completely before freezing. Use a freezer-safe container or bag. Remove as much air as possible to prevent freezer burn. It can last for up to three months in the freezer. When you’re ready to eat, thaw it in the fridge overnight and reheat as described above. For best results, add a bit more cheese or milk when reheating to restore its creaminess. For a full recipe of Instant Pot Creamy Mac and Cheese, check out the detailed instructions above. Yes, you can use gluten-free pasta. Just check the cooking time on the package. Gluten-free pasta may cook faster, so adjust the pressure cooking time to around 3 minutes. If you overcook it, the pasta can become mushy. To make it dairy-free, swap the cheese with plant-based options. Use dairy-free butter and cream. You can also try cashew cream for a rich texture. Nutritional yeast can add a cheesy flavor without dairy. Sharp cheddar is my favorite for its bold flavor. It melts well and adds creaminess. Mozzarella gives a nice stretch, while cream cheese adds richness. A mix of these cheeses works best for a creamy texture. Different pasta shapes need different cooking times. For example, penne or shells may need 5 minutes. Always check the pasta package for the right time. Remember, you want the pasta to be tender but not mushy. Making Instant Pot Creamy Mac and Cheese is easy. You learned about key ingredients and the best cheeses. I shared step-by-step cooking tips and ways to avoid common mistakes. You can add fun flavors and proteins for variety. Remember, store and reheat leftovers correctly for best taste. Enjoy your creamy mac and cheese journey! It’s a dish that brings joy to any meal.](https://dailydishly.com/wp-content/uploads/2025/07/aef5e05b-bf60-4c96-8d62-11668510c0c6-768x768.webp)
