Crispy Air Fryer Chickpeas Simple and Tasty Snack

Looking for a delicious and crunchy snack? You’ll love crispy air fryer chickpeas! They are easy to make, healthy, and packed with flavor. In this post, I’ll share simple ingredients, step-by-step instructions, and helpful tips to get the perfect crunch. Whether you stick to the basics or try fun seasoning variations, these chickpeas will be a hit. Let’s get cooking and snack smarter today!
Ingredients
Essential Ingredients for Crispy Chickpeas
To make crispy air fryer chickpeas, you need just a few simple items:
– 1 can (15 oz) chickpeas, drained and rinsed
– 1 tablespoon olive oil
– 1 teaspoon smoked paprika
– 1/2 teaspoon garlic powder
– 1/2 teaspoon onion powder
– 1/2 teaspoon cumin
– 1/4 teaspoon cayenne pepper (adjust to taste)
– Salt to taste
These ingredients work together to create a tasty and crunchy snack. The chickpeas are the star here, and rinsing them helps remove the brine taste. Olive oil adds richness and helps the spices stick.
Recommended Seasonings and Variations
The base recipe gives you a great flavor, but feel free to get creative! Here are some ideas:
– Instead of smoked paprika, try regular paprika or chili powder for a different kick.
– Add some Italian seasoning or curry powder for a unique twist.
– If you love heat, increase the cayenne pepper or add red pepper flakes.
Experimenting with spices turns a simple snack into something special. Mix and match to find your favorite.
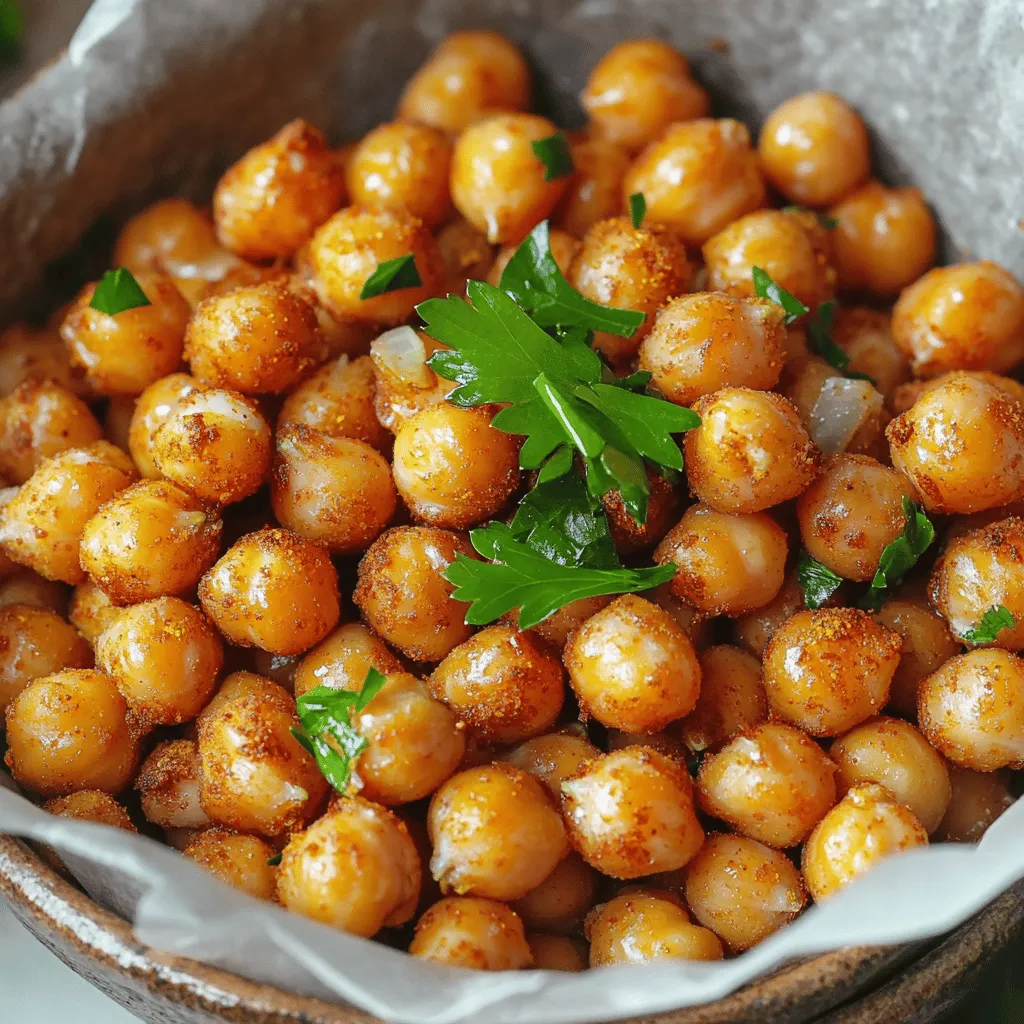
Optional Garnishes to Enhance Presentation
Garnishes can make your crispy chickpeas look even better. Here are some fun ideas:
– Fresh parsley, chopped, adds a pop of color and freshness.
– A squeeze of lemon juice brightens the flavors.
– Serve them in a bowl lined with parchment for a rustic vibe.
These small touches make your dish not only taste good but look great too.Enjoy your crispy air fryer chickpeas!
Step-by-Step Instructions
Preheating the Air Fryer
Start by preheating your air fryer to 400°F (200°C). This step is key. It helps cook the chickpeas evenly. Set your timer for about 5 minutes. While it heats, you can prepare the chickpeas.
Preparing the Chickpeas
Grab a can of chickpeas, around 15 oz. Drain and rinse them well under cold water. Use a paper towel to dry them. This is important for getting them crispy. If you want extra crunch, remove any loose skins. This little step helps a lot!
Coating and Seasoning Processes
In a mixing bowl, add the dried chickpeas. Pour in 1 tablespoon of olive oil. Next, sprinkle in the spices: 1 teaspoon of smoked paprika, 1/2 teaspoon of garlic powder, 1/2 teaspoon of onion powder, and 1/2 teaspoon of cumin. For some heat, add 1/4 teaspoon of cayenne pepper. Finally, add salt to taste. Toss everything well. You want the chickpeas to be fully coated with all those yummy flavors.
Cooking Time and Techniques
Now it’s time to cook! Place the seasoned chickpeas in your air fryer basket. Make sure they are in a single layer. This helps them get crispy all over. Air fry for 15 to 18 minutes. Remember to shake the basket halfway through. This keeps them cooking evenly. When they turn golden brown and crunchy, they are done. Let them cool for a few minutes. They will get even crispier as they cool. Enjoy your crispy air fryer chickpeas as a tasty snack!
Tips & Tricks
Achieving Maximum Crispiness
To get the best crunch, start with dry chickpeas. After rinsing, pat them with a paper towel. Removing loose skins can help too. This makes for a crispier bite. When you coat them with oil and spices, make sure they are evenly covered. Use a single layer in the air fryer to let the hot air flow. Shake the basket halfway through to cook them evenly.
Common Mistakes to Avoid
One big mistake is overcrowding the basket. This can lead to soggy chickpeas. Another error is not drying the chickpeas enough before cooking. Wet chickpeas won’t crisp up well. Also, be careful with the oil. Too much can lead to greasy snacks instead of light and crispy bites. Lastly, keep an eye on cooking time. Overcooking can burn them, while undercooking leaves them soft.
Adjusting Spice Levels and Flavor Profiles
You can easily change the spice levels to fit your taste. If you like heat, add more cayenne pepper. For a milder flavor, reduce the cayenne or skip it. Try different spices like curry powder or Italian herbs for unique flavors. You can also mix in some grated cheese after cooking for a savory twist. Experiment to find your perfect blend!

Variations
Alternative Seasoning Combinations
You can change the flavor of your crispy air fryer chickpeas with different spices. Try using chili powder for heat, or Italian herbs for a fresh taste. You can also mix in lemon zest for brightness. If you like sweet snacks, cinnamon and a bit of sugar can make a fun treat. Each mix gives a unique twist to the chickpeas.
Using Different Types of Beans or Lentils
Chickpeas are great, but other beans work well too. Try black beans for a rich flavor or kidney beans for a nice color. Lentils can also be air-fried but need a little extra cooking time. Just make sure to dry them well before seasoning. This way, you can enjoy a variety of textures and tastes.
Serving Options and Pairing Suggestions
Crispy chickpeas make a tasty snack on their own. You can also use them as toppings for salads or soups. They add crunch and protein. Serve them with a dip like hummus or yogurt for a fun combo. You can even mix them into rice bowls for extra flavor and texture. The options are endless!
Storage Info
Best Practices for Storing Leftovers
To keep your crispy chickpeas fresh, store them in an airtight container. This helps preserve their crunch. Avoid placing them in the fridge, as moisture can make them soggy. Instead, keep them at room temperature away from direct sunlight. For best results, consume them within a few days.
Reheating Tips for Optimal Texture
If you have leftovers, you can reheat them in the air fryer. Set it to 350°F (175°C) and air fry for about 5 minutes. This method helps restore their crispiness. You can also use a regular oven at the same temperature, but it may take a bit longer. Avoid using a microwave, as it will make them soft.
Shelf Life of Crispy Chickpeas
Crispy air fryer chickpeas can last up to 5 days when stored properly. After that, they may lose their crunch and flavor. Always check for any signs of spoilage before eating. For longer storage, consider freezing them, though this may affect their texture. Enjoy your crispy chickpeas as a quick and tasty snack!
FAQs
How do I make sure my chickpeas are crispy?
To ensure crispy chickpeas, start with dry ones. Drain and rinse them well. Pat them dry with a towel. Remove loose skins if you want extra crunch. Coat them evenly with olive oil and spices. Air fry in a single layer. Shake the basket halfway through cooking. This helps them crisp up nicely.
Can I make this recipe without an air fryer?
Yes, you can make crispy chickpeas in the oven. Preheat your oven to 400°F (200°C). Spread the seasoned chickpeas on a baking sheet. Bake for about 25-30 minutes. Stir them every ten minutes for even cooking. They will be crunchy and tasty, just like the air-fried version.
What are the health benefits of chickpeas?
Chickpeas are packed with nutrients. They are high in protein and fiber. This makes them great for your diet. Eating chickpeas can help with digestion. They also support heart health. Plus, they are low in calories. This makes them a smart snack choice.
Can I use dried chickpeas instead of canned?
You can use dried chickpeas, but they need more prep. Soak them overnight in water. Cook them until soft before seasoning. This may take longer than using canned chickpeas. However, you will enjoy a fresh flavor in your dish.
In this article, we explored how to make crispy chickpeas. You learned about key ingredients, cooking steps, and tips for perfecting crispiness. We also discussed variations and ways to store leftovers.
Enjoy experimenting with flavors and textures in your kitchen. Crispy chickpeas are a tasty and healthy snack option. With these steps, you can create a fun recipe that impresses your friends and family. Try it out and enjoy!


![- 1 lb ground chicken - 1 cup shiitake mushrooms, finely chopped - 1 red bell pepper, diced - 3 tablespoons soy sauce - 1 tablespoon hoisin sauce - 1 tablespoon sesame oil - 1 head of butter lettuce or romaine lettuce leaves, separated - Chopped peanuts or cashews for garnish - Fresh cilantro for garnish The main ingredients in this recipe create a tasty base for your wraps. Ground chicken provides protein and moisture. Shiitake mushrooms add umami and depth. Diced red bell pepper brings sweetness and color. For the sauce, soy sauce gives a salty kick. Hoisin sauce adds sweetness and richness. Sesame oil brings a nutty flavor that ties it all together. Finally, the garnishes are key. Fresh lettuce leaves cradle your filling. Chopped peanuts or cashews add crunch. Fresh cilantro gives a pop of herbiness. You can find the full recipe above for exact measurements and steps. Enjoy crafting these delicious wraps! First, heat sesame oil in a large skillet over medium heat. This oil gives the wraps a nice flavor. Next, add minced garlic and grated ginger. Sauté for about one minute until you smell their aroma. Then, add the ground chicken to the skillet. Break it apart with a wooden spoon. Cook for about 5 to 7 minutes until the chicken is browned and fully cooked. Now, stir in the chopped shiitake mushrooms and diced red bell pepper. Cook these for an additional 3 to 4 minutes until the vegetables are tender. This step adds texture and color to your dish. After that, pour in the soy sauce, hoisin sauce, and rice vinegar. Stir everything together until well mixed. Season with salt and pepper to taste. This mixture brings all the flavors together. To assemble, scoop a generous spoonful of the chicken mixture into a lettuce leaf. This is where the fun begins! Top with chopped peanuts or cashews for some crunch. Add fresh cilantro for a burst of freshness. Serve immediately, letting guests wrap their own lettuce cups. This makes for a fun and interactive meal. For the complete recipe, check out the [Full Recipe]. To cook ground chicken well, heat your skillet first. Add sesame oil and let it get hot. Then, add minced garlic and grated ginger. Cook until fragrant, about one minute. Next, add the ground chicken. Break it apart with a spoon. Cook for five to seven minutes until it's brown. For crunchy veggies, don't overcook them. After adding shiitake mushrooms and red bell pepper, cook for just three to four minutes. This keeps them crisp and fresh. To add heat, try chili paste or sriracha. Start with a small amount. You can always add more if you want it spicier. Also, feel free to play with spices. Try adding a pinch of five-spice powder or a dash of black pepper. Each spice adds a new layer of flavor. For serving, arrange the wraps on a large plate. Place the chicken mixture in the center. This way, guests can serve themselves. To keep the lettuce crisp, wash and dry the leaves well. Store them in a sealed bag with a paper towel. This helps absorb moisture and keeps the leaves fresh. For the full recipe, check the [Full Recipe]. {{image_2}} You can switch the ground chicken for other meats. Ground turkey works great. It has less fat and a mild flavor. Ground beef is another option if you want a richer taste. If you want a vegetarian dish, try using tofu. Press the tofu first to remove extra water. Then crumble it into small pieces. Cook it just like you would the chicken. It will soak up all the nice flavors. The sauce makes the dish pop. You can try different sauces for fun. Teriyaki sauce adds sweetness and a nice glaze. Peanut sauce gives a creamy texture that many love. If you need a gluten-free option, use tamari instead of soy sauce. It tastes similar but is safe for those avoiding gluten. This change will keep your meal flavorful. Adding more veggies makes your wraps even better. Carrots add crunch and sweetness. Water chestnuts give a nice texture. Chop them up small and stir them in with the chicken. Fresh herbs can boost the flavor too. Cilantro adds brightness, while mint gives a fresh taste. Just sprinkle them in before you wrap everything up. You can find more ideas in the Full Recipe. To store your chicken mixture, let it cool first. Place it in a clean, airtight container. This keeps it fresh for up to three days. To keep your lettuce fresh, wrap the leaves in a damp paper towel. Then, place them in a plastic bag. Store this in the vegetable crisper of your fridge. Yes, you can freeze the chicken mixture! Use an airtight container or freezer bag. Be sure to label it with the date. It can last up to three months in the freezer. For thawing, place it in the fridge overnight. Reheat in a skillet over medium heat until hot. Stir well to ensure even warming. Leftovers last about three days in the fridge. After that, they may spoil. Signs of spoilage include a sour smell or a change in color. If you see mold, throw it away. Always trust your senses when checking for freshness. Enjoy the full recipe for more delicious details! I love using butter lettuce for wraps. Its leaves are tender and perfect for holding the filling. Butter lettuce has a nice, soft texture, making it easy to bite into. Romaine is another option. It has a crisp and sturdy texture. Romaine leaves can hold more filling, but they may be a bit tougher to chew. Both types work well, but I prefer butter lettuce for its flavor and feel. Yes, you can prep ahead. Cook the chicken mixture and let it cool down. Then, store it in an airtight container in the fridge. Store the lettuce leaves separately to keep them fresh. This way, you can assemble the wraps right before serving. You can also chop the veggies ahead of time. Just keep them in the fridge until you are ready to cook. You can serve the wraps with a side of rice or quinoa. This adds some heartiness to the meal. Try a simple dip like sweet chili sauce or soy sauce for extra flavor. Fresh vegetables on the side, like carrot sticks or cucumber slices, also make a great addition. Don’t forget to offer chopped peanuts or cashews as a crunchy garnish. To make it gluten-free, switch soy sauce for tamari. Tamari has a similar taste but is gluten-free. You should also check hoisin sauce for gluten. Some brands offer gluten-free versions. Use fresh ingredients and avoid pre-packaged sauces unless they are labeled gluten-free. These small changes let everyone enjoy the meal without worry. For the full recipe, check out the Asian Chicken Lettuce Wraps recipe. Asian Chicken Lettuce Wraps combine simple ingredients and delightful flavors. You learned to prepare juicy ground chicken, fresh veggies, and a tasty sauce. Remember to play with different proteins and sauces for variety. Store leftovers wisely to keep them fresh. These wraps are fun to make and even better to eat. Enjoy creating your versions and impress your family or friends with great snacks!](https://dailydishly.com/wp-content/uploads/2025/07/cde1ffe3-32d5-41af-a230-f4c5c520fc8a-768x768.webp)
![- 1 can (15 oz) chickpeas, drained and rinsed - 1/2 cup sun-dried tomatoes, chopped - 1/4 cup red onion, finely chopped - 1/2 cucumber, diced Chickpeas are the star of this salad. They add protein and fiber. Sun-dried tomatoes bring a burst of flavor and a bit of sweetness. Fresh veggies, like cucumber and red onion, add crunch and color. Together, they make a hearty base. - 2 tablespoons olive oil - 1 tablespoon lemon juice - 1 teaspoon dried oregano - Salt and pepper to taste The dressing is simple yet full of taste. Olive oil adds richness, while lemon juice gives a bright kick. Oregano adds an earthy note. Salt and pepper round out the flavors nicely. - 1/4 cup feta cheese, crumbled - 2 tablespoons fresh parsley, chopped Feta cheese adds a creamy, tangy element. Fresh herbs like parsley give a burst of freshness. You can add these if you want more flavor and texture. If you want the full recipe, check it out [Full Recipe]. - Combine Key Ingredients Start by taking a large mixing bowl. Add one can of drained and rinsed chickpeas. Then, toss in half a cup of chopped sun-dried tomatoes. Next, add a quarter cup of finely chopped red onion and half a diced cucumber. Finally, sprinkle in a quarter cup of crumbled feta cheese. - Whisk the Dressing In a small bowl, mix two tablespoons of olive oil with one tablespoon of lemon juice. Then, add one teaspoon of dried oregano. Season with salt and pepper to taste. Whisk these ingredients together until well combined. This dressing is key to bringing out the flavors. - Toss Ingredients Together Pour the dressing over the salad mix. Gently toss everything together to coat the ingredients evenly. Be careful not to mash the chickpeas or feta. You want everything to stay nice and whole. - Letting Flavors Meld Once tossed, let the salad sit for at least 15 minutes. This time helps the flavors blend. You can cover it and set it aside. It will taste even better after it rests. - Chilled or Room Temperature You can serve this salad chilled or at room temperature. Both options work well. It makes a great side dish or a light lunch. Enjoy the freshness of the sun-dried tomatoes and the crunch of the cucumber. You can save time by preparing ingredients in advance. Chop the cucumbers, red onions, and sun-dried tomatoes the day before. Store them in airtight containers in your fridge. This way, when you're ready to make the salad, it’s quick and easy. You can also mix the dressing ahead of time. Just give it a good shake before using it. To boost flavor, let the salad marinate. After mixing all the ingredients, cover the bowl. Place it in the fridge for at least 30 minutes. This waiting time helps the flavors blend well. You can also add some balsamic vinegar to the dressing for a deeper taste. Seasoning matters! Use fresh herbs like basil or mint for a bright taste. You can also try adding a pinch of red pepper flakes for a bit of heat. Always taste the salad before serving. Adjust salt and pepper to suit your liking. If you prefer a creamier salad, add more feta cheese or a dollop of Greek yogurt. For a lighter version, reduce the olive oil. You can also add more lemon juice for extra zing. Feel free to adjust the chickpeas too; add more for a heartier salad. {{image_2}} You can boost your Sun-Dried Tomato Chickpea Salad by adding proteins. One great choice is grilled chicken. Just cook the chicken until it’s golden and slice it thin. Add the slices right on top of your salad. This makes it heartier and perfect for lunch. Another option is incorporating tuna. Drain a can of tuna and mix it in. The tuna adds a nice flavor and a bit of richness. Both options give you a tasty way to enjoy the salad. For a vegetarian twist, try non-dairy cheese options. There are many brands that mimic feta well. Crumble it on top like regular feta. This keeps the creaminess without dairy. If you prefer a vegan version, consider other legumes. Black beans or kidney beans work well. They add protein and fiber while keeping the salad filling and delicious. As the seasons change, you can mix in fresh veggies. In summer, consider adding bell peppers. They add crunch and color. You can also toss in cherry tomatoes for extra sweetness. For fall, think about adding roasted squash or sweet potatoes. These ingredients bring warmth and earthiness to the salad. Each season offers new flavors to explore in your Sun-Dried Tomato Chickpea Salad. How long will it last? This salad stays fresh in the fridge for about three days. Make sure to store it in an airtight container. This keeps the flavors locked in and the veggies crisp. Can I freeze the salad? I do not recommend freezing this salad. The fresh veggies and feta do not hold up well after freezing. If you freeze it, the texture will change, and it may become mushy. What are the best practices for serving leftovers? You can enjoy this salad cold right from the fridge. If you prefer it warm, gently heat it in the microwave for about 30 seconds. Stir it well to ensure even heating. Just remember, warm is nice, but cold is better for this dish! To make this salad, you start with simple steps. The full recipe shows you how. First, gather your ingredients. You need chickpeas, sun-dried tomatoes, red onion, cucumber, and feta cheese. 1. In a bowl, mix the chickpeas, sun-dried tomatoes, diced cucumber, red onion, and feta cheese. 2. For the dressing, whisk olive oil, lemon juice, dried oregano, salt, and pepper in a small bowl. 3. Pour this dressing over the salad and mix gently. 4. Add chopped parsley and toss once more. 5. Let it sit for at least 15 minutes. This helps the flavors blend. You can serve it cold or at room temp. Yes, you can use dried chickpeas! However, you need to prepare them first. - Soak the dried chickpeas overnight in water. This helps them soften. - The next day, drain and rinse them. - Cook them in boiling water for about 1 to 1.5 hours until they are tender. - Once cooked, drain and cool them before using in your salad. This salad pairs well with many dishes. Here are some ideas: - Serve it alongside grilled chicken for a protein boost. - Pair it with some crusty bread for a tasty meal. - Enjoy it as a side with fish or a light pasta dish. - It also works great as a filling for wraps or pita pockets. Feel free to mix and match! In this post, we explored the sun-dried tomato chickpea salad. We looked at key ingredients, like chickpeas and fresh veggies. We also discussed making a tasty dressing with olive oil and lemon juice. You learned how to prepare and assemble the salad, plus tips for flavor and storage. This salad is both simple and flexible. You can customize it to your taste. Enjoy your delicious creation!](https://dailydishly.com/wp-content/uploads/2025/07/f0fe0f85-1842-4358-ad7f-ac591425fdaf-768x768.webp)
