Crispy Air Fryer Falafel Easy Plant-Based Delight

Welcome to my kitchen, where we’re whipping up Crispy Air Fryer Falafel, an easy plant-based delight! If you want a tasty snack or meal packed with flavor, you’re in the right place. With simple ingredients and step-by-step instructions, I’ll guide you to perfect falafel every time. Say goodbye to greasy frying—it’s time to air fry your way to crunch and flavor. Let’s get started!
Ingredients
Main Ingredients List
To make crispy air fryer falafel, gather these key items:
– 1 can (15 oz) chickpeas, drained and rinsed
– 1 small onion, roughly chopped
– 2 garlic cloves, minced
– 1 cup fresh parsley leaves, packed
– 1 teaspoon ground cumin
– 1 teaspoon ground coriander
– 1/2 teaspoon baking powder
– 1 tablespoon lemon juice
– Salt and pepper to taste
– 2 tablespoons olive oil (plus extra for drizzling)
These ingredients form the base of your falafel. Chickpeas give it a hearty texture, while fresh parsley adds a vibrant flavor.
Optional Additions for Extra Crunch
For an added crunch, consider using:
– 1/2 cup breadcrumbs
Breadcrumbs enhance the texture, making your falafel even crispier. You can mix them in after combining the main ingredients.
Key Seasonings and Flavor Enhancers
Seasonings elevate the falafel’s taste. Use:
– Ground cumin
– Ground coriander
– Salt and pepper
– Lemon juice
Cumin and coriander bring warmth and depth. Lemon juice adds brightness, balancing the flavors. Adjust salt and pepper to your liking for that perfect bite.
Step-by-Step Instructions
Preparing the Falafel Mixture
Start by draining and rinsing one can of chickpeas. Place the chickpeas in a food processor. Next, add a small, roughly chopped onion and two minced garlic cloves. Toss in one cup of fresh parsley leaves. Pulse the mixture until it’s coarsely ground. Be careful not to overprocess; you want some texture.
Now, add one teaspoon of ground cumin and one teaspoon of ground coriander. Sprinkle in half a teaspoon of baking powder. Pour in one tablespoon of lemon juice, and season with salt and pepper to taste. Drizzle in two tablespoons of olive oil. Pulse again until everything is well mixed but still a bit chunky. If you like extra crunch, mix in half a cup of breadcrumbs now.
Transfer the mixture to a bowl. Cover it and refrigerate for at least 30 minutes. This step helps the flavors meld and firms up the mixture for shaping.
Shaping and Prepping for Air Frying
After chilling, it’s time to shape your falafel. Scoop about two tablespoons of the mixture. Roll it into small balls or flatten them into patties. Make sure they are uniform in size for even cooking.
Next, lightly spray your air fryer basket with cooking spray or olive oil. Place the falafel in the basket. Leave some space between each piece to allow air to flow. Lightly drizzle the tops of the falafel with more olive oil. This will help them get crispy.
Cooking in the Air Fryer
Now, preheat your air fryer to 375°F (190°C). Once it’s ready, place the basket inside. Cook the falafel for 12 to 15 minutes. Flip them halfway through to ensure they cook evenly. They should turn golden brown and crispy when done.
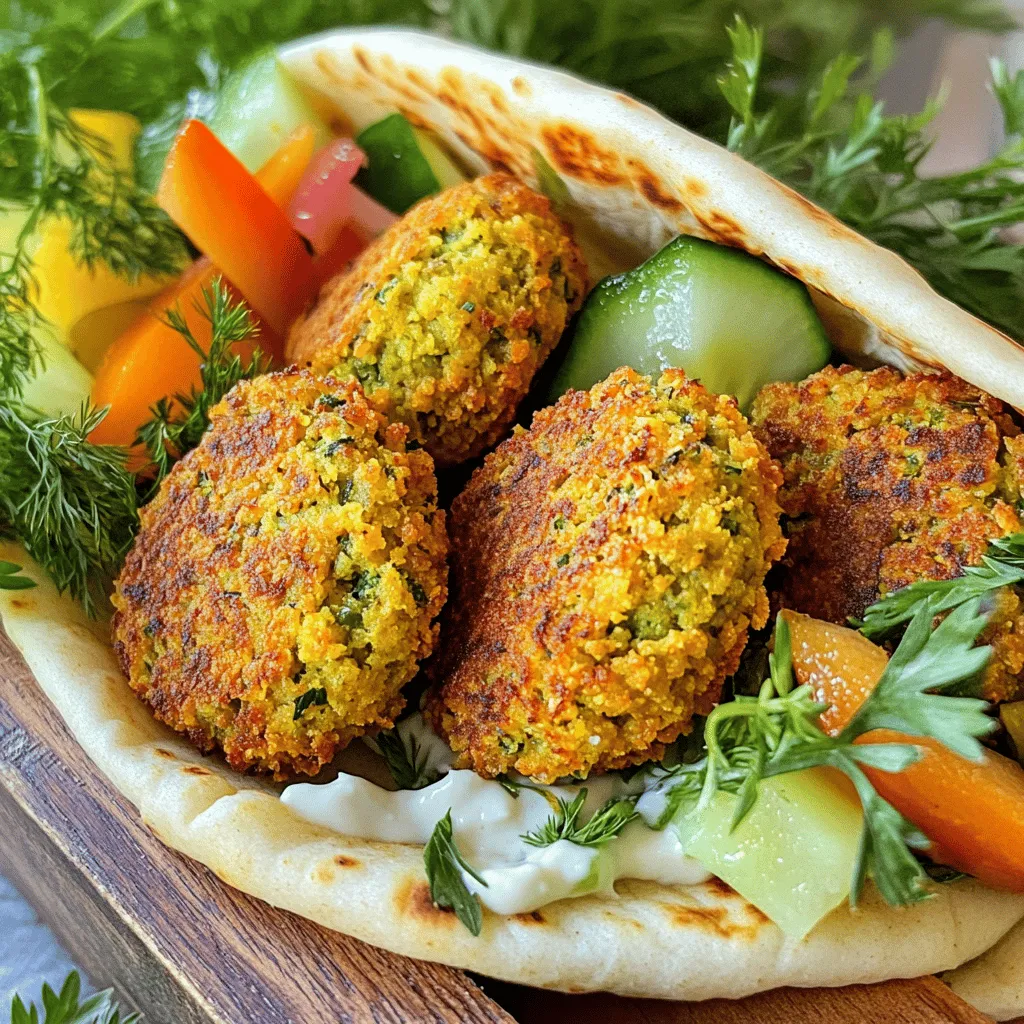
Once cooked, remove the falafel from the air fryer. Let them cool slightly before serving. Enjoy them in a wrap or pita with fresh veggies and tahini sauce.
Tips & Tricks
Achieving Maximum Crispiness
To get crispy falafel, use a few simple tricks. Start by refrigerating the mixture for 30 minutes. Chilling helps firm up the falafel. When ready to cook, lightly drizzle olive oil on top. This adds a golden color and crunch. Also, don’t overcrowd the air fryer basket. Give each falafel room to breathe.
Best Practices for Air Frying Falafel
Preheat your air fryer to 375°F (190°C) before cooking. This ensures even cooking. Use a light cooking spray on the basket to prevent sticking. Flip the falafel halfway through for an even cook. It helps achieve that nice, crispy texture on both sides.
Common Mistakes to Avoid
One mistake is over-processing the falafel mixture. You want a coarse texture, not a paste. Another common issue is not using enough oil. A light drizzle is key to crispiness. Avoid overcrowding the air fryer. If they touch, they won’t crisp up well. Lastly, don’t skip refrigeration. It aids in flavor and texture.

Variations
Vegan Falafel Recipe Substitutions
You can swap chickpeas for other beans, like black beans or lentils. If you don’t have parsley, try cilantro or spinach for a fresh twist. For the onion, use green onions or shallots if you like a milder taste. You can also ditch the olive oil and use avocado oil or coconut oil. If you want gluten-free falafel, replace breadcrumbs with ground oats or almond flour.
Flavor Enhancements (Spices & Herbs)
To make your falafel pop, add more spices. Try smoked paprika for a warm flavor or cayenne for heat. You could mix in dried herbs like thyme or oregano for a unique taste. Fresh mint or dill can add a refreshing touch to your falafel mix. Experiment with flavors until you find your favorite blend.
Serving Suggestions and Pairings
Serve crispy falafel in a warm pita with crunchy veggies. Add tahini sauce for a creamy, nutty flavor. You can pair it with a zesty cucumber salad or a tangy tabbouleh. For a fun twist, serve falafel as a topping on a grain bowl with quinoa or brown rice. Garnish with fresh herbs, lemon wedges, or a sprinkle of sumac for added flair.
Storage Info
How to Store Leftover Falafel
To store leftover falafel, let them cool first. Place them in an airtight container. They will stay fresh in the fridge for up to three days. Make sure to space them out so they do not stick together.
Reheating Tips for Crispy Texture
For a crispy texture when reheating, use your air fryer. Heat the falafel at 375°F (190°C) for about 5 minutes. This will bring back the crunch. You can also use a skillet on medium heat. Just add a little oil and cook until heated through.
Freezing Falafel for Future Use
To freeze falafel, first shape the mixture into patties or balls. Place them on a baking sheet lined with parchment paper. Freeze until solid, about 1-2 hours. Then, transfer them to a freezer bag. They can last up to three months. When ready to eat, cook them straight from the freezer. Just add a few extra minutes to the cooking time.
FAQs
Can I make falafel without a food processor?
Yes, you can make falafel without a food processor. Use a fork or a masher. Just mash the chickpeas well. Chop the onion and parsley finely by hand. This method takes more time but still works great.
What can I use instead of chickpeas?
You can use other beans like black beans or lentils. These options add different flavors. Each will change the taste slightly, but they are still delicious. Just make sure to drain and rinse them well.
How do I know when falafel is done cooking?
Falafel is done when it is golden brown and crispy. You want a nice crunch on the outside. The inside should feel warm and firm. Keep an eye on them while cooking to avoid burning.
Can I bake falafel instead of frying?
Yes, you can bake falafel. Preheat your oven to 375°F (190°C). Place the falafel on a lined baking sheet. Drizzle a little olive oil on top for crispiness. Bake for 20-25 minutes, flipping halfway through.
You now know how to make tasty falafel in an air fryer. We covered the main ingredients, step-by-step cooking tips, and ways to keep your falafel crisp. Remember, you can vary your recipe with spices or different beans. Store and reheat leftovers for the best results. If you follow these tips, you’ll avoid common mistakes and impress your friends with your falafel skills. Enjoy experimenting and sharing your delicious creations!


![- 8 oz fusilli or rotini pasta - 1 cup cherry tomatoes, halved - 1 cup cucumber, diced - 1/2 cup red bell pepper, diced - 1/4 cup red onion, finely chopped - 1/2 cup Kalamata olives, pitted and sliced - 1/3 cup fresh basil leaves, torn - 1/4 cup crumbled feta cheese (optional) - 1/4 cup olive oil - 3 tablespoons fresh lemon juice - 1 teaspoon lemon zest - 1 teaspoon honey or maple syrup - Salt and pepper to taste In this Lemon Basil Pasta Salad, I use fresh and vibrant ingredients. The pasta holds the flavors well. I like using fusilli or rotini because they catch the dressing and veggies nicely. Cherry tomatoes add a pop of color and sweetness. They brighten the salad. Cucumbers bring a cool crunch. Red bell pepper adds sweetness and color too. The red onion gives a nice bite, while Kalamata olives add a salty touch. Fresh basil is the star here. Its aroma and flavor are amazing. I often tear the leaves to release their oils. If you want, you can add crumbled feta cheese for a creamy texture. For the dressing, I mix olive oil, fresh lemon juice, lemon zest, and honey or maple syrup. This blend makes the salad bright and zesty. I also add salt and pepper to balance the flavors. Remember, you can find the full recipe at the end of the article. This salad is not just tasty; it looks great too. It’s perfect for gatherings or a simple meal at home! Start by bringing a large pot of salted water to a boil. Use about 1 tablespoon of salt for every 4 quarts of water. Add the pasta once the water is boiling. Cook it according to the package instructions until it is al dente. This usually takes about 8 to 10 minutes. After it cooks, drain the pasta and rinse it under cold water. This helps cool it down quickly, so it won’t cook anymore. While the pasta cooks, chop your vegetables. Use a sharp knife for clean cuts. I like to slice the cherry tomatoes in half and dice the cucumber and bell pepper into small pieces. Finely chop the red onion to add a nice bite. In a large mixing bowl, combine the chopped cherry tomatoes, cucumber, red bell pepper, red onion, and Kalamata olives. This mix brings bright colors and flavors to your salad. In a small bowl, whisk together the olive oil, lemon juice, and lemon zest. Add honey or maple syrup for a touch of sweetness. A pinch of salt and pepper helps balance the flavors. Whisk until all the ingredients blend well. This dressing should be bright and tangy, perfect for your salad. Now, it’s time to mix everything. Add the cooled pasta to the vegetable bowl. Pour the dressing over the pasta and vegetables. Gently toss everything together so that the pasta and veggies are evenly coated. This ensures every bite is full of flavor. Lastly, fold in the torn basil leaves and crumbled feta cheese if you choose to include it. Cover the salad with plastic wrap and place it in the fridge. Let it chill for at least 30 minutes. This waiting time allows the flavors to meld together nicely. For covering, you can also use a large bowl with a lid. Chilling the salad enhances its taste and makes it refreshing when served. For the full recipe, check out the details above. Enjoy your Lemon Basil Pasta Salad! To get the best taste, store the pasta until you’re ready to mix. This keeps it from getting soggy. Rinse the pasta in cold water after cooking. This cools it down and stops the cooking. Adjusting seasoning is key. Always taste your salad before serving. If it needs more flavor, add salt, pepper, or lemon juice. A little extra lemon juice can brighten everything up. For a wow factor, garnish your salad with more fresh basil leaves. Thin lemon slices also add a nice touch. Serve the salad in a big, colorful bowl to catch the eye. Individual plates work well, too, for a personal touch. Pre-preparing ingredients can save time. Chop your veggies the day before. This makes cooking day easier. You can also make the dressing ahead of time. Store it in the fridge until you're ready to mix everything. For quick dressing options, try a simple mix of olive oil and lemon juice. This adds flavor fast and keeps it healthy. You can find the full recipe for Lemon Basil Pasta Salad [Full Recipe]. {{image_2}} You can change the vegetables in your Lemon Basil Pasta Salad. Consider using: - Zucchini, diced small - Spinach, chopped - Broccoli florets, blanched These swaps keep the dish fresh and exciting. You can also try different pasta shapes like: - Penne - Farfalle - Whole wheat pasta These changes can enhance the taste and texture of your salad. To make the salad more filling, add some proteins. Great options include: - Grilled chicken, diced - Shrimp, cooked and peeled - Chickpeas, drained and rinsed If you prefer vegetarian options, try: - Black beans - Edamame - Tofu, cubed and sautéed These additions make the dish heartier while keeping it flavorful. You can play with the dressing to fit your taste. For citrus variations, consider: - Lime juice instead of lemon - Orange juice for a sweet twist If you want a creamy dressing, try: - Greek yogurt mixed with lemon juice - A creamy vinaigrette made with tahini These alternatives can add new layers of flavor to your Lemon Basil Pasta Salad. For the full recipe, check out the detailed instructions above. Enjoy your cooking! To keep Lemon Basil Pasta Salad fresh, store it in an airtight container. This helps prevent drying out. Place the salad in the fridge right after serving. It will stay good for about 3 to 5 days. Keep an eye on the vegetables. If they start to look mushy, it's time to toss them. Yes, you can freeze this salad, but it's best to leave out the fresh herbs and cheese. These ingredients do not freeze well. If you want to freeze it, do so in a freezer-safe container. This way, you can enjoy it later. When you're ready to eat, thaw it in the fridge overnight. This keeps the flavors intact. When you reheat the salad, avoid using the microwave. This can make the pasta too mushy. Instead, let it come to room temperature on its own. You can also serve it cold straight from the fridge. If you want it warm, mix it with a little olive oil in a pan over low heat. This will keep the flavors bright and fresh. You can prepare this salad a day in advance. Store it in an airtight container. Keep it in the fridge. This way, the flavors blend well. When ready to serve, give it a quick toss. If it seems dry, add a bit more olive oil or lemon juice. This pasta salad pairs well with grilled chicken or fish. It also goes great with fresh bread or a side of fruit. You can serve it at picnics or barbecues. It makes a perfect light lunch or dinner. Yes, you can make it your own! Add your favorite veggies or proteins. Try roasted peppers or artichokes for extra flavor. You can even swap the feta for goat cheese. Make it suit your taste! Yes, you can make this salad gluten-free. Use gluten-free pasta like rice or quinoa pasta. These options work well. They will keep the dish delicious and light. The salad lasts about 3 days in the fridge. Store it in a tight container. The flavors will stay fresh, but the veggies may soften. Enjoy it within this time for the best taste. You can find the Full Recipe for more details. This blog post covers how to make a tasty Lemon Basil Pasta Salad. We discussed the best ingredients, how to prepare them, and smart tips for a perfect dish. With simple steps and easy variations, you can customize it to fit your taste. Remember, letting the salad chill enhances its flavor. Enjoy this dish at your next gathering! It’s fresh, easy, and packed with flavor, making it a hit for everyone. Dive in and experiment using your favorite ingredients!](https://dailydishly.com/wp-content/uploads/2025/07/2e0c17ed-3df4-4b24-b113-5392c2bd150f-768x768.webp)