
Are you ready to savor a snack that’s both tasty and healthy? Crispy baked sweet potato fries are easy to make and full of flavor! With just a few simple ingredients, you can create a delightful dish perfect for any occasion. In this guide, I’ll walk you through each step, share tips for crispiness, and explore fun variations. Let’s dive into this delicious recipe and elevate your snacking game!
Ingredients
Main Ingredients
To make crispy baked sweet potato fries, you need a few key ingredients:
– 2 large sweet potatoes, cut into fries
– 2 tablespoons olive oil
– 1 teaspoon cornstarch
– 1 teaspoon paprika
– 1/2 teaspoon garlic powder
– 1/2 teaspoon onion powder
– 1/4 teaspoon cayenne pepper (optional for heat)
– Salt and pepper to taste
– Fresh parsley, chopped (for garnish)
Using quality ingredients makes a big difference in taste. Fresh sweet potatoes give your fries a lovely flavor. Good olive oil adds richness. The cornstarch helps achieve that perfect crispiness.
Optional Ingredients
You can enhance your fries with extra seasonings. Try adding:
– Chili powder for a smoky kick
– Italian herbs for a fresh taste
– Parmesan cheese for a savory touch
When it comes to dips, the options are endless! Serve your fries with:
– Spicy mayo for some heat
– Ketchup for a classic combo
– Garlic aioli for a fancy twist
These additions make your crispy baked sweet potato fries even more fun and tasty!
Step-by-Step Instructions
Preparation Steps
1. Preheat your oven to 425°F (220°C). This helps the fries crisp up well.
2. Line a baking sheet with parchment paper. This keeps the fries from sticking.
3. Cut the sweet potatoes into strips. Aim for uniform sizes for even cooking.
4. In a large bowl, toss the fries with olive oil. Ensure they are nicely coated.
5. Sprinkle cornstarch, paprika, garlic powder, onion powder, cayenne pepper, salt, and pepper. Toss again until all fries are coated.
Cooking Instructions
1. Spread the fries in a single layer on the baking sheet. Do not crowd them.
2. Bake for 25 to 30 minutes. Flip them halfway for even crispiness.
3. Check for a crispy golden brown color on the edges. This means they are done.
Final Touches
1. Once baked, remove the fries from the oven and let them cool for a few minutes.
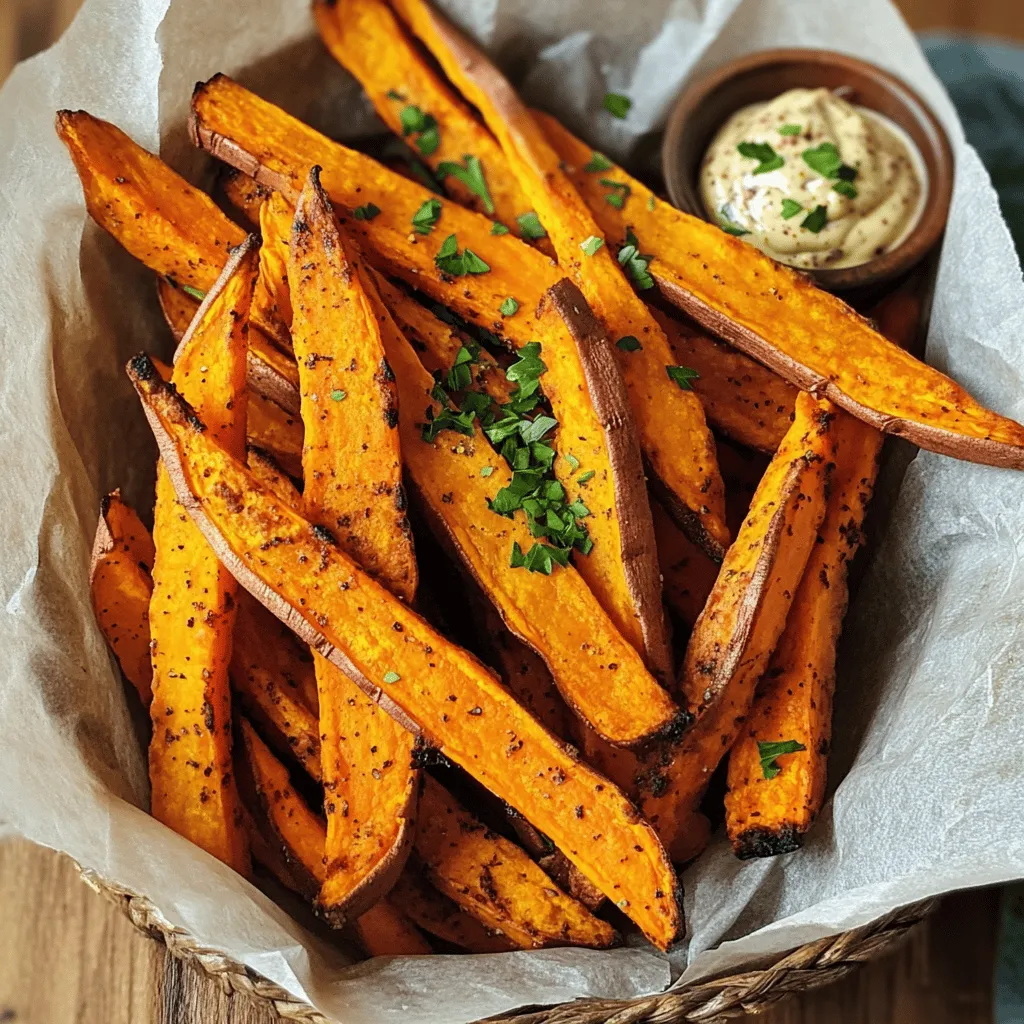
2. Garnish with fresh parsley for a pop of color.
3. Serve the fries in a cone or basket lined with parchment paper.
4. Add a small bowl of your favorite dip, like spicy mayo or ketchup, for fun.
Tips & Tricks
Achieving Maximum Crispiness
To make your sweet potato fries crispy, follow a few key steps. First, coat the fries in olive oil. This helps them brown nicely. Next, add cornstarch to the mix. Cornstarch absorbs moisture and creates a crispy outer layer.
When you place the fries on the baking sheet, spread them out. Do not overcrowd the pan. If they are too close, they will steam instead of crisp. Give each fry room to breathe, so they can cook evenly.
Common Mistakes to Avoid
Avoid cutting the fries too thick. Thin fries cook better and become crispier. Another mistake is not flipping the fries halfway through baking. Flipping ensures even cooking and browning on both sides.
If your fries turn out soggy, check the oil and cornstarch amounts. You may need to adjust these. Also, ensure that your baking sheet is not crowded. If you follow these tips, you will have perfect crispy fries every time!
Variations
Flavor Variations
You can change the taste of your crispy baked sweet potato fries with different seasonings. Here are some ideas:
– Cajun Spice: Use Cajun seasoning for a bold flavor.
– Italian Herbs: Mix in dried oregano and basil for a fresh twist.
– Cinnamon Sugar: For a sweet option, dust with cinnamon and sugar after baking.
– Taco Seasoning: Add taco seasoning for a fun, zesty kick.
Experiment with spice blends and herbs to find your favorite taste.
Cooking Methods
You can cook sweet potato fries in different ways. Each method gives a unique texture and flavor.
– Air Frying: This method uses less oil and can make fries even crispier. Cook at 400°F for about 20 minutes.
– Deep Frying: For a classic taste, deep fry in hot oil until golden. This method gives a crunchy exterior but uses more oil.
– Baking: The original method yields a lighter fry. Bake at 425°F for 25-30 minutes, flipping halfway through.
Each method has its pros and cons, so try them all to find your favorite!
Storage Info
Storing Leftovers
To store your crispy baked sweet potato fries, first, let them cool completely. This step helps keep them crispy. Place the fries in an airtight container. Use a container that has a tight seal to prevent moisture. You can keep them in the fridge for up to three days. When you’re ready to eat them, reheat in the oven at 400°F (200°C) for about 10-15 minutes. This method helps restore their crunch.
Freezing Instructions
You can freeze both raw and cooked sweet potato fries. For raw fries, cut and coat them as you would for baking. Spread them in a single layer on a baking sheet. Freeze them for about two hours until solid. Then, transfer the fries to a freezer bag. Remove as much air as possible before sealing. They can stay in the freezer for up to three months.
To cook from frozen, preheat the oven to 425°F (220°C). Spread the frozen fries on a baking sheet. Bake for 25-30 minutes, flipping halfway through. This method gives you crispy fries without thawing. Enjoy your delicious fries anytime!
FAQs
How long to bake sweet potato fries at 425°F?
Bake sweet potato fries at 425°F for 25 to 30 minutes. This time gives you crispy edges and soft centers. Flip them halfway through to ensure even cooking. Keep an eye on them. Ovens can vary, so adjust the time as needed. Look for a golden color to know they are done.
Can I use other types of potatoes?
Yes, you can use other potatoes. Regular russet potatoes work great for fries. They may not be as sweet, but they can still be crispy. You could also try Yukon gold or purple potatoes. Each type gives a different taste and texture. Just remember to adjust the baking time as needed.
How can I make my fries spicier?
To add heat, sprinkle cayenne pepper over the fries. You can also add chili powder or crushed red pepper flakes. Mix spices with olive oil before coating the fries. This helps the heat stick better. Start with a little and taste as you go. Adjust based on your spice tolerance.
In this post, we explored how to make perfect sweet potato fries. We covered essential ingredients, preparation steps, and cooking methods. I shared tips to achieve crispiness and avoid common mistakes. You also learned about flavor variations and the best ways to store leftovers. Making great fries can be easy and fun. By using quality ingredients and following the steps, you’ll enjoy delicious, crispy fries every time. Now, gather your supplies and get cooking for a tasty treat!


