Are you ready to indulge in a sweet, crispy treat? My Crispy Cinnamon Apple Fries Air Fryer recipe is perfect for satisfying your cravings and impressing your friends. With just a few simple ingredients and easy steps, you can whip up these delicious fries in no time. Let’s dive into this delightful recipe that’s sure to become a family favorite! Your taste buds will thank you.
Ingredients
List of Necessary Ingredients
To make crispy cinnamon apple fries, gather these key ingredients:
– 3 medium-sized apples (preferably Fuji or Honeycrisp), peeled and cut into fry shapes
– 1 cup all-purpose flour
– 1 teaspoon cinnamon
– 1/2 teaspoon nutmeg
– 1/2 teaspoon salt
– 1/2 cup granulated sugar
– 1 large egg
– 1 tablespoon milk
– 1 teaspoon vanilla extract
– Cooking spray
Suggested Apple Varieties
Choosing the right apple is key for flavor and texture. I recommend these varieties:
– Fuji: Sweet and crisp, great for frying.
– Honeycrisp: Juicy with a nice balance of sweet and tart.
– Granny Smith: Tart and firm, adds a nice contrast.
Optional Ingredients for Extra Flavor
For added flair, consider these optional ingredients:
– Powdered sugar for dusting: This adds a sweet finish.
– A pinch of cayenne pepper: For a spicy kick.
– Chopped nuts: Almonds or pecans can add crunch.
Using these ingredients, you can create a treat that is both crispy and delicious.
Step-by-Step Instructions
Preheating the Air Fryer
Start by preheating your air fryer to 375°F (190°C). This step is key for getting crispy apple fries. If your air fryer has a preheat setting, use it. If not, simply run it for about five minutes. This helps the fries cook evenly.
Preparing the Flour and Sugar Mixture
In a shallow bowl, mix these dry ingredients:
– 1 cup all-purpose flour
– 1 teaspoon cinnamon
– 1/2 teaspoon nutmeg
– 1/2 teaspoon salt
– 1/2 cup granulated sugar
Stir these ingredients until they blend well. This mixture adds a sweet and spicy flavor to your fries.
Coating the Apple Fries
In another bowl, whisk together:
– 1 large egg
– 1 tablespoon milk
– 1 teaspoon vanilla extract
Now, take your apple fries and dip them into the egg mixture. Let any extra egg drip off. Then, roll each fry in the flour mixture. Make sure each piece gets a good coat. Place the coated fries on a plate.
Cooking the Apple Fries in the Air Fryer
Spray the basket of your air fryer with cooking spray. This prevents sticking. Arrange the apple fries in a single layer. If your air fryer is small, cook in batches. Lightly spray the tops of the fries with more cooking spray. Cook them for about 12 to 15 minutes. Flip them halfway through. Look for a golden brown color and crisp texture.
Serving Suggestions
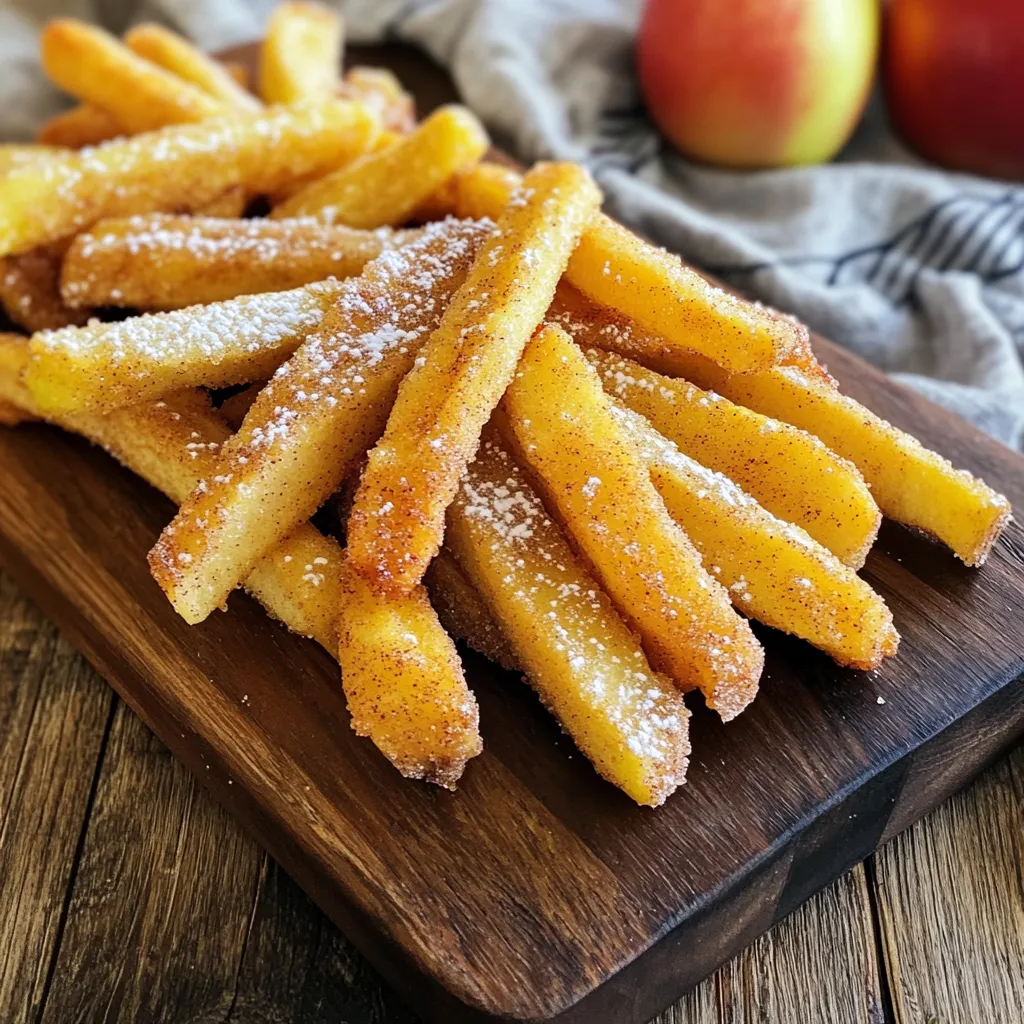
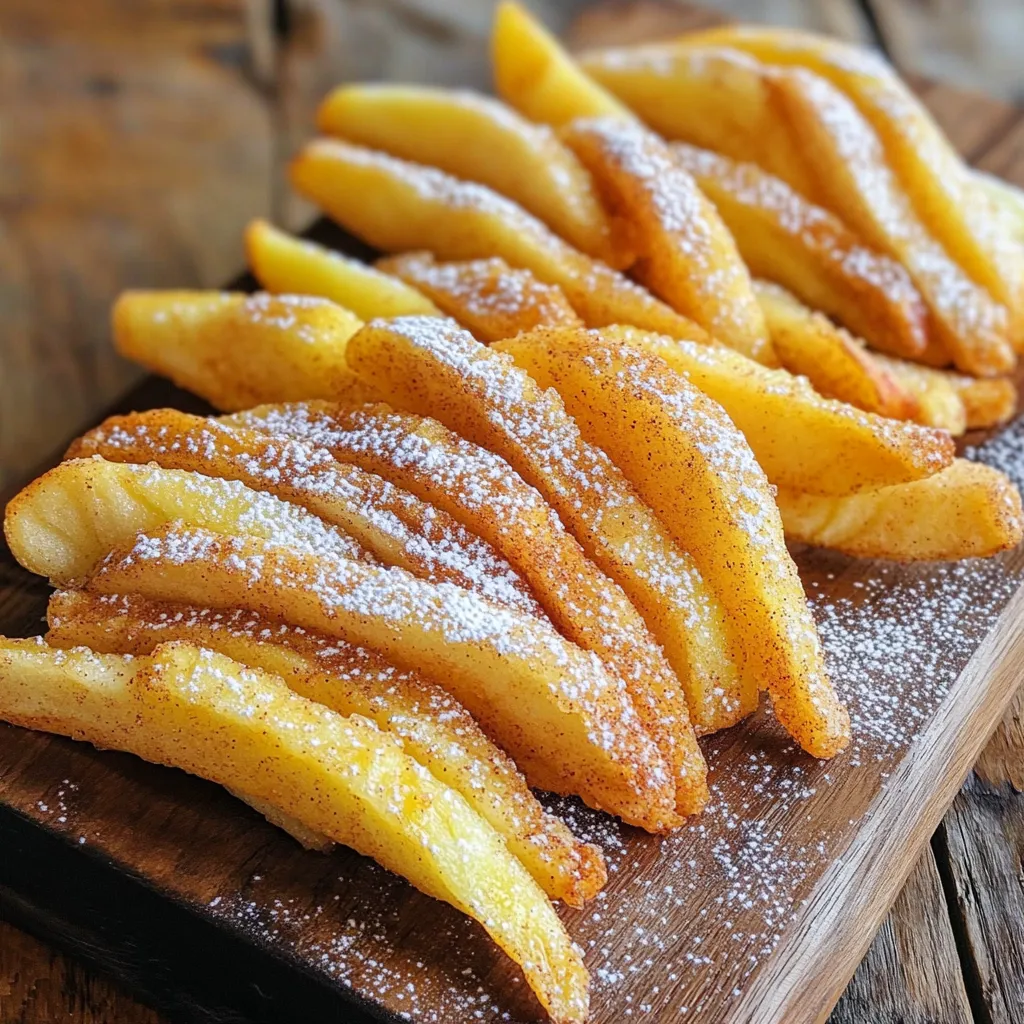
Once the apple fries are done, take them out and let them cool for a few minutes. For an extra sweet touch, dust them with powdered sugar before serving. Enjoy these tasty treats with a side of caramel or chocolate sauce for dipping!
Tips & Tricks
Achieving the Perfect Crispiness
To get that perfect crispiness, spray your apple fries well with cooking spray. This adds a nice crunch. Make sure to cook them in a single layer. If you stack them, they will steam instead of fry. Cook at 375°F (190°C) for 12 to 15 minutes. Flip them halfway through for even cooking. The golden color means they are ready!
Apple Preparation Tips
Use firm apples like Fuji or Honeycrisp. These apples hold their shape well when cooked. Peel them for a smooth texture. Cut them into even fry shapes. This helps them cook evenly. A sharper knife makes the job easier. Keep the cuts thick enough to stay juicy but thin enough to crisp up nicely.
Common Mistakes to Avoid
Don’t skip the cooking spray. It is key for crispiness. Avoid overcrowding the air fryer basket. If they are too close, they won’t fry well. Another mistake is not flipping them. Flipping ensures they cook on all sides. Lastly, don’t skip dusting with powdered sugar. It adds a sweet touch that everyone loves!
Variations
Alternative Coatings (e.g., gluten-free options)
You can easily make these apple fries gluten-free! Instead of all-purpose flour, use almond flour or gluten-free flour. These options will give you a nice texture while keeping it safe for those with gluten allergies. Just follow the same steps in the recipe, and you will still get those crispy fries.
Flavor Variations (add-ins like chocolate or caramel)
Want to jazz up your apple fries? Try adding some fun flavors! You can dip them in melted chocolate or drizzle caramel on top. Mix in a bit of cocoa powder with the flour for chocolatey goodness. You can even sprinkle some sea salt on the caramel for a sweet and salty treat. These changes will make your apple fries even more delicious!
Different Fruit Options
While apples are great, other fruits work too. Pears are a fantastic choice and have a nice sweetness. Try using peaches or even bananas for a fun twist. Just cut them into fry shapes and follow the same coating process. Each fruit will bring its unique flavor, so feel free to experiment!
Storage Info
How to Store Leftover Apple Fries
To keep your apple fries fresh, store them in an airtight container. Let them cool down first. Place a paper towel at the bottom of the container. This helps absorb any moisture. Keep the container in the fridge for up to three days.
Reheating Instructions for Best Texture
To reheat your apple fries, use the air fryer again. Preheat it to 375°F (190°C). Place the apple fries in the basket. Cook for about 5 minutes. This will help them regain their crispiness. Avoid using the microwave, as that can make them soggy.
Freezing Apple Fries for Later Use
You can freeze apple fries for later. First, let them cool completely. Spread them on a baking sheet in a single layer. Freeze for 1-2 hours until solid. Then, transfer them to a freezer bag. Label the bag with the date. They will last for up to three months. When ready to eat, reheat from frozen in the air fryer. This keeps them tasty and crunchy!
FAQs
Can I use different types of apples?
Yes, you can use different apples. Fuji and Honeycrisp work well because they are sweet and firm. Other options include Granny Smith for a tart taste or Gala for a mild flavor. Each type will give you a unique taste and texture, so feel free to experiment!
How can I make these apple fries healthier?
To make these apple fries healthier, you can try a few easy swaps. Use whole wheat flour instead of all-purpose flour. You can also reduce the sugar or use a natural sweetener like honey. Instead of frying, bake them in the oven at a higher temperature for a crisp finish.
What dipping sauces pair well with apple fries?
Apple fries taste great with many sauces! A classic choice is caramel sauce. You can also try peanut butter or yogurt for a creamier option. For a fun twist, serve them with chocolate sauce or a sweet cream cheese dip. Each sauce adds a new layer of flavor!
Can I make these apple fries without an air fryer?
Yes, you can make apple fries without an air fryer! Use your oven instead. Preheat it to 375°F (190°C) and place the coated fries on a baking sheet. Bake for about 15-20 minutes, flipping halfway through. This method works well, but the apple fries may not be as crispy.
Making apple fries is simple and fun. We covered the key ingredients, from choosing the best apples to optional extras that enhance flavor. I walked you through the easy steps, from prepping to cooking, so you can enjoy crispy fries. Remember to avoid common mistakes to get them just right. Explore different coatings and fruit options for variety.
Now, you have all the tools to create great apple fries at home. Enjoy experimenting with flavors and impress your friends and family!


