Are you ready to elevate your side dish game? Crispy Garlic Parmesan Potatoes are simple to make and full of flavor. This recipe will turn ordinary baby potatoes into a crispy delight that everyone will love. With just a handful of ingredients and easy steps, you’ll impress your family at dinner. Let’s dive into this tasty, golden snack that’s perfect for any occasion!
Why I Love This Recipe
- Bold Flavor: The combination of garlic and Parmesan creates a rich and savory flavor profile that elevates these simple potatoes.
- Crispy Texture: Roasting the potatoes at high heat ensures they become perfectly crispy on the outside while remaining tender inside.
- Quick and Easy: With just a few ingredients and minimal prep time, this dish is a hassle-free side that anyone can make.
- Versatile Dish: These crispy garlic Parmesan potatoes pair well with a variety of main courses, making them a great addition to any meal.
Ingredients
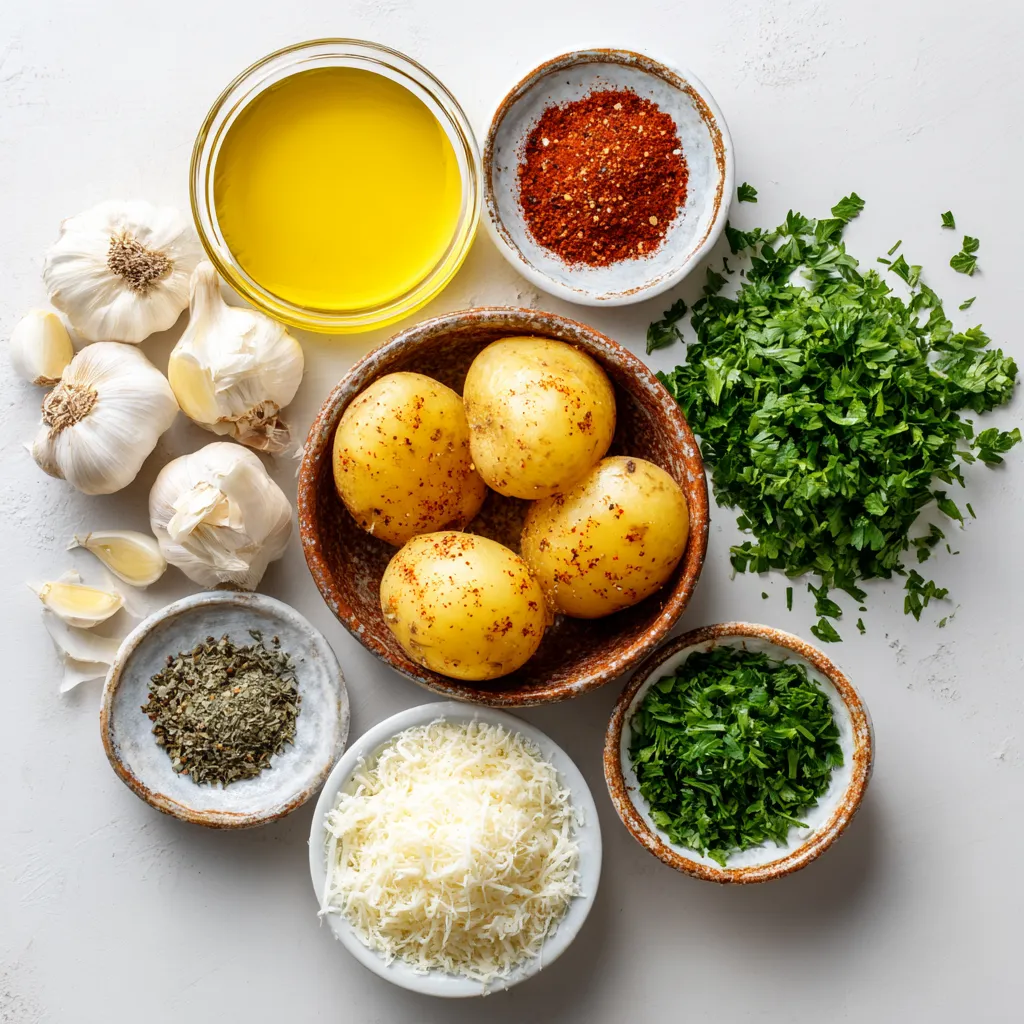
List of Ingredients
– 1.5 lbs baby potatoes, halved
– 3 tablespoons olive oil
– 4 cloves garlic, minced
– 1 teaspoon dried oregano
– 1 teaspoon paprika
– ½ cup grated Parmesan cheese
– Salt and pepper to taste
– Fresh parsley, chopped (for garnish)
Notes on Ingredient Quality
Choosing the right type of potatoes is key for great flavor. I recommend using baby potatoes for their creamy texture. They cook evenly and become tender inside while staying crispy outside.
Fresh herbs bring bright flavors. If you can, use fresh garlic instead of dried. It makes a big difference. When using dried herbs, keep them fresh and stored in a cool place.
Recommended Tools
You will need a few simple tools. A mixing bowl is great for combining ingredients. A baking sheet helps in roasting. Don’t forget parchment paper; it makes cleanup easy and helps the potatoes cook evenly.
Step-by-Step Instructions
Prepping the Potatoes
To start, you need to halve the baby potatoes. Use a sharp knife for this. Cut each potato in half lengthwise. This helps them cook evenly. Next, place the halved potatoes in a large bowl. Add the olive oil, minced garlic, oregano, paprika, salt, and pepper. Toss the mix well. Ensure each potato is coated in oil and spices. This step adds lots of flavor.
Roasting Techniques
First, preheat your oven to 425°F (220°C). Spread the seasoned potatoes in a single layer on a baking sheet lined with parchment paper. Make sure they have space. Crowding them can make them soggy. Roast the potatoes for 25 minutes. They should start to get soft and golden. After 25 minutes, remove the baking sheet from the oven. Now, sprinkle the grated Parmesan cheese over the potatoes. This cheese will create a crispy layer when roasted. Return the baking sheet to the oven and roast for another 10 to 15 minutes. You want them to be golden brown and crispy.
Final Touches
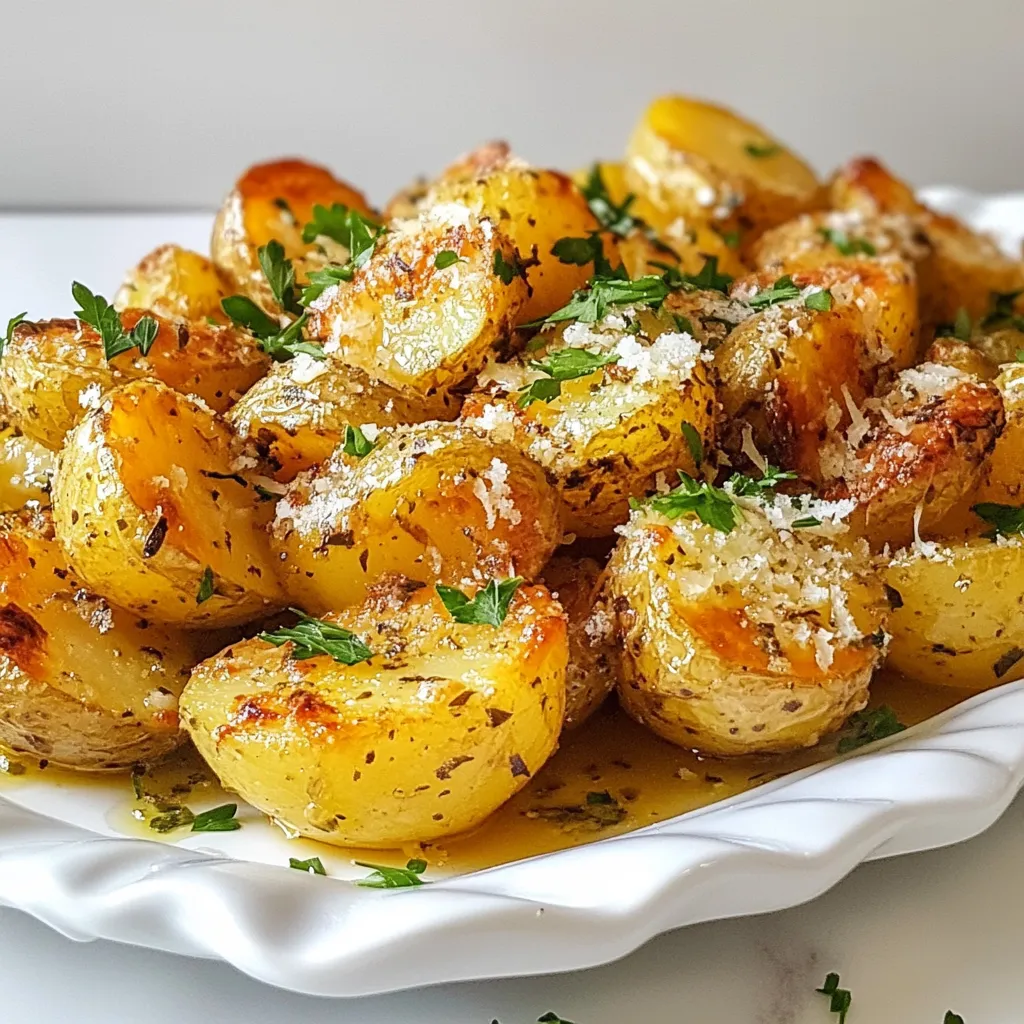
Once the potatoes are done, take them out of the oven. Let them cool for a couple of minutes. This helps them firm up a bit. Finally, garnish with freshly chopped parsley before serving. The green parsley adds a nice touch of color and freshness. Enjoy your crispy garlic Parmesan potatoes!
Tips & Tricks
Achieving Extra Crispiness
To make your potatoes super crispy, spread them out in a single layer. This helps the hot air flow around each potato piece. If you have a convection oven, use it! The fan circulates hot air, giving you a nice, even crispness.
Flavor Enhancements
You can add more flavor with extra spices. Try a pinch of cayenne for heat or some rosemary for a fresh taste. If you want a cheese swap, use feta or cheddar instead of Parmesan. Each brings a unique taste to the dish.
Presentation Ideas
Serve your crispy garlic Parmesan potatoes on a large platter. For a pop of color, sprinkle fresh parsley over the top. Add a few lemon wedges on the side for a bright touch. This not only looks great but also adds a zesty flavor when you squeeze it on the potatoes.
Pro Tips
- Choose the Right Potatoes: Baby potatoes are ideal for this recipe due to their naturally creamy texture and ability to crisp up nicely. If you can’t find baby potatoes, try using small red or yellow potatoes instead.
- Don’t Rush the Roasting: Ensuring the potatoes are spread out in a single layer on the baking sheet allows for even cooking and maximum crispiness. Avoid overcrowding to get that perfect golden brown finish.
- Fresh Garlic for Best Flavor: While you can use pre-minced garlic, fresh garlic will give the potatoes a much richer and more aromatic flavor. Mince it just before using for the best results.
- Experiment with Seasonings: Feel free to add other herbs and spices to complement the flavor, such as rosemary, thyme, or even a pinch of cayenne for heat. Customizing the seasoning can make this dish your own!
Variations
Different Potato Types
When making crispy garlic Parmesan potatoes, the type of potato matters. I often use baby potatoes because they cook evenly and have a great texture. However, you can try other types too:
– Yukon Gold: These potatoes are creamy and buttery. They crisp up well and have a nice flavor.
– Red Potatoes: Their skin is thin and they hold their shape well. I like them for a colorful dish.
– Fingerlings: These small, elongated potatoes offer a unique shape. They have a nutty taste that pairs nicely with garlic and cheese.
Each type brings its own twist to the recipe. Experiment with what you like best!
Alternative Cheese Options
Parmesan cheese is a classic choice for this dish, but you can switch it up. Here are some cheese ideas:
– Pecorino Romano: This cheese is saltier and has a stronger flavor. It adds a nice kick.
– Asiago: A bit milder than Parmesan, Asiago melts well and gives a smooth finish.
– Cheddar: For a richer taste, use sharp cheddar. It brings a different depth to the potatoes.
Mix and match cheeses to find your favorite combination!
Adding Proteins
To make this dish a full meal, consider adding proteins. Here are some tasty options:
– Chicken: Grilled or roasted chicken pairs well with the crispy potatoes. It makes for a hearty dish.
– Shrimp: If you want seafood, shrimp works great. Toss them in with the potatoes during the last few minutes of roasting.
– Bacon: Adding crispy bacon pieces gives a smoky flavor that many love.
These proteins not only enhance the meal but also make it more filling. Enjoy being creative with your combinations!
Storage Info
Storing Leftovers
To keep your crispy garlic Parmesan potatoes fresh, store them in an airtight container. Place them in the fridge within two hours after cooking. This way, they stay tasty for about 3 days. If you want to prevent sogginess, do not cover them tightly. Instead, leave a little space for air to flow.
Reheating Tips
When reheating, aim to keep that lovely crispiness. The best method is to use an oven. Preheat your oven to 400°F (200°C). Spread the potatoes on a baking sheet. Heat them for about 10-15 minutes. This method helps restore their crunch. You can also use an air fryer if you have one. It works great for getting them crispy again.
Freezer Guidelines
Can you freeze crispy potatoes? Yes, but they may lose their crunch. If you want to freeze them, let them cool first. Place them in a freezer-safe bag, removing as much air as possible. They can last up to a month in the freezer. When you’re ready to eat, thaw them overnight in the fridge. Then, reheat in the oven as mentioned above for the best results.
FAQs
How can I make Crispy Garlic Parmesan Potatoes spicier?
To add spice, try these options:
– Cayenne pepper: Add a pinch for heat.
– Chili powder: This gives a smoky flavor.
– Red pepper flakes: Sprinkle some on before roasting.
You can mix these spices in with the garlic and olive oil. Make sure to taste as you go. Adjust the spice level to your liking. This way, you get a kick without losing the potato’s savory flavor.
Can I prepare these potatoes in advance?
Yes, you can prep these potatoes ahead of time. Here’s how:
1. Wash and halve the baby potatoes.
2. Mix the seasonings: Combine olive oil, garlic, oregano, paprika, salt, and pepper in a bowl.
3. Toss the potatoes: Coat the halved potatoes in the seasoning mix.
4. Store: Place them in the fridge in an airtight container.
You can keep them like this for up to 24 hours. When you are ready, just spread them on a baking sheet and roast as usual. This saves time on busy days!
What can I serve with Crispy Garlic Parmesan Potatoes?
These potatoes pair well with many dishes. Here are some ideas:
– Grilled chicken: The flavors complement each other well.
– Steak: A hearty meal with rich flavors.
– Roasted vegetables: Add color and nutrition to your plate.
– Salad: A fresh green salad balances the crispy texture.
You can also serve them as a snack with your favorite dipping sauce. Enjoy mixing and matching!
You now have a clear guide to making Crispy Garlic Parmesan Potatoes. We covered ingredients, tools, and all the steps. Remember, using quality ingredients makes a big difference. Roasting techniques and garnishing tips help boost flavor and presentation. Try different potatoes or cheeses for tasty variations. Don’t forget proper storage and reheating methods for leftovers. Enjoy creating this dish and experimenting with your own ideas. Keep cooking fun and simpl


