Crispy Roasted Sweet Potatoes Simple and Tasty Recipe

If you crave a tasty side dish that’s easy to make, crispy roasted sweet potatoes are it! With just a few simple ingredients, you can whip up a dish that’s both healthy and full of flavor. Whether you want a quick snack or a great addition to dinner, this recipe has you covered. Let’s dive into the steps for making these delicious sweet potatoes!
Ingredients
List of Ingredients
– 4 medium sweet potatoes, peeled and cut into 1-inch cubes
– 3 tablespoons olive oil
– 2 teaspoons smoked paprika
– 1 teaspoon garlic powder
– 1 teaspoon onion powder
– ½ teaspoon cayenne pepper (optional for heat)
– Salt and black pepper to taste
– Fresh parsley, chopped (for garnish)
Measurement Tips
Precise measurements matter for great flavor and texture. Too much oil can make them greasy. Too little salt can dull the taste. Measure each ingredient carefully to get the best results. This small effort pays off with each crispy bite.
Ingredient Substitutions
If you can’t find sweet potatoes, try butternut squash. It has a similar taste and texture. For oil, you can use avocado oil or sunflower oil. Both work well for roasting. Feel free to swap spices too. Use your favorite herbs, like thyme or rosemary, to change the flavor. Experimenting keeps your meals fresh and exciting!
Step-by-Step Instructions
Preparation Steps
Start by prepping the sweet potatoes. Peel them, then cut them into 1-inch cubes. This size helps them cook evenly. Next, measure your spices. You will need smoked paprika, garlic powder, onion powder, cayenne pepper, salt, and black pepper. Measuring spices correctly gives your sweet potatoes great flavor.
Roasting Process
Now, let’s roast! Preheat your oven to 425°F (220°C). In a large bowl, mix the sweet potato cubes with olive oil and the spices. Toss them well to coat each piece. Spread the sweet potatoes on a baking sheet lined with parchment paper. Make sure they are in a single layer; this helps them cook evenly and get crispy. Roast them for 25 to 30 minutes. Flip them halfway through for even cooking. They should be golden brown and crispy on the edges when done.
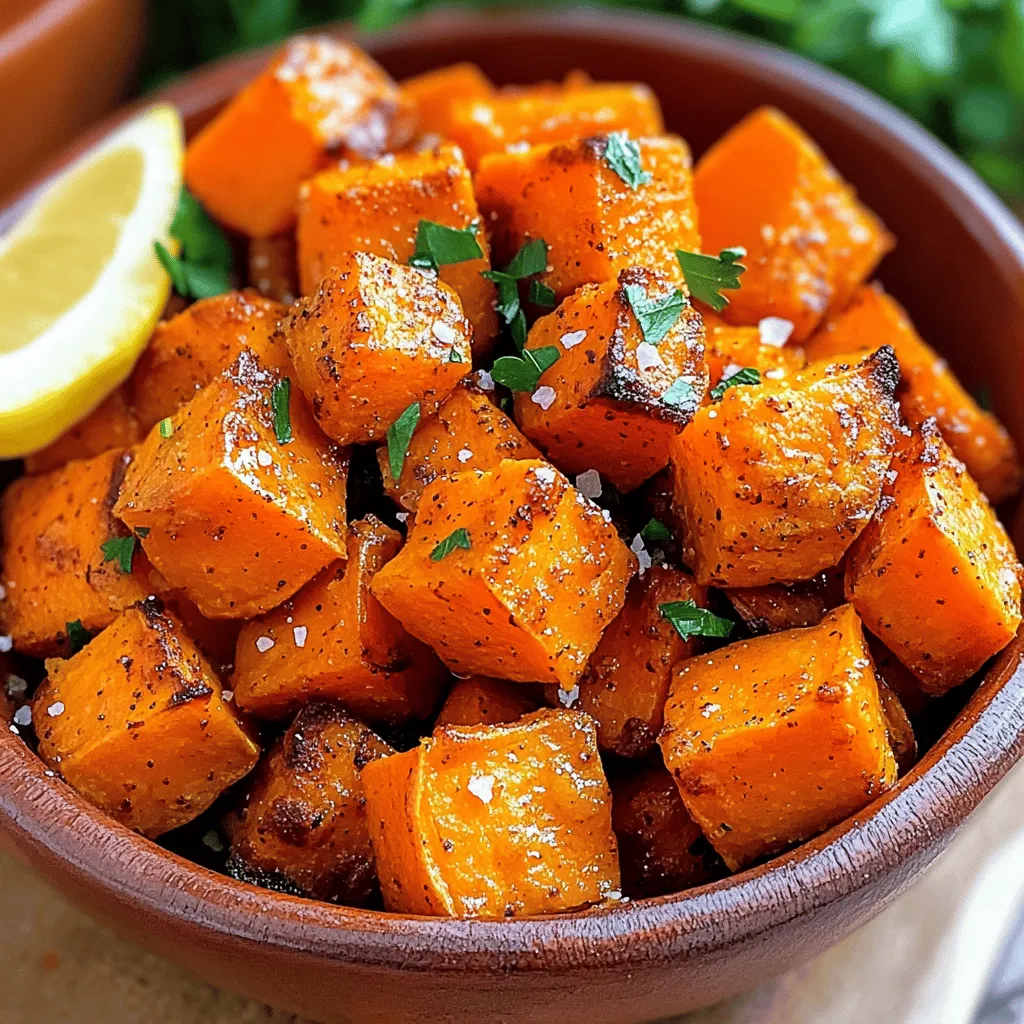
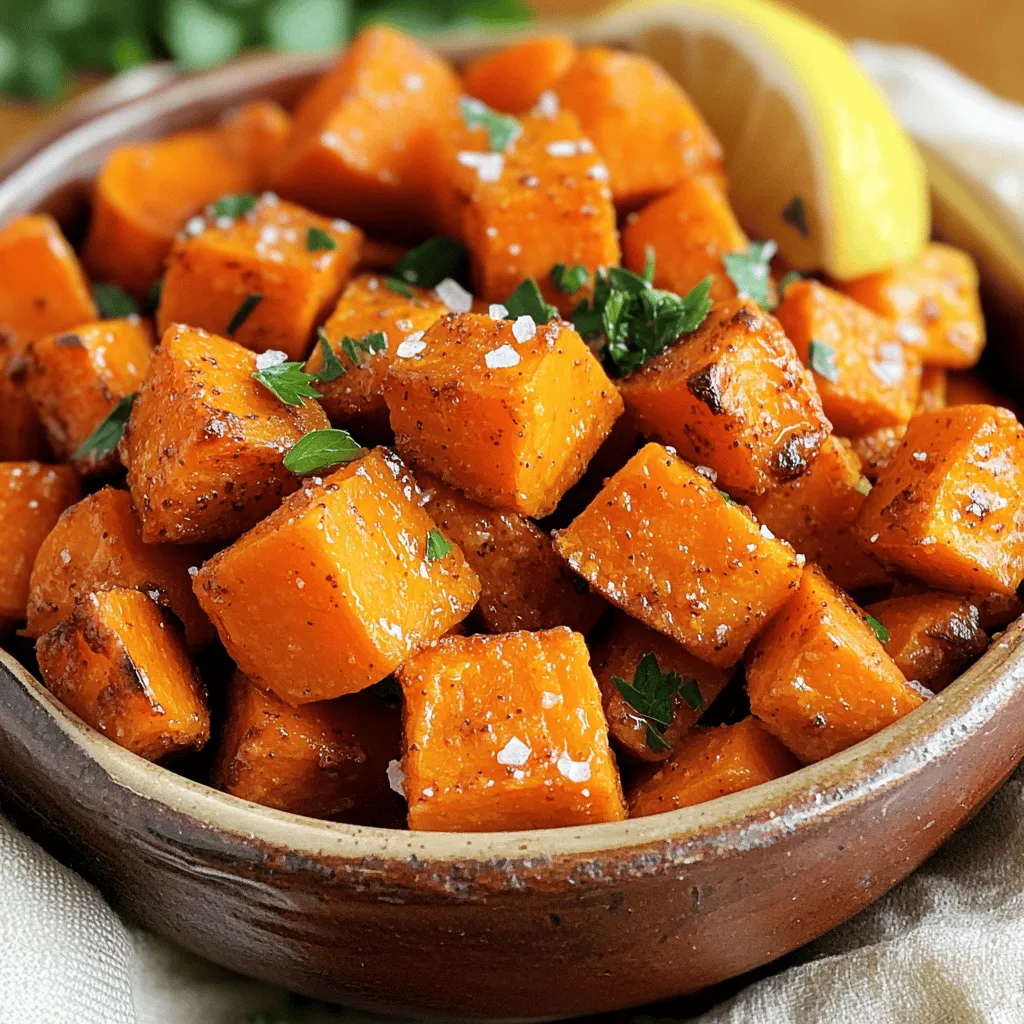
Serving Suggestions
When ready, take them out of the oven and let them cool a bit. Garnish with chopped fresh parsley for color and flavor. Serve your crispy roasted sweet potatoes in a rustic bowl. Sprinkle some extra parsley and a pinch of sea salt on top. Add a wedge of lemon or lime on the side for a burst of flavor.
Tips & Tricks
Achieving Crispiness
To get your sweet potatoes crispy, start with the right size. Cut them into 1-inch cubes. This size ensures even cooking. Next, toss them in olive oil and spices. A good coating helps them crisp up nicely. Spread them out on the baking sheet. Leave space between each piece to allow air to flow. Roasting at a high temperature, like 425°F, is key. Flip them halfway through to get all sides golden.
Common Mistakes
One common mistake is overcrowding the baking sheet. If you put too many sweet potatoes together, they will steam instead of roast. Another error is not drying the sweet potatoes before cooking. Moisture can prevent crispiness. Also, avoid using too little oil. It helps create that nice, crunchy texture. Lastly, don’t skip the flipping. This step is crucial for even browning.
Enhancing Flavor
To boost flavor, try adding different spices. You can mix in cumin or cayenne for heat. A pinch of cinnamon adds a warm touch. For a tangy twist, squeeze some lemon juice after roasting. You can also experiment with fresh herbs. Thyme or rosemary can give a fragrant lift. Adding a bit of honey or maple syrup can create a sweet glaze. These ideas will take your crispy roasted sweet potatoes from good to great!

Variations
Flavor Profiles
You can change the taste of crispy roasted sweet potatoes with different spices. Try using cumin for a warm, earthy flavor. Or, add cinnamon for a hint of sweetness. For a zesty kick, toss in some chili powder. You can even mix in fresh herbs, like rosemary or thyme. These small changes will create a unique dish each time.
Dietary Adaptations
If you follow a vegan diet, this recipe is already perfect for you. It has no animal products. For gluten-free options, make sure your spices do not contain gluten. Most spices are gluten-free, but check the labels. These easy swaps let everyone enjoy this tasty dish.
Serving Pairings
Crispy roasted sweet potatoes go well with many dishes. Try serving them with grilled chicken or fish for a hearty meal. They also pair nicely with a rich garlic aioli or tangy yogurt sauce. If you want a fresh twist, serve them alongside a zesty salsa or a green salad. These pairings make your meal colorful and fun.
Storage Info
Refrigeration Tips
To store your crispy roasted sweet potatoes, let them cool first. Place leftovers in an airtight container. This helps keep them fresh and tasty. Stored this way, they last up to four days in the fridge. When you want to eat them again, reheat in the oven for the best crispiness. You can also use a microwave, but they won’t be as crunchy.
Freezing Guidelines
If you want to save some for later, freezing is a great option. Cut the leftover sweet potatoes into smaller pieces for easier storage. Place them in a freezer-safe bag or container, removing as much air as possible. They can last up to three months in the freezer. When you’re ready to eat, thaw them in the fridge overnight. Reheat them in the oven to bring back that crispy texture.
Shelf Life
In the fridge, crispy roasted sweet potatoes stay good for about four days. If you freeze them, they can last up to three months. Sweet potatoes that are raw can last longer, about one to two weeks in a cool, dark place. Always check for any signs of spoilage before use. For the best flavor and texture, use them within these timeframes.
FAQs
How do I make crispy roasted sweet potatoes?
To make crispy roasted sweet potatoes, start by preheating your oven to 425°F (220°C). In a bowl, mix 1-inch sweet potato cubes with olive oil and spices. Toss them well to coat. Spread the cubes on a baking sheet in a single layer. Roast for 25-30 minutes, flipping halfway.
Can I use different types of potatoes?
Yes, you can use different types of potatoes. Regular russet potatoes are a great choice. They have a fluffy texture when cooked. Yukon gold potatoes work too, offering a creamy texture with a buttery flavor. Each type will change the taste and texture of your dish, giving you options.
What should I serve with crispy roasted sweet potatoes?
Crispy roasted sweet potatoes pair well with many main dishes. Try them with grilled chicken or fish for a balanced meal. They also go great with a fresh salad or a hearty stew. For a vegetarian option, serve them with quinoa or black bean tacos.
Crispy roasted sweet potatoes are easy and tasty. This guide covered ingredients, measurements, and substitutions. You learned how to prepare, roast, and serve them for great results. I shared tips to enhance flavor and avoid common mistakes. Different variations can make your dish shine. Proper storage keeps leftovers fresh for future meals. Enjoy experimenting with flavors and pairings. You now have all the tools to make delicious crispy roasted sweet potatoes. Get in the kitchen and let your taste buds celebrate!


![- 2 pounds chicken wings - 1/2 cup honey - 1/4 cup low-sodium soy sauce - 3 tablespoons minced garlic - 1 tablespoon fresh ginger, grated - 1 tablespoon rice vinegar - 1 teaspoon sesame oil - 1/2 teaspoon black pepper - 1 tablespoon cornstarch (optional for thickening) - 2 tablespoons green onions (for garnish) - Sesame seeds (for garnish) Let's dive into why these ingredients make Honey Garlic Chicken Wings so special. First, the chicken wings give a great base. They are juicy and perfect for absorbing flavors. Next, honey adds sweetness and a sticky texture. It caramelizes beautifully when cooked. The low-sodium soy sauce brings a savory taste that balances the honey. This mix creates a flavor that will make your taste buds dance. Now, let's talk about the flavor enhancers. Minced garlic gives a strong, aromatic kick. Fresh ginger adds warmth and depth. Rice vinegar brightens the sauce, cutting through the sweetness. Together, they create a rich, well-rounded flavor profile. For the additional ingredients, sesame oil adds a nutty note. Black pepper gives a subtle heat. If you want a thicker sauce, cornstarch can help. Finally, the green onions and sesame seeds make a lovely garnish. They add color and a fresh crunch. You can find the full recipe here, and you'll see how easy it is to make these tasty wings. - Preheat the oven to 400°F (200°C). - Rinse and dry the chicken wings thoroughly. This helps them get crispy. - In a bowl, whisk together: - 1/2 cup honey - 1/4 cup soy sauce - 3 tablespoons minced garlic - 1 tablespoon fresh ginger, grated - 1 tablespoon rice vinegar - 1 teaspoon sesame oil - 1/2 teaspoon black pepper - Optionally, add 1 tablespoon of cornstarch for thickening. - Place the wings in a bowl, then pour the marinade over them. - Make sure each wing is fully coated. Cover and refrigerate for 30 minutes to 2 hours. - Arrange wings on a wire rack over a baking sheet. Bake for 25-30 minutes, flipping halfway. - In the last 5 minutes, pour remaining marinade into a saucepan. Heat it until boiling, then simmer for 3-5 minutes until thickened. - Brush the baked wings with the glaze for extra flavor. - Garnish with chopped green onions and sesame seeds before serving. Enjoy your sticky honey garlic chicken wings! For the full recipe, see above. - Choose the right type of chicken wings: Look for fresh or frozen wings that are meaty and plump. Split wings or whole wings work well. Both have their charm. - Importance of drying wings for crispness: After rinsing, pat the wings dry with paper towels. This helps them get crispy when cooked. Moisture is the enemy of crispiness. - Marination time tips for optimal taste: Marinate your wings for at least 30 minutes. For the best flavor, aim for 2 hours. This allows the honey garlic mix to soak in well. - How to balance sweetness and savoriness in the sauce: Use the right amount of soy sauce and honey. A half-cup of honey balances with a quarter-cup of soy sauce. This mix gives you both sweet and salty. - Alternative cooking methods: You can grill or fry the wings. Grilling gives a nice smokey flavor. Frying makes them extra crispy. Both options are tasty. - Tips for monitoring doneness and crispiness: Use a meat thermometer for doneness. The wings should reach 165°F. Keep an eye on the color. They should be golden brown and crispy. For the full recipe, check out the [Full Recipe]. {{image_2}} You can easily change up the taste of your honey garlic chicken wings. One option is to add chili flakes for a spicy kick. This addition pairs well with the sweet honey. If you want an Asian twist, add some sesame oil and chopped green onions. These flavors make the wings even more special and delicious. You can cook wings in different ways. Oven-baking is a popular method. It gives the wings a nice crispness. You can also use an air fryer. This method cooks wings faster while keeping them juicy. For an easier prep, try slow cooking. Just set it and forget it while the flavors blend together. When serving these wings, think about side dishes. Coleslaw adds a crunchy texture. Potato wedges are another great choice for a hearty meal. For dipping, offer a variety of sauces. Ranch or blue cheese can balance the sweetness of the wings. You can find the full recipe for these tasty wings [Full Recipe]. After you enjoy your honey garlic chicken wings, store any leftovers. First, let them cool to room temperature. This helps keep them fresh. Use an airtight container for storage. These containers keep air out and prevent the wings from drying. You can refrigerate cooked wings for up to three days. If you want them to last longer, freezing is a great option. To reheat your wings, you want them crispy again. The oven is the best method for this. Preheat your oven to 375°F (190°C). Place the wings on a baking sheet lined with foil. Heat them for about 10-15 minutes, flipping halfway through. This helps them crisp up nicely. If you are in a hurry, you can use the microwave. But be careful; it may make them a bit soggy. Heat them in a microwave-safe dish for 1-2 minutes. Check them often to avoid overcooking. You can freeze both raw and cooked chicken wings. If freezing raw wings, keep them in their original packaging. Wrap them well in plastic wrap or foil. This helps prevent freezer burn. You can store them this way for up to six months. For cooked wings, let them cool first. Place them in an airtight container or freezer bag. You can freeze cooked wings for up to three months. When you are ready to eat, just thaw them in the fridge overnight before reheating. For the full recipe, check out the Sticky Honey Garlic Chicken Wings. Honey garlic chicken wings are not spicy. They have a sweet and savory flavor. However, you can add heat if you like spice. Just stir in some red pepper flakes or a dash of hot sauce into the marinade. Start with a small amount. You can always add more heat later. Yes, you can use frozen chicken wings. Make sure to thaw them before cooking. To thaw, place the wings in the fridge overnight. If you're short on time, you can use the cold water method. Seal the wings in a bag and submerge them in cold water for about an hour. Once thawed, follow the recipe as normal. Check the internal temperature of the wings. They should reach 165°F (74°C). You can use a meat thermometer for this. Look for a nice golden brown color on the outside. The juices should run clear when you cut into them. If they're still pink, they need more time. These wings pair well with several side dishes. Consider serving coleslaw for crunch and freshness. Potato wedges also work great. You can try a simple salad for balance. If you want something fun, serve with crispy onion rings. Each of these sides adds a tasty touch to your meal. Yes, you can bake the wings in advance. Cook them, then let them cool completely. Store them in an airtight container in the fridge. To reheat, place them on a baking sheet. Bake at 350°F (175°C) for about 10-15 minutes. This keeps them crispy and tasty. For the best flavor, brush them with extra glaze before serving. For the full recipe, check out the sticky honey garlic chicken wings section. This blog post detailed how to make Honey Garlic Chicken Wings from start to finish. You learned about the key ingredients and steps needed to create the perfect marinade. I also shared tips to enhance flavor and achieve that ideal crispiness. Remember, you can easily alter recipes to suit your taste. Serve these wings with your favorite sides for a complete meal. Enjoy the process and have fun experimenting with different flavors!](https://dailydishly.com/wp-content/uploads/2025/06/2feb3bb2-4133-459b-bb32-a04192496237-768x768.webp)
