Crispy Vegetable Spring Rolls Easy and Flavorful Recipe
![To make crispy vegetable spring rolls, you need a few fresh ingredients. Here’s a list: - 1 cup cabbage, finely shredded - 1 carrot, julienned - 1 bell pepper (any color), julienned - 1 cup bean sprouts - 2 green onions, finely chopped - 1 clove garlic, minced - 1 teaspoon ginger, grated - 1 tablespoon soy sauce - 1 teaspoon sesame oil - 10-12 spring roll wrappers - Vegetable oil for frying - Salt and pepper to taste Choosing fresh ingredients is key for great taste. Look for vibrant colors in your veggies. The cabbage should feel crisp and firm. Fresh carrots are bright and firm too. Bell peppers should have smooth skin. Avoid any that are wrinkled or soft. For the garlic and ginger, choose firm roots with no dark spots. Fresh herbs can also add a nice touch. Quality ingredients make your spring rolls taste even better. You can add optional ingredients for more flavor. Try adding: - Mushrooms for an earthy taste - Spinach for extra greens - Fresh herbs like cilantro or mint - A splash of lime juice for brightness - Chopped chili for spice These extras can enhance the taste and make your spring rolls unique. Mix and match to find your favorite combination! Start by gathering your ingredients. You will need cabbage, carrots, bell peppers, bean sprouts, green onions, garlic, ginger, soy sauce, and sesame oil. Slice all your veggies into small pieces. This helps them cook evenly. In a large bowl, mix the shredded cabbage, julienned carrot, bell pepper, bean sprouts, and chopped green onions. Add the minced garlic and grated ginger. Drizzle the soy sauce and sesame oil over the filling. Season with salt and pepper. Mix everything well until it’s nicely combined. This veggie mix is full of flavor and crunch. Now, it's time to roll! Take a spring roll wrapper and lay it flat on a clean surface. Point one corner toward you. Spoon about 2 tablespoons of your vegetable filling onto the wrapper, about 2 inches from the corner. Fold the corner over the filling. Next, fold in the sides. Roll the wrapper tightly away from you. Use a bit of water on the edge to seal it if needed. Repeat this for all the wrappers. Make sure each spring roll is sealed well so they don’t open while cooking. For crispy spring rolls, proper frying is key. Heat vegetable oil in a large frying pan or deep skillet over medium-high heat. You need enough oil to cover the rolls. Once the oil is hot, carefully add a few spring rolls. Don’t crowd the pan; this helps them fry evenly. Fry each side for about 3-4 minutes until golden brown. Use a slotted spoon to take them out. Place the cooked spring rolls on a paper towel to drain excess oil. Enjoy your crispy spring rolls hot, paired with sweet chili sauce or soy sauce for dipping. To make your spring rolls crispy, use the right oil. Vegetable oil works great. Heat the oil to the right temperature before frying. If it’s too cold, the rolls will soak up oil. If it’s too hot, they will burn. Aim for a temperature around 350°F. Fry in small batches to avoid crowding. This ensures even cooking and crispiness. Once golden brown, place them on paper towels to absorb extra oil. One common mistake is using too much filling. Overstuffed rolls can burst open while frying. It's best to use about two tablespoons of filling per roll. Another error is not sealing the edges well. Use water to help the wrapper stick. Lastly, skip the flour or cornstarch for dusting your surface. It can cause the rolls to stick, making it hard to roll them up tightly. Serve your crispy vegetable spring rolls with a side of sweet chili sauce or soy sauce. These dips add a nice kick and enhance the flavor. You can also add a fresh salad on the side. A simple salad with cucumber and carrots works well. It adds a refreshing crunch. If you want something extra, use a sprinkle of sesame seeds on top. This adds a nice touch and makes your dish look great! For more ideas, check out the Full Recipe. {{image_2}} You can change the veggies in your spring rolls. Try using spinach, mushrooms, or zucchini. These add new flavors and textures. You can also add herbs like basil or cilantro. They give a fresh taste that brightens the rolls. For a protein boost, add tofu or chicken to your filling. Tofu is a great choice for a vegetarian option. Just cube it and fry it lightly before mixing. If you prefer chicken, cook and shred it first. This adds heartiness to your rolls and makes them more filling. If you love heat, add chili paste or slices of jalapeño to your mix. This gives your spring rolls a spicy kick. You can also use chili oil while frying for extra flavor. Experiment with sauces like sriracha or hoisin for dipping. These add layers of taste that make each bite exciting. For the full recipe, check out the [Full Recipe]. To store leftover spring rolls, place them in an airtight container. Make sure they are completely cool before sealing the container. This helps keep them fresh. Store them in the fridge. They can last up to three days. If you want to enjoy them later, consider freezing. Reheating spring rolls can be tricky. You want them crispy, not soggy. The best way is to use an oven or air fryer. Preheat your oven to 375°F (190°C). Place the rolls on a baking sheet. Heat for about 10 minutes, turning halfway. In an air fryer, set it to 350°F (175°C) and heat for about 5-7 minutes. This keeps them crispy. To freeze spring rolls, wrap them tightly in plastic wrap. Then, place them in a freezer bag. Make sure to remove as much air as possible from the bag. They can stay frozen for up to three months. When ready to eat, thaw them in the fridge overnight before reheating. Enjoy your crispy vegetable spring rolls later with full flavors! For the detailed process, check out the Full Recipe. To make crispy vegetable spring rolls, gather your ingredients first. You need cabbage, carrots, bell pepper, bean sprouts, green onions, garlic, ginger, soy sauce, sesame oil, spring roll wrappers, and oil for frying. 1. Mix the filling: In a bowl, combine the cabbage, carrots, bell pepper, bean sprouts, green onions, garlic, and ginger. 2. Season: Add soy sauce and sesame oil. Stir well. 3. Roll the spring rolls: Place a spring roll wrapper on a flat surface. Put about 2 tablespoons of the filling on it. Fold the bottom corner over the filling, then fold in the sides, and roll tightly. 4. Fry: Heat oil in a pan. Fry the rolls until golden and crispy, about 3-4 minutes per side. You can dip spring rolls in many tasty sauces. Sweet chili sauce is a popular choice. Soy sauce also works well. For a kick, try sriracha or a spicy peanut dip. Each dip adds a new flavor to your rolls. Yes, you can bake spring rolls! Preheat your oven to 400°F (200°C). Brush the rolls with oil. Place them on a baking sheet. Bake for about 20-25 minutes or until they are golden and crispy. Baking is a healthier option than frying. You can find crispy vegetable spring rolls in many grocery stores. Check the frozen food aisle for pre-made options. Asian markets often have fresh spring rolls. Restaurants that serve Asian cuisine usually offer them as appetizers. You can easily customize your spring rolls. Add your favorite veggies, like zucchini or mushrooms. For protein, include tofu, shrimp, or chicken. Spices like chili flakes or herbs can also enhance the flavor. Get creative and make it your own! For more details on making these delicious rolls, check out the Full Recipe. In this blog post, we explored the key ingredients for making spring rolls, focusing on freshness and quality. You learned step-by-step how to prepare the filling, roll the spring rolls, and fry them for a crispy finish. I shared tips to avoid common mistakes and suggested various serving options. We also discussed delicious variations, storage tips, and answered common questions. In closing, making spring rolls is fun and rewarding. With the right ingredients and techniques, you will enjoy tasty snacks that everyone loves. Try it out!](https://dailydishly.com/wp-content/uploads/2025/06/947db9c4-fe2b-4e58-90c7-1de163361a05.webp)
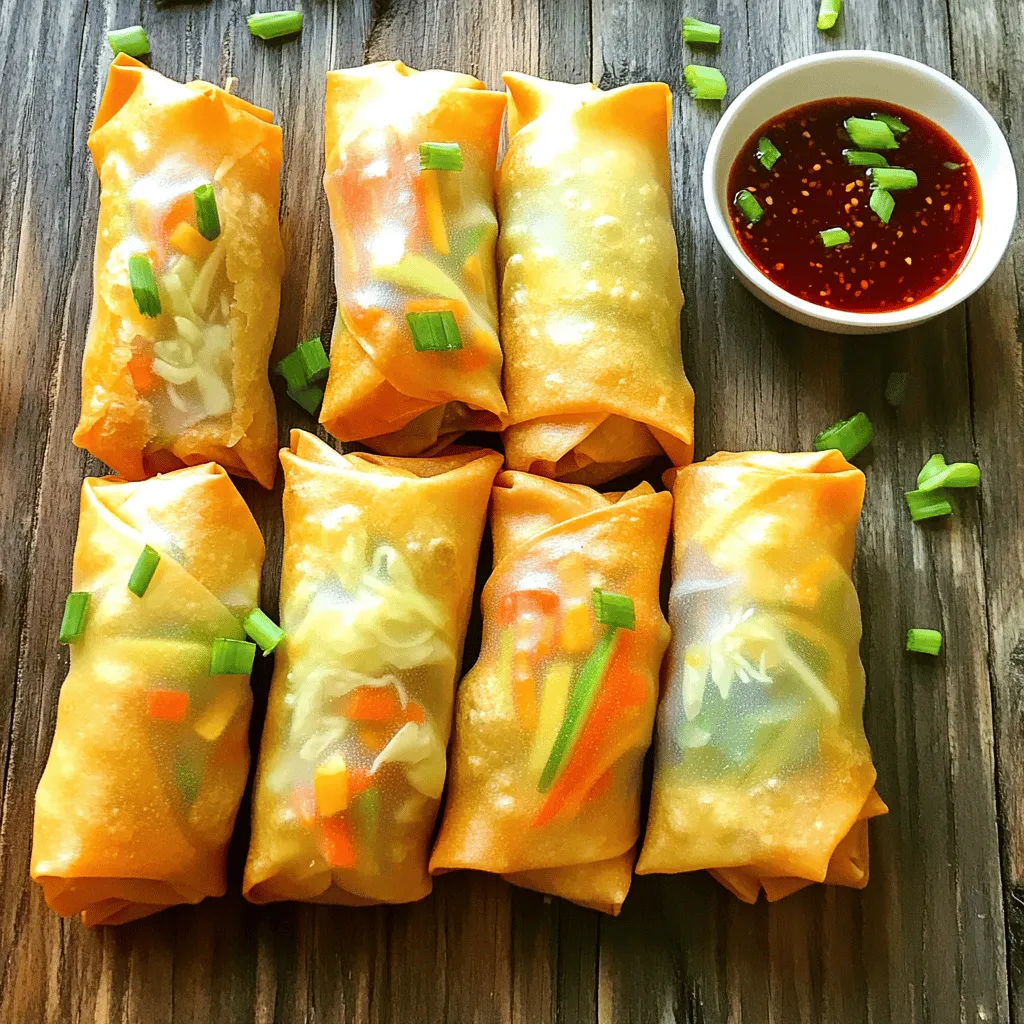
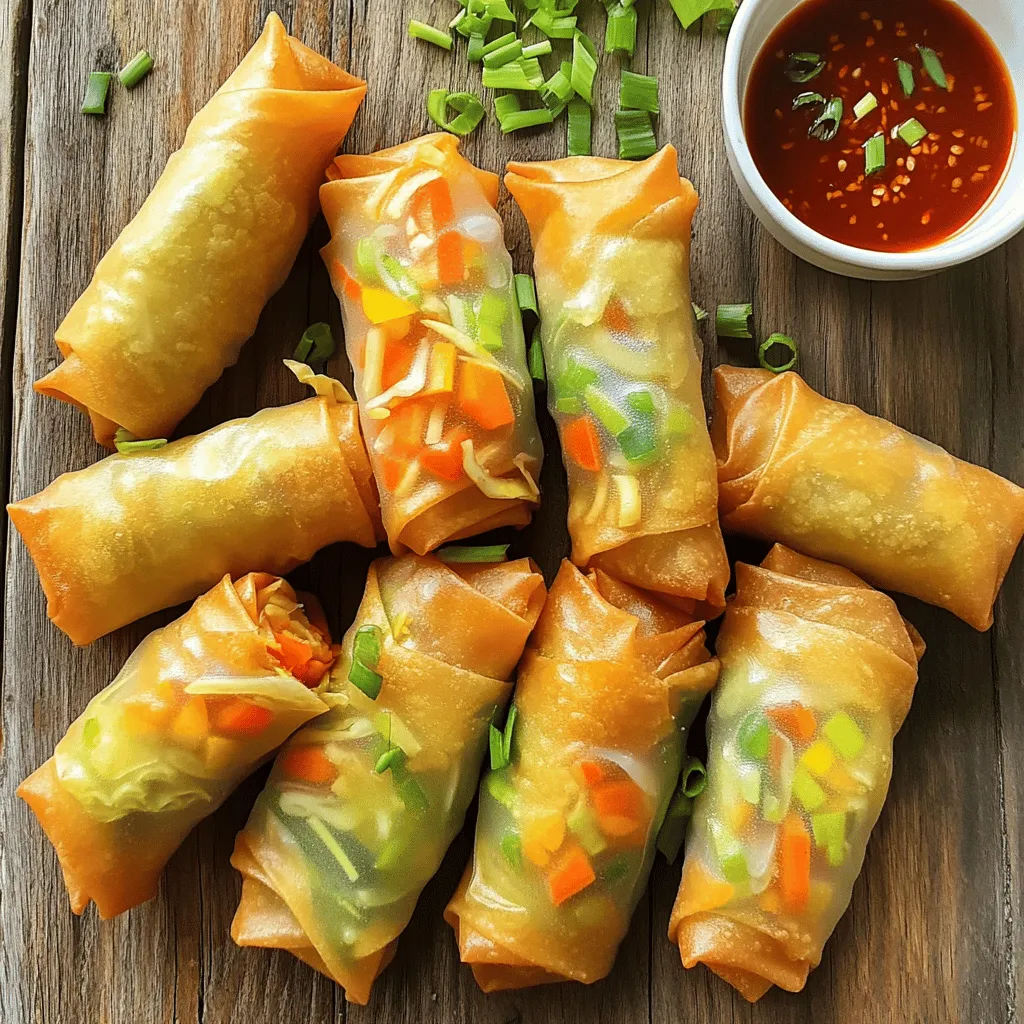
If you crave a tasty snack that’s both crispy and fresh, these vegetable spring rolls are perfect for you. I’ll show you how to make them easy and flavorful, so every bite bursts with goodness. With simple steps and fresh ingredients, you’ll impress your family or friends in no time. Join me as we dive into this delightful recipe that’s sure to become a favorite!
Ingredients
List of Required Ingredients
To make crispy vegetable spring rolls, you need a few fresh ingredients. Here’s a list:
– 1 cup cabbage, finely shredded
– 1 carrot, julienned
– 1 bell pepper (any color), julienned
– 1 cup bean sprouts
– 2 green onions, finely chopped
– 1 clove garlic, minced
– 1 teaspoon ginger, grated
– 1 tablespoon soy sauce
– 1 teaspoon sesame oil
– 10-12 spring roll wrappers
– Vegetable oil for frying
– Salt and pepper to taste
Freshness and Quality Tips
Choosing fresh ingredients is key for great taste. Look for vibrant colors in your veggies. The cabbage should feel crisp and firm. Fresh carrots are bright and firm too. Bell peppers should have smooth skin. Avoid any that are wrinkled or soft. For the garlic and ginger, choose firm roots with no dark spots. Fresh herbs can also add a nice touch. Quality ingredients make your spring rolls taste even better.
Optional Ingredients for Enhanced Flavor
You can add optional ingredients for more flavor. Try adding:
– Mushrooms for an earthy taste
– Spinach for extra greens
– Fresh herbs like cilantro or mint
– A splash of lime juice for brightness
– Chopped chili for spice
These extras can enhance the taste and make your spring rolls unique. Mix and match to find your favorite combination!
Step-by-Step Instructions
Preparation of the Vegetable Filling
Start by gathering your ingredients. You will need cabbage, carrots, bell peppers, bean sprouts, green onions, garlic, ginger, soy sauce, and sesame oil. Slice all your veggies into small pieces. This helps them cook evenly. In a large bowl, mix the shredded cabbage, julienned carrot, bell pepper, bean sprouts, and chopped green onions. Add the minced garlic and grated ginger. Drizzle the soy sauce and sesame oil over the filling. Season with salt and pepper. Mix everything well until it’s nicely combined. This veggie mix is full of flavor and crunch.
How to Roll the Spring Rolls
Now, it’s time to roll! Take a spring roll wrapper and lay it flat on a clean surface. Point one corner toward you. Spoon about 2 tablespoons of your vegetable filling onto the wrapper, about 2 inches from the corner. Fold the corner over the filling. Next, fold in the sides. Roll the wrapper tightly away from you. Use a bit of water on the edge to seal it if needed. Repeat this for all the wrappers. Make sure each spring roll is sealed well so they don’t open while cooking.
Frying Techniques for Crispy Results
For crispy spring rolls, proper frying is key. Heat vegetable oil in a large frying pan or deep skillet over medium-high heat. You need enough oil to cover the rolls. Once the oil is hot, carefully add a few spring rolls. Don’t crowd the pan; this helps them fry evenly. Fry each side for about 3-4 minutes until golden brown. Use a slotted spoon to take them out. Place the cooked spring rolls on a paper towel to drain excess oil. Enjoy your crispy spring rolls hot, paired with sweet chili sauce or soy sauce for dipping.
Tips & Tricks
Achieving the Perfect Crispy Texture
To make your spring rolls crispy, use the right oil. Vegetable oil works great. Heat the oil to the right temperature before frying. If it’s too cold, the rolls will soak up oil. If it’s too hot, they will burn. Aim for a temperature around 350°F. Fry in small batches to avoid crowding. This ensures even cooking and crispiness. Once golden brown, place them on paper towels to absorb extra oil.
Common Mistakes to Avoid
One common mistake is using too much filling. Overstuffed rolls can burst open while frying. It’s best to use about two tablespoons of filling per roll. Another error is not sealing the edges well. Use water to help the wrapper stick. Lastly, skip the flour or cornstarch for dusting your surface. It can cause the rolls to stick, making it hard to roll them up tightly.
Serving Suggestions for Best Experience
Serve your crispy vegetable spring rolls with a side of sweet chili sauce or soy sauce. These dips add a nice kick and enhance the flavor. You can also add a fresh salad on the side. A simple salad with cucumber and carrots works well. It adds a refreshing crunch. If you want something extra, use a sprinkle of sesame seeds on top. This adds a nice touch and makes your dish look great!

Variations
Vegetarian Alternatives
You can change the veggies in your spring rolls. Try using spinach, mushrooms, or zucchini. These add new flavors and textures. You can also add herbs like basil or cilantro. They give a fresh taste that brightens the rolls.
Adding Proteins (Tofu, Chicken, etc.)
For a protein boost, add tofu or chicken to your filling. Tofu is a great choice for a vegetarian option. Just cube it and fry it lightly before mixing. If you prefer chicken, cook and shred it first. This adds heartiness to your rolls and makes them more filling.
Spicy and Flavorful Twists
If you love heat, add chili paste or slices of jalapeño to your mix. This gives your spring rolls a spicy kick. You can also use chili oil while frying for extra flavor. Experiment with sauces like sriracha or hoisin for dipping. These add layers of taste that make each bite exciting.
Storage Info
How to Store Leftover Spring Rolls
To store leftover spring rolls, place them in an airtight container. Make sure they are completely cool before sealing the container. This helps keep them fresh. Store them in the fridge. They can last up to three days. If you want to enjoy them later, consider freezing.
Reheating Methods for Best Taste
Reheating spring rolls can be tricky. You want them crispy, not soggy. The best way is to use an oven or air fryer. Preheat your oven to 375°F (190°C). Place the rolls on a baking sheet. Heat for about 10 minutes, turning halfway. In an air fryer, set it to 350°F (175°C) and heat for about 5-7 minutes. This keeps them crispy.
Freezing Tips for Longer Storage
To freeze spring rolls, wrap them tightly in plastic wrap. Then, place them in a freezer bag. Make sure to remove as much air as possible from the bag. They can stay frozen for up to three months. When ready to eat, thaw them in the fridge overnight before reheating. Enjoy your crispy vegetable spring rolls later with full flavors!
FAQs
How do I make crispy vegetable spring rolls?
To make crispy vegetable spring rolls, gather your ingredients first. You need cabbage, carrots, bell pepper, bean sprouts, green onions, garlic, ginger, soy sauce, sesame oil, spring roll wrappers, and oil for frying.
1. Mix the filling: In a bowl, combine the cabbage, carrots, bell pepper, bean sprouts, green onions, garlic, and ginger.
2. Season: Add soy sauce and sesame oil. Stir well.
3. Roll the spring rolls: Place a spring roll wrapper on a flat surface. Put about 2 tablespoons of the filling on it. Fold the bottom corner over the filling, then fold in the sides, and roll tightly.
4. Fry: Heat oil in a pan. Fry the rolls until golden and crispy, about 3-4 minutes per side.
What can I dip spring rolls in?
You can dip spring rolls in many tasty sauces. Sweet chili sauce is a popular choice. Soy sauce also works well. For a kick, try sriracha or a spicy peanut dip. Each dip adds a new flavor to your rolls.
Can I bake spring rolls instead of frying them?
Yes, you can bake spring rolls! Preheat your oven to 400°F (200°C). Brush the rolls with oil. Place them on a baking sheet. Bake for about 20-25 minutes or until they are golden and crispy. Baking is a healthier option than frying.
Where can I buy crispy vegetable spring rolls?
You can find crispy vegetable spring rolls in many grocery stores. Check the frozen food aisle for pre-made options. Asian markets often have fresh spring rolls. Restaurants that serve Asian cuisine usually offer them as appetizers.
How do I customize the filling for my spring rolls?
You can easily customize your spring rolls. Add your favorite veggies, like zucchini or mushrooms. For protein, include tofu, shrimp, or chicken. Spices like chili flakes or herbs can also enhance the flavor. Get creative and make it your own!
In this blog post, we explored the key ingredients for making spring rolls, focusing on freshness and quality. You learned step-by-step how to prepare the filling, roll the spring rolls, and fry them for a crispy finish. I shared tips to avoid common mistakes and suggested various serving options. We also discussed delicious variations, storage tips, and answered common questions.
In closing, making spring rolls is fun and rewarding. With the right ingredients and techniques, you will enjoy tasty snacks that everyone loves. Try it out!
![To make crispy vegetable spring rolls, you need a few fresh ingredients. Here’s a list: - 1 cup cabbage, finely shredded - 1 carrot, julienned - 1 bell pepper (any color), julienned - 1 cup bean sprouts - 2 green onions, finely chopped - 1 clove garlic, minced - 1 teaspoon ginger, grated - 1 tablespoon soy sauce - 1 teaspoon sesame oil - 10-12 spring roll wrappers - Vegetable oil for frying - Salt and pepper to taste Choosing fresh ingredients is key for great taste. Look for vibrant colors in your veggies. The cabbage should feel crisp and firm. Fresh carrots are bright and firm too. Bell peppers should have smooth skin. Avoid any that are wrinkled or soft. For the garlic and ginger, choose firm roots with no dark spots. Fresh herbs can also add a nice touch. Quality ingredients make your spring rolls taste even better. You can add optional ingredients for more flavor. Try adding: - Mushrooms for an earthy taste - Spinach for extra greens - Fresh herbs like cilantro or mint - A splash of lime juice for brightness - Chopped chili for spice These extras can enhance the taste and make your spring rolls unique. Mix and match to find your favorite combination! Start by gathering your ingredients. You will need cabbage, carrots, bell peppers, bean sprouts, green onions, garlic, ginger, soy sauce, and sesame oil. Slice all your veggies into small pieces. This helps them cook evenly. In a large bowl, mix the shredded cabbage, julienned carrot, bell pepper, bean sprouts, and chopped green onions. Add the minced garlic and grated ginger. Drizzle the soy sauce and sesame oil over the filling. Season with salt and pepper. Mix everything well until it’s nicely combined. This veggie mix is full of flavor and crunch. Now, it's time to roll! Take a spring roll wrapper and lay it flat on a clean surface. Point one corner toward you. Spoon about 2 tablespoons of your vegetable filling onto the wrapper, about 2 inches from the corner. Fold the corner over the filling. Next, fold in the sides. Roll the wrapper tightly away from you. Use a bit of water on the edge to seal it if needed. Repeat this for all the wrappers. Make sure each spring roll is sealed well so they don’t open while cooking. For crispy spring rolls, proper frying is key. Heat vegetable oil in a large frying pan or deep skillet over medium-high heat. You need enough oil to cover the rolls. Once the oil is hot, carefully add a few spring rolls. Don’t crowd the pan; this helps them fry evenly. Fry each side for about 3-4 minutes until golden brown. Use a slotted spoon to take them out. Place the cooked spring rolls on a paper towel to drain excess oil. Enjoy your crispy spring rolls hot, paired with sweet chili sauce or soy sauce for dipping. To make your spring rolls crispy, use the right oil. Vegetable oil works great. Heat the oil to the right temperature before frying. If it’s too cold, the rolls will soak up oil. If it’s too hot, they will burn. Aim for a temperature around 350°F. Fry in small batches to avoid crowding. This ensures even cooking and crispiness. Once golden brown, place them on paper towels to absorb extra oil. One common mistake is using too much filling. Overstuffed rolls can burst open while frying. It's best to use about two tablespoons of filling per roll. Another error is not sealing the edges well. Use water to help the wrapper stick. Lastly, skip the flour or cornstarch for dusting your surface. It can cause the rolls to stick, making it hard to roll them up tightly. Serve your crispy vegetable spring rolls with a side of sweet chili sauce or soy sauce. These dips add a nice kick and enhance the flavor. You can also add a fresh salad on the side. A simple salad with cucumber and carrots works well. It adds a refreshing crunch. If you want something extra, use a sprinkle of sesame seeds on top. This adds a nice touch and makes your dish look great! For more ideas, check out the Full Recipe. {{image_2}} You can change the veggies in your spring rolls. Try using spinach, mushrooms, or zucchini. These add new flavors and textures. You can also add herbs like basil or cilantro. They give a fresh taste that brightens the rolls. For a protein boost, add tofu or chicken to your filling. Tofu is a great choice for a vegetarian option. Just cube it and fry it lightly before mixing. If you prefer chicken, cook and shred it first. This adds heartiness to your rolls and makes them more filling. If you love heat, add chili paste or slices of jalapeño to your mix. This gives your spring rolls a spicy kick. You can also use chili oil while frying for extra flavor. Experiment with sauces like sriracha or hoisin for dipping. These add layers of taste that make each bite exciting. For the full recipe, check out the [Full Recipe]. To store leftover spring rolls, place them in an airtight container. Make sure they are completely cool before sealing the container. This helps keep them fresh. Store them in the fridge. They can last up to three days. If you want to enjoy them later, consider freezing. Reheating spring rolls can be tricky. You want them crispy, not soggy. The best way is to use an oven or air fryer. Preheat your oven to 375°F (190°C). Place the rolls on a baking sheet. Heat for about 10 minutes, turning halfway. In an air fryer, set it to 350°F (175°C) and heat for about 5-7 minutes. This keeps them crispy. To freeze spring rolls, wrap them tightly in plastic wrap. Then, place them in a freezer bag. Make sure to remove as much air as possible from the bag. They can stay frozen for up to three months. When ready to eat, thaw them in the fridge overnight before reheating. Enjoy your crispy vegetable spring rolls later with full flavors! For the detailed process, check out the Full Recipe. To make crispy vegetable spring rolls, gather your ingredients first. You need cabbage, carrots, bell pepper, bean sprouts, green onions, garlic, ginger, soy sauce, sesame oil, spring roll wrappers, and oil for frying. 1. Mix the filling: In a bowl, combine the cabbage, carrots, bell pepper, bean sprouts, green onions, garlic, and ginger. 2. Season: Add soy sauce and sesame oil. Stir well. 3. Roll the spring rolls: Place a spring roll wrapper on a flat surface. Put about 2 tablespoons of the filling on it. Fold the bottom corner over the filling, then fold in the sides, and roll tightly. 4. Fry: Heat oil in a pan. Fry the rolls until golden and crispy, about 3-4 minutes per side. You can dip spring rolls in many tasty sauces. Sweet chili sauce is a popular choice. Soy sauce also works well. For a kick, try sriracha or a spicy peanut dip. Each dip adds a new flavor to your rolls. Yes, you can bake spring rolls! Preheat your oven to 400°F (200°C). Brush the rolls with oil. Place them on a baking sheet. Bake for about 20-25 minutes or until they are golden and crispy. Baking is a healthier option than frying. You can find crispy vegetable spring rolls in many grocery stores. Check the frozen food aisle for pre-made options. Asian markets often have fresh spring rolls. Restaurants that serve Asian cuisine usually offer them as appetizers. You can easily customize your spring rolls. Add your favorite veggies, like zucchini or mushrooms. For protein, include tofu, shrimp, or chicken. Spices like chili flakes or herbs can also enhance the flavor. Get creative and make it your own! For more details on making these delicious rolls, check out the Full Recipe. In this blog post, we explored the key ingredients for making spring rolls, focusing on freshness and quality. You learned step-by-step how to prepare the filling, roll the spring rolls, and fry them for a crispy finish. I shared tips to avoid common mistakes and suggested various serving options. We also discussed delicious variations, storage tips, and answered common questions. In closing, making spring rolls is fun and rewarding. With the right ingredients and techniques, you will enjoy tasty snacks that everyone loves. Try it out!](https://dailydishly.com/wp-content/uploads/2025/06/947db9c4-fe2b-4e58-90c7-1de163361a05-300x300.webp)

![- 1 can (15 oz) chickpeas, drained and rinsed - 1/2 cup sun-dried tomatoes, chopped - 1/4 cup red onion, finely chopped - 1/2 cucumber, diced Chickpeas are the star of this salad. They add protein and fiber. Sun-dried tomatoes bring a burst of flavor and a bit of sweetness. Fresh veggies, like cucumber and red onion, add crunch and color. Together, they make a hearty base. - 2 tablespoons olive oil - 1 tablespoon lemon juice - 1 teaspoon dried oregano - Salt and pepper to taste The dressing is simple yet full of taste. Olive oil adds richness, while lemon juice gives a bright kick. Oregano adds an earthy note. Salt and pepper round out the flavors nicely. - 1/4 cup feta cheese, crumbled - 2 tablespoons fresh parsley, chopped Feta cheese adds a creamy, tangy element. Fresh herbs like parsley give a burst of freshness. You can add these if you want more flavor and texture. If you want the full recipe, check it out [Full Recipe]. - Combine Key Ingredients Start by taking a large mixing bowl. Add one can of drained and rinsed chickpeas. Then, toss in half a cup of chopped sun-dried tomatoes. Next, add a quarter cup of finely chopped red onion and half a diced cucumber. Finally, sprinkle in a quarter cup of crumbled feta cheese. - Whisk the Dressing In a small bowl, mix two tablespoons of olive oil with one tablespoon of lemon juice. Then, add one teaspoon of dried oregano. Season with salt and pepper to taste. Whisk these ingredients together until well combined. This dressing is key to bringing out the flavors. - Toss Ingredients Together Pour the dressing over the salad mix. Gently toss everything together to coat the ingredients evenly. Be careful not to mash the chickpeas or feta. You want everything to stay nice and whole. - Letting Flavors Meld Once tossed, let the salad sit for at least 15 minutes. This time helps the flavors blend. You can cover it and set it aside. It will taste even better after it rests. - Chilled or Room Temperature You can serve this salad chilled or at room temperature. Both options work well. It makes a great side dish or a light lunch. Enjoy the freshness of the sun-dried tomatoes and the crunch of the cucumber. You can save time by preparing ingredients in advance. Chop the cucumbers, red onions, and sun-dried tomatoes the day before. Store them in airtight containers in your fridge. This way, when you're ready to make the salad, it’s quick and easy. You can also mix the dressing ahead of time. Just give it a good shake before using it. To boost flavor, let the salad marinate. After mixing all the ingredients, cover the bowl. Place it in the fridge for at least 30 minutes. This waiting time helps the flavors blend well. You can also add some balsamic vinegar to the dressing for a deeper taste. Seasoning matters! Use fresh herbs like basil or mint for a bright taste. You can also try adding a pinch of red pepper flakes for a bit of heat. Always taste the salad before serving. Adjust salt and pepper to suit your liking. If you prefer a creamier salad, add more feta cheese or a dollop of Greek yogurt. For a lighter version, reduce the olive oil. You can also add more lemon juice for extra zing. Feel free to adjust the chickpeas too; add more for a heartier salad. {{image_2}} You can boost your Sun-Dried Tomato Chickpea Salad by adding proteins. One great choice is grilled chicken. Just cook the chicken until it’s golden and slice it thin. Add the slices right on top of your salad. This makes it heartier and perfect for lunch. Another option is incorporating tuna. Drain a can of tuna and mix it in. The tuna adds a nice flavor and a bit of richness. Both options give you a tasty way to enjoy the salad. For a vegetarian twist, try non-dairy cheese options. There are many brands that mimic feta well. Crumble it on top like regular feta. This keeps the creaminess without dairy. If you prefer a vegan version, consider other legumes. Black beans or kidney beans work well. They add protein and fiber while keeping the salad filling and delicious. As the seasons change, you can mix in fresh veggies. In summer, consider adding bell peppers. They add crunch and color. You can also toss in cherry tomatoes for extra sweetness. For fall, think about adding roasted squash or sweet potatoes. These ingredients bring warmth and earthiness to the salad. Each season offers new flavors to explore in your Sun-Dried Tomato Chickpea Salad. How long will it last? This salad stays fresh in the fridge for about three days. Make sure to store it in an airtight container. This keeps the flavors locked in and the veggies crisp. Can I freeze the salad? I do not recommend freezing this salad. The fresh veggies and feta do not hold up well after freezing. If you freeze it, the texture will change, and it may become mushy. What are the best practices for serving leftovers? You can enjoy this salad cold right from the fridge. If you prefer it warm, gently heat it in the microwave for about 30 seconds. Stir it well to ensure even heating. Just remember, warm is nice, but cold is better for this dish! To make this salad, you start with simple steps. The full recipe shows you how. First, gather your ingredients. You need chickpeas, sun-dried tomatoes, red onion, cucumber, and feta cheese. 1. In a bowl, mix the chickpeas, sun-dried tomatoes, diced cucumber, red onion, and feta cheese. 2. For the dressing, whisk olive oil, lemon juice, dried oregano, salt, and pepper in a small bowl. 3. Pour this dressing over the salad and mix gently. 4. Add chopped parsley and toss once more. 5. Let it sit for at least 15 minutes. This helps the flavors blend. You can serve it cold or at room temp. Yes, you can use dried chickpeas! However, you need to prepare them first. - Soak the dried chickpeas overnight in water. This helps them soften. - The next day, drain and rinse them. - Cook them in boiling water for about 1 to 1.5 hours until they are tender. - Once cooked, drain and cool them before using in your salad. This salad pairs well with many dishes. Here are some ideas: - Serve it alongside grilled chicken for a protein boost. - Pair it with some crusty bread for a tasty meal. - Enjoy it as a side with fish or a light pasta dish. - It also works great as a filling for wraps or pita pockets. Feel free to mix and match! In this post, we explored the sun-dried tomato chickpea salad. We looked at key ingredients, like chickpeas and fresh veggies. We also discussed making a tasty dressing with olive oil and lemon juice. You learned how to prepare and assemble the salad, plus tips for flavor and storage. This salad is both simple and flexible. You can customize it to your taste. Enjoy your delicious creation!](https://dailydishly.com/wp-content/uploads/2025/07/f0fe0f85-1842-4358-ad7f-ac591425fdaf-768x768.webp)

![For this fresh and tasty grilled peach caprese salad, gather these ingredients: - 2 ripe peaches, halved and pitted - 8 ounces fresh mozzarella, sliced - 2 cups mixed greens (like arugula, spinach, or baby kale) - 1 cup cherry tomatoes, halved - 1/4 cup fresh basil leaves, torn To enhance the flavors, use these seasonings and dressings: - 2 tablespoons balsamic glaze - 1 tablespoon olive oil - Salt and pepper to taste You will need some key tools: - A grill or grill pan - A brush for oiling the peaches - A sharp knife for slicing - A large serving platter to arrange the salad This simple list will help you create a vibrant dish. The mix of sweet peaches and creamy mozzarella makes this salad shine. You can find the full recipe in our guide. Start by preheating your grill to medium-high heat. This step is key for good grill marks. Cut the peaches in half and remove the pits. Brush the cut sides with olive oil. This helps the peaches not stick to the grill. Place the peach halves cut side down on the grill. Grill them for about 3-4 minutes. You'll know they are ready when you see nice grill marks and they feel a bit soft. Once done, take them off the grill and let them cool for a minute. Take a large serving platter. Arrange the mixed greens as a nice bed for your salad. Next, place the grilled peach halves on top. Spread them out evenly for a lovely look. Add the fresh mozzarella slices next. Scatter the cherry tomato halves around the peaches. Finally, sprinkle the torn basil leaves over the top. This adds a fresh touch. Drizzle the balsamic glaze over the whole salad. Finish with a sprinkle of salt and pepper to taste. Serve the salad right away for the best flavor. You can also chill it slightly if you prefer. Pair it with grilled chicken or fish for a complete meal. This salad makes a great side dish too. For a fun twist, add some nuts or seeds for extra crunch. Enjoy the balance of sweet peaches and creamy mozzarella! For the full recipe, check out the [Full Recipe]. To get those beautiful grill marks, start with ripe peaches. Choose peaches that are firm but yield slightly to pressure. Brush the cut sides with olive oil. This keeps them from sticking to the grill. Preheat your grill to medium-high heat. Place the peaches cut side down. Grill them for 3-4 minutes. You’ll see lovely marks form, and they will soften just right. Flip them only if needed. Fresh mozzarella is key for this dish. Look for mozzarella packed in water or brine. This keeps it moist and flavorful. The texture should be soft and slightly springy. You can tear it into pieces for a rustic look. Aim for a good balance between peach sweetness and mozzarella creaminess. It enhances the overall taste of the salad. Add depth to your salad with a few simple extras. A sprinkle of salt brings out the peach flavor. Fresh basil adds a nice aroma and taste. For a bit of heat, consider adding sliced jalapeños. Drizzle with balsamic glaze to balance the sweetness. If you want more crunch, toss in some nuts like walnuts or pistachios. These pair well with the soft mozzarella and juicy peaches. For the full recipe, check out the details above. {{image_2}} You can change this salad based on what’s fresh and in season. Try using nectarines instead of peaches for a different taste. In fall, add sliced apples or pears for sweetness. In winter, you might want to use roasted butternut squash. This gives a warm touch to the dish. Each swap brings new flavors and fun to your table. If you want a vegan version, swap the mozzarella with vegan cheese or avocado slices. Both options add creaminess. You can also use a nut-based cheese for a rich flavor. Make sure the balsamic glaze is vegan too, as some contain honey. This way, everyone can enjoy the salad without missing out. Want to add more zest? Try adding prosciutto or crispy bacon for a savory bite. Nuts, like sliced almonds or walnuts, give a nice crunch and healthy fats. A sprinkle of chili flakes can add a kick if you like spice. You can mix and match these options to create your own unique twist on the grilled peach Caprese salad. For the full recipe, check out the entire process above! If you have leftover Grilled Peach Caprese Salad, store it right. First, let the salad cool to room temperature. Then, place it in a container. Keep the dressing separate if possible. This helps keep the greens crisp. You can use this salad within two days for the best taste. Choose an airtight container for storage. Glass containers work well and do not retain odors. Plastic containers are also fine, but make sure they seal tightly. Avoid storing in a bowl covered with plastic wrap. This can let air in and spoil your salad faster. The shelf life of your salad depends on the ingredients. Grilled peaches can last up to three days in the fridge. Fresh mozzarella should be used within two days. Mixed greens are best consumed within one day. Always check for any signs of spoilage before eating. Enjoy your delicious salad while it’s fresh! Yes, you can make the salad ahead of time. I suggest grilling the peaches just before serving. If you grill them too early, they may lose some of their charm. You can prepare the salad base, like mixed greens and tomatoes, and store them in the fridge. Just add the peaches and drizzle the glaze when you are ready to eat. If you do not have balsamic glaze, you can use balsamic vinegar instead. Just drizzle a bit more to get that sweet flavor. Honey or maple syrup can also work in a pinch. Mix them with some olive oil for a tasty dressing. This will add a new twist to your salad. To find ripe peaches, look for a sweet smell and a slight softness. If the peach gives a bit when you press it gently, it is ready. Avoid hard peaches, as they will not grill well. Choose peaches with a golden hue and a bit of redness for the best flavor. In this article, we explored how to make a delicious peach salad. We covered the best fresh ingredients, seasonings, and tools you need for success. You learned step-by-step how to prepare and serve your salad. We also shared tips for perfect grill marks and flavor pairings. Don’t forget to try the variations for a unique touch. Finally, proper storage keeps leftovers fresh and tasty. Enjoy creating this bright dish that anyone can love!](https://dailydishly.com/wp-content/uploads/2025/06/c765deb6-47e2-46b1-bbfc-9b058c8c2a51-768x768.webp)


