Are you ready to elevate your dinner game? This delicious Chicken Alfredo Stuffed Shells recipe is simple, quick, and packed with flavor. With creamy cheeses, tender chicken, and a rich sauce, these stuffed shells are a crowd-pleaser. Whether you’re cooking for family or hosting friends, this dish guarantees smiles all around. Let’s dive into the ingredients and steps to create this tasty meal that everyone will love!
Why I Love This Recipe
- Deliciously Creamy: The rich Alfredo sauce combined with the cheesy filling creates an irresistible flavor that is both comforting and satisfying.
- Easy to Prepare: This recipe is simple and straightforward, making it perfect for weeknight dinners or special occasions.
- Customizable: You can easily swap out ingredients, such as using different cheeses or adding veggies, to suit your taste preferences.
- Family-Friendly: Everyone in the family will love these stuffed shells, making them a great choice for feeding a crowd.
Ingredients
Main Ingredients List
– 12 large jumbo pasta shells
– 2 cups cooked chicken, shredded
– 1 cup ricotta cheese
– 1 cup mozzarella cheese, shredded
– 1/2 cup Parmesan cheese, grated
For this dish, the jumbo pasta shells are key. They hold a lot of filling and create a perfect bite. I use cooked chicken that I shred myself. It adds great flavor and makes this dish hearty.
Cheese is essential here. I like to use a mix of ricotta, mozzarella, and Parmesan. The ricotta gives it a creamy texture. Mozzarella melts well, and Parmesan adds a salty kick.
Seasoning and Sauce
– 1 teaspoon garlic powder
– 1 teaspoon Italian seasoning
– 2 cups Alfredo sauce (store-bought or homemade)
Seasoning is vital for flavor. I use garlic powder and Italian seasoning to enhance the dish. They add depth and make it taste amazing.
For the sauce, I often go with Alfredo. You can use store-bought or make your own. Both work well, but homemade can take it to the next level.
Garnish Suggestions
– Fresh parsley
– Alternative garnish options
Garnish is not just for looks; it adds flavor. I like to use fresh parsley for a pop of color and taste. You can also try other options like basil or even a sprinkle of extra cheese.

Step-by-Step Instructions
Preparation Steps
1. Preheat your oven to 350°F (175°C). This step warms the oven and helps cook the shells evenly.
2. Cook the jumbo pasta shells in a large pot of salted boiling water. Follow the package instructions until they are al dente. Drain the shells and set them aside to cool slightly.
Filling the Shells
1. In a mixing bowl, combine the shredded chicken, ricotta cheese, 1/2 cup of mozzarella cheese, 1/4 cup of Parmesan cheese, garlic powder, Italian seasoning, salt, and pepper. Mix these ingredients well until they are fully combined.
2. Now, take each cooked pasta shell and carefully stuff it with the chicken and cheese mixture. Place them seam-side up in a baking dish.
Baking Instructions
1. Spread 1 cup of Alfredo sauce evenly over the bottom of a 9×13 inch baking dish. This keeps the shells moist.
2. Pour the remaining Alfredo sauce over the stuffed shells. Make sure to cover them generously.
3. Sprinkle the top with the remaining mozzarella and Parmesan cheese. This will create a nice golden crust.
4. Cover the dish with aluminum foil and bake in the preheated oven for 25 minutes.
5. After 25 minutes, remove the foil and bake for an additional 10-15 minutes. The cheese should be melted and bubbly.
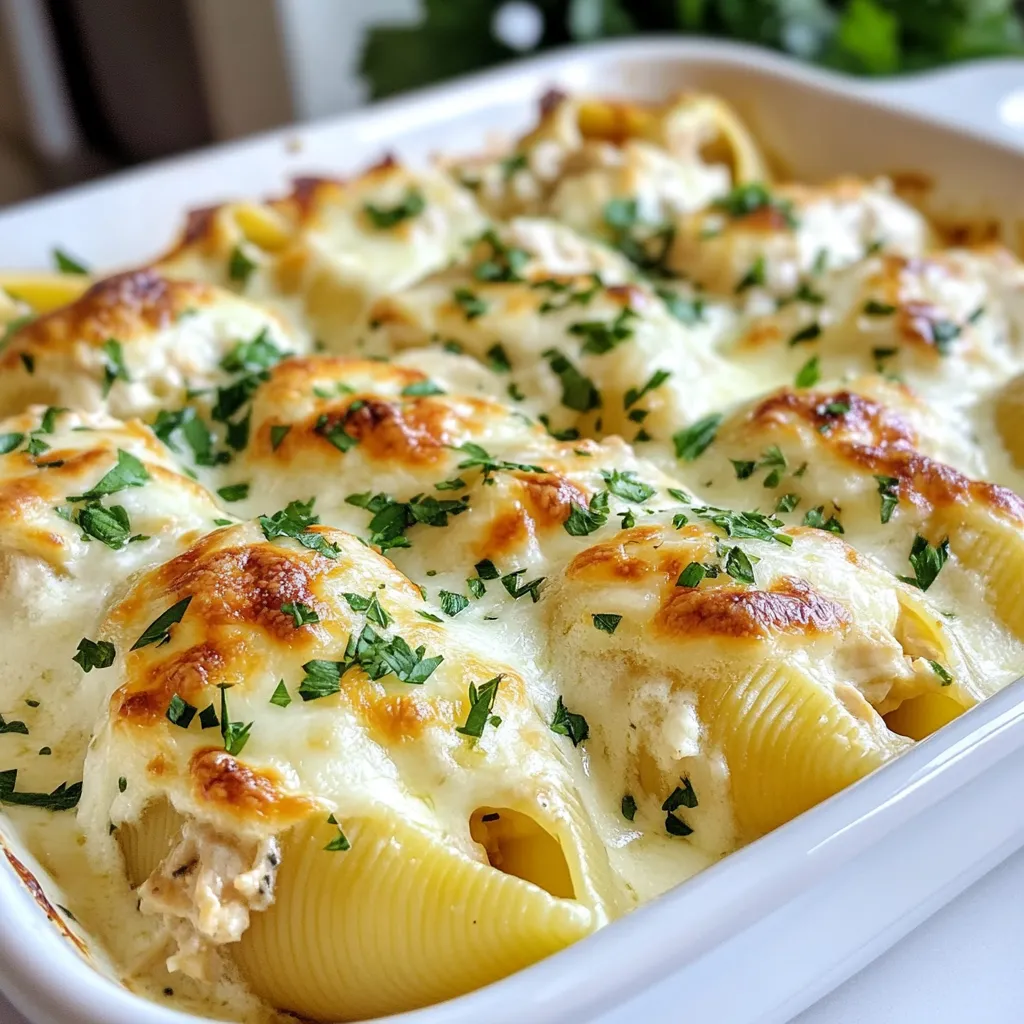
6. Once baked, take the dish out of the oven and let it cool for a few minutes. Garnish with fresh parsley before serving.
Tips & Tricks
Cooking Tips
To ensure perfect pasta texture, cook the jumbo shells until they are al dente. This means they should be firm yet tender. Overcooking can lead to soggy shells. After cooking, drain them and let them cool slightly to make stuffing easier.
If you have leftover chicken, use it! Shred it up and mix it with the cheese. This makes a great filling. You can also use rotisserie chicken to save time. Just make sure to remove any skin before shredding.
Presentation Tips
For plating, arrange the stuffed shells in a nice row. Drizzle extra Alfredo sauce on top for a beautiful look. You can also serve them on a bed of fresh spinach or arugula for color.
Garnish with fresh parsley. It adds a nice touch of green and freshness. You could also sprinkle some additional Parmesan cheese for extra flavor.
Shortcut Tips
Using store-bought ingredients can save you time. You can buy pre-made Alfredo sauce and rotisserie chicken. This makes your cooking process quicker and easier.
For time-saving methods, try cooking the shells while you prepare the filling. This way, you save time and keep the meal moving. Also, you can bake the stuffed shells while you set the table, making everything more efficient.
Pro Tips
- Cook Pasta Al Dente: Make sure to cook the jumbo shells just until al dente. They will continue to cook in the oven, preventing them from becoming mushy.
- Use Rotisserie Chicken: For a quicker option, use store-bought rotisserie chicken to save time on cooking and shredding.
- Customize Your Cheese: Feel free to experiment with different types of cheese, such as gouda or fontina, for a unique flavor twist.
- Add Vegetables: Incorporate some sautéed spinach or mushrooms into the filling for added nutrition and flavor.
Variations
Flavor Variations
You can make Chicken Alfredo Stuffed Shells even better by adding vegetables. Spinach, mushrooms, and bell peppers work great. Just sauté them first to soften. Mix them into the filling for extra taste and nutrition.
You can also change the cheese. Instead of just mozzarella, try gouda or fontina. These cheeses melt well and add a unique flavor. Mixing cheeses can make your dish more exciting and delicious.
Dietary Adjustments
If you need a gluten-free option, use gluten-free jumbo pasta shells. Many brands now offer this choice. Just cook them according to package directions. Your stuffed shells will still taste great!
For a vegetarian version, skip the chicken. Use more cheese or add beans for protein. You could also add roasted vegetables. This keeps the dish hearty and satisfying without meat.
Different Sauces
You can swap the Alfredo sauce for a white sauce. A simple béchamel can give a nice twist to the dish. It’s creamy and still delicious.
If you like heat, try a spicy Alfredo. Add red pepper flakes to the sauce. This gives the dish a kick and makes it more interesting.
Storage Info
Refrigeration Guidelines
To store your stuffed shells, place them in an airtight container. Make sure the dish is cooled down before you cover it. This keeps the flavors fresh. You can store them in the fridge for about 3 to 4 days. If you want to enjoy them later, it’s best to eat them fresh.
Freezing Instructions
You can freeze stuffed shells either before or after baking. If you freeze them before baking, wrap the dish tightly with plastic wrap and then foil. This helps keep out air. For freezing after baking, let them cool first, then cover well. They last up to 3 months in the freezer. To thaw, place them in the fridge overnight. Heat them in the oven at 350°F until warm. Cover with foil to keep moisture in.
Leftover Suggestions
Leftover Chicken Alfredo Stuffed Shells are great for quick meals. You can chop them up in a salad or mix them in a pasta bake. For reheating, use the oven to keep the shells nice and creamy. Place them in a baking dish and cover with foil. Heat at 350°F until heated through. This helps keep the texture just right.
FAQs
Common Questions
Can I make Chicken Alfredo Stuffed Shells ahead of time?
Yes, you can prepare these stuffed shells in advance. Just fill the shells and layer them with sauce. Cover and store them in the fridge for up to 24 hours. When ready, bake them straight from the fridge. You may need to add a few extra minutes to the baking time.
What can I substitute for ricotta cheese?
If you don’t have ricotta cheese, try using cottage cheese. You can blend it to make it smooth. Cream cheese is also a great option for a richer taste. Just make sure to adjust the amount to keep the texture right.
Recipe-Specific Inquiries
Can I use different pasta shapes?
You can use other pasta shapes if you prefer. Manicotti or cannelloni work well too. Just ensure they are large enough to hold the filling. Cooking times may vary, so check the package instructions.
How do I know when the stuffed shells are done?
Stuffed shells are done when the cheese on top is melted and bubbly. The edges should be slightly golden. You can also check the center with a fork to ensure it is hot throughout.
Alfredo Sauce Queries
Can I use homemade Alfredo sauce?
Absolutely! Homemade Alfredo sauce adds a nice touch. Just make sure it’s creamy and well-seasoned. It will enhance the flavor of the stuffed shells.
What are the best brands for store-bought Alfredo sauce?
Some popular brands for store-bought Alfredo sauce include Bertolli, Classico, and Rao’s. Choose a brand that you enjoy. Look for sauces with natural ingredients for the best taste.
This blog has guided you through making Chicken Alfredo Stuffed Shells. We covered key ingredients, step-by-step instructions, and useful tips for success. You now have ways to customize your dish and store leftovers.
As you cook, remember to have fun and get creative. Enjoy each bite you share with family or friends. These stuffed shells can be a hit at any meal. You have all the tools to make it grea


