Easy Baked Ziti Flavorful Dinner Recipe in Minutes

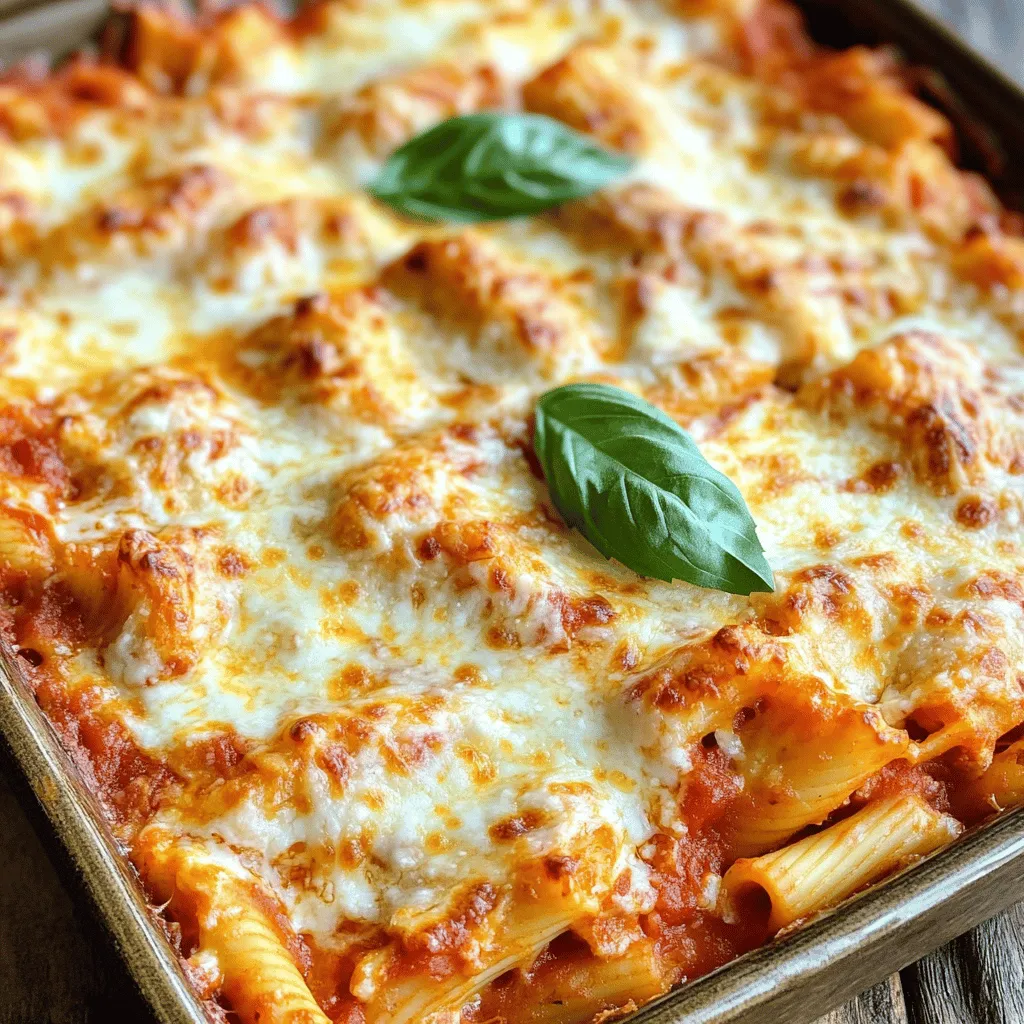
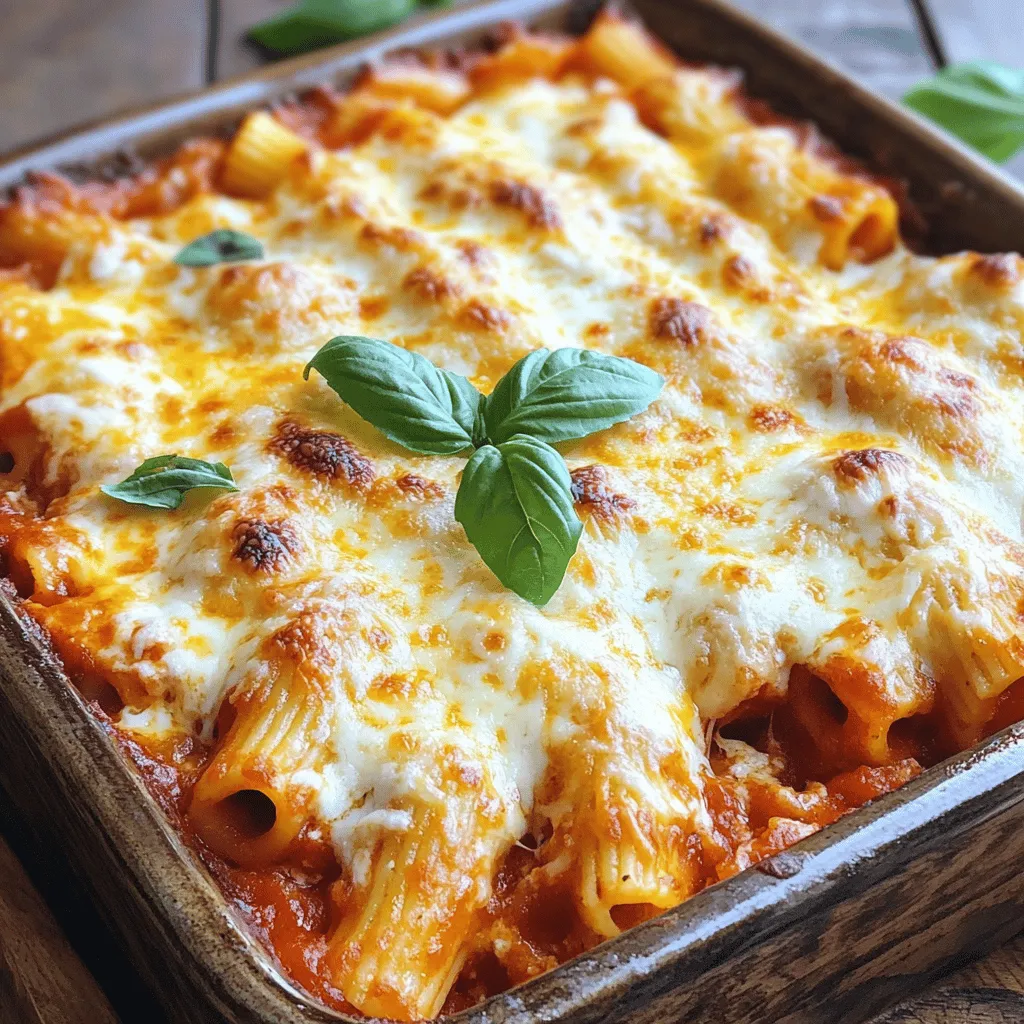
Looking for a quick and delicious dinner idea? Try my Easy Baked Ziti! This dish combines ziti pasta, rich marinara sauce, and creamy cheeses into a hearty meal ready in just minutes. It’s simple enough for a weeknight yet tasty enough to impress guests. With easy steps and common ingredients, you’ll love making this comfort food staple. Let’s dive in and get cooking!
Ingredients
To make Easy Baked Ziti, you need a few simple ingredients. These will create a creamy and cheesy dish that everyone will love. Here’s what you need:
– 12 oz ziti pasta
– 2 cups marinara sauce (store-bought or homemade)
– 2 cups ricotta cheese
– 2 cups shredded mozzarella cheese
– 1 cup grated Parmesan cheese
– 1 egg
– 1 teaspoon Italian seasoning
– 1 teaspoon garlic powder
– Salt and pepper to taste
– Fresh basil leaves for garnish (optional)
Each ingredient plays a role. The ziti pasta gives the dish its shape. Marinara sauce adds rich flavor. Ricotta and mozzarella create a creamy texture. Parmesan brings a salty kick. The egg helps bind everything together. Italian seasoning and garlic powder add depth. Finally, salt and pepper enhance all the flavors.
Use fresh basil as a garnish for a pop of color and taste. This recipe is fun and easy! It’s perfect for a family dinner or a gathering.
Step-by-Step Instructions
Prepping the Ingredients
To start, cook your ziti pasta. Boil a large pot of salted water and add the pasta. Follow the package directions and cook until it is al dente. This means it should be firm but not hard. Drain the pasta and set it aside.
Next, mix the ricotta cheese and seasonings. In a big bowl, combine the ricotta, egg, Italian seasoning, garlic powder, salt, and pepper. Stir until the mix is smooth. This step adds flavor and creaminess to your dish.
Layering the Baked Ziti
Now, create the sauce and cheese mixture. In a separate bowl, blend the marinara sauce with half of the mozzarella cheese. This mix will keep your baked ziti moist and cheesy.
Time to assemble! In a large baking dish, start layering your ingredients. First, add a layer of the sauce and cheese mix at the bottom. Then, place half of the cooked ziti on top. Spread half of the ricotta mix over the pasta and sprinkle some grated Parmesan cheese on top. Repeat these layers with the remaining ingredients. Finish with the leftover mozzarella and Parmesan on top.
Baking and Serving
Preheat your oven to 375°F (190°C). While it heats, cover your baking dish with aluminum foil. Bake for 25 minutes. After that, remove the foil and bake for another 15-20 minutes. Check for bubbly, golden cheese on top.
Once it’s done, let your baked ziti rest for 5-10 minutes. This helps the layers set and makes serving easier. Now you are ready to enjoy a delicious meal!
Tips & Tricks
Cooking Tips
To ensure perfect al dente pasta, cook the ziti for just a few minutes less than the package states. This keeps it firm and helps it hold up in the oven. Drain the pasta and rinse it quickly under cold water. This stops the cooking process and helps the pasta stay firm when baked.
When mixing ingredients, use a large bowl for the ricotta cheese, egg, and seasonings. I like to mix all the ingredients until they are smooth. This way, every bite will have that creamy, cheesy goodness. If you are adding meat, mix it in with the marinara sauce for even distribution.
Serving Suggestions
For ideal accompaniments, serve the baked ziti with garlic bread and a fresh salad. The crisp salad balances the creamy dish well. A light vinaigrette adds a nice touch.
To garnish, sprinkle fresh basil leaves on top just before serving. This adds a pop of color and fresh flavor. You can also sprinkle extra Parmesan cheese on top for a richer taste.
Don’t Forget These!
Resting time is key after baking. Let the ziti sit for 5-10 minutes before serving. This helps the layers set and makes it easier to cut.
Great kitchen tools to use include a large baking dish and a sturdy spatula. A good spatula helps lift out portions without falling apart. Also, consider using parchment paper to line the dish for easy cleanup.

Variations
Ingredient Substitutions
You can swap ricotta cheese for cottage cheese. Cottage cheese gives a nice, creamy texture. If you can’t find mozzarella, try using provolone or gouda. Both melt well and add flavor.
To make baked ziti vegetarian, replace meat with veggies like spinach or mushrooms. You can add zucchini or bell peppers for extra crunch. These swaps keep the dish tasty and fun.
Flavor Additions
For meat lovers, add cooked ground beef, sausage, or turkey. These meats mix well with the sauce. They add protein and depth to your meal. If you want more flavor, try adding Italian sausage for a spicy kick.
Herbs and spices can really change the taste. A pinch of red pepper flakes adds heat. Fresh herbs, like basil or parsley, give a fresh zest. Try adding oregano or thyme for a classic Italian touch.
Different Cooking Methods
You can make baked ziti in a slow cooker. Just layer the ingredients as usual, then cook on low for 4 hours. This method is great for busy days. It keeps your ziti moist and full of flavor.
If you need a gluten-free option, use gluten-free pasta. Many brands offer ziti-style pasta made from rice or corn. The flavors stay the same, and everyone can enjoy it.
Storage Info
Storing Leftovers
To keep your baked ziti fresh, store it in an airtight container. Make sure it cools down first. Place it in the fridge right away. This keeps bacteria from growing. For freezing, portion out the ziti into smaller containers. Wrap each container tightly with plastic wrap. This helps prevent freezer burn.
Reheating Methods
You can reheat baked ziti in two ways: the oven or the microwave. The oven gives the best results. Preheat it to 350°F (175°C). Place the ziti in a baking dish and cover with foil. Heat for about 20-25 minutes. If you use the microwave, place a portion in a microwave-safe dish. Heat for 2-3 minutes. Stir halfway for even heating.
To keep texture and flavor, add a splash of water before reheating. This helps the pasta stay moist.
Duration for Freshness
Baked ziti lasts about 3-5 days in the fridge. Check for signs of spoilage. If it smells sour or looks dry, throw it away. When frozen, it can last up to 3 months. To know if it’s bad, look for ice crystals or freezer burn.
FAQs
How do I make baked ziti without meat?
You can make baked ziti without meat by using only cheese and sauce. Just follow the recipe and skip any meat. The ricotta and mozzarella give it a rich flavor. You can add more herbs for more taste.
Can I prepare baked ziti in advance?
Yes, you can prepare baked ziti in advance. Simply assemble it and cover it tightly. You can store it in the fridge for up to two days. When ready to bake, just add a few extra minutes to the cooking time.
How do I keep baked ziti from drying out?
To keep baked ziti moist, cover it with foil while baking. This traps steam and keeps the cheese gooey. You can also add a bit more sauce before baking if it looks dry.
What type of sauce is best for baked ziti?
The best sauce for baked ziti is marinara. It gives a classic taste and pairs well with cheese. You can use store-bought or your favorite homemade recipe for extra flavor.
Can I add vegetables to my baked ziti?
Absolutely! Adding vegetables is a great way to boost nutrition. Try spinach, mushrooms, or zucchini. Just sauté them lightly before adding to the layers for the best taste.
Baked ziti is a comforting dish made with simple ingredients like pasta, marinara, and cheese. I shared step-by-step instructions to help you create this dish perfectly every time. Remember to rest your ziti before serving for the best flavor. You can also customize it to fit your taste with different ingredients and cooking methods. Enjoy your delicious baked ziti with friends or family, and don’t forget to experiment with new flavors!


![To start, let's gather the key ingredients for your spicy black bean tacos. Here’s what you need: - 2 cans (15 oz each) black beans, rinsed and drained - 1 tablespoon olive oil - 1 small onion, finely chopped - 2 cloves garlic, minced - 1 jalapeño, finely chopped (seeds removed for less heat) - 1 teaspoon ground cumin - 1 teaspoon smoked paprika - 1/2 teaspoon cayenne pepper (adjust to taste) - Salt and pepper to taste - 8 small corn tortillas - 1 avocado, sliced - 1 cup shredded cabbage (purple or green) - Fresh cilantro, chopped, for garnish - Lime wedges, for serving These ingredients create a tasty and healthy meal that is easy to make. The black beans are the main star. They are full of fiber and protein. The spices add great flavor, while the vegetables provide crunch. Once you've made your tacos, you can customize them with optional toppings. Here are some ideas: - Salsa or pico de gallo - Sour cream or Greek yogurt - Shredded cheese - Pickled onions - Hot sauce for extra heat Feel free to mix and match toppings. This lets you create your own perfect taco. These spicy black bean tacos are great for many diets. They are vegetarian and can be made vegan by skipping any dairy toppings. The black beans are high in protein, making them filling. If you are gluten-free, make sure to use corn tortillas. For those watching their salt intake, you can adjust the amount of salt and use low-sodium beans. You can enjoy this recipe with confidence, knowing it fits different dietary needs. Check out the Full Recipe for a delicious meal that everyone will love. To make your black bean filling, start with a medium skillet. Heat one tablespoon of olive oil over medium heat. Add one small, finely chopped onion. Sauté it for about three to four minutes until it turns soft and clear. Then, add two minced garlic cloves and one chopped jalapeño. If you want less heat, remove the seeds from the jalapeño. Cook this mix for another two minutes. Next, it’s time for the black beans. Use two cans of black beans, rinsed and drained. Add them to the pan along with one teaspoon of ground cumin, one teaspoon of smoked paprika, and half a teaspoon of cayenne pepper. Season with salt and pepper to taste. Stir everything well and let it cook for five to seven minutes. This helps blend the flavors. You can slightly mash some beans to make the filling creamier. Now, let’s get the corn tortillas ready. Take eight small corn tortillas. Heat a dry skillet over medium heat. Place one tortilla in the skillet, cooking it for about 30 seconds on each side. You want them warm and soft, not crisp. Once they are pliable, place them on a plate. Cover them with a clean towel to keep them warm while you finish your filling. Now comes the fun part—assembling your tacos! Take one warm tortilla and spoon some of the black bean mixture into the center. Don’t overfill; a few spoonfuls will do. Top it with slices of avocado, a handful of shredded cabbage, and some fresh chopped cilantro. Repeat this for each tortilla. Serve your tacos with lime wedges on the side for a zesty kick. If you want the full recipe, you can find it above. Enjoy your tasty creation! To make your spicy black bean tacos pop, you can adjust the spices. Start with the basic recipe, then taste and modify. If you like heat, add more cayenne pepper. If you want a smoky flavor, increase the smoked paprika. You can also add fresh herbs like cilantro for extra freshness. Always remember to mix well and let the flavors blend. Soggy tacos are a common problem. To avoid this, warm your tortillas just before filling them. Use a dry skillet for about 30 seconds on each side. This makes them soft but not wet. Also, add your toppings right before serving. This keeps the tortillas crisp, allowing you to enjoy every bite. Meal prep can save you time. You can make the black bean filling ahead of time. Store it in the fridge for up to three days. When you're ready to eat, just heat it in a pan. Warm your tortillas while the filling heats. This way, you can enjoy fresh tacos in just minutes. Follow the [Full Recipe] for quick and easy steps! {{image_2}} You can easily make these tacos vegetarian and vegan. The black beans are already plant-based, which makes them a great choice. To keep it vegan, skip any dairy toppings like cheese or sour cream. Instead, add more fresh toppings like guacamole or diced tomatoes. These additions give a burst of flavor and keep the meal fresh and light. If you want to change up the protein, try using lentils or quinoa. Both options are filling and work well with the spices. Lentils cook quickly and soak up flavors well. Quinoa adds a nice crunch and a different texture. You can also use shredded jackfruit for a meatier feel. This option is great for adding more variety to your tacos. You can adjust the spice level to fit your taste. For a milder taco, remove the jalapeño seeds and use less cayenne pepper. You can also add sweet peppers for flavor without heat. If you love spice, add more cayenne or even some chili powder. For a smoky flavor, consider adding chipotle peppers in adobo sauce. This gives the tacos a different twist and a deeper taste. Experimenting with these variations can lead to new favorites. You can find the full recipe for Spicy Black Bean Tacos to get started on your cooking adventure! To store leftover black bean filling, let it cool first. Use an airtight container to keep it fresh. Place the filling in the container and seal it tightly. It will stay good for up to three days in the fridge. If you want to enjoy it later, freezing is a great option. When you’re ready to eat, you can reheat the black bean filling. Transfer it to a skillet over medium heat. Stir it often until it's hot throughout. You can also use the microwave. Place the filling in a microwave-safe bowl and heat for about one to two minutes. Stir it halfway to ensure even heating. If you want to freeze the tacos, it’s best to do it before adding fresh toppings. Wrap each taco tightly in plastic wrap. Then place them in a freezer-safe bag. They can stay frozen for up to two months. When you want to eat them, thaw in the fridge overnight. Reheat in the oven or a skillet for a crispy finish. You can then add your favorite toppings fresh before serving. Make sure to check out the Full Recipe for more details! To make Spicy Black Bean Tacos less spicy, you can remove the jalapeño seeds. You can also use less cayenne pepper. Another option is to add more beans to the mix. This will balance the heat. You can also serve the tacos with sour cream or yogurt. These toppings help cool the spice level. Yes, you can use other beans for this recipe. Pinto beans work well and have a nice flavor. Kidney beans are another option, adding a different taste. You can even use lentils for a fun twist. Just make sure to adjust cooking times if needed. The key is to keep the texture hearty and satisfying. You can serve many things with Spicy Black Bean Tacos. Some tasty sides include rice or quinoa. A fresh salad with lime dressing pairs well too. You might also enjoy guacamole or salsa for extra flavor. Chips are a great snack on the side. For drinks, try a light beer or refreshing lemonade. You can find the Full Recipe to make these delicious tacos and more! Spicy Black Bean Tacos are a tasty and easy meal to make. You now know the key ingredients, plus fun toppings and dietary options. I showed you how to prepare the filling, heat the tortillas, and assemble the tacos. Our tips help boost flavor and keep them fresh. You can also explore variations and find storage ideas to enjoy later. Remember, tacos are flexible; adjust spices or toppings to fit your taste. Enjoy creating your perfect Spicy Black Bean Tacos!](https://dailydishly.com/wp-content/uploads/2025/07/c52f9e49-68ab-4e28-8267-2347654248bf-768x768.webp)


![- 4 salmon fillets (6 ounces each) - 1/4 cup soy sauce (low-sodium preferred) - 1/4 cup honey - 2 tablespoons rice vinegar - 1 tablespoon grated fresh ginger - 2 cloves garlic, minced - 1 teaspoon sesame oil The heart of this dish is the salmon. I love using fresh salmon fillets for their rich flavor and texture. They cook well and stay moist. For the sauce, soy sauce adds that umami punch. Low-sodium options are great if you want to cut down on salt. Honey gives a sweet touch, balancing the salty soy. Rice vinegar adds tang and depth. Fresh ginger and garlic bring warmth and spice to the marinade. - 2 green onions, finely chopped (for garnish) - 1 tablespoon sesame seeds (for garnish) Garnishes can elevate your dish. Chopped green onions add color and a mild onion flavor. Sesame seeds give a nice crunch and nutty taste. They make the dish look beautiful too. - Cooked jasmine rice - Steamed vegetables I recommend serving the teriyaki salmon over fluffy jasmine rice. The rice soaks up the sauce perfectly. Steamed vegetables are great on the side. They add color, texture, and nutrients to your meal. This combo makes a full and balanced plate. For the complete cooking process, check the Full Recipe. To start, you need to whisk the marinade. In a medium bowl, combine: - 1/4 cup soy sauce - 1/4 cup honey - 2 tablespoons rice vinegar - 1 tablespoon grated fresh ginger - 2 cloves garlic, minced - 1 teaspoon sesame oil Whisk them until smooth. This creates a sweet and salty blend. Next, marinate the salmon. Place the salmon fillets in a shallow dish. Pour the marinade over them. Cover the dish and refrigerate for at least 30 minutes. For a stronger flavor, marinate up to 2 hours. Now, it’s time to bake. Preheat your oven to 400°F (200°C). This step is key for even cooking. Line a baking sheet with parchment paper or foil. This makes for easy cleanup. After marinating, take the salmon out. Reserve the marinade for later. Place the fillets skin-side down on the sheet. Bake the salmon for 12-15 minutes. It’s done when it flakes easily with a fork. While the salmon bakes, prepare the sauce. Pour the reserved marinade into a small saucepan. Bring it to a boil over medium heat. Let it simmer for 3-5 minutes. This thickens the sauce nicely. Be careful not to over-reduce it. Once the salmon is ready, drizzle the thickened sauce on top. Garnish with: - Chopped green onions - Sesame seeds Now, serve your teriyaki salmon over fluffy jasmine rice for a complete meal. For the full recipe, check the section above. For the best teriyaki salmon, marination is key. I recommend marinating for at least 30 minutes. If you have time, go for 2 hours. This extra time allows the flavors to soak in. Balancing the flavors is also important. The soy sauce adds saltiness, while honey brings sweetness. Adjust these to fit your taste. You can even add a splash of lime juice for a zesty kick! You can cook the salmon in the oven or on the grill. If you use the oven, preheat it to 400°F (200°C). For grilling, heat your grill to medium-high. Both methods yield tasty results. Just make sure not to overcook the salmon. Cook it until it flakes easily with a fork. This usually takes about 12 to 15 minutes in the oven. If grilling, check often to avoid dryness. When plating, keep it simple and elegant. Place the salmon on a bed of fluffy jasmine rice. Drizzle it with the thickened teriyaki sauce. Garnish with green onions and sesame seeds for a pop of color. For sides, steamed vegetables work great. Try broccoli or snap peas for a fresh crunch. This makes your meal not just tasty but also beautiful! {{image_2}} You can swap out salmon for other fish. Try using trout or tilapia. Both have great flavors and cook well. For gluten-free options, use tamari instead of soy sauce. Tamari has a similar taste and works perfectly in this recipe. You can also use coconut aminos, a great soy sauce alternative. Want to change the taste? Add spices like black pepper or red pepper flakes. These spices give the dish a nice kick. You can also add citrus juice. Lime or lemon juice brightens up the flavors. Just mix it into the marinade for a fresh twist. You can grill the salmon for a smoky flavor. Just preheat your grill and cook the salmon for about 6-8 minutes each side. If you want a caramelized finish, try broiling. Place the salmon under a broiler for 2-3 minutes after baking. This gives a nice, crisp topping. This Easy Teriyaki Salmon recipe is flexible. Feel free to mix and match these ideas! For the full recipe, check out the [Full Recipe]. To store leftovers, let the salmon cool to room temperature. Place it in an airtight container. This keeps it fresh and prevents strong smells. The shelf life in the fridge is about 3 to 4 days. If you plan to eat it later, remember to check for any signs of spoilage before enjoying. You can freeze cooked salmon for up to 3 months. Wrap each piece tightly in plastic wrap, then place it in an airtight container or freezer bag. To reheat, thaw the salmon overnight in the fridge. You can warm it in the oven at 350°F (175°C) for about 10-15 minutes. This helps keep the texture nice and flaky. Use airtight containers for storing salmon. This prevents air from getting in and keeps it fresh longer. Avoid leaving cooked salmon out at room temperature for too long. Proper storage helps retain its rich flavor and juicy texture. Enjoy your Easy Teriyaki Salmon at its best! For the full recipe, check out the [Full Recipe]. I recommend marinating teriyaki salmon for at least 30 minutes. This allows the flavors to soak in. For a stronger taste, you can marinate it for up to 2 hours. Just don’t go over two hours, or the salmon may get too salty. Yes, you can use frozen salmon! Just be sure to thaw it first. To thaw, place the salmon in the fridge overnight. If you need it faster, seal it in a bag and submerge it in cold water for about an hour. After thawing, pat it dry before marinating. I love serving teriyaki salmon with fluffy jasmine rice. It soaks up the tasty sauce well. You can also pair it with steamed vegetables like broccoli or green beans. A fresh salad with a light dressing works great, too! Check out the Full Recipe for more ideas. In this post, we explored how to make easy teriyaki salmon using simple ingredients. We discussed key items like salmon fillets, soy sauce, honey, and fresh ginger. You learned step-by-step instructions for making the marinade, baking the salmon, and adding finishing touches. We also covered tips for perfecting the dish and how to customize it. Remember, you can store leftovers for later enjoyment. With these insights, you now have all the tools to create a delicious teriyaki salmon that impresses. Enjoy your cooking journey!](https://dailydishly.com/wp-content/uploads/2025/06/d319870b-f2b5-4b65-bbf7-0456604e94a9-768x768.webp)
