Looking for a quick and tasty meal? My Easy Garlic Shrimp recipe is perfect for you! With just a few simple ingredients, you can whip up a dish that bursts with flavor. In this post, I’ll guide you through each step, share tips for perfection, and offer substitutions to suit your taste. Get ready to impress your family and friends without spending hours in the kitchen! Let’s dive in!
Ingredients
List of Ingredients
– 1 lb large shrimp, peeled and deveined
– 4 cloves garlic, minced
– 3 tablespoons olive oil
– 1 teaspoon red pepper flakes (adjust to taste)
– 1 tablespoon lemon juice
– 1 tablespoon fresh parsley, chopped
– Salt and pepper to taste
– Lemon wedges for serving
Ingredient Substitutions
You can swap shrimp for other seafood like scallops or fish. If you don’t have olive oil, try avocado or canola oil. For a milder flavor, reduce the red pepper flakes or skip them.
Fresh vs. Frozen Shrimp
Fresh shrimp taste great and have a firm texture. Look for shrimp with a mild smell and firm bodies. If you use frozen shrimp, thaw them in cold water. Pat them dry before cooking. Frozen shrimp save time and work well in this dish.
Step-by-Step Instructions
Preparation Steps
1. Rinsing and drying the shrimp: Start by rinsing your shrimp under cold water. This step helps clean them well. After rinsing, pat them dry with paper towels. Dry shrimp sear better in the pan.
2. Preparing the garlic and other ingredients: Mince the garlic cloves. You will need four cloves for this recipe. Gather your other ingredients, like olive oil, red pepper flakes, lemon juice, parsley, salt, and pepper. Having everything ready makes cooking smoother.
Cooking Process
1. Heating the oil and sautéing garlic: In a large skillet, heat three tablespoons of olive oil over medium-high heat. Wait until the oil shimmers. Add the minced garlic and sauté for about 30 seconds. Stir it constantly to avoid burning. You’ll want the garlic to smell amazing but not brown.
2. Cooking the shrimp and adding spices: Add the shrimp to the skillet in a single layer. Sprinkle one teaspoon of red pepper flakes, salt, and pepper over them. Cook for about 2-3 minutes on each side. The shrimp should turn pink and opaque when they are done.
Final Touches
1. Adding lemon juice and garnishing: Once the shrimp are cooked, remove the skillet from heat. Drizzle one tablespoon of lemon juice over the shrimp and toss gently to mix.
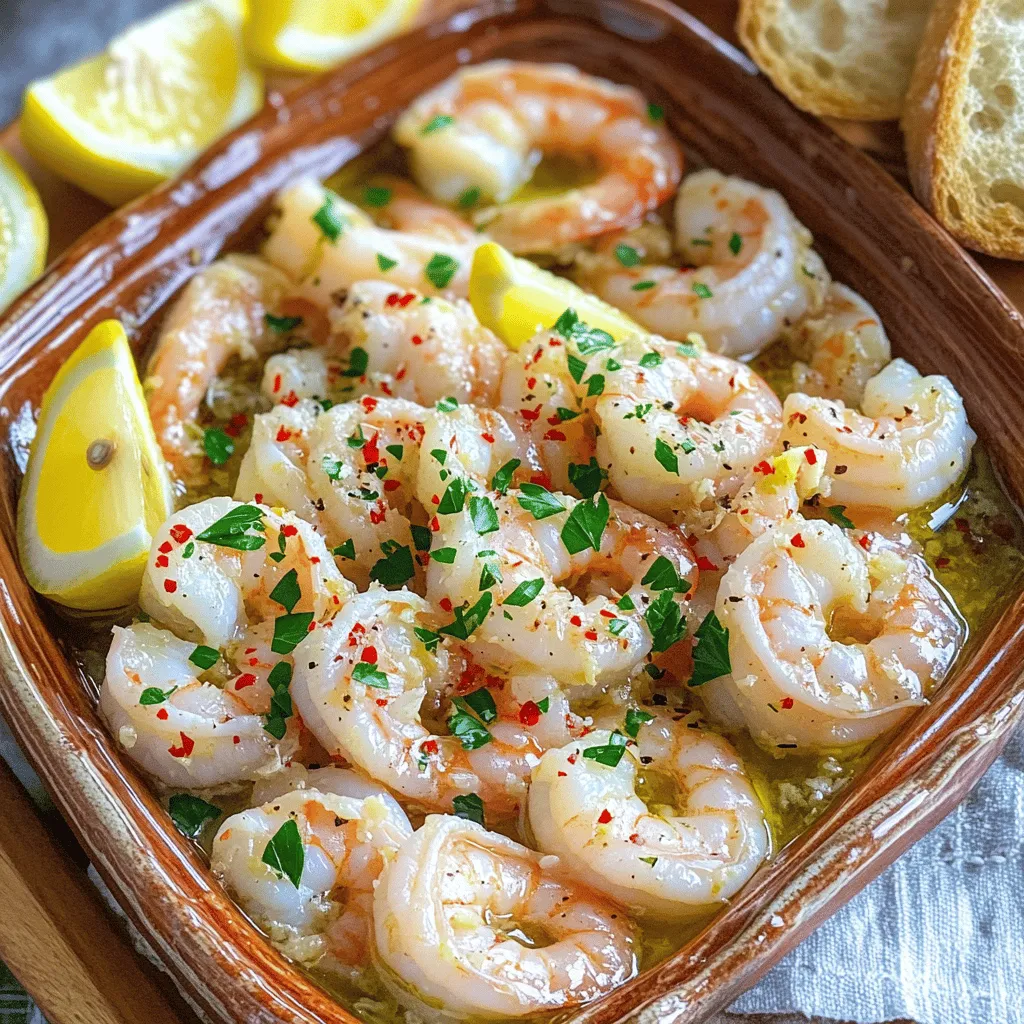
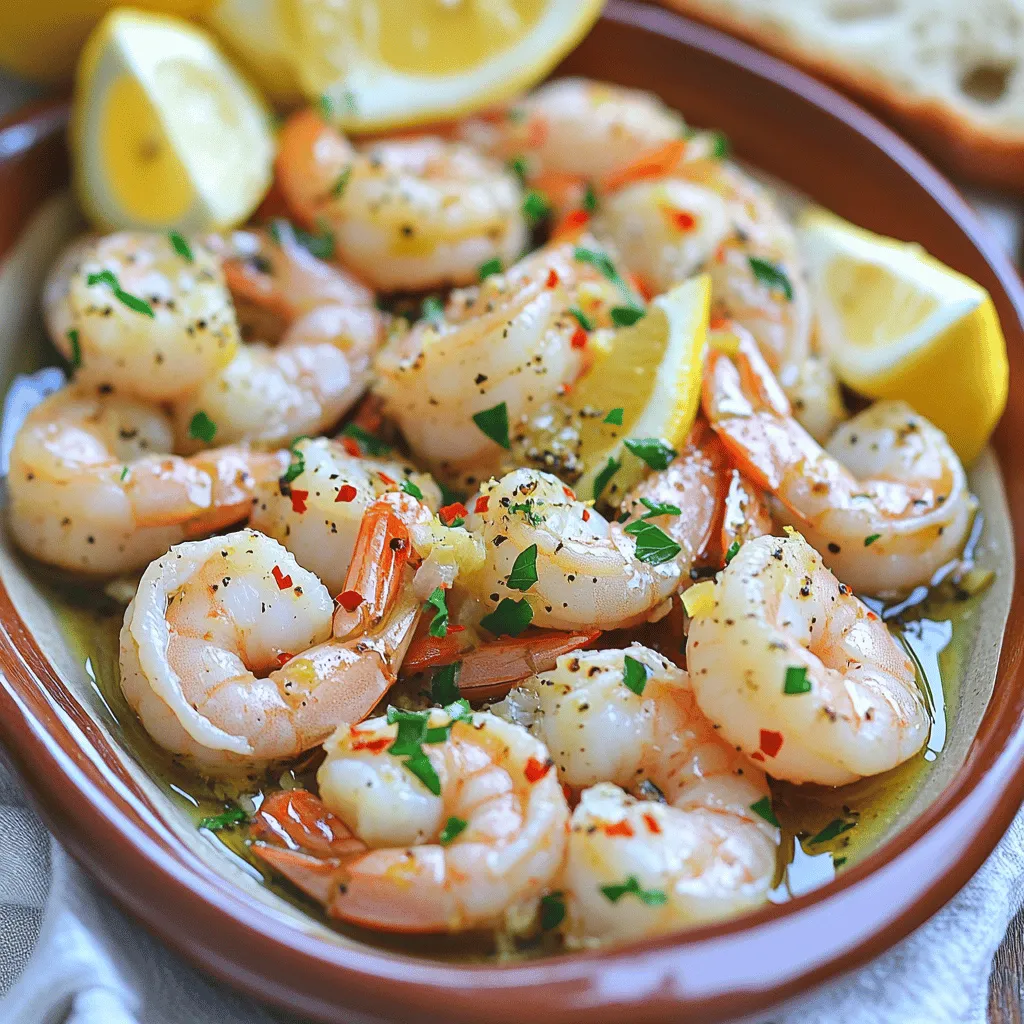
2. Serving suggestions: Transfer your sizzling garlic shrimp to a serving platter. Garnish with freshly chopped parsley for color. Add lemon wedges around the dish for an extra zing! Enjoy this dish with crusty bread to soak up the flavorful oil or serve it over rice for a complete meal.
This easy garlic shrimp dish brings bold flavors in under 15 minutes.
Tips & Tricks
Cooking Tips for Perfect Shrimp
– Avoiding overcooked shrimp: Cook shrimp until they turn pink and opaque. This usually takes 2-3 minutes per side. If they curl up tightly, they’re overcooked. Always keep an eye on them!
– Ensuring garlic doesn’t burn: Sauté garlic over medium heat. Stir it constantly for about 30 seconds. If it turns brown, it will taste bitter. Remove it from heat if it starts to brown too early.
Pairing Suggestions
– Best side dishes for garlic shrimp: Garlic shrimp pairs well with rice, crusty bread, or a fresh salad. Try serving it with steamed asparagus or sautéed spinach for a colorful plate.
– Wine and beverage pairings: A chilled white wine, like Sauvignon Blanc, complements garlic shrimp. If you prefer non-alcoholic drinks, try sparkling water with lemon. It enhances the dish’s flavors.
Storing Leftovers
– Reheating tips for best flavor: Reheat shrimp in a skillet over low heat. Add a splash of olive oil to keep them moist. Avoid microwaving, as it can make shrimp rubbery.
– Proper storage methods: Store leftovers in an airtight container in the fridge. They stay fresh for up to 2 days. If you want to keep them longer, freeze in a freezer-safe container. They last about a month frozen.
Variations
Flavor Variations
You can change the taste of your garlic shrimp easily. Adding different herbs and spices can make a big difference. Try fresh basil or thyme for a lovely twist. A pinch of smoked paprika gives a warm, smoky flavor. You can also add lemon zest for a bright finish.
Incorporating vegetables is another great way to enhance this dish. Bell peppers, zucchini, or asparagus add color and crunch. Just toss them in with the shrimp for a complete meal.
Dietary Modifications
If you need to make this dish gluten-free, you are in luck! The recipe is naturally gluten-free. Just ensure that any added sauces are also gluten-free.
For dairy-free options, you can skip any cheese or cream. The olive oil and lemon juice keep it flavorful and fresh. You won’t miss the dairy at all!
Cooking Methods
There are different ways to cook garlic shrimp. Grilling gives a nice char and smoky flavor. Simply thread the shrimp onto skewers and grill for about 2-3 minutes per side.
Pan-searing is my favorite method. It creates a sear that locks in flavor.
Oven-baking is another option. Preheat your oven to 400°F (200°C). Spread the shrimp on a baking sheet and bake for about 8-10 minutes. This method is easy and leaves you with less mess!
Storage Info
How to Store Leftovers
To keep your garlic shrimp fresh, store it in the fridge. Use an airtight container. Make sure to cool it down first. This helps keep flavors intact. You can keep it in the fridge for up to three days.
If you want to save it longer, freeze the shrimp. Place it in a freezer-safe bag. Remove as much air as possible. It can last for up to three months in the freezer.
Shelf Life of Garlic Shrimp
In the fridge, garlic shrimp lasts about three days. If it smells off or looks slimy, it’s time to toss it. You should always avoid eating spoiled food. Trust your senses; they are a good guide.
Reheating Instructions
To reheat your garlic shrimp, use a skillet. Heat it on medium-low. This keeps the shrimp from getting rubbery. Stir occasionally for even heating. You can also add a splash of olive oil or lemon juice. This boosts the flavor and helps keep it moist. Enjoy your garlic shrimp just like it was fresh!
FAQs
How long does it take to cook shrimp?
Cooking shrimp takes about 5 to 6 minutes. I cook them for 2 to 3 minutes per side. You want them to turn pink and opaque. Overcooking makes shrimp tough and chewy.
Can I make garlic shrimp in advance?
Yes, you can prepare garlic shrimp ahead of time. Cook them and let them cool. Store them in an airtight container in the fridge. Reheat gently on the stove before serving.
What’s the best way to tell when shrimp are done?
Look for color and texture. Cooked shrimp turn pink and opaque. They should curl slightly but not into a tight ball. This shows they are tender and ready to eat.
How do I make shrimp less chewy?
To avoid chewy shrimp, do not overcook them. Use fresh shrimp for the best texture. Also, marinating shrimp briefly can help make them tender and flavorful.
This blog post covered garlic shrimp from ingredients to cooking tips. You learned about the best shrimp types and ingredient swaps. Cooking methods and flavor variations give you many options. I shared storage tips to keep your dish fresh. With this, you can craft a delicious garlic shrimp meal. Enjoy experimenting with flavors and techniques. Your seafood skills can shine bright!


