Easy Veggie Sushi Rolls Healthy and Delicious Recipe
![- 2 cups sushi rice - 4 sheets nori (seaweed) - 1 avocado, sliced - 1 cucumber, julienned - 1 carrot, julienned - 1 red bell pepper, julienned To make easy veggie sushi rolls, you need key ingredients that create the perfect base and flavor. Sushi rice is sticky and helps hold the rolls together. Nori provides a tasty wrap. Fresh veggies add crunch and color. - 1/4 cup rice vinegar - 1 tablespoon sugar - 1/2 teaspoon salt These seasoning ingredients enhance the rice's flavor. Rice vinegar gives a slight tang. Sugar adds a hint of sweetness, while salt balances the taste. This mixture makes the sushi rice shine. - Soy sauce for dipping - Optional garnishes (sesame seeds, wasabi) When serving, soy sauce adds a salty kick. You can sprinkle sesame seeds for added crunch. Wasabi provides a spicy option for those who like heat. Enjoying these rolls with the right dips makes them even better. For the full recipe, check the Easy Veggie Sushi Rolls section. To start, rinse the sushi rice under cold water. This helps remove the excess starch. Keep rinsing until the water runs clear. You can cook the rice in a rice cooker or on the stovetop. If using a rice cooker, add 2 ½ cups of water and follow the machine's instructions. For stovetop cooking, bring the rice and water to a boil. Then, lower the heat, cover, and simmer for about 20 minutes until the water is gone. Next, mix rice vinegar, sugar, and salt in a small bowl. After cooking, transfer the rice to a large bowl. While it is still warm, gently fold in the vinegar mixture. This adds great flavor to the rice. Allow the rice to cool to room temperature before using it. While the rice cools, slice your fresh veggies. Take an avocado and slice it into thin pieces. Next, julienne the cucumber and carrot. Finally, slice the red bell pepper into thin strips. Each vegetable adds a nice crunch and color to your sushi. Place a bamboo sushi mat on a flat surface. Put a sheet of nori on top, shiny side down. Wet your hands to stop the rice from sticking. Take about a handful of rice and spread it evenly over the nori, leaving a small margin at the top edge. Now it's time to roll! Add a few pieces of each vegetable horizontally across the center of the rice. Starting from the bottom edge, carefully roll the mat away from you, holding the filling with your fingers. Make sure to roll tightly, but not too tight. Moisten the top edge with water to seal the roll. Use a sharp knife to slice the roll into bite-sized pieces. Wipe the knife with a damp cloth between cuts for clean slices. Arrange the sushi rolls on a serving platter. If you like, sprinkle sesame seeds on top and serve with soy sauce for dipping. Enjoy your beautiful veggie sushi rolls! For the complete recipe, check out [Full Recipe]. - Overcooking rice: If you cook the rice too long, it becomes mushy. This ruins the texture of your sushi. Keep an eye on your timer! - Squashing the roll while slicing: When you cut the sushi, press too hard. This squashes the roll and makes a mess. Use a sharp knife and gentle pressure. - How to roll sushi without a mat: No mat? No problem! Use a clean kitchen towel instead. Place the nori on the towel, add rice and fillings, and roll tightly. Keep your hands wet to avoid sticking. - Adding sauces or spices: Soy sauce is classic, but you can try others too. Add a splash of sriracha for heat or sprinkle sesame seeds for crunch. Experiment with flavors you love! For the complete recipe, you can refer to the Full Recipe section. {{image_2}} You can add protein to your sushi rolls for extra flavor and nutrition. Tofu is a great choice. Try firm or extra-firm tofu. It holds its shape well. You can marinate it in soy sauce or sesame oil for added flavor. Then, grill or sauté it until golden. Tempeh is another tasty option. This soy product has a nutty flavor. Slice it thin and cook it the same way. Both tofu and tempeh make your rolls filling and satisfying. Don’t feel limited to just avocado and cucumber! Use seasonal veggies for variety. In spring, try adding asparagus or snap peas. They add a nice crunch. In summer, bell peppers and zucchini are perfect. They are sweet and juicy. In fall, consider roasted sweet potatoes or beets for earthiness. Winter brings hearty greens like kale or spinach. You can even use radishes for a spicy kick. Mix and match to find your favorite combinations. Get creative by blending cuisines! Add cream cheese for a sushi-style bagel roll. You can also try spicy kimchi for a Korean twist. Consider using hummus and roasted red peppers for a Mediterranean flair. For a Mexican spin, add black beans and corn. Top it with fresh cilantro and lime juice. Each fusion idea brings new flavors to your rolls. It makes sushi fun and exciting! For the complete recipe, check out the Full Recipe section. To store leftover sushi rolls, wrap them tightly in plastic wrap or foil. This keeps them fresh and prevents the rice from drying out. Place the wrapped rolls in an airtight container. Store them in the fridge for up to 24 hours. The sooner you eat them, the better they taste. Freezing sushi rolls is simple. Wrap each roll in plastic wrap, then place them in a freezer-safe bag. Squeeze out as much air as possible. You can freeze sushi for about one month. When you are ready to eat, thaw it in the fridge overnight. Avoid microwaving, as it can make the rice mushy. Sushi rolls taste best when fresh. If stored properly in the fridge, they last for one day. After that, they may lose their flavor and texture. If you freeze the rolls, they can stay fresh for one month. Always check for any off smells or changes in color before eating. The best rice for sushi is short-grain sushi rice. This rice is sticky and holds its shape well. It gives sushi rolls their unique texture. When cooked, this rice becomes chewy, which is great for sushi. Look for sushi rice in Asian grocery stores or online. You can also use medium-grain rice if sushi rice is hard to find. Just remember not to use long-grain rice, as it will not stick well. Yes, you can use other ingredients besides nori. If you don’t like nori, try using lettuce leaves. They are fresh and crunchy. You can also use rice paper, which adds a different texture. Another option is to use thinly sliced cucumber as a wrap. This keeps your sushi light and refreshing. Just be creative with your wraps and fillings. The choice is all yours! Absolutely! This recipe is great for meal prep. You can make sushi rolls in advance and store them. Just keep them in an airtight container in the fridge. They will stay fresh for about 24 hours. If you prep the rice and veggies ahead of time, it makes rolling easy. You can also cut the rolls into pieces before storing. This way, you have quick snacks or lunches ready to go. Enjoy making your sushi rolls ahead of time! For the full recipe, check out the Easy Veggie Sushi Rolls section. In this blog post, I covered how to create sushi from start to finish. We looked at key ingredients like sushi rice, nori, and fresh veggies. I shared step-by-step instructions to prepare the rice, slice the vegetables, and assemble your rolls. I also offered tips to avoid common mistakes and enhance flavor. You can add your favorite proteins and try different veggies or fusion styles. With proper storage, your sushi can stay fresh for days. Now, it’s time to roll up your sleeves and enjoy making sushi at home!](https://dailydishly.com/wp-content/uploads/2025/07/11ef977b-69a9-4776-8bce-81e4c28b3d11.webp)
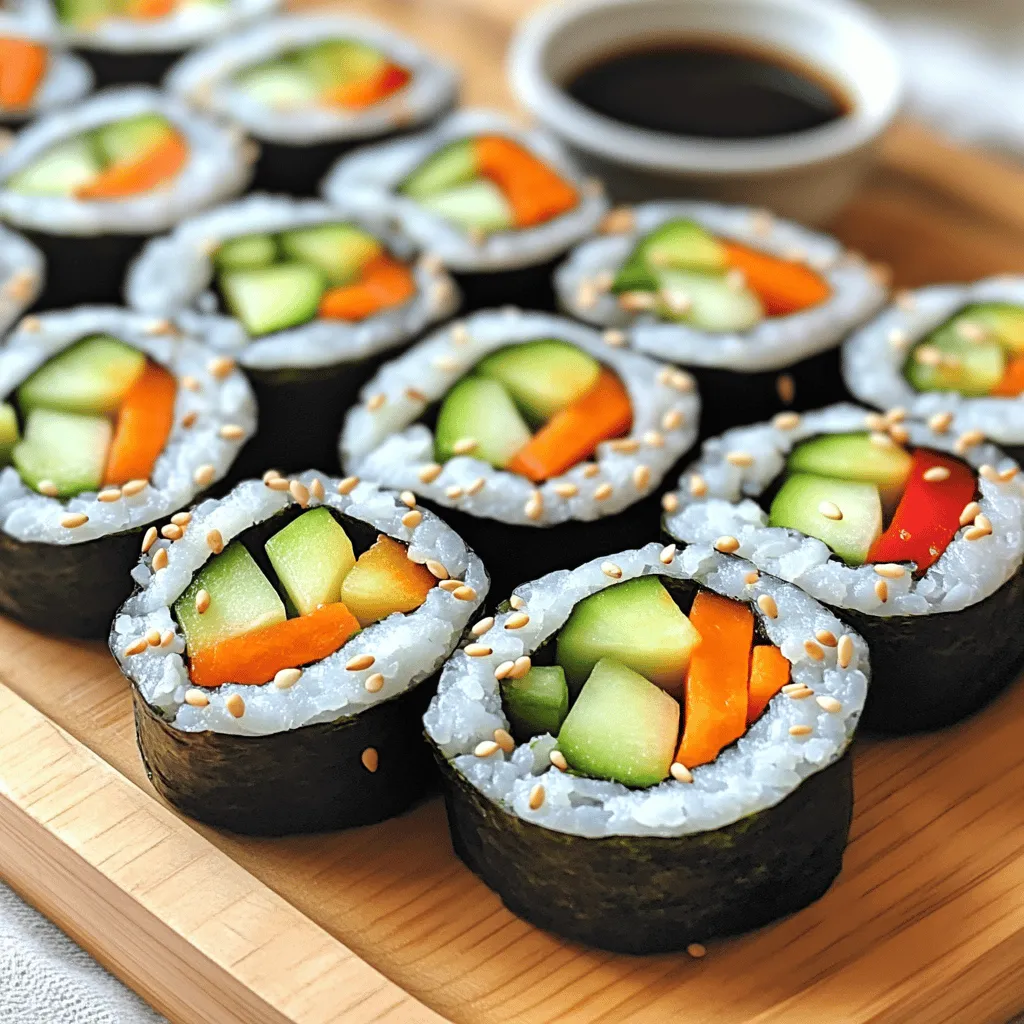
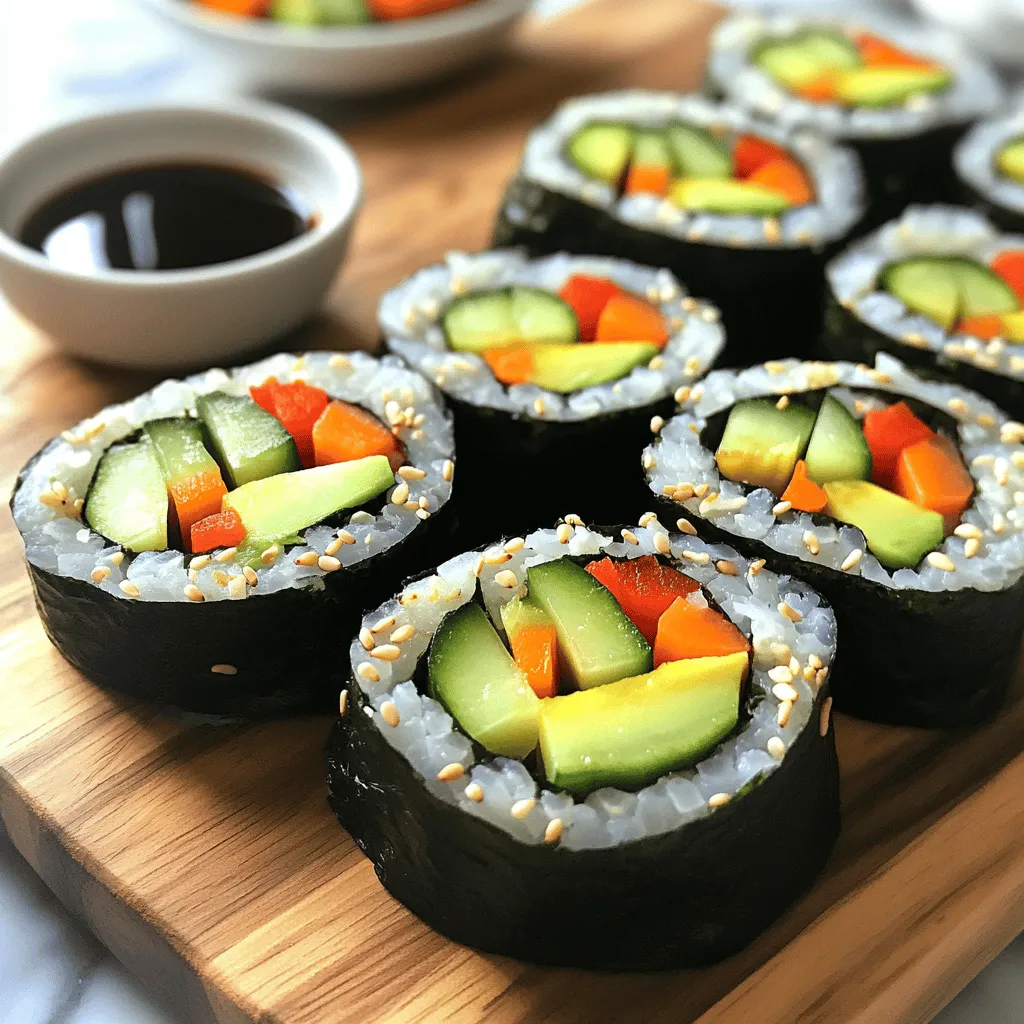
Are you ready to roll? Making your own veggie sushi rolls is simple, tasty, and fun! In this easy recipe, I’ll share how to create healthy sushi using fresh ingredients like avocado, cucumber, and bell pepper. With just a few steps, you’ll impress your friends and family with your sushi-making skills. Let’s dive into the fresh and delicious world of veggie sushi rolls!
Ingredients
Main Ingredients
– 2 cups sushi rice
– 4 sheets nori (seaweed)
– 1 avocado, sliced
– 1 cucumber, julienned
– 1 carrot, julienned
– 1 red bell pepper, julienned
To make easy veggie sushi rolls, you need key ingredients that create the perfect base and flavor. Sushi rice is sticky and helps hold the rolls together. Nori provides a tasty wrap. Fresh veggies add crunch and color.
Seasoning Ingredients
– 1/4 cup rice vinegar
– 1 tablespoon sugar
– 1/2 teaspoon salt
These seasoning ingredients enhance the rice’s flavor. Rice vinegar gives a slight tang. Sugar adds a hint of sweetness, while salt balances the taste. This mixture makes the sushi rice shine.
Serving Suggestions
– Soy sauce for dipping
– Optional garnishes (sesame seeds, wasabi)
When serving, soy sauce adds a salty kick. You can sprinkle sesame seeds for added crunch. Wasabi provides a spicy option for those who like heat. Enjoying these rolls with the right dips makes them even better.
Step-by-Step Instructions
Preparing the Rice
To start, rinse the sushi rice under cold water. This helps remove the excess starch. Keep rinsing until the water runs clear. You can cook the rice in a rice cooker or on the stovetop. If using a rice cooker, add 2 ½ cups of water and follow the machine’s instructions. For stovetop cooking, bring the rice and water to a boil. Then, lower the heat, cover, and simmer for about 20 minutes until the water is gone.
Seasoning the Rice
Next, mix rice vinegar, sugar, and salt in a small bowl. After cooking, transfer the rice to a large bowl. While it is still warm, gently fold in the vinegar mixture. This adds great flavor to the rice. Allow the rice to cool to room temperature before using it.
Preparing the Fillings
While the rice cools, slice your fresh veggies. Take an avocado and slice it into thin pieces. Next, julienne the cucumber and carrot. Finally, slice the red bell pepper into thin strips. Each vegetable adds a nice crunch and color to your sushi.
Assembling the Rolls
Place a bamboo sushi mat on a flat surface. Put a sheet of nori on top, shiny side down. Wet your hands to stop the rice from sticking. Take about a handful of rice and spread it evenly over the nori, leaving a small margin at the top edge.
Rolling the Sushi
Now it’s time to roll! Add a few pieces of each vegetable horizontally across the center of the rice. Starting from the bottom edge, carefully roll the mat away from you, holding the filling with your fingers. Make sure to roll tightly, but not too tight. Moisten the top edge with water to seal the roll.
Slicing and Serving
Use a sharp knife to slice the roll into bite-sized pieces. Wipe the knife with a damp cloth between cuts for clean slices. Arrange the sushi rolls on a serving platter. If you like, sprinkle sesame seeds on top and serve with soy sauce for dipping. Enjoy your beautiful veggie sushi rolls!
Tips & Tricks
Common Mistakes to Avoid
– Overcooking rice: If you cook the rice too long, it becomes mushy. This ruins the texture of your sushi. Keep an eye on your timer!
– Squashing the roll while slicing: When you cut the sushi, press too hard. This squashes the roll and makes a mess. Use a sharp knife and gentle pressure.
Perfecting Your Technique
– How to roll sushi without a mat: No mat? No problem! Use a clean kitchen towel instead. Place the nori on the towel, add rice and fillings, and roll tightly. Keep your hands wet to avoid sticking.
Enhancing Flavor
– Adding sauces or spices: Soy sauce is classic, but you can try others too. Add a splash of sriracha for heat or sprinkle sesame seeds for crunch. Experiment with flavors you love!

Variations
Protein Additions
You can add protein to your sushi rolls for extra flavor and nutrition. Tofu is a great choice. Try firm or extra-firm tofu. It holds its shape well. You can marinate it in soy sauce or sesame oil for added flavor. Then, grill or sauté it until golden.
Tempeh is another tasty option. This soy product has a nutty flavor. Slice it thin and cook it the same way. Both tofu and tempeh make your rolls filling and satisfying.
Different Vegetable Combinations
Don’t feel limited to just avocado and cucumber! Use seasonal veggies for variety. In spring, try adding asparagus or snap peas. They add a nice crunch. In summer, bell peppers and zucchini are perfect. They are sweet and juicy. In fall, consider roasted sweet potatoes or beets for earthiness.
Winter brings hearty greens like kale or spinach. You can even use radishes for a spicy kick. Mix and match to find your favorite combinations.
Fusion Ideas
Get creative by blending cuisines! Add cream cheese for a sushi-style bagel roll. You can also try spicy kimchi for a Korean twist. Consider using hummus and roasted red peppers for a Mediterranean flair.
For a Mexican spin, add black beans and corn. Top it with fresh cilantro and lime juice. Each fusion idea brings new flavors to your rolls. It makes sushi fun and exciting!
Storage Info
Refrigeration Tips
To store leftover sushi rolls, wrap them tightly in plastic wrap or foil. This keeps them fresh and prevents the rice from drying out. Place the wrapped rolls in an airtight container. Store them in the fridge for up to 24 hours. The sooner you eat them, the better they taste.
Freezing Sushi
Freezing sushi rolls is simple. Wrap each roll in plastic wrap, then place them in a freezer-safe bag. Squeeze out as much air as possible. You can freeze sushi for about one month. When you are ready to eat, thaw it in the fridge overnight. Avoid microwaving, as it can make the rice mushy.
Shelf Life
Sushi rolls taste best when fresh. If stored properly in the fridge, they last for one day. After that, they may lose their flavor and texture. If you freeze the rolls, they can stay fresh for one month. Always check for any off smells or changes in color before eating.
FAQs
What kind of rice is best for sushi?
The best rice for sushi is short-grain sushi rice. This rice is sticky and holds its shape well. It gives sushi rolls their unique texture. When cooked, this rice becomes chewy, which is great for sushi. Look for sushi rice in Asian grocery stores or online. You can also use medium-grain rice if sushi rice is hard to find. Just remember not to use long-grain rice, as it will not stick well.
Can I use other ingredients besides nori?
Yes, you can use other ingredients besides nori. If you don’t like nori, try using lettuce leaves. They are fresh and crunchy. You can also use rice paper, which adds a different texture. Another option is to use thinly sliced cucumber as a wrap. This keeps your sushi light and refreshing. Just be creative with your wraps and fillings. The choice is all yours!
Is this recipe suitable for meal prep?
Absolutely! This recipe is great for meal prep. You can make sushi rolls in advance and store them. Just keep them in an airtight container in the fridge. They will stay fresh for about 24 hours. If you prep the rice and veggies ahead of time, it makes rolling easy. You can also cut the rolls into pieces before storing. This way, you have quick snacks or lunches ready to go. Enjoy making your sushi rolls ahead of time!
In this blog post, I covered how to create sushi from start to finish. We looked at key ingredients like sushi rice, nori, and fresh veggies. I shared step-by-step instructions to prepare the rice, slice the vegetables, and assemble your rolls. I also offered tips to avoid common mistakes and enhance flavor. You can add your favorite proteins and try different veggies or fusion styles. With proper storage, your sushi can stay fresh for days. Now, it’s time to roll up your sleeves and enjoy making sushi at home!
![- 2 cups sushi rice - 4 sheets nori (seaweed) - 1 avocado, sliced - 1 cucumber, julienned - 1 carrot, julienned - 1 red bell pepper, julienned To make easy veggie sushi rolls, you need key ingredients that create the perfect base and flavor. Sushi rice is sticky and helps hold the rolls together. Nori provides a tasty wrap. Fresh veggies add crunch and color. - 1/4 cup rice vinegar - 1 tablespoon sugar - 1/2 teaspoon salt These seasoning ingredients enhance the rice's flavor. Rice vinegar gives a slight tang. Sugar adds a hint of sweetness, while salt balances the taste. This mixture makes the sushi rice shine. - Soy sauce for dipping - Optional garnishes (sesame seeds, wasabi) When serving, soy sauce adds a salty kick. You can sprinkle sesame seeds for added crunch. Wasabi provides a spicy option for those who like heat. Enjoying these rolls with the right dips makes them even better. For the full recipe, check the Easy Veggie Sushi Rolls section. To start, rinse the sushi rice under cold water. This helps remove the excess starch. Keep rinsing until the water runs clear. You can cook the rice in a rice cooker or on the stovetop. If using a rice cooker, add 2 ½ cups of water and follow the machine's instructions. For stovetop cooking, bring the rice and water to a boil. Then, lower the heat, cover, and simmer for about 20 minutes until the water is gone. Next, mix rice vinegar, sugar, and salt in a small bowl. After cooking, transfer the rice to a large bowl. While it is still warm, gently fold in the vinegar mixture. This adds great flavor to the rice. Allow the rice to cool to room temperature before using it. While the rice cools, slice your fresh veggies. Take an avocado and slice it into thin pieces. Next, julienne the cucumber and carrot. Finally, slice the red bell pepper into thin strips. Each vegetable adds a nice crunch and color to your sushi. Place a bamboo sushi mat on a flat surface. Put a sheet of nori on top, shiny side down. Wet your hands to stop the rice from sticking. Take about a handful of rice and spread it evenly over the nori, leaving a small margin at the top edge. Now it's time to roll! Add a few pieces of each vegetable horizontally across the center of the rice. Starting from the bottom edge, carefully roll the mat away from you, holding the filling with your fingers. Make sure to roll tightly, but not too tight. Moisten the top edge with water to seal the roll. Use a sharp knife to slice the roll into bite-sized pieces. Wipe the knife with a damp cloth between cuts for clean slices. Arrange the sushi rolls on a serving platter. If you like, sprinkle sesame seeds on top and serve with soy sauce for dipping. Enjoy your beautiful veggie sushi rolls! For the complete recipe, check out [Full Recipe]. - Overcooking rice: If you cook the rice too long, it becomes mushy. This ruins the texture of your sushi. Keep an eye on your timer! - Squashing the roll while slicing: When you cut the sushi, press too hard. This squashes the roll and makes a mess. Use a sharp knife and gentle pressure. - How to roll sushi without a mat: No mat? No problem! Use a clean kitchen towel instead. Place the nori on the towel, add rice and fillings, and roll tightly. Keep your hands wet to avoid sticking. - Adding sauces or spices: Soy sauce is classic, but you can try others too. Add a splash of sriracha for heat or sprinkle sesame seeds for crunch. Experiment with flavors you love! For the complete recipe, you can refer to the Full Recipe section. {{image_2}} You can add protein to your sushi rolls for extra flavor and nutrition. Tofu is a great choice. Try firm or extra-firm tofu. It holds its shape well. You can marinate it in soy sauce or sesame oil for added flavor. Then, grill or sauté it until golden. Tempeh is another tasty option. This soy product has a nutty flavor. Slice it thin and cook it the same way. Both tofu and tempeh make your rolls filling and satisfying. Don’t feel limited to just avocado and cucumber! Use seasonal veggies for variety. In spring, try adding asparagus or snap peas. They add a nice crunch. In summer, bell peppers and zucchini are perfect. They are sweet and juicy. In fall, consider roasted sweet potatoes or beets for earthiness. Winter brings hearty greens like kale or spinach. You can even use radishes for a spicy kick. Mix and match to find your favorite combinations. Get creative by blending cuisines! Add cream cheese for a sushi-style bagel roll. You can also try spicy kimchi for a Korean twist. Consider using hummus and roasted red peppers for a Mediterranean flair. For a Mexican spin, add black beans and corn. Top it with fresh cilantro and lime juice. Each fusion idea brings new flavors to your rolls. It makes sushi fun and exciting! For the complete recipe, check out the Full Recipe section. To store leftover sushi rolls, wrap them tightly in plastic wrap or foil. This keeps them fresh and prevents the rice from drying out. Place the wrapped rolls in an airtight container. Store them in the fridge for up to 24 hours. The sooner you eat them, the better they taste. Freezing sushi rolls is simple. Wrap each roll in plastic wrap, then place them in a freezer-safe bag. Squeeze out as much air as possible. You can freeze sushi for about one month. When you are ready to eat, thaw it in the fridge overnight. Avoid microwaving, as it can make the rice mushy. Sushi rolls taste best when fresh. If stored properly in the fridge, they last for one day. After that, they may lose their flavor and texture. If you freeze the rolls, they can stay fresh for one month. Always check for any off smells or changes in color before eating. The best rice for sushi is short-grain sushi rice. This rice is sticky and holds its shape well. It gives sushi rolls their unique texture. When cooked, this rice becomes chewy, which is great for sushi. Look for sushi rice in Asian grocery stores or online. You can also use medium-grain rice if sushi rice is hard to find. Just remember not to use long-grain rice, as it will not stick well. Yes, you can use other ingredients besides nori. If you don’t like nori, try using lettuce leaves. They are fresh and crunchy. You can also use rice paper, which adds a different texture. Another option is to use thinly sliced cucumber as a wrap. This keeps your sushi light and refreshing. Just be creative with your wraps and fillings. The choice is all yours! Absolutely! This recipe is great for meal prep. You can make sushi rolls in advance and store them. Just keep them in an airtight container in the fridge. They will stay fresh for about 24 hours. If you prep the rice and veggies ahead of time, it makes rolling easy. You can also cut the rolls into pieces before storing. This way, you have quick snacks or lunches ready to go. Enjoy making your sushi rolls ahead of time! For the full recipe, check out the Easy Veggie Sushi Rolls section. In this blog post, I covered how to create sushi from start to finish. We looked at key ingredients like sushi rice, nori, and fresh veggies. I shared step-by-step instructions to prepare the rice, slice the vegetables, and assemble your rolls. I also offered tips to avoid common mistakes and enhance flavor. You can add your favorite proteins and try different veggies or fusion styles. With proper storage, your sushi can stay fresh for days. Now, it’s time to roll up your sleeves and enjoy making sushi at home!](https://dailydishly.com/wp-content/uploads/2025/07/11ef977b-69a9-4776-8bce-81e4c28b3d11-300x300.webp)

![- 4 ears of corn, husked - 4 tablespoons unsalted butter, melted - 3 cloves garlic, minced - Zest of 1 lemon - 2 tablespoons fresh lemon juice - 1 teaspoon paprika - Salt and pepper to taste - Fresh parsley, chopped (for garnish) What can I use instead of unsalted butter? You can swap unsalted butter for olive oil or coconut oil. Both choices add nice flavors. What are alternatives for fresh garlic? You can use garlic powder as a quick fix. One teaspoon of garlic powder equals one clove of garlic. How can I substitute fresh lemon juice? If you don’t have fresh lemon juice, use bottled lemon juice. You might want to adjust the amount for taste. This recipe brings a burst of fresh taste to any meal. Check out the Full Recipe for cooking details! First, preheat your oven to 400°F (200°C). This step is key for even cooking. While the oven heats, prepare your baking sheet. Line it with parchment paper for easy cleanup. Next, mix the lemon garlic butter. In a small bowl, combine the melted butter, minced garlic, lemon zest, lemon juice, paprika, salt, and pepper. Stir until everything blends well. This mixture adds a bright flavor to the corn. Now, it’s time to coat the corn. Take your husked ears of corn and lay them on the prepared baking sheet. Use a brush to apply the lemon garlic mixture generously. Make sure every ear is well coated for the best taste. Roast the corn in the oven for 25-30 minutes. Turn the corn every 10 minutes. This helps it cook evenly and get a nice char. Look for tender corn with some golden spots when done. Once the corn is roasted, take it out and let it cool for a few minutes. Garnish with chopped fresh parsley for a pop of color. You can drizzle leftover garlic butter from the baking sheet over the corn for extra flavor. This dish pairs well with grilled meats or fresh salads. It makes a lovely side for summer barbecues or family dinners. For the full recipe, check out the complete guide on Lemon Garlic Roasted Corn. To make perfect roasted corn, you want the right char and tenderness. Start by preheating your oven to 400°F (200°C). This heat gives the corn that nice roasted flavor. Roast the corn for 25 to 30 minutes. Turn it every ten minutes. This ensures even cooking and nice char spots. For even coating of flavors, brush the lemon garlic mixture on each ear of corn. Use a basting brush for the best results. Make sure to coat all sides. This helps every bite burst with flavor. Serve your lemon garlic roasted corn right after cooking. It tastes best hot and fresh from the oven. The lemon juice and garlic flavors shine when warm. If you have leftovers, store them in an airtight container in the fridge. They last about three days. You can reheat them in the oven or microwave. For a quick snack, enjoy them cold or add them to salads. Try drizzling a little olive oil over the corn for extra flavor. For the full recipe, check out the [Full Recipe]. {{image_2}} To make lemon garlic roasted corn even more exciting, you can add herbs and spices. Fresh herbs like basil or cilantro can bring a nice twist. Dried spices like cumin or chili powder also work well. These options can change the flavor profile easily. If you like heat, try adding cayenne pepper or red pepper flakes. This addition gives your corn a spicy kick. You can mix these spices right into the butter for even coverage. You can grill your corn for a smoky flavor. To grill, soak the husked corn in water for 30 minutes. Then, place it on the grill over medium heat. Turn it every few minutes until it’s charred and cooked through. This takes about 15-20 minutes. If you prefer the stovetop, you can also use a skillet. Heat a bit of butter in a large pan over medium heat. Add the corn and cook for about 10-15 minutes. Stir frequently until it's tender and has a nice golden color. Each method gives you a unique taste, so feel free to experiment! You can find the full recipe [here]. To keep your Lemon Garlic Roasted Corn fresh, store it right. First, let the corn cool down. Then, wrap each ear in plastic wrap or place it in an airtight container. This keeps moisture in and prevents drying out. You can store it in the fridge for up to four days. If you want to save it for longer, freezing is a great option. Wrap each ear tightly in foil, then place them in a freezer bag. They can last for up to six months in the freezer. When it's time to enjoy your leftovers, you want them to taste great. There are a few ways to reheat them. The oven is my favorite method. Preheat it to 350°F (175°C). Place the corn on a baking sheet and cover it with foil. Heat for about 10-15 minutes. This warms the corn evenly without losing flavor. You can also use the microwave for a quicker option. Place the corn on a microwave-safe plate and cover it with a damp paper towel. Heat for 1-2 minutes, checking often to avoid overheating. If you want a bit of char, you can quickly sear the corn in a hot pan for a minute or two. Enjoy your tasty Lemon Garlic Roasted Corn just like it was fresh! For the full recipe, check out the details above. What can I substitute for corn on the cob? You can use canned corn or frozen corn. Both options work well. For canned corn, drain it well. For frozen corn, thaw it first. This swap can save time and still taste great. Can I use frozen corn for this recipe? Yes, frozen corn is perfect for this recipe. Just make sure to thaw it completely and pat it dry. This helps to avoid excess moisture. You can then follow the same roasting steps. How can I make Lemon Garlic Roasted Corn spicier? To add heat, you can mix in red pepper flakes or cayenne pepper. Just a pinch can spice things up. You can also add a dash of hot sauce to the butter mixture for an extra kick. What is the best way to select fresh corn? Look for corn with bright green husks. The silk should be silky and slightly sticky. Check that the kernels are plump and full. If they feel firm and slightly moist, you’ve got a winner! This blog covers the best ways to make Lemon Garlic Roasted Corn. You learned about the simple ingredients, substitutions, and step-by-step cooking instructions. I shared tips for perfecting your corn and serving suggestions to impress your guests. We also discussed variations and storage to make your meal prep easier. As you try this recipe, keep these ideas in mind. Enjoy creating a delicious dish that will wow everyone who tastes it!](https://dailydishly.com/wp-content/uploads/2025/06/f91470b5-a76f-455c-a4a1-e8941e612567-768x768.webp)


![To make crispy baked sweet potato fries, you need a few key ingredients: - 2 large sweet potatoes, cut into fries - 2 tablespoons olive oil - 1 teaspoon cornstarch - 1 teaspoon paprika - 1/2 teaspoon garlic powder - 1/2 teaspoon onion powder - 1/4 teaspoon cayenne pepper (optional for heat) - Salt and pepper to taste - Fresh parsley, chopped (for garnish) Using quality ingredients makes a big difference in taste. Fresh sweet potatoes give your fries a lovely flavor. Good olive oil adds richness. The cornstarch helps achieve that perfect crispiness. You can enhance your fries with extra seasonings. Try adding: - Chili powder for a smoky kick - Italian herbs for a fresh taste - Parmesan cheese for a savory touch When it comes to dips, the options are endless! Serve your fries with: - Spicy mayo for some heat - Ketchup for a classic combo - Garlic aioli for a fancy twist These additions make your crispy baked sweet potato fries even more fun and tasty! For the complete recipe, check out the [Full Recipe]. 1. Preheat your oven to 425°F (220°C). This helps the fries crisp up well. 2. Line a baking sheet with parchment paper. This keeps the fries from sticking. 3. Cut the sweet potatoes into strips. Aim for uniform sizes for even cooking. 4. In a large bowl, toss the fries with olive oil. Ensure they are nicely coated. 5. Sprinkle cornstarch, paprika, garlic powder, onion powder, cayenne pepper, salt, and pepper. Toss again until all fries are coated. 1. Spread the fries in a single layer on the baking sheet. Do not crowd them. 2. Bake for 25 to 30 minutes. Flip them halfway for even crispiness. 3. Check for a crispy golden brown color on the edges. This means they are done. 1. Once baked, remove the fries from the oven and let them cool for a few minutes. 2. Garnish with fresh parsley for a pop of color. 3. Serve the fries in a cone or basket lined with parchment paper. 4. Add a small bowl of your favorite dip, like spicy mayo or ketchup, for fun. For a full recipe, check the detailed guide provided earlier. To make your sweet potato fries crispy, follow a few key steps. First, coat the fries in olive oil. This helps them brown nicely. Next, add cornstarch to the mix. Cornstarch absorbs moisture and creates a crispy outer layer. When you place the fries on the baking sheet, spread them out. Do not overcrowd the pan. If they are too close, they will steam instead of crisp. Give each fry room to breathe, so they can cook evenly. Avoid cutting the fries too thick. Thin fries cook better and become crispier. Another mistake is not flipping the fries halfway through baking. Flipping ensures even cooking and browning on both sides. If your fries turn out soggy, check the oil and cornstarch amounts. You may need to adjust these. Also, ensure that your baking sheet is not crowded. If you follow these tips, you will have perfect crispy fries every time! {{image_2}} You can change the taste of your crispy baked sweet potato fries with different seasonings. Here are some ideas: - Cajun Spice: Use Cajun seasoning for a bold flavor. - Italian Herbs: Mix in dried oregano and basil for a fresh twist. - Cinnamon Sugar: For a sweet option, dust with cinnamon and sugar after baking. - Taco Seasoning: Add taco seasoning for a fun, zesty kick. Experiment with spice blends and herbs to find your favorite taste. You can cook sweet potato fries in different ways. Each method gives a unique texture and flavor. - Air Frying: This method uses less oil and can make fries even crispier. Cook at 400°F for about 20 minutes. - Deep Frying: For a classic taste, deep fry in hot oil until golden. This method gives a crunchy exterior but uses more oil. - Baking: The original method yields a lighter fry. Bake at 425°F for 25-30 minutes, flipping halfway through. Each method has its pros and cons, so try them all to find your favorite! To store your crispy baked sweet potato fries, first, let them cool completely. This step helps keep them crispy. Place the fries in an airtight container. Use a container that has a tight seal to prevent moisture. You can keep them in the fridge for up to three days. When you're ready to eat them, reheat in the oven at 400°F (200°C) for about 10-15 minutes. This method helps restore their crunch. You can freeze both raw and cooked sweet potato fries. For raw fries, cut and coat them as you would for baking. Spread them in a single layer on a baking sheet. Freeze them for about two hours until solid. Then, transfer the fries to a freezer bag. Remove as much air as possible before sealing. They can stay in the freezer for up to three months. To cook from frozen, preheat the oven to 425°F (220°C). Spread the frozen fries on a baking sheet. Bake for 25-30 minutes, flipping halfway through. This method gives you crispy fries without thawing. Enjoy your delicious fries anytime! For the full recipe, check out the detailed steps above. Bake sweet potato fries at 425°F for 25 to 30 minutes. This time gives you crispy edges and soft centers. Flip them halfway through to ensure even cooking. Keep an eye on them. Ovens can vary, so adjust the time as needed. Look for a golden color to know they are done. Yes, you can use other potatoes. Regular russet potatoes work great for fries. They may not be as sweet, but they can still be crispy. You could also try Yukon gold or purple potatoes. Each type gives a different taste and texture. Just remember to adjust the baking time as needed. To add heat, sprinkle cayenne pepper over the fries. You can also add chili powder or crushed red pepper flakes. Mix spices with olive oil before coating the fries. This helps the heat stick better. Start with a little and taste as you go. Adjust based on your spice tolerance. In this post, we explored how to make perfect sweet potato fries. We covered essential ingredients, preparation steps, and cooking methods. I shared tips to achieve crispiness and avoid common mistakes. You also learned about flavor variations and the best ways to store leftovers. Making great fries can be easy and fun. By using quality ingredients and following the steps, you’ll enjoy delicious, crispy fries every time. Now, gather your supplies and get cooking for a tasty treat!](https://dailydishly.com/wp-content/uploads/2025/07/5c45319a-0858-4d48-b29a-502acd419023-768x768.webp)