Firecracker Chicken Meatballs Spicy and Savory Treat

Looking for a dish that’s both spicy and savory? You’ve come to the right place! My Firecracker Chicken Meatballs are packed with flavor and excitement. With simple ingredients like ground chicken and fresh vegetables, these meatballs bring a kick to any meal. Whether you’re craving a quick dinner or a fun party snack, this recipe has you covered. Let’s dive into how to make these delicious bites!
Why I Love This Recipe
- Quick and Easy: This recipe allows you to whip up delicious meatballs in just 15 minutes of prep time, making it perfect for busy weeknights.
- Flavor Explosion: The combination of sriracha, ginger, and honey creates a sweet and spicy flavor profile that is irresistible.
- Healthier Option: Using ground chicken and fresh vegetables makes these meatballs a lighter alternative to traditional meatballs.
- Customizable: You can easily adjust the spice level by adding more or less sriracha, tailoring the recipe to your taste preferences.
Ingredients
Main Ingredients
– 1 pound ground chicken
– 1/4 cup breadcrumbs
– 1/4 cup grated carrot
Flavor Additions
– 2 cloves garlic, minced
– 1 tablespoon fresh ginger, grated
– 1 tablespoon soy sauce
– 2 tablespoons sriracha (adjust to taste)
– 1 tablespoon honey
– 1 teaspoon sesame oil
– Salt and pepper to taste
Garnish Options
– Sesame seeds
– Sliced green onions
Firecracker chicken meatballs are easy to make. You just need a few simple ingredients. First, ground chicken is the main part. It gives the meatballs a nice texture. Next, breadcrumbs help bind everything. Grated carrot adds a sweet touch and color.
For flavor, garlic and ginger are key. They bring warmth and depth. Soy sauce adds saltiness, while sriracha gives heat. Honey balances the spice with sweetness. Sesame oil adds a nutty taste. Don’t forget salt and pepper to enhance all the flavors.
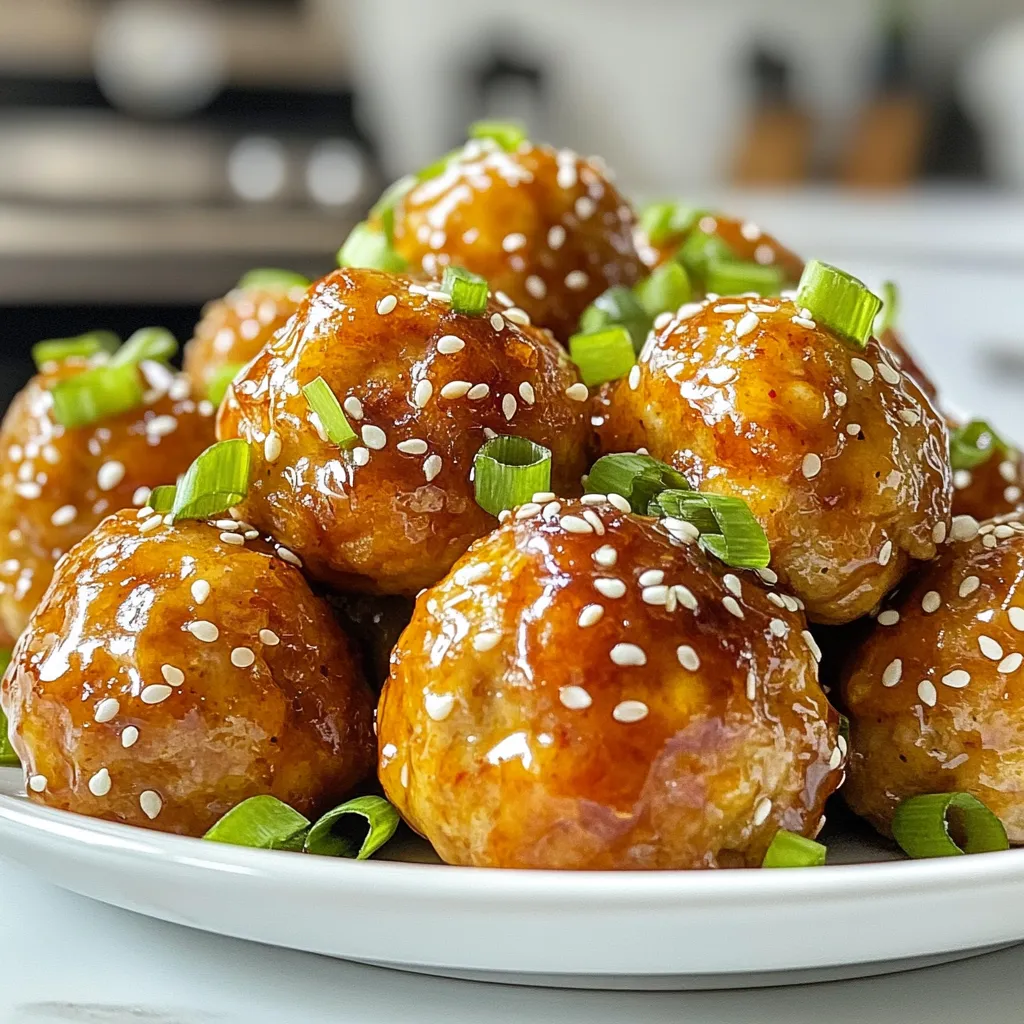
Finally, garnishing your meatballs is fun! Sprinkle sesame seeds for crunch. Add sliced green onions for freshness. These toppings make your dish pop visually and tastefully.

Step-by-Step Instructions
Preparing the Oven and Baking Sheet
– Preheat your oven to 400°F (200°C).
– Line a baking sheet with parchment paper. This helps the meatballs not stick.
Mixing Meatball Ingredients
– In a large bowl, combine 1 pound of ground chicken, 1/4 cup of breadcrumbs, and 1/4 cup of grated carrot.
– Add in 2 chopped green onions, 2 minced garlic cloves, and 1 tablespoon of grated ginger.
– Mix in 1 tablespoon of soy sauce, 2 tablespoons of sriracha, 1 tablespoon of honey, and 1 lightly beaten egg.
– Pour in 1 teaspoon of sesame oil and season with salt and pepper. Use your hands to mix until everything is combined well.
Forming and Baking the Meatballs
– Scoop out tablespoon-sized portions of the mixture and roll them into balls.
– Place the meatballs on your baking sheet, leaving about an inch between each one.
– Bake in the preheated oven for 20-25 minutes. Check for doneness by ensuring they are cooked through and lightly browned.
Tips & Tricks
Ensuring Flavorful Meatballs
Mixing the meatball ingredients well is key. Get your hands in there! This ensures that every part of the meatball gets equal flavor. For spiciness, adjust the sriracha to your taste. If you want more heat, add a bit more. If you prefer mild, use less.
Achieving the Perfect Texture
Choose your breadcrumbs wisely. I recommend plain or panko breadcrumbs. They give the meatballs a nice bite. The egg acts as a binder. It keeps everything together and adds moisture. Make sure to lightly beat the egg before adding it to the mix.
Making Ahead
You can prep these meatballs in advance. Form them, then freeze them on a sheet pan. Once frozen, place them in a bag. They can last up to three months. When ready to cook, bake them straight from the freezer. Just add a few extra minutes to the baking time. This makes weeknight meals easy and quick!
Pro Tips
- Keep it Moist: Adding grated carrot helps retain moisture in the meatballs, preventing them from drying out during baking.
- Adjust the Heat: Feel free to modify the amount of sriracha based on your spice tolerance. Start with less and add more if needed!
- Uniform Size: Use a cookie scoop for evenly sized meatballs. This ensures they cook evenly and look great on the plate.
- Make Ahead: You can prepare the meatballs in advance and refrigerate them. Bake them fresh when you’re ready to serve!

Variations
Alternative Protein Options
You can switch up the ground chicken for ground turkey or pork. Both options keep the meatballs juicy and tasty. If you want to try a plant-based version, use a mix of lentils and mushrooms. This gives you a healthy meatball that is still full of flavor.
Different Sauce Ideas
While the original sauce is spicy and sweet, feel free to get creative. A sweet and sour sauce can add a tangy twist. If BBQ is your style, brush the meatballs with your favorite BBQ sauce. Teriyaki sauce also works well for a savory glaze. Each sauce brings its own flavor, making the dish exciting.
Serving Ideas
When serving these meatballs, think about fun sides. Rice or quinoa pairs well and soaks up the sauce. You can also serve them on skewers for a fun party snack. Add fresh veggies or a salad to balance the meal. The bright colors make the plate pop!
Storage Info
Refrigeration Guidelines
To store cooked meatballs, place them in an airtight container. Let them cool down first. You can keep them in the fridge for up to four days. When reheating, use the microwave or oven. If using the microwave, heat them in short bursts. Check often to avoid overcooking. In the oven, preheat to 350°F (175°C) and heat for about 10 minutes. This keeps them moist and tasty.
Freezing Instructions
You can freeze meatballs before or after cooking. If freezing before cooking, shape the meatballs and place them on a baking sheet. Freeze them for about two hours until firm. Then, transfer them to a freezer bag. For cooked meatballs, store them in a freezer-safe container. They will stay fresh for up to three months. When you are ready to use them, thaw in the fridge overnight. You can also use the microwave for quick thawing.
Shelf Life
In the fridge, cooked Firecracker Chicken Meatballs last for four days. In the freezer, they stay good for about three months. Always check for any off smells or changes in texture before eating. Proper storage keeps them safe and delicious!
FAQs
Can I make Firecracker Chicken Meatballs ahead of time?
Yes, you can make these meatballs ahead. Mix the ingredients and form the meatballs. Then, place them on a baking sheet and cover with plastic wrap. You can store them in the fridge for up to one day. If you want to keep them longer, freeze them. Use a freezer bag or container to store them. When ready to cook, bake from frozen, adding a few extra minutes.
What if I don’t have sriracha?
No sriracha? No problem! You can use other sauces. Try chili garlic sauce or hot sauce as a substitute. For a milder kick, use BBQ sauce mixed with a bit of hot sauce. You can also make a sweet sauce by mixing honey with soy sauce. Adjust to your taste for heat and flavor!
How can I make this recipe gluten-free?
To make these meatballs gluten-free, you need to swap some ingredients. Use gluten-free breadcrumbs instead of regular ones. For soy sauce, choose a gluten-free version. Check labels to ensure all ingredients are safe. This way, you can enjoy delicious Firecracker Chicken Meatballs without worry!
In this blog post, we explored how to make tasty Firecracker Chicken Meatballs. We covered key ingredients, like ground chicken and breadcrumbs, and added flavors like garlic and ginger. You learned step-by-step instructions for preparation and baking. We shared tips for taste and texture, along with variations and storage advice.
Now you can enjoy these meatballs any time. They are easy to make and fun to customize. Find your favorite flavors, and make the recipe your own. Happy cookin

Firecracker Chicken Meatballs
Ingredients
- 1 pound ground chicken
- 0.25 cup breadcrumbs
- 0.25 cup grated carrot
- 2 pieces green onions, finely chopped
- 2 cloves garlic, minced
- 1 tablespoon fresh ginger, grated
- 1 tablespoon soy sauce
- 2 tablespoons sriracha
- 1 tablespoon honey
- 1 piece egg, lightly beaten
- 1 teaspoon sesame oil
- to taste salt and pepper
- for garnish sesame seeds and sliced green onions
Instructions
- Preheat your oven to 400°F (200°C) and line a baking sheet with parchment paper.
- In a large bowl, combine the ground chicken, breadcrumbs, grated carrot, green onions, garlic, ginger, soy sauce, sriracha, honey, egg, sesame oil, salt, and pepper. Use your hands to mix until well incorporated.
- Scoop out tablespoon-sized portions of the mixture and roll them into balls. Place them on the prepared baking sheet, spacing them about an inch apart.
- Bake in the preheated oven for 20-25 minutes, or until the meatballs are cooked through and lightly browned.
- While the meatballs are baking, in a small saucepan over medium heat, combine 1/4 cup sriracha, 1 tablespoon honey, and 1 tablespoon soy sauce. Cook for 2-3 minutes until warmed and slightly thickened.
- Remove the meatballs from the oven and brush them with the prepared sauce, ensuring they’re well coated.
- Transfer the meatballs to a serving platter and sprinkle with sesame seeds and sliced green onions for garnish.


![- 1 can (15 oz) chickpeas, drained and rinsed - 1/2 cup sun-dried tomatoes, chopped - 1/4 cup red onion, finely chopped - 1/2 cucumber, diced Chickpeas are the star of this salad. They add protein and fiber. Sun-dried tomatoes bring a burst of flavor and a bit of sweetness. Fresh veggies, like cucumber and red onion, add crunch and color. Together, they make a hearty base. - 2 tablespoons olive oil - 1 tablespoon lemon juice - 1 teaspoon dried oregano - Salt and pepper to taste The dressing is simple yet full of taste. Olive oil adds richness, while lemon juice gives a bright kick. Oregano adds an earthy note. Salt and pepper round out the flavors nicely. - 1/4 cup feta cheese, crumbled - 2 tablespoons fresh parsley, chopped Feta cheese adds a creamy, tangy element. Fresh herbs like parsley give a burst of freshness. You can add these if you want more flavor and texture. If you want the full recipe, check it out [Full Recipe]. - Combine Key Ingredients Start by taking a large mixing bowl. Add one can of drained and rinsed chickpeas. Then, toss in half a cup of chopped sun-dried tomatoes. Next, add a quarter cup of finely chopped red onion and half a diced cucumber. Finally, sprinkle in a quarter cup of crumbled feta cheese. - Whisk the Dressing In a small bowl, mix two tablespoons of olive oil with one tablespoon of lemon juice. Then, add one teaspoon of dried oregano. Season with salt and pepper to taste. Whisk these ingredients together until well combined. This dressing is key to bringing out the flavors. - Toss Ingredients Together Pour the dressing over the salad mix. Gently toss everything together to coat the ingredients evenly. Be careful not to mash the chickpeas or feta. You want everything to stay nice and whole. - Letting Flavors Meld Once tossed, let the salad sit for at least 15 minutes. This time helps the flavors blend. You can cover it and set it aside. It will taste even better after it rests. - Chilled or Room Temperature You can serve this salad chilled or at room temperature. Both options work well. It makes a great side dish or a light lunch. Enjoy the freshness of the sun-dried tomatoes and the crunch of the cucumber. You can save time by preparing ingredients in advance. Chop the cucumbers, red onions, and sun-dried tomatoes the day before. Store them in airtight containers in your fridge. This way, when you're ready to make the salad, it’s quick and easy. You can also mix the dressing ahead of time. Just give it a good shake before using it. To boost flavor, let the salad marinate. After mixing all the ingredients, cover the bowl. Place it in the fridge for at least 30 minutes. This waiting time helps the flavors blend well. You can also add some balsamic vinegar to the dressing for a deeper taste. Seasoning matters! Use fresh herbs like basil or mint for a bright taste. You can also try adding a pinch of red pepper flakes for a bit of heat. Always taste the salad before serving. Adjust salt and pepper to suit your liking. If you prefer a creamier salad, add more feta cheese or a dollop of Greek yogurt. For a lighter version, reduce the olive oil. You can also add more lemon juice for extra zing. Feel free to adjust the chickpeas too; add more for a heartier salad. {{image_2}} You can boost your Sun-Dried Tomato Chickpea Salad by adding proteins. One great choice is grilled chicken. Just cook the chicken until it’s golden and slice it thin. Add the slices right on top of your salad. This makes it heartier and perfect for lunch. Another option is incorporating tuna. Drain a can of tuna and mix it in. The tuna adds a nice flavor and a bit of richness. Both options give you a tasty way to enjoy the salad. For a vegetarian twist, try non-dairy cheese options. There are many brands that mimic feta well. Crumble it on top like regular feta. This keeps the creaminess without dairy. If you prefer a vegan version, consider other legumes. Black beans or kidney beans work well. They add protein and fiber while keeping the salad filling and delicious. As the seasons change, you can mix in fresh veggies. In summer, consider adding bell peppers. They add crunch and color. You can also toss in cherry tomatoes for extra sweetness. For fall, think about adding roasted squash or sweet potatoes. These ingredients bring warmth and earthiness to the salad. Each season offers new flavors to explore in your Sun-Dried Tomato Chickpea Salad. How long will it last? This salad stays fresh in the fridge for about three days. Make sure to store it in an airtight container. This keeps the flavors locked in and the veggies crisp. Can I freeze the salad? I do not recommend freezing this salad. The fresh veggies and feta do not hold up well after freezing. If you freeze it, the texture will change, and it may become mushy. What are the best practices for serving leftovers? You can enjoy this salad cold right from the fridge. If you prefer it warm, gently heat it in the microwave for about 30 seconds. Stir it well to ensure even heating. Just remember, warm is nice, but cold is better for this dish! To make this salad, you start with simple steps. The full recipe shows you how. First, gather your ingredients. You need chickpeas, sun-dried tomatoes, red onion, cucumber, and feta cheese. 1. In a bowl, mix the chickpeas, sun-dried tomatoes, diced cucumber, red onion, and feta cheese. 2. For the dressing, whisk olive oil, lemon juice, dried oregano, salt, and pepper in a small bowl. 3. Pour this dressing over the salad and mix gently. 4. Add chopped parsley and toss once more. 5. Let it sit for at least 15 minutes. This helps the flavors blend. You can serve it cold or at room temp. Yes, you can use dried chickpeas! However, you need to prepare them first. - Soak the dried chickpeas overnight in water. This helps them soften. - The next day, drain and rinse them. - Cook them in boiling water for about 1 to 1.5 hours until they are tender. - Once cooked, drain and cool them before using in your salad. This salad pairs well with many dishes. Here are some ideas: - Serve it alongside grilled chicken for a protein boost. - Pair it with some crusty bread for a tasty meal. - Enjoy it as a side with fish or a light pasta dish. - It also works great as a filling for wraps or pita pockets. Feel free to mix and match! In this post, we explored the sun-dried tomato chickpea salad. We looked at key ingredients, like chickpeas and fresh veggies. We also discussed making a tasty dressing with olive oil and lemon juice. You learned how to prepare and assemble the salad, plus tips for flavor and storage. This salad is both simple and flexible. You can customize it to your taste. Enjoy your delicious creation!](https://dailydishly.com/wp-content/uploads/2025/07/f0fe0f85-1842-4358-ad7f-ac591425fdaf-768x768.webp)
![- 4 ears of corn, husked - 4 tablespoons unsalted butter, melted - 3 cloves garlic, minced - Zest of 1 lemon - 2 tablespoons fresh lemon juice - 1 teaspoon paprika - Salt and pepper to taste - Fresh parsley, chopped (for garnish) What can I use instead of unsalted butter? You can swap unsalted butter for olive oil or coconut oil. Both choices add nice flavors. What are alternatives for fresh garlic? You can use garlic powder as a quick fix. One teaspoon of garlic powder equals one clove of garlic. How can I substitute fresh lemon juice? If you don’t have fresh lemon juice, use bottled lemon juice. You might want to adjust the amount for taste. This recipe brings a burst of fresh taste to any meal. Check out the Full Recipe for cooking details! First, preheat your oven to 400°F (200°C). This step is key for even cooking. While the oven heats, prepare your baking sheet. Line it with parchment paper for easy cleanup. Next, mix the lemon garlic butter. In a small bowl, combine the melted butter, minced garlic, lemon zest, lemon juice, paprika, salt, and pepper. Stir until everything blends well. This mixture adds a bright flavor to the corn. Now, it’s time to coat the corn. Take your husked ears of corn and lay them on the prepared baking sheet. Use a brush to apply the lemon garlic mixture generously. Make sure every ear is well coated for the best taste. Roast the corn in the oven for 25-30 minutes. Turn the corn every 10 minutes. This helps it cook evenly and get a nice char. Look for tender corn with some golden spots when done. Once the corn is roasted, take it out and let it cool for a few minutes. Garnish with chopped fresh parsley for a pop of color. You can drizzle leftover garlic butter from the baking sheet over the corn for extra flavor. This dish pairs well with grilled meats or fresh salads. It makes a lovely side for summer barbecues or family dinners. For the full recipe, check out the complete guide on Lemon Garlic Roasted Corn. To make perfect roasted corn, you want the right char and tenderness. Start by preheating your oven to 400°F (200°C). This heat gives the corn that nice roasted flavor. Roast the corn for 25 to 30 minutes. Turn it every ten minutes. This ensures even cooking and nice char spots. For even coating of flavors, brush the lemon garlic mixture on each ear of corn. Use a basting brush for the best results. Make sure to coat all sides. This helps every bite burst with flavor. Serve your lemon garlic roasted corn right after cooking. It tastes best hot and fresh from the oven. The lemon juice and garlic flavors shine when warm. If you have leftovers, store them in an airtight container in the fridge. They last about three days. You can reheat them in the oven or microwave. For a quick snack, enjoy them cold or add them to salads. Try drizzling a little olive oil over the corn for extra flavor. For the full recipe, check out the [Full Recipe]. {{image_2}} To make lemon garlic roasted corn even more exciting, you can add herbs and spices. Fresh herbs like basil or cilantro can bring a nice twist. Dried spices like cumin or chili powder also work well. These options can change the flavor profile easily. If you like heat, try adding cayenne pepper or red pepper flakes. This addition gives your corn a spicy kick. You can mix these spices right into the butter for even coverage. You can grill your corn for a smoky flavor. To grill, soak the husked corn in water for 30 minutes. Then, place it on the grill over medium heat. Turn it every few minutes until it’s charred and cooked through. This takes about 15-20 minutes. If you prefer the stovetop, you can also use a skillet. Heat a bit of butter in a large pan over medium heat. Add the corn and cook for about 10-15 minutes. Stir frequently until it's tender and has a nice golden color. Each method gives you a unique taste, so feel free to experiment! You can find the full recipe [here]. To keep your Lemon Garlic Roasted Corn fresh, store it right. First, let the corn cool down. Then, wrap each ear in plastic wrap or place it in an airtight container. This keeps moisture in and prevents drying out. You can store it in the fridge for up to four days. If you want to save it for longer, freezing is a great option. Wrap each ear tightly in foil, then place them in a freezer bag. They can last for up to six months in the freezer. When it's time to enjoy your leftovers, you want them to taste great. There are a few ways to reheat them. The oven is my favorite method. Preheat it to 350°F (175°C). Place the corn on a baking sheet and cover it with foil. Heat for about 10-15 minutes. This warms the corn evenly without losing flavor. You can also use the microwave for a quicker option. Place the corn on a microwave-safe plate and cover it with a damp paper towel. Heat for 1-2 minutes, checking often to avoid overheating. If you want a bit of char, you can quickly sear the corn in a hot pan for a minute or two. Enjoy your tasty Lemon Garlic Roasted Corn just like it was fresh! For the full recipe, check out the details above. What can I substitute for corn on the cob? You can use canned corn or frozen corn. Both options work well. For canned corn, drain it well. For frozen corn, thaw it first. This swap can save time and still taste great. Can I use frozen corn for this recipe? Yes, frozen corn is perfect for this recipe. Just make sure to thaw it completely and pat it dry. This helps to avoid excess moisture. You can then follow the same roasting steps. How can I make Lemon Garlic Roasted Corn spicier? To add heat, you can mix in red pepper flakes or cayenne pepper. Just a pinch can spice things up. You can also add a dash of hot sauce to the butter mixture for an extra kick. What is the best way to select fresh corn? Look for corn with bright green husks. The silk should be silky and slightly sticky. Check that the kernels are plump and full. If they feel firm and slightly moist, you’ve got a winner! This blog covers the best ways to make Lemon Garlic Roasted Corn. You learned about the simple ingredients, substitutions, and step-by-step cooking instructions. I shared tips for perfecting your corn and serving suggestions to impress your guests. We also discussed variations and storage to make your meal prep easier. As you try this recipe, keep these ideas in mind. Enjoy creating a delicious dish that will wow everyone who tastes it!](https://dailydishly.com/wp-content/uploads/2025/06/f91470b5-a76f-455c-a4a1-e8941e612567-768x768.webp)


