Fresh Peach Crisp Delightful and Simple Recipe

Are you ready to indulge in a sweet, juicy treat? My Fresh Peach Crisp is both delightful and simple to make. With ripe peaches and a crunchy topping, this dessert suits any occasion. I’ll guide you step-by-step, ensuring your crisp turns out perfect every time. Let’s dive into the world of fresh peaches and create a dessert that’s sure to impress your friends and family!
Ingredients
Fresh Peaches
For this recipe, you need ripe peaches. They should be sweet and juicy for the best taste. I recommend using about 6 medium peaches. Slice them into thin pieces. This helps them cook evenly and blend well with the topping.
Topping Ingredients
You will also need some simple ingredients for the topping. Here’s what you need:
– 1 cup rolled oats
– 1/2 cup flour (you can use all-purpose or almond)
– 1/2 cup brown sugar
– 1/4 cup granulated sugar
– 1/4 cup unsalted butter, melted
– 1 teaspoon cinnamon
– 1/4 teaspoon nutmeg
– 1/4 teaspoon salt
– 1 teaspoon vanilla extract
Mix these together to create a crumbly topping. The oats give it a nice texture.
Optional Serving Suggestions
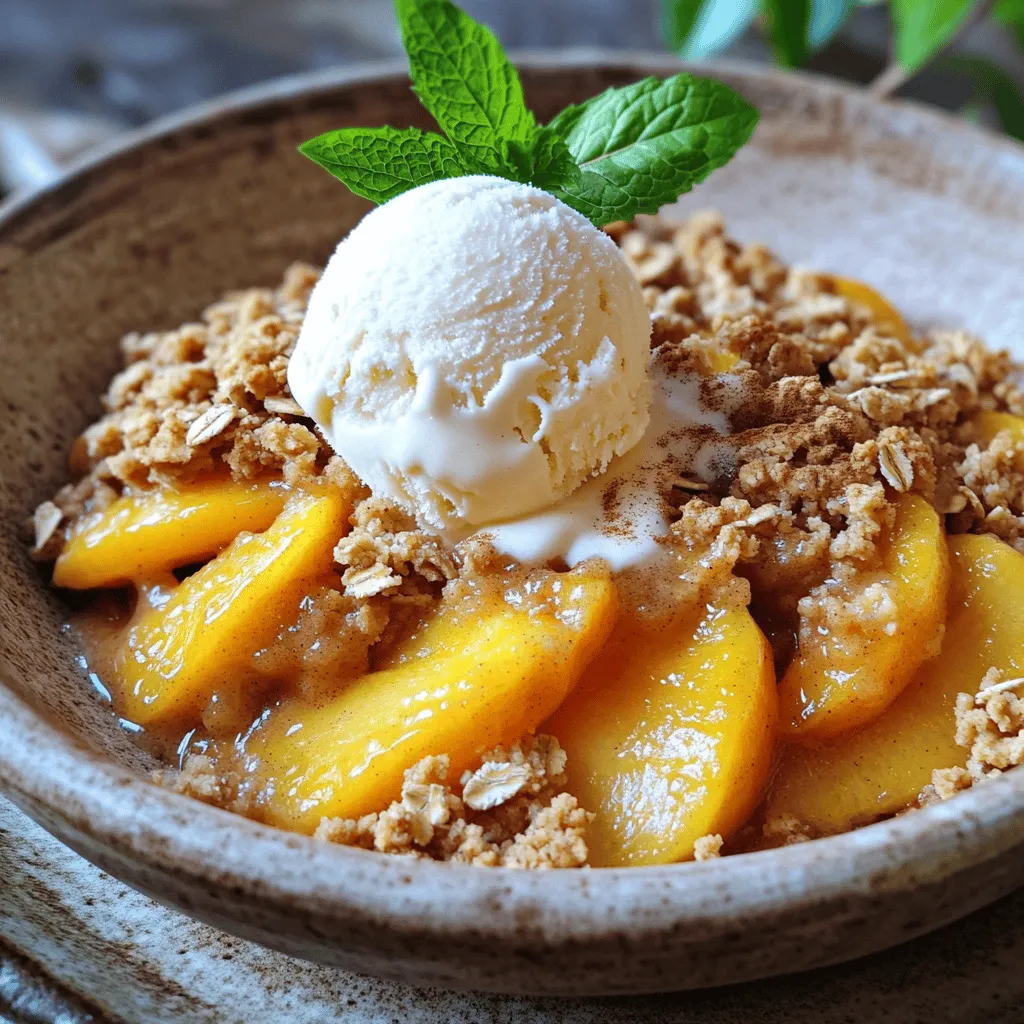
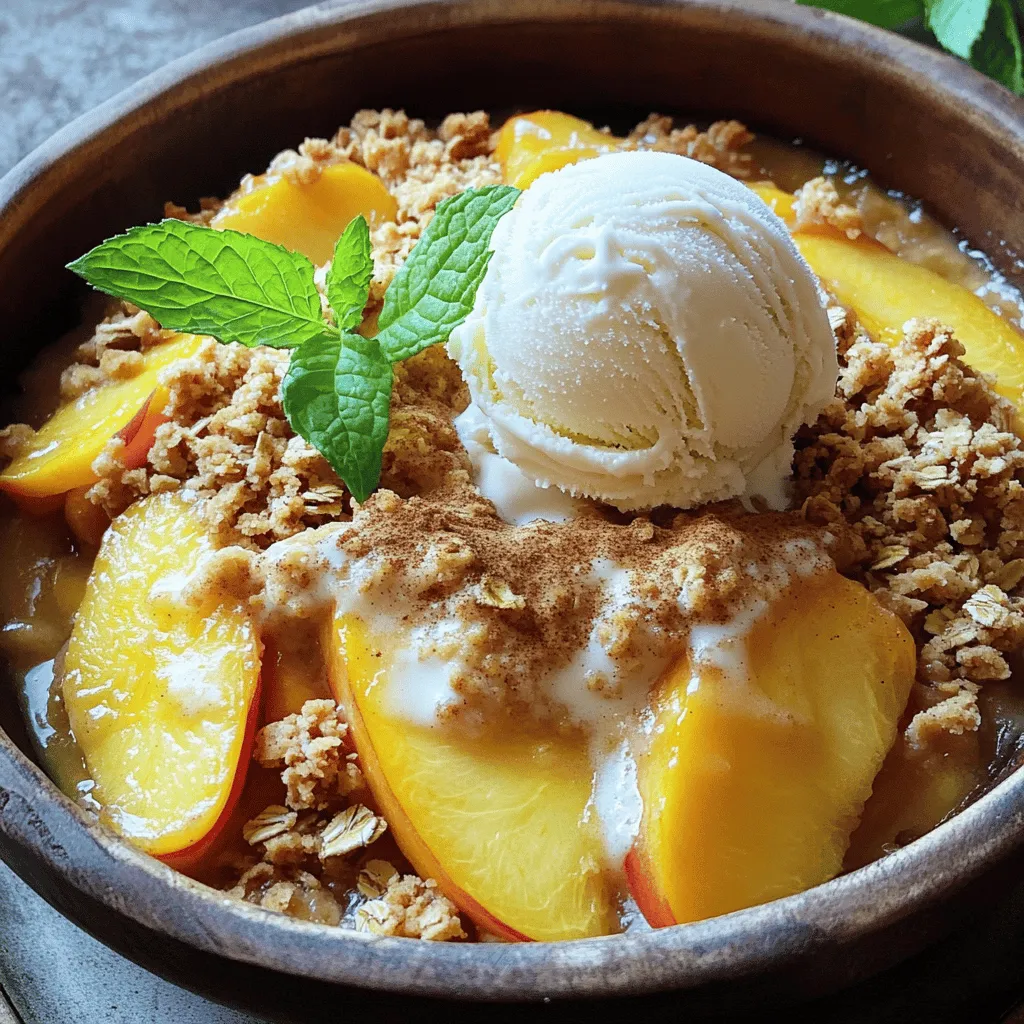
When you serve your fresh peach crisp, consider adding a scoop of vanilla ice cream or a dollop of whipped cream. These extra touches make it even more delightful. Top with a mint sprig for color and freshness. Enjoy every bite!
Step-by-Step Instructions
Preparation of Peaches
First, wash the peaches in cold water. This removes dirt and wax. Slice each peach in half and remove the pit. Cut each half into thin slices. Take a large bowl and add the sliced peaches. Sprinkle in the granulated sugar and vanilla extract. Gently mix the peaches until they are well-coated. Pour this peach mix into a greased 8×8 inch baking dish. This dish will hold all the goodness of your crisp.
Making the Oat Topping
In a separate bowl, gather the rolled oats, flour, brown sugar, cinnamon, nutmeg, and salt. Mix these dry ingredients well. Now, pour the melted butter over the oat mixture. Use a fork to stir until it forms a crumbly texture. You want it to look like small pebbles. This topping gives the crisp its crunchy goodness.
Baking Procedure
Preheat your oven to 350°F (175°C). Once the oven is ready, evenly distribute the oat topping over your peach mixture in the baking dish. Bake it in the preheated oven for 30-35 minutes. Look for a golden brown topping and bubbling peaches around the edges. When it’s done, remove it from the oven and let it cool for a few minutes. This wait makes it easier to serve. Enjoy your fresh peach crisp!
Tips & Tricks
Selecting Ripe Peaches
Choosing ripe peaches makes your crisp shine. Look for peaches that are slightly soft when you press them gently. Their skin should be a warm yellow or golden color, with a hint of red blush. This shows they are sweet and juicy. Avoid peaches with bruises or dark spots. If you find firm peaches, let them sit at room temperature for a few days. They will ripen nicely.
Ensuring Perfect Crisp Texture
A great crisp has a balance of crunch and softness. To get this, mix your oats, flour, and sugar well. When you add melted butter, stir just enough to get a crumbly mix. Too much mixing can make it dense. Spread the topping evenly over the peaches. This helps it cook evenly. Bake until the top turns golden brown and the peaches bubble. This gives you that perfect crisp texture.
Serving Suggestions
Serving your peach crisp is fun and simple. I love to serve it warm. Add a scoop of vanilla ice cream on top for a creamy finish. If you prefer a lighter touch, a dollop of whipped cream works great too. For a fresh twist, add a mint leaf as a garnish. You can also serve it in small bowls for individual treats.

Variations
Gluten-Free Options
You can easily make peach crisp gluten-free. Instead of all-purpose flour, use almond flour or a gluten-free blend. This keeps the crisp tasty and safe for those with gluten sensitivities. Look for oats labeled gluten-free to ensure they are safe as well.
Adding Nuts or Chocolate
Want to boost flavor and crunch? Try adding nuts or chocolate! Chopped pecans or walnuts give a nice texture. If you love chocolate, add some chocolate chips to the oat topping. Both options add a fun twist to your peach crisp.
Seasonal Fruit Swaps
Don’t limit yourself to just peaches! You can swap in other fruits based on what’s in season. Try using fresh blueberries, strawberries, or apples. Each fruit brings a unique taste and keeps your dessert fresh and exciting.
Storage Information
Storing Leftovers
You might have some peach crisp left after a tasty meal. Store any leftovers in a sealed container. Keep it in the fridge for up to three days. The crisp will stay fresh and delicious. Make sure to cover it tightly. This helps keep the flavors in and the air out.
Reheating Instructions
When you want to enjoy your peach crisp again, reheating is simple. Preheat your oven to 350°F (175°C). Place the crisp in an oven-safe dish. Cover it with foil to keep it moist. Heat for about 15-20 minutes. If you like it crispy, remove the foil for the last few minutes. You can also reheat it in the microwave. Heat a single serving for about 30 seconds. Check to see if it’s warm enough.
Freezing Peach Crisp
If you want to save peach crisp for later, freezing works well. First, let it cool completely. Then, cut it into portions. Wrap each piece in plastic wrap. Place the wrapped pieces in a freezer bag. This helps avoid freezer burn. You can freeze it for up to three months. When you’re ready to eat, thaw it in the fridge overnight. Then, reheat as mentioned above. This way, you can enjoy your peach crisp anytime!
FAQs
Can I use frozen peaches?
Yes, you can use frozen peaches in this recipe. Just thaw them first. Drain any extra juice before mixing them with sugar and vanilla. This helps keep the filling from getting too watery. Frozen peaches can taste just as good as fresh ones!
How can I make it vegan?
Making this peach crisp vegan is easy. Replace the butter with coconut oil or a vegan butter substitute. Use maple syrup or a vegan sugar option instead of brown sugar. This way, you can enjoy a tasty treat that fits your vegan lifestyle.
What’s the best way to serve peach crisp?
Serve peach crisp warm for the best taste. I love to add a scoop of vanilla ice cream on top. The cold ice cream melts slightly, creating a creamy texture. You can also use whipped cream or enjoy it plain. Garnish with mint leaves for a fresh touch.
This blog outlines how to make a delicious peach crisp. We discussed fresh peaches, toppings, and serving ideas. I shared step-by-step instructions for preparing and baking your dish. You learned tips for picking ripe peaches and getting a perfect crisp texture. We even explored variations with gluten-free options and added ingredients. Plus, I covered how to store leftovers and reheating methods.
In the end, peach crisp is easy to make and enjoy. Happy baking!


![To make a No-Bake Oreo Cheesecake, you need a few key items. Here’s what you’ll need: - 24 Oreo cookies (plus extra for garnish) - 4 tablespoons unsalted butter, melted - 16 oz cream cheese, softened - 1 cup powdered sugar - 1 teaspoon vanilla extract - 1 cup heavy whipping cream - 1/2 cup mini chocolate chips (optional) These ingredients create a rich and creamy dessert that everyone loves. You can amp up the taste with a few fun additions. Consider these options: - Crushed peppermint candies for a minty twist - A splash of coffee or espresso for depth - Different flavored cookies, like peanut butter Oreos These extras can give your cheesecake a unique flair. If you’re missing an item, don’t worry! Here are some swaps you can use: - Use gluten-free cookies if you need a gluten-free option. - For a lighter version, try low-fat cream cheese. - Sour cream can replace some cream cheese for tanginess. These substitutions help you customize the recipe to suit your taste or dietary needs. Always remember to check for allergies when serving to others. For the full recipe, you can refer to the details shared above. Enjoy creating this delightful dessert! To start, gather your ingredients. You need 24 Oreo cookies and 4 tablespoons of melted butter. Place the cookies in a food processor. Crush them into fine crumbs. Once you have crumbs, add the melted butter. Pulse the mixture until it's well combined. This should look like wet sand. Next, take a 9-inch springform pan. Press the Oreo mixture firmly into the bottom. Make sure it is even and compact. This crust will hold everything together. Now, put the pan in the refrigerator. Let it chill while you make the filling. Now, let’s focus on the cheesecake filling. You’ll need 16 oz of softened cream cheese, 1 cup of powdered sugar, and 1 teaspoon of vanilla extract. In a large bowl, beat the cream cheese until smooth with an electric mixer. Gradually add the powdered sugar and vanilla. Mix until fully combined. In another bowl, pour in 1 cup of heavy whipping cream. Whip it until stiff peaks form. This will make your cheesecake light and fluffy. Gently fold the whipped cream into the cream cheese mixture. If you like, fold in 1/2 cup of mini chocolate chips for extra flavor. Now, let’s bring it all together. Take the chilled Oreo crust from the refrigerator. Spoon the cheesecake filling over the crust. Smooth the top with a spatula for a nice finish. Cover the pan with plastic wrap. Place it back in the refrigerator and let it chill for at least 4 hours. For the best results, let it chill overnight. This helps the cheesecake set firmly. Once set, remove the cheesecake from the springform pan. Garnish with crushed Oreo cookies on top. Now, slice it into wedges and serve. Enjoy your creamy, delicious no-bake Oreo cheesecake! For the complete recipe, check out the [Full Recipe]. When making a no-bake Oreo cheesecake, avoid overmixing your cream cheese. This can make it too runny. Also, don’t forget to chill the crust before adding the filling. A warm crust can melt the filling. Lastly, use softened cream cheese. Cold cream cheese does not mix well and can cause lumps. To get a smooth texture, beat the cream cheese until creamy before adding sugar. Mix slowly when adding the whipped cream. This keeps the air in the mixture, making it light. If you want a firmer cheesecake, chill it longer. I recommend overnight for the best results. You can make your cheesecake even better. Try adding mini chocolate chips for a fun crunch. You might also mix in crushed Oreos for extra flavor. If you like a hint of coffee, add a teaspoon of espresso powder. This adds depth without overpowering the Oreo flavor. For a fruity twist, use a layer of fruit puree on top. It looks great and tastes amazing! For more details, check out the Full Recipe. {{image_2}} You can have fun with flavors! Instead of Oreos, try using other cookies. For a classic taste, use graham crackers. If you love chocolate, use chocolate sandwich cookies. You can even mix in fruit flavors. Adding lemon or strawberry can brighten your cheesecake. Just swap the cookie crust and adjust the filling to match your new flavor. Want a lighter version? You can use low-fat cream cheese. It still tastes great! Substitute Greek yogurt for some of the cream cheese. This adds protein and cuts fat. You can also use a sugar substitute if you want fewer calories. For the crust, replace regular cookies with whole grain options. These swaps help make a lighter cheesecake without losing the taste. Toppings can change the whole dessert! Besides crushed Oreos, think about fresh fruit. Strawberries and raspberries add color and flavor. You can drizzle chocolate or caramel sauce on top. Whipped cream is always a hit too. For a fun crunch, sprinkle nuts or toffee bits on each slice. Get creative and mix different toppings for a unique look and taste! For the full recipe, check out the details above. Enjoy making your own variations! To keep your No-Bake Oreo Cheesecake fresh, cover it tightly with plastic wrap. You can also use an airtight container. Store it in the refrigerator. It will stay good for up to five days. Make sure it is fully set before covering it. This will help keep the texture perfect. If you want to keep your cheesecake longer, freezing is a great option. First, let the cheesecake chill completely in the fridge. Then, wrap it in plastic wrap, and follow with aluminum foil. This double layer helps prevent freezer burn. It can last up to three months in the freezer. To enjoy it, move the cheesecake to the fridge to thaw overnight. When serving leftovers, use a sharp knife to cut clean slices. Wipe the knife after each cut for neat edges. If you have extra toppings, like whipped cream or chocolate sauce, add them right before serving. This keeps them fresh and tasty. Enjoy your leftovers within three days for the best flavor! It takes about 4 hours for the cheesecake to set. For the best results, chill it overnight. This gives the filling time to firm up. You want it to hold its shape when you slice it. If you rush this step, the cheesecake may be too soft. You need both cream cheese and whipped cream for this recipe. Cream cheese adds the rich flavor. The whipped cream makes the cheesecake light and fluffy. If you only use cream cheese, it will be too dense. Stick to the recipe for the best taste. To cut a no-bake cheesecake, use a sharp knife. Dip the knife in hot water and wipe it dry before cutting. This method helps create clean slices. You can also use a thin spatula to lift out each piece. Enjoy serving this beautiful dessert! This blog covered how to make a no-bake Oreo cheesecake step by step. We explored essential and optional ingredients, plus tips for perfect texture. I also shared variations to make this dessert fit your taste and healthier choices. Finally, I included storage methods and answers to common questions. You now have the tools to create a delicious cheesecake and impress everyone. Enjoy making this tasty treat!](https://dailydishly.com/wp-content/uploads/2025/07/9651beeb-141b-494d-95f3-40869f463a5c-768x768.webp)


