Fresh Watermelon Feta Salad Nutritious Summer Recipe

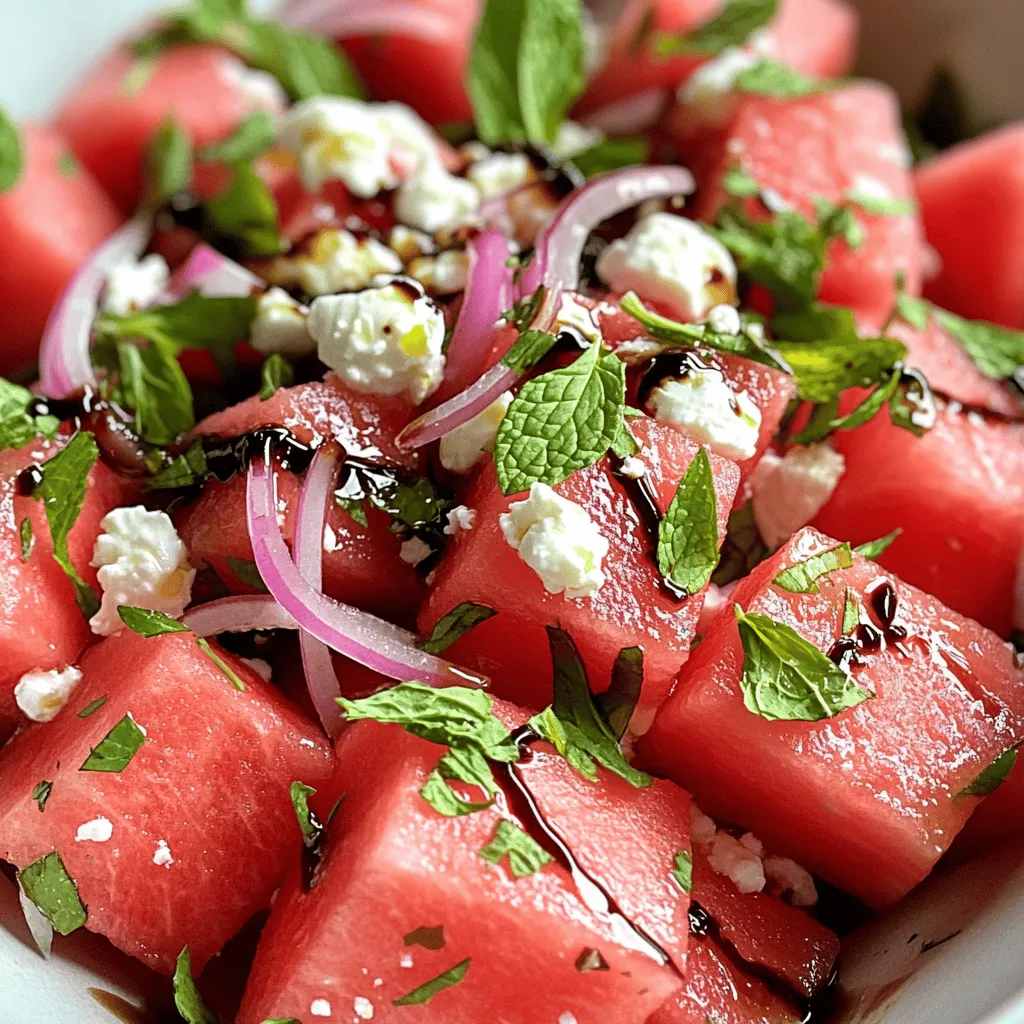
Looking for a quick, tasty summer dish? My Fresh Watermelon Feta Salad has it all. Juicy watermelon pairs perfectly with creamy feta cheese. This refreshing salad not only delights your taste buds but also provides essential nutrients. I’ll guide you through each easy step, from picking fresh ingredients to serving with flair. Whether you’re hosting a barbecue or enjoying a quiet dinner, this salad is sure to impress. Let’s dive in!It combines sweet watermelon with creamy feta. The mix of flavors gives you a refreshing dish. You can whip it up in just 15 minutes. This recipe is for four servings and perfect for gatherings.
Fresh Ingredients Needed
To make this salad, you will need:
– 4 cups watermelon, cubed
– 1 cup feta cheese, crumbled
– 1/4 cup fresh mint leaves, chopped
– 1/4 cup red onion, thinly sliced
– 2 tablespoons extra virgin olive oil
– 2 tablespoons balsamic glaze
– Salt and pepper to taste
Each ingredient plays a key role. Watermelon gives sweetness, while feta adds creaminess. Mint brings a fresh taste, and red onion adds a nice crunch.
Equipment Required
You don’t need much to make this salad. Here’s what you will need:
– A large mixing bowl
– A sharp knife
– A cutting board
– A spoon for mixing
This simple setup makes it easy to prepare the salad. Just gather your tools, and you’re ready to create a delicious dish.
Step-by-Step Instructions
Preparation of Watermelon
First, I cut the watermelon into cubes. I like to use a sharp knife for clean cuts. Aim for bite-sized pieces, so it’s easy to eat. Place the cubes in a large mixing bowl. Make sure to remove any seeds you find. This keeps the salad smooth and tasty. The watermelon should be sweet and juicy. If it feels firm, it might not be ripe enough.
Mixing Ingredients Together
Next, I add the crumbled feta cheese to the bowl. The saltiness of the feta pairs well with the sweet watermelon. Then, I toss in the chopped mint leaves and thinly sliced red onion. The mint adds a fresh taste, while the onion gives a little crunch. Drizzle the extra virgin olive oil and balsamic glaze over the mix. Gently toss the ingredients together. Be careful not to break the watermelon too much. You want to keep those lovely cubes intact.
Flavor Enhancement Techniques
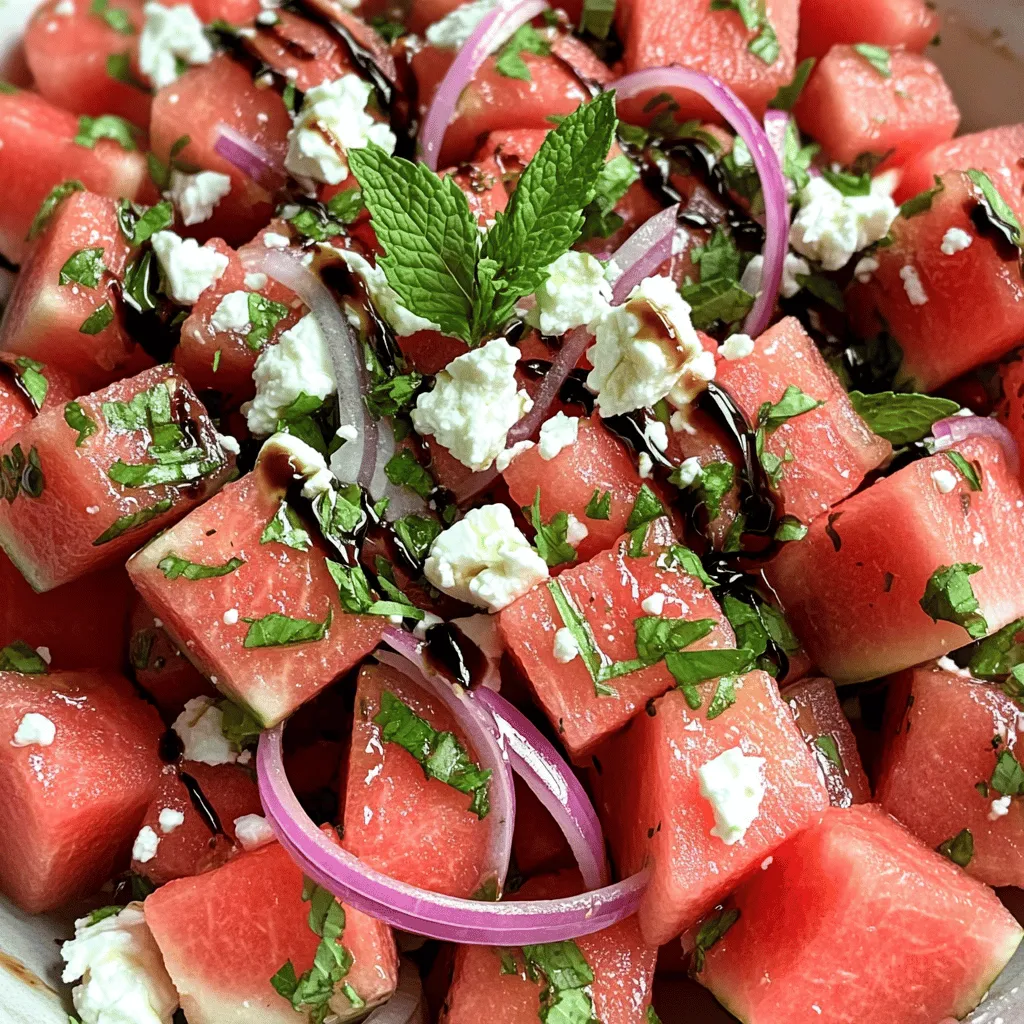
To boost flavors, I season the salad with a pinch of salt and fresh pepper. This simple step brings out the best in each ingredient. Letting the salad rest for about 10 minutes helps the flavors blend. This is key for a tasty experience. I like to serve it chilled for a refreshing feel. For a beautiful look, garnish with more mint and a drizzle of balsamic glaze. This can elevate the dish and impress your guests.
Tips & Tricks
Best Ways to Serve Fresh Watermelon Feta Salad
Serving this salad right makes it pop! I love to use a chilled bowl. It keeps the salad cool and tasty. For a fun look, add extra mint leaves on top. A light drizzle of balsamic glaze adds flair and flavor. This makes the dish look fancy but is super easy to do. You can pair this salad with grilled chicken or fish for a full meal.
How to Perfectly Cut Watermelon
Cutting watermelon can be fun! Start by washing the outside. Use a sharp knife for clean cuts. First, slice the watermelon in half lengthwise. Then, cut each half into long strips. Turn the strips and cut them into cubes. This way, you get nice, even pieces. Make sure to remove any seeds, too. Fresh watermelon tastes best when it’s cut right before serving.
Tips for Choosing Quality Feta Cheese
Good feta cheese makes this salad shine. Look for cheese that is creamy and crumbly. If you can, try to get feta in brine. This keeps it fresh longer. When you taste it, it should be tangy but not too salty. Check the label for natural ingredients. Some brands use additives, and you want to avoid those. Quality feta will bring the whole salad together.

Variations
Adding Fresh Herbs (e.g., Mint, Basil)
Fresh herbs can make this salad pop. I love adding mint for its cool taste. You can also try basil for a sweet twist. Just chop up the herbs and mix them in. This adds color and flavor. Mint and basil pair well with watermelon and feta.
Mixing in Other Fruits (e.g., Cucumber, Berries)
You can get creative with fruits! Cucumber adds a nice crunch. Slice it thinly and toss it in. Berries like strawberries or blueberries bring sweetness. They also add a burst of color. Mix and match your favorite fruits to keep things fun.
Incorporating Greens (e.g., Arugula, Spinach)
Adding greens gives your salad more body. Arugula has a peppery taste that contrasts well with the sweet watermelon. Spinach is mild and blends nicely. Toss in a handful of greens for added nutrition. They make the salad feel fresh and vibrant.
Storage Info
How to Store Leftovers
To store leftovers, place the salad in an airtight container. Make sure to keep it in the fridge. If possible, separate the dressing from the salad. This helps prevent the watermelon from getting soggy. You can mix it in just before serving.
Best Containers for Storing Salad
Use glass or plastic containers with tight lids. These materials keep the salad fresh. They also make it easy to see what’s inside. Avoid using metal containers, as they can react with the ingredients.
Shelf Life and Freshness Tips
Fresh Watermelon Feta Salad lasts about three days in the fridge. After that, the watermelon may lose its crunch. Check for any signs of spoilage, like bad smells or slimy texture. If you notice these, it’s best to toss the salad. To enjoy the best flavors, eat it within the first day or two.
FAQs
Can I make Fresh Watermelon Feta Salad ahead of time?
Yes, you can prepare this salad ahead of time. I recommend chopping the watermelon and mixing it with the feta and herbs. However, wait to add the dressing until just before serving. This keeps the salad fresh and prevents it from getting soggy. If you plan to serve this at a party, you can make it a few hours in advance. Just store it in the fridge until you’re ready to serve.
What are the health benefits of watermelon and feta cheese?
Watermelon is hydrating, low in calories, and full of vitamins A and C. It helps keep you cool in summer. Feta cheese adds protein and calcium, which are good for your bones. Together, they make a tasty combo that is light and good for your health. Plus, the mint adds fresh flavor and aids digestion. Eating this salad gives you a boost in nutrients while being delicious.
How can I make this salad vegan-friendly?
To make the salad vegan, skip the feta cheese. Instead, try using avocado or a vegan cheese substitute. You can also add nuts like walnuts for extra crunch and protein. This way, you keep the salad tasty and satisfying while making it plant-based. Just remember to check that your dressing is dairy-free as well.
This blog post covered everything you need for a fresh Watermelon Feta Salad. We explored the key ingredients, step-by-step directions, and tips to make it shine. You can try fun variations, serve it well, and store it right.
Fresh watermelon and feta create a tasty and healthy dish. Enjoy your salad and remember to experiment. Make it your own with flavors you love!


![- 2 ripe avocados, diced - 1 cup sweet corn (canned or grilled) - 1 cup cherry tomatoes, halved - 1 red bell pepper, diced - 1/4 cup red onion, finely chopped - 1/4 cup fresh cilantro, chopped - Juice of 2 limes - 2 tablespoons olive oil - 1 teaspoon cumin powder - Salt and pepper to taste I love using ripe avocados in this salad. They add creaminess. Sweet corn brings a nice crunch and sweetness. Cherry tomatoes add freshness and a pop of color. Red bell pepper gives it a crisp bite. Red onion adds a sharp taste that balances the other flavors. Fresh cilantro brightens everything up with its unique flavor. Lime juice adds a tangy kick. Olive oil gives richness. Cumin powder adds warmth. Salt and pepper round out the taste perfectly. - Additional vegetables - Cheese options - Protein additions (e.g., black beans, chicken) Feel free to add more vegetables like cucumbers or radishes for extra crunch. You can sprinkle cheese like feta or cotija for a salty bite. For a heartier dish, add protein like black beans or grilled chicken. These options make the salad more filling and can change the flavor profile. I love how versatile this salad is! For the full recipe, check out the provided details. 1. Combining base ingredients Start by grabbing a large mixing bowl. Add the diced avocados and sweet corn. Next, toss in the halved cherry tomatoes, diced red bell pepper, and finely chopped red onion. These fresh ingredients create a colorful base. 2. Whisking the dressing In a small bowl, combine lime juice, olive oil, cumin powder, salt, and pepper. Use a whisk to mix the dressing well. This will add flavor and bring the salad together. 3. Tossing and seasoning the salad Pour the dressing over the salad mixture. Gently toss everything together until all ingredients are coated. Taste the salad and adjust the seasoning if needed. Let it sit for about 10 minutes before serving to let the flavors blend. - Choosing ripe avocados Look for avocados that are slightly soft when you squeeze them. They should yield to gentle pressure. This ensures a creamy texture in your salad. - Tips for cutting vegetables Use a sharp knife to cut the veggies. For the avocados, cut them in half, remove the pit, and scoop out the flesh with a spoon. Dice them into bite-sized pieces. - Balancing flavors in the dressing Adjust the lime juice and salt to your taste. If you like it tangy, add more lime. A pinch of sugar can balance the acidity if needed. To make your avocado corn salad pop, serve it in a large, shallow bowl. This type of dish lets the colors shine. I love to garnish with fresh cilantro leaves on top. Adding lime wedges on the side makes it look fresh and inviting. For dishware, choose bright colors. White or light-colored bowls make the salad's colors stand out. You want your guests to be drawn in by the vibrant greens, reds, and yellows. You can prepare this salad a bit early. Chop the vegetables and store them in separate containers. This keeps them fresh and crunchy. You can mix the dressing in advance too. Just keep it in a jar in the fridge. When ready to serve, combine everything in a big bowl. Pour the dressing over the salad and toss gently. This way, your salad stays fresh and tasty. To keep the salad fresh, store it in an airtight container. This locks in flavors and keeps the ingredients crisp. If you notice browning avocados, squeeze a bit more lime juice on top. It helps slow down the browning. For the full recipe, check the earlier section. Enjoy your fresh and flavorful avocado corn salad! {{image_2}} You can easily change this salad. Spice it up by adding diced jalapeños. This will give it a kick. You can also try different dressings. A zesty vinaigrette adds a bright note. If you want creaminess, go for a yogurt-based dressing. Both options fit well with the fresh flavors. This salad shines in every season. In summer, add diced mango or peach. Their sweetness pairs perfectly with the corn and avocado. For winter, think roasted vegetables. Roasted sweet potatoes or bell peppers add warmth. These variations keep the dish fresh and exciting all year. For the full recipe, check out the detailed instructions above. To keep your avocado corn salad fresh, store it in the fridge. Use an airtight container. This will help keep moisture in and air out. To prevent browning of avocados, squeeze a little lime juice over them. The lime slows down oxidation. You can also cover the salad tightly with plastic wrap. Press the wrap directly onto the salad to limit air exposure. Your salad lasts for about 1 to 2 days in the fridge. After that, it may lose its taste and texture. Signs that your salad has spoiled include a strong, sour smell or a mushy texture. If you see dark spots on the avocados, it's time to toss it. Always trust your senses to decide if it's safe to eat. For the full recipe, check out the details above! To make this salad vegan, swap the honey for maple syrup if you like sweetness. Use a vegan olive oil dressing instead of any store-bought dressings. All the main ingredients are vegan-friendly. This gives you a fresh, tasty salad that fits your diet. Yes, you can use frozen corn! Just thaw it first. If you want a crisp taste, try grilling it briefly. This adds a nice smoky flavor. Both options work well in this salad. This salad pairs well with many dishes. You can add grilled chicken or shrimp for protein. It also works great with black beans for a vegetarian option. Serve it alongside tacos or grilled fish for a full meal. For a light meal, enjoy it on its own. For the complete recipe, check out the [Full Recipe]. In this blog post, I covered how to make a delicious avocado salad. You learned about the main ingredients, like ripe avocados, sweet corn, and cherry tomatoes. I shared tips for preparation and gave you ideas on how to present and store your salad. Remember, feel free to mix in different flavors or proteins. Get creative and make this dish your own. With fresh ingredients and simple steps, you can create a tasty and healthy meal that everyone will enjoy.](https://dailydishly.com/wp-content/uploads/2025/07/333f1f81-7d50-4cc6-bd3d-a33e08904fb9-768x768.webp)


![- 1 pound large shrimp, peeled and deveined - 1/4 cup honey - 3 cloves garlic, minced - 2 tablespoons soy sauce - 1 tablespoon fresh lemon juice For the best flavor, fresh ingredients work wonders. When I use large shrimp, they soak up the marinade well. Honey adds sweetness, while garlic brings a rich taste. Soy sauce provides a savory kick, and lemon juice balances the flavors. - 1 tablespoon olive oil - 1 teaspoon crushed red pepper flakes - Salt and pepper to taste - Skewers (soaked in water if wooden) Olive oil helps the shrimp cook well on the grill. The red pepper flakes add a bit of heat, so adjust them based on your spice preference. Always season with salt and pepper to enhance the dish. If you use wooden skewers, soaking them prevents burning while grilling. - Lemon wedges - Fresh parsley Lemon wedges brighten the dish and make it look appealing. Fresh parsley adds a pop of color and freshness. These garnishes make your skewers not just tasty but also beautiful. For the full recipe, check out the details above. First, gather your marinade ingredients. In a bowl, mix together the honey, minced garlic, soy sauce, lemon juice, olive oil, crushed red pepper flakes, salt, and pepper. Whisk this mixture well until it’s blended. Next, add your peeled and deveined shrimp to the bowl. Make sure each shrimp gets coated with the marinade. Cover the bowl with plastic wrap and place it in the fridge. Let it marinate for at least 30 minutes. This helps the shrimp soak up all that yummy flavor. While the shrimp marinates, it's time to get your grill ready. Preheat the grill to medium-high heat. If you use wooden skewers, soak them in water for about 30 minutes. This step is key. It stops the skewers from burning while grilling. Now for the fun part! Start by threading the marinated shrimp onto the skewers. Leave a little space between each shrimp to help them cook evenly. Place the skewers on the grill. Cook the shrimp for about 2-3 minutes on each side. You’ll know they’re done when they turn pink and opaque. During cooking, brush any extra marinade over the shrimp. This gives them an extra burst of flavor. Once cooked, remove the skewers from the grill and let them rest for a minute. Enjoy these delicious Honey Garlic Shrimp Skewers! For the full recipe, check out the details above. To get the best Honey Garlic Shrimp Skewers, set your grill to medium-high heat. This temperature cooks the shrimp nicely without burning them. You want the grill hot enough to sear the shrimp but not so hot that they turn dry. Leave a little space between each shrimp on the skewers. This helps them cook evenly. If they are too close, they will steam instead of grilling. Proper spacing lets the heat circulate around each piece. Want to spice things up? You can add extra herbs like cilantro, basil, or even a pinch of cumin. These will give your skewers a unique twist. If you want a touch of sweetness, try adding a bit of orange juice or zest. For a different flavor, you can swap the marinade. Try teriyaki sauce for a sweet and savory taste. Or use a spicy chili paste for heat. The options are endless, and each twist can create a new favorite. Pair your Honey Garlic Shrimp Skewers with fresh sides. A light salad with mixed greens and a citrus dressing works great. You can also serve them with a side of grilled vegetables for added color and flavor. For presentation, arrange the skewers on a large platter. Add lemon wedges and sprigs of parsley for a pop of color. This not only makes it look appealing but adds freshness to each bite. Don’t forget to have extra dipping sauce on the side for your guests! {{image_2}} You can change the main protein in this recipe. If you want to swap shrimp for chicken, use boneless chicken breast cut into bite-sized pieces. For a plant-based option, tofu works great too. Just press the tofu to remove excess water before marinating. You can also switch the sweetener. If honey is not your thing, try maple syrup or agave. These options will add a unique twist to the flavor. You can cook these shrimp in different ways. Grilling adds a smoky taste, which makes the dish special. However, if you don’t have a grill, you can bake the shrimp in the oven. Set your oven to 400°F (200°C) and cook for about 10-12 minutes. Another great option is to use a skillet on the stovetop. Heat a bit of oil and cook the shrimp for 2-3 minutes on each side until they turn pink and opaque. To enhance the taste, you can add tropical elements. Pineapple chunks or shredded coconut can give your skewers a fun twist. Don’t be afraid to experiment with herbs! Fresh cilantro, basil, or mint can add freshness and depth. Try adding a mix of herbs to see what suits your taste best. For the full recipe, check out the Honey Garlic Shrimp Skewers section. After you enjoy your honey garlic shrimp skewers, store any leftovers in the fridge. Place them in a clean, airtight container. This will keep them fresh and safe to eat. Try to eat them within three days for the best taste. If you want to keep them longer, you can freeze them. Wrap the skewers tightly in plastic wrap or foil, then put them in a freezer bag. Cooked shrimp skewers can last up to three months in the freezer. When it's time to eat your leftovers, reheating them properly is key. The oven works best for this. Preheat your oven to 350°F. Place the skewers on a baking sheet and cover them with foil. Heat for about 10-15 minutes until warm. If you're in a rush, you can use the microwave. Place the shrimp on a microwave-safe plate and cover it with a damp paper towel. Heat in short bursts of 30 seconds until warmed. To keep the shrimp juicy, avoid overheating them. Cooked honey garlic shrimp skewers can last in the fridge for about three days. After that, the shrimp may spoil. Signs of spoilage include a sour smell, a slimy texture, or discoloration. If you notice any of these signs, it's best to throw them away. Always prioritize your health and safety when it comes to food storage. For the best flavor, marinate the shrimp for at least 30 minutes. This time allows the shrimp to soak up the sweet and savory notes of the marinade. If you have time, marinating for up to 2 hours enhances the taste even more. Just remember not to exceed this time, as shrimp can become mushy. Yes, you can use frozen shrimp. To prepare frozen shrimp, first, thaw them in the fridge overnight. If you need them quicker, place the shrimp in a sealed bag and submerge it in cold water for about 15-20 minutes. Once thawed, rinse them under cold water and pat dry before marinating. Several sides pair well with Honey Garlic Shrimp Skewers. Try serving them with: - Steamed rice or quinoa for a filling base. - Grilled vegetables like zucchini or bell peppers for a colorful plate. - A fresh salad with mixed greens and a light vinaigrette for crunch. - Garlic bread to soak up any extra sauce. Yes, you can make Honey Garlic Shrimp Skewers in the oven. Preheat your oven to 400°F (200°C). Place the skewers on a baking sheet lined with foil. Bake for about 8-10 minutes, flipping halfway through. The shrimp should be pink and opaque when done. This method is perfect if you don’t have a grill. For more details, check the [Full Recipe]. This blog post covers all you need for perfect Honey Garlic Shrimp Skewers. You learned about the key ingredients, including shrimp, honey, and garlic. I shared step-by-step grilling instructions and useful tips for a better cook. Plus, I offered variations for different tastes and storage advice for leftovers. Now you can make delicious skewers with confidence. Enjoy trying new flavors and impressing your friends and family with this recipe!](https://dailydishly.com/wp-content/uploads/2025/07/c236e5ff-bf7a-4bb5-97d9-fa918dc47393-768x768.webp)