Garlic Butter Herbed Carrots Flavorful Side Dish

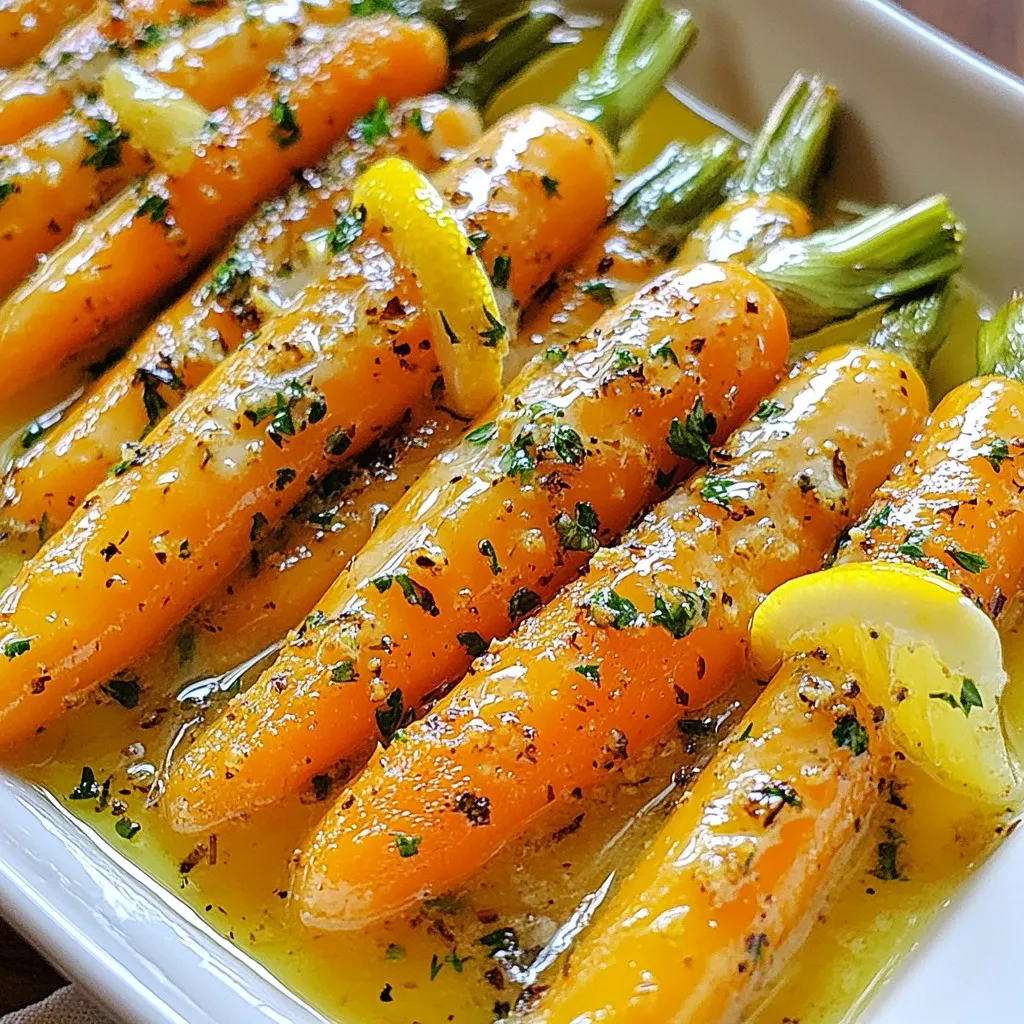
Looking for a side dish that packs flavor without the fuss? Try these Garlic Butter Herbed Carrots! This easy recipe turns baby carrots into a delightful treat, coated in rich garlic butter and fresh herbs. With just a few simple ingredients, you’ll impress your family and friends. Let’s dive into how to make this delicious dish that elevates any meal!
Why I Love This Recipe
- Delicious Flavor Combination: The rich garlic butter combined with fresh herbs and a hint of lemon creates a mouthwatering taste that elevates the carrots to a new level.
- Quick and Easy: This recipe is perfect for busy weeknights, taking only 20 minutes from start to finish, making it a go-to side dish.
- Healthy and Colorful: With baby carrots being naturally sweet and packed with nutrients, this dish adds a vibrant touch to any meal while being good for you.
- Customizable: You can easily adjust the herbs and seasonings to suit your taste preferences, making it a versatile recipe for different occasions.
Ingredients
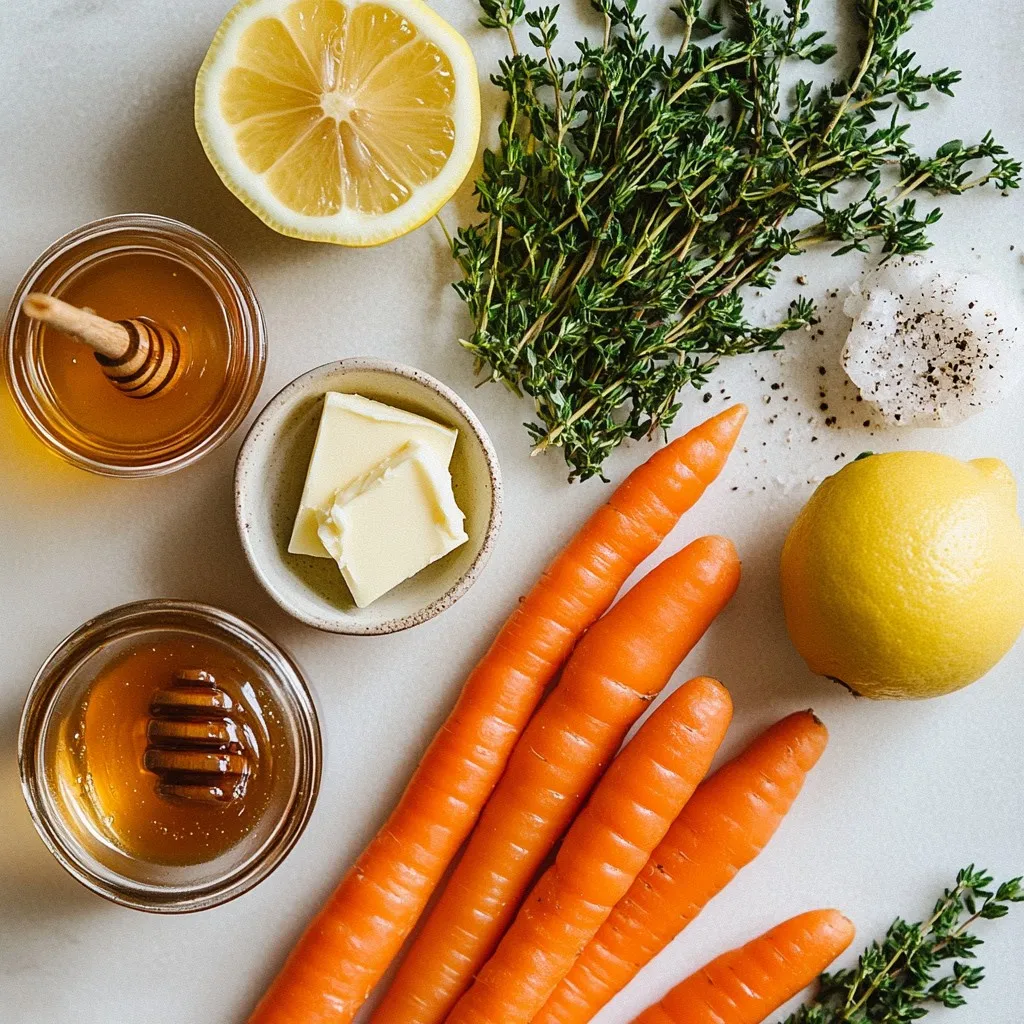
To make Garlic Butter Herbed Carrots, you will need a few simple ingredients. Each one plays a key role in the dish’s flavor. Here is the list of ingredients:
– 1 lb baby carrots, peeled
– 4 tablespoons unsalted butter
– 4 cloves garlic, minced
– 1 tablespoon fresh thyme leaves
– 1 tablespoon fresh parsley, chopped
– 1 teaspoon honey
– Salt and pepper to taste
– Zest of 1 lemon
These ingredients blend together to create a sweet and savory taste. Baby carrots are tender and sweet, while garlic adds depth. Fresh herbs bring brightness, and lemon zest gives a nice kick. This mix makes for a tasty side dish that pairs well with many meals.
Using unsalted butter allows you to control the saltiness. Honey adds a subtle sweetness, which balances the garlic. Fresh thyme and parsley are great for adding herbal notes.
Make sure to use fresh ingredients whenever possible. They will enhance the overall flavor of your Garlic Butter Herbed Carrots. Enjoy the process of cooking with these great ingredients!

Step-by-Step Instructions
Preparation of Carrots
Start by washing the baby carrots under cool water. Use a peeler to remove their skins. If you have larger carrots, cut them into uniform sticks. This helps them cook evenly.
Boiling Carrots
Next, fill a large pot with water and add salt. Bring the salted water to a boil. Once boiling, add the baby carrots. Cook them for about 5 to 7 minutes. You want them tender but still crisp. After cooking, drain the carrots and set them aside.
Making Garlic Butter
Now, let’s make the garlic butter. In a large skillet, melt the unsalted butter over medium heat. Add the minced garlic and sauté it for 1 to 2 minutes. Watch closely to avoid burning the garlic.
Combining Ingredients
In the skillet, add the cooked carrots. Toss them gently in the garlic butter. This coats them well. Then, sprinkle in the fresh thyme and parsley. Drizzle in the honey and season with salt and pepper. Mix everything well. Zest the lemon over the mixture for bright flavor.
Sautéing and Serving
Continue to sauté the carrots in the garlic butter for another 2 to 3 minutes. Stir occasionally for even heating. Once the carrots are nicely coated and warm, remove them from heat. Serve them right away for the best taste.
Tips & Tricks
Perfecting the Garlic Butter
To make great garlic butter, I focus on two things: not burning the garlic and balancing the herbs.
– Preventing garlic from burning: I always use medium heat for the butter. Garlic cooks fast, so I stir it often. If it turns too dark, it can taste bitter. You want it golden, not brown.
– Adjusting flavors with herbs: Fresh herbs bring life to your dish. I love using thyme and parsley, but feel free to mix them up. If you like basil or dill, those work too! Just chop them finely and add them at the end.
Carrot Preparation Tips
Choosing and prepping your carrots can change the dish’s taste and look.
– Choosing the right carrots: Baby carrots are sweet and tender. If you use larger ones, pick firm, bright carrots. They should feel heavy for their size. Freshness matters!
– Cooking techniques for different types of carrots: For baby carrots, boiling works great. For larger carrots, cut them into sticks. This helps them cook evenly. You can also roast them for a nice caramelized flavor.
Enhancing Flavor
Want to add more excitement to your dish? Here are some ideas.
– Using alternative herbs: If you want a different twist, swap the thyme for oregano or tarragon. Each herb gives a unique taste. Experiment until you find your favorite!
– Adding spices for extra flavor: A pinch of chili flakes can add heat. You can also try garlic powder for more depth. Just remember to start small; you can always add more!
Pro Tips
- Uniform Size: Ensure that all carrots are cut to the same size for even cooking.
- Butter Temperature: Use room temperature butter for easier melting and better incorporation with garlic.
- Don’t Overcook: Keep an eye on the carrots while boiling; they should be tender yet still have a slight crunch.
- Fresh Herbs: For the best flavor, use fresh herbs rather than dried ones, and add them at the end to retain their vibrant taste.

Variations
Alternative Ingredients
You can change the butter type in this recipe. Try olive oil for a lighter taste. It adds a unique flavor and is a great option for health. You can also add other veggies. Peas or green beans pair well with the carrots. They add color and crunch, making the dish even more fun.
Flavor Enhancements
To make your dish even better, experiment with herbs and spices. Rosemary or dill can give new tastes. You can also swap honey for maple syrup. It will add a sweet twist that makes the dish stand out.
Cooking Methods
You can cook these carrots in different ways. Use a skillet for a quick dish. It gives the carrots a nice, crispy finish. Oven roasting is another option. It brings out the natural sweetness of the carrots. You can also use cilantro or dill instead of thyme and parsley for a fresh twist. These herbs change the flavor while keeping it delicious.
Storage Info
Storing Leftovers
To keep your Garlic Butter Herbed Carrots fresh, place them in an airtight container. This method helps lock in flavor and moisture. Store the container in the fridge. They can last up to four days in the refrigerator. For longer storage, you can freeze them. First, let the carrots cool completely. Next, place them in a freezer-safe bag or container. Label it with the date. Frozen carrots can last for up to three months.
Reheating Tips
When you are ready to enjoy leftovers, reheat them gently. The best method is using a skillet over low heat. Add a little butter to prevent sticking. Stir occasionally until heated through. This way, you keep the great flavor intact. Avoid microwaving, as it can make the carrots soggy. If you must use a microwave, cover them with a damp paper towel to help keep moisture.
Shelf Life
Garlic Butter Herbed Carrots can last about four days in the fridge. After that, they may lose flavor and texture. Always check for signs of spoilage. If they smell off or look slimy, it’s best to toss them. Freshness is key to enjoying this tasty side dish. Always trust your senses when it comes to food safety!
FAQs
How do I best prepare baby carrots?
To prepare baby carrots, wash and peel them well. If you have larger carrots, cut them into sticks. This helps them cook evenly. Make sure to keep them similar in size for best results.
Can I use frozen carrots for this recipe?
Yes, you can use frozen carrots. They are quick and easy. Just remember to thaw them first. You may need to adjust the cooking time since frozen carrots can cook faster.
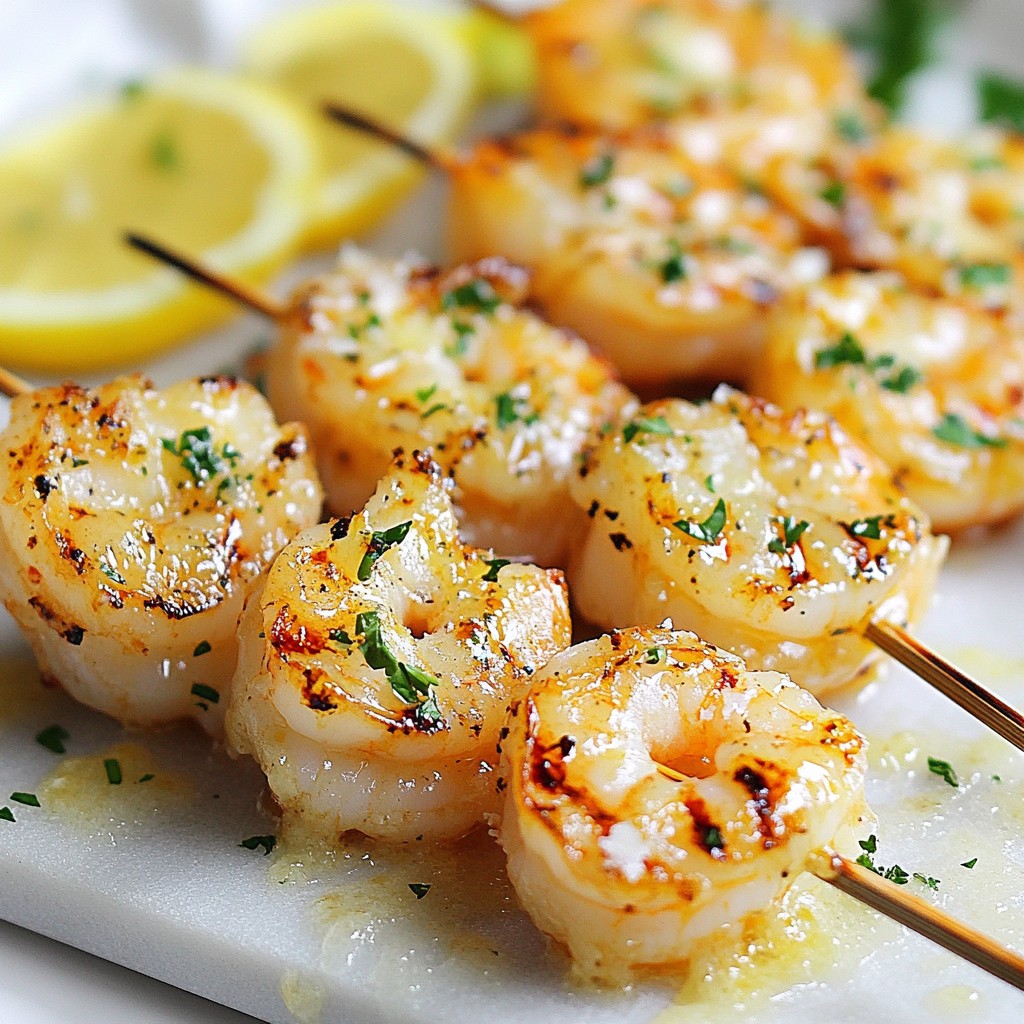
What can I serve with Garlic Butter Herbed Carrots?
Garlic Butter Herbed Carrots pair well with many dishes. They go great with roasted chicken or grilled fish. You can also serve them with rice or quinoa for a complete meal.
How can I make this recipe vegan-friendly?
To make this dish vegan, swap the butter for olive oil or vegan butter. You can also replace honey with maple syrup or agave nectar. This keeps the flavor while making it plant-based.
Can I use dried herbs instead of fresh?
Yes, you can use dried herbs. However, use less since dried herbs are stronger. A good rule is to use one-third the amount of dried herbs compared to fresh. This keeps the flavor balanced.
Garlic Butter Herbed Carrots are a great and simple dish. We covered ingredients, preparation, and tips to make them shine. You can use fresh thyme and parsley for flavor. Remember to choose the best carrots for the best results. Feel free to experiment with herbs and spices. Store leftovers properly to enjoy them later. With these steps and variations, you’ll impress everyone at your table. Enjoy making your Garlic Butter Herbed Carrots next tim

Garlic Butter Herbed Carrots
Ingredients
- 1 lb baby carrots, peeled
- 4 tablespoons unsalted butter
- 4 cloves garlic, minced
- 1 tablespoon fresh thyme leaves
- 1 tablespoon fresh parsley, chopped
- 1 teaspoon honey
- to taste salt and pepper
- 1 zest lemon
Instructions
- Preparation: Start by washing and peeling the baby carrots. If using larger carrots, cut them into uniform sticks.
- Boil Carrots: In a large pot, bring salted water to a boil. Add the baby carrots and cook for about 5-7 minutes, or until they are tender but still crisp. Drain the carrots and set aside.
- Make Garlic Butter: In a large skillet over medium heat, melt the unsalted butter. Add the minced garlic and sauté for 1-2 minutes, until fragrant and lightly golden—be careful not to burn it.
- Combine Ingredients: In the skillet with the garlic butter, add the cooked carrots and toss them gently to coat in the garlic butter.
- Add Herbs and Seasoning: Sprinkle in the fresh thyme, parsley, and honey. Season to taste with salt and pepper, and mix well. Add lemon zest for a bright flavor kick.
- Sauté: Continue to sauté the carrots in the garlic butter for another 2-3 minutes, stirring occasionally to ensure even cooking.
- Serve: Once the carrots are nicely coated and heated through, remove from heat and serve immediately.


![To make a tasty Roasted Red Pepper Quinoa Salad, gather these ingredients: - 1 cup quinoa, rinsed - 2 large red bell peppers - 1/2 cup cherry tomatoes, halved - 1/4 cup red onion, finely chopped - 1/2 cup cucumber, diced - 1/4 cup feta cheese, crumbled (optional) - 3 tablespoons olive oil - 2 tablespoons balsamic vinegar - 1 teaspoon garlic powder - Salt and pepper to taste - Fresh parsley, chopped for garnish This salad is not just delicious; it’s healthy too. Here’s why each ingredient matters: - Quinoa: A great source of protein and fiber. It helps keep you full and satisfied. - Red bell peppers: High in vitamins A and C, these add color and crunch. They also support your immune system. - Cherry tomatoes: Packed with antioxidants, they boost heart health and add sweetness. - Red onion: Contains quercetin, which may help lower blood pressure and cholesterol. - Cucumber: Hydrating and low in calories, cucumbers make your salad light and fresh. - Feta cheese: Adds creaminess and flavor; it’s a source of calcium. - Olive oil: A source of healthy fats, it’s good for your heart. - Balsamic vinegar: Adds tanginess and may help regulate blood sugar levels. - Garlic powder: Great for flavor, it also has health benefits like boosting your immune system. - Fresh parsley: Rich in vitamins K and C, it also freshens your breath. Fresh veggies make the salad shine. Here are some tips: - Red bell peppers: Look for bright colors and firm skin. Avoid soft spots. - Cherry tomatoes: Choose shiny, plump tomatoes. They should smell sweet. - Cucumber: Pick cucumbers that feel firm and are dark green. - Red onion: Look for heavy onions with smooth skin. Avoid any that feel soft or have dark spots. - Fresh parsley: Choose parsley that is bright green and crisp. Avoid yellow or wilting leaves. When you use fresh ingredients, your Roasted Red Pepper Quinoa Salad will taste amazing. Don't forget to check the [Full Recipe] for all the steps! To make the quinoa, start by rinsing one cup under cold water. This helps remove any bitter taste. In a medium saucepan, mix the rinsed quinoa with two cups of water. Bring it to a boil over high heat. Once it boils, lower the heat to a simmer. Cover the pot and let it cook for about 15 minutes. The water should absorb fully. After that, fluff the quinoa with a fork and let it cool. This fluffy base gives the salad its nice texture. Next, we need to roast the red peppers. Preheat your oven to 425°F (220°C). Cut the peppers in half and remove the seeds. Place them skin-side up on a baking sheet. Roast them for about 25 minutes. You want the skins to be blistered and slightly charred. Once roasted, take them out and let them cool. After cooling, peel off the skin and chop the peppers into bite-sized pieces. This smoky flavor adds depth to our salad. Now it’s time to bring everything together. In a large mixing bowl, combine the cooled quinoa, chopped roasted peppers, halved cherry tomatoes, diced cucumber, and finely chopped red onion. To make the dressing, whisk together three tablespoons of olive oil, two tablespoons of balsamic vinegar, one teaspoon of garlic powder, and salt and pepper to taste in a small bowl. Pour this dressing over the salad mixture. Toss gently to combine everything well. If you like, add some crumbled feta cheese for extra creaminess. Finally, garnish with fresh parsley before serving. You can find the full recipe here. To get the best texture for your quinoa, rinse it well. This step removes any bitterness. Use a fine mesh strainer and run cold water over the quinoa for about a minute. After rinsing, cook it with a 2:1 water-to-quinoa ratio. Bring it to a boil, then lower the heat and cover it. Let it simmer for 15 minutes. When done, fluff it with a fork. This keeps the grains separate and light. Use fresh herbs to boost the flavor of your salad. Fresh parsley adds brightness. You can also try basil or cilantro for a twist. For extra flavor, add spices like cumin or smoked paprika. These spices will give depth and warmth to your dish. Just a pinch can make a big difference. Mix them into your dressing or sprinkle them on top before serving. A beautiful presentation makes your salad more inviting. Use a large, shallow bowl to showcase the colors. Arrange the ingredients in sections for a vibrant look. You can also serve it in individual bowls for a personal touch. Garnish with extra parsley or a sprinkle of feta on top. Drizzle a little olive oil or balsamic vinegar just before serving to add shine. Check out the Full Recipe for more serving ideas! {{image_2}} To make this salad vegan, skip the feta cheese. You can add nuts or seeds for creaminess. Toasted sunflower seeds or sliced almonds work well. They add crunch and flavor without dairy. You can also swap balsamic vinegar for a splash of lemon juice. This keeps the salad bright and fresh. Good news! Quinoa is naturally gluten-free. This salad is a great choice for those with gluten issues. Just ensure that all your other ingredients are also gluten-free. Check labels on dressings and canned items. You can enjoy this dish without worry. Want to boost the protein? You have options! Chickpeas are a great choice. They add fiber and taste. Just rinse and toss them in. Grilled chicken is another option. Cook it simply with salt and pepper, then slice it up. This makes the salad filling and tasty. Feel free to mix and match proteins based on your needs. For the full recipe, check out the details above. To keep your roasted red pepper quinoa salad fresh, store it in an airtight container. This will help lock in flavor and moisture. If you have extra dressing, store it separately. This way, the salad won’t get soggy. Place the container in the fridge right away. You can eat this salad cold, but if you prefer it warm, reheat it gently. Use the microwave for quick warming. Heat for 30 seconds, then stir. Check if it’s warm enough. You can also use a skillet. Heat on low for a few minutes, stirring often. This salad stays fresh in the fridge for about three days. After that, the veggies may lose their crunch, and the flavors might fade. Always check for any strange smells or changes in color before eating. If you see any signs of spoilage, it’s best to toss it out. Enjoy your meal while it's fresh! For the complete recipe, see the [Full Recipe]. Yes, you can make this salad ahead of time. I often prepare it in the morning for lunch later. The flavors blend well after sitting for a few hours. Just keep it in the fridge. If you want, hold off on adding the dressing until you're ready to eat. This keeps everything fresh and crisp. If you need a substitute for quinoa, try brown rice or farro. Both add great texture. You can also use couscous or bulgur for a quick cook time. Each option gives a unique taste and feel. Just make sure to adjust the cooking time based on what you choose. To adjust spice levels, use less garlic powder or add more veggies. If you like heat, try adding red pepper flakes or diced jalapeños. For a milder taste, skip the feta cheese. Taste as you go, so you get it just right for you. This blog post covered how to create a tasty salad. We discussed each ingredient, their benefits, and how to choose fresh veggies. You learned clear steps to prepare quinoa, roast peppers, and mix your salad well. We shared tips for perfect texture, flavor boosts, and neat serving ideas. You can also explore vegan or gluten-free options and add proteins. Lastly, proper storage keeps your leftovers fresh. Use this guide to enjoy healthy salads any time!](https://dailydishly.com/wp-content/uploads/2025/06/1f28db07-8093-4cb7-8796-796da85cb13a-768x768.webp)