Garlic Butter Potato Wedges Crispy and Flavorful Treat

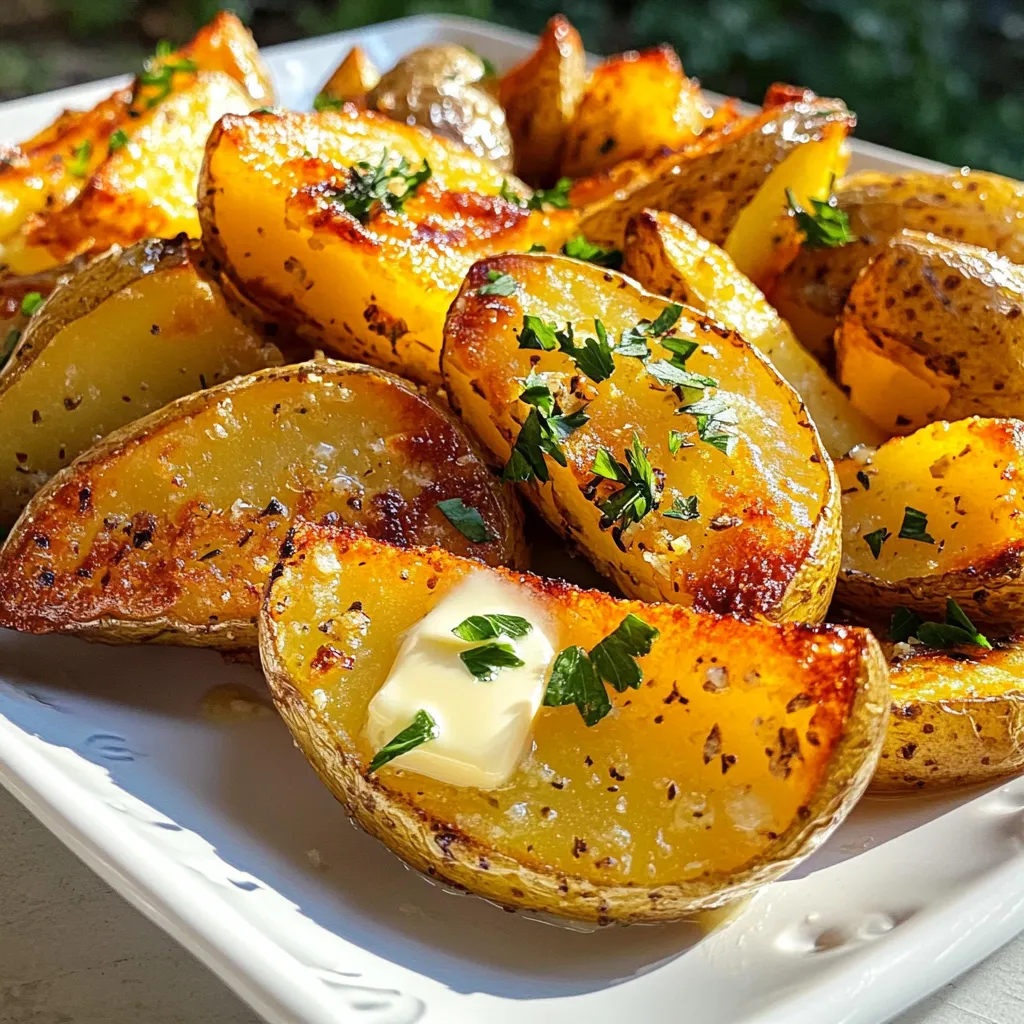
If you’re craving a crispy and flavorful snack, you’ll love these Garlic Butter Potato Wedges! Golden brown and bursting with rich garlic flavor, they make the perfect side or stand-alone treat. With just a few simple ingredients and easy steps, you can whip up a delicious batch in no time. Let’s dive into the tasty details and get started on this delightful recipe!
Ingredients
List of Ingredients
– 4 large russet potatoes
– 1/2 cup unsalted butter
– 6 cloves garlic
– 1 teaspoon dried rosemary
– 1 teaspoon dried thyme
– 1/2 teaspoon smoked paprika
– Salt and pepper
– Fresh parsley for garnish
Equipment Needed
– Baking sheet
– Parchment paper
– Mixing bowl
– Knife and cutting board
When I make garlic butter potato wedges, I start with these simple ingredients. Russet potatoes are my top choice. They have a nice texture that turns crispy when cooked. I use unsalted butter to control the saltiness. Fresh minced garlic adds a rich flavor. Dried herbs like rosemary and thyme give depth. Smoked paprika brings a hint of warmth. I always add salt and pepper to taste. Lastly, fresh parsley brightens up the dish.
For equipment, a baking sheet is key. Lining it with parchment paper helps with cleanup and prevents sticking. A mixing bowl is perfect for combining the butter and spices. A good knife and cutting board make it easy to slice the potatoes into wedges.
With these ingredients and tools, you are ready to create a tasty treat that everyone will love.
Step-by-Step Instructions
Prepping the Potatoes
– Wash and scrub the potatoes. This removes dirt and keeps them clean.
– Cut the potatoes into wedges. Aim for about 8 wedges per potato. This size helps them cook evenly.
Preparing the Garlic Butter Mixture
– In a small bowl, combine melted butter and minced garlic.
– Add dried rosemary, dried thyme, smoked paprika, salt, and pepper.
– Mix until everything blends well. You want a smooth garlic butter sauce.
Coating and Roasting the Wedges
– Toss the potato wedges with the garlic butter mixture. Make sure each wedge is coated.
– Spread the wedges on a baking sheet in a single layer. Don’t crowd them! This helps them get crispy.
– Roast in the oven at 425°F (220°C) for 30-35 minutes. Flip them halfway through for even cooking.
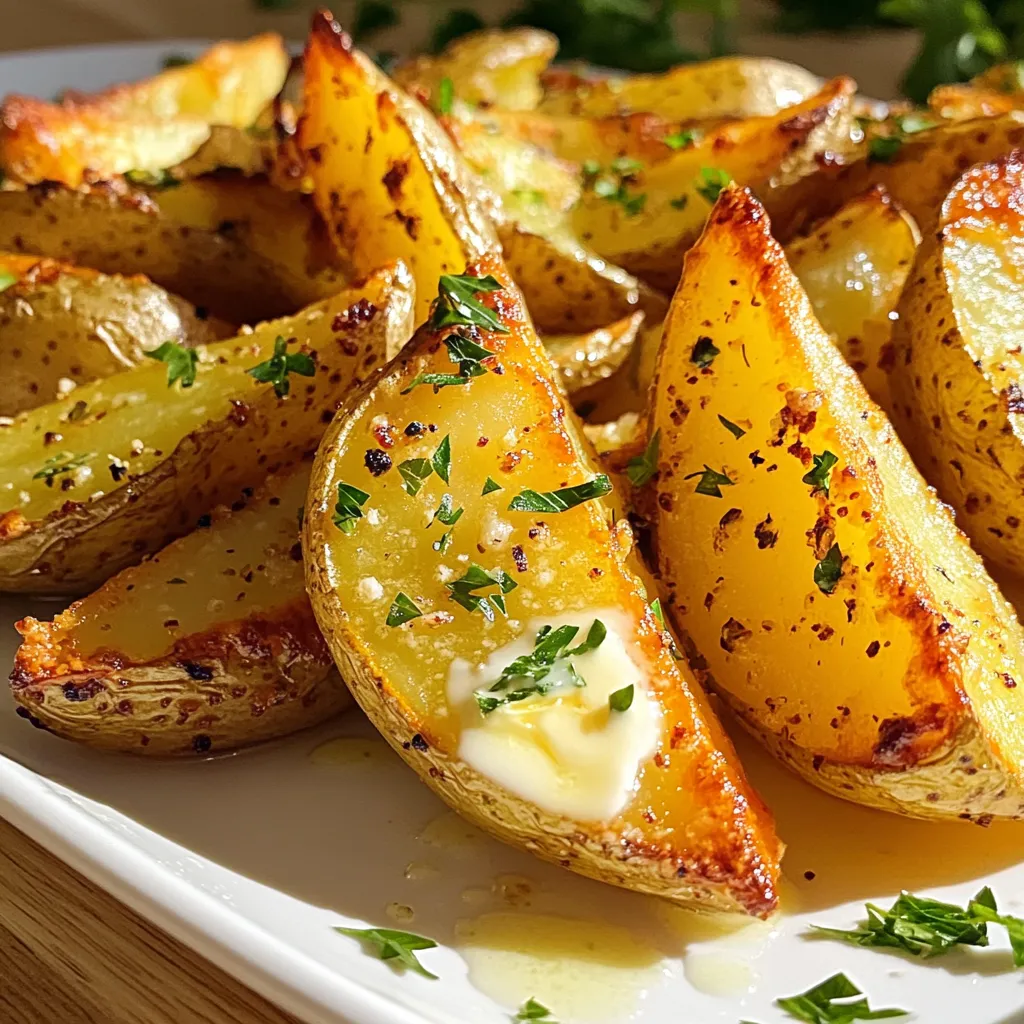
– Look for a golden brown color. That’s when they are done!
Tips & Tricks
Achieving Perfect Crispiness
To get crispy potato wedges, space them well on the baking sheet. If they touch, they steam and won’t crisp up. Keep them in a single layer. Flip the wedges halfway through cooking. This helps all sides get golden and crispy.
Flavor Enhancements
Want more taste? Try adding other seasonings. Consider garlic powder, onion powder, or even a pinch of chili powder. Fresh garlic packs a punch, but minced garlic is easy. If using fresh, crush it for better flavor.
Serving Suggestions
Dipping sauces can take your wedges to the next level. Try garlic aioli or creamy ranch for a tasty combo. For a fun presentation, stack the wedges on a platter and sprinkle with parsley. Add a small bowl of sauce for a nice touch.

Variations
Different Seasonings to Try
You can easily change the flavor of your garlic butter potato wedges. One great idea is to add parmesan cheese. This will give your wedges a rich and cheesy taste. Just sprinkle some grated parmesan over the top before roasting. It melts and creates a delicious crust.
If you like heat, try cayenne pepper. Just a pinch can make your wedges spicy and exciting. Mix it in with the garlic butter before tossing the potatoes. This adds a nice kick that pairs well with the garlic.
Alternative Cooking Methods
You don’t have to stick to the oven. An air fryer is a fantastic option for garlic butter potato wedges. Preheat your air fryer to 400°F (200°C). Toss the wedges with the garlic butter as before. Place them in the air fryer basket in a single layer. Cook for about 20-25 minutes, shaking halfway through. You’ll end up with crispy, golden wedges in less time!
Grilling is another fun choice, especially in summer. Preheat your grill and use a grill basket or foil. Coat the wedges in garlic butter and place them on the grill. Cook for 15-20 minutes, turning often. Grill marks add a lovely flavor and look to your wedges. Enjoy experimenting with these methods!
Storage Info
Storing Leftovers
To store your garlic butter potato wedges, place them in an airtight container. Make sure they are cooled completely before sealing. This helps to keep them fresh. You can store them in the refrigerator for up to 3 days. After that, they may lose their flavor and texture.
Reheating Tips
When reheating leftover wedges, the best method is to use an oven or an air fryer. Preheat the oven to 400°F (200°C) and spread the wedges on a baking sheet. Heat for about 10-15 minutes. If you use an air fryer, cook at 350°F (175°C) for 5-7 minutes. This keeps them crispy. Avoid microwaving, as it can make them soggy. For extra crispiness, spray a little cooking oil on them before reheating.
FAQs
How long do garlic butter potato wedges last in the fridge?
Garlic butter potato wedges last about 3 to 5 days in the fridge. Store them in an airtight container. This keeps them fresh and tasty. When you’re ready to eat, just reheat them in the oven. This warms them and helps them regain some crispiness.
Can I use a different type of potato?
Yes, you can use many types of potatoes. Here are some great options:
– Yukon Gold potatoes for a creamy inside
– Sweet potatoes for a hint of sweetness
– Red potatoes for a waxy texture
Each type brings a unique flavor and texture. Feel free to experiment!
What can I serve with garlic butter potato wedges?
Garlic butter potato wedges pair well with many dishes. Here are some ideas:
– Grilled chicken or steak for a hearty meal
– Burgers for a fun backyard cookout
– A fresh salad for a lighter option
– Dipping sauces like garlic aioli or creamy ranch
These pairings will make your meal even more delicious!
In this article, we covered how to make delicious garlic butter potato wedges. You learned the right ingredients and equipment needed. I shared step-by-step instructions for prepping, coating, and roasting the wedges. Tips on getting them crispy and flavorful helped enhance your dish. You can also explore variations and storage options.
These potato wedges are a tasty side dish. They complement many meals and are easy to make. Enjoy creating your own version and make them a favorite in your kitchen!


![- 12 mini bell peppers (assorted colors) - 1 cup cooked quinoa - 1 cup black beans, rinsed and drained - 1 cup corn (fresh, frozen, or canned) - 1/2 cup diced tomatoes (fresh or canned) - 1 cup shredded cheese (cheddar or pepper jack) The mini bell peppers are the stars here. Their sweet crunch makes a great bite. They come in many colors, adding fun to your dish. Quinoa adds protein and a nice texture. Black beans bring fiber and heartiness. Corn adds sweetness and color, while diced tomatoes add moisture and flavor. Finally, shredded cheese melts into a gooey topping that ties everything together. - 1 teaspoon cumin - 1 teaspoon smoked paprika - 1 teaspoon garlic powder - 1/2 teaspoon onion powder - Salt and pepper to taste Seasonings bring life to your dish. Cumin adds warmth and earthiness. Smoked paprika gives a touch of smokiness. Garlic powder adds depth, while onion powder enhances flavor. Salt and pepper balance everything out. This blend will make your stuffed mini bell peppers burst with flavor. - Fresh cilantro, chopped (for garnish) - 1 tablespoon olive oil Garnishes make your dish pretty and fresh. Fresh cilantro adds a pop of color and brightness. Olive oil adds richness and ties the flavors together. Together, they make your stuffed mini bell peppers look and taste amazing. You can find the full recipe [here]. 1. Preheat the oven to 375°F (190°C). This step gets your oven ready for baking. 2. Cut the tops off the mini bell peppers. Use a sharp knife for a clean cut. 3. Remove the seeds and any white parts inside the peppers. This helps reduce bitterness. 1. In a large mixing bowl, combine the cooked quinoa, black beans, corn, and diced tomatoes. 2. Add half a cup of shredded cheese to the mix. This adds creaminess and flavor. 3. Stir in the cumin, smoked paprika, garlic powder, onion powder, salt, and pepper. Mix well until everything is combined. 4. Drizzle one tablespoon of olive oil over the filling and stir again. This keeps it moist. 1. Carefully fill each mini bell pepper with the quinoa mixture. Press down gently to pack it in. 2. Arrange the stuffed peppers upright in a baking dish. If they tip over, use crumpled aluminum foil to help them stand. 3. Sprinkle the rest of the cheese on top of the stuffed peppers. This will melt into a tasty layer. 4. Cover the dish with aluminum foil. Bake for 20 minutes, then remove the foil. 5. Bake for an additional 10-15 minutes, until the peppers are tender and the cheese is bubbly and golden. 6. After baking, let them cool for a few minutes before garnishing with fresh cilantro. For the Full Recipe, refer to the ingredients and precise steps above. Enjoy! You can easily change this recipe. Try using ground turkey instead of black beans. It adds a nice flavor. For some heat, add chili powder or cayenne pepper. This can spice things up! If you want vegan options, skip the cheese and use tofu. For gluten-free, ensure you select gluten-free grains and beans. You have options for cooking. Baking is simple and gives a soft texture. You can also use an air fryer. Air frying makes them crispy and quick. If you want a smoky taste, grilling is great. Just watch the peppers so they don’t burn. Dips enhance the meal. Salsa and guacamole pair well with the stuffed peppers. You can serve them as appetizers or as a fun main dish. They are colorful and bright, making your table look good. For a complete meal, add a fresh salad on the side. You can find the full recipe above, so you have all the details you need. {{image_2}} You can make stuffed mini bell peppers in many tasty ways. For a Mexican twist, add taco seasoning to the filling. This adds spice and flavor. You can use ground meat or keep it vegetarian. For a Mediterranean style, mix in feta cheese and olives. This creates a salty and creamy taste. The tangy flavors work great with the sweet peppers. Both options are fun and easy to try. Feel free to play with the main ingredients. You can swap quinoa for rice if you prefer it. Rice adds a nice texture and flavor. If you want a change, use lentils instead of beans. Lentils cook fast and have a great taste. They also boost the protein in your dish. These swaps let you customize the recipe to your liking. Seasonal changes can inspire new stuffed pepper ideas. In summer, use fresh garden veggies like zucchini or corn. These add brightness and flavor. In winter, try heartier vegetables like mushrooms or kale. They give warmth and comfort to your meal. These seasonal changes keep things interesting and delicious. For the full recipe, check out the details above. After you enjoy your stuffed mini bell peppers, store the leftovers in the fridge. Place them in an airtight container. This keeps them fresh and tasty. If you have a lot, you can stack them, but make sure they are not too crowded. The best containers are glass or BPA-free plastic. They seal well and help keep the flavor. To freeze stuffed peppers, let them cool first. Then, wrap each pepper tightly in plastic wrap. After that, put them in a freezer-safe bag or container. This helps prevent freezer burn. When you want to eat them, take them out. Thaw them in the fridge overnight. You can reheat them in the oven or microwave. If using the oven, bake at 350°F (175°C) until warmed through. Stuffed mini bell peppers last about 3 to 5 days in the fridge. If frozen, they can last up to 3 months. For the best taste, eat them sooner rather than later. Always check for any signs of spoilage before eating. Keeping track of freshness helps you enjoy your meal at its best. Stuffed mini bell peppers are small, colorful peppers filled with a tasty mix. They are often stuffed with ingredients like quinoa, beans, corn, and cheese. After baking, they become soft and flavorful. The peppers add a nice crunch and sweetness. This dish is perfect as an appetizer or a main course. You can enjoy them warm or at room temperature. Yes, you can make stuffed mini bell peppers in advance. Prepare the filling and stuff the peppers. Then, cover and refrigerate them for up to a day. When ready to bake, take them out and let them sit for 15 minutes. This helps them cook evenly. You can also freeze them before baking. To do this, wrap them tightly and store them for up to three months. Thaw in the fridge overnight before baking. Stuffed mini bell peppers pair well with many sides. Here are a few tasty options: - A fresh green salad with vinaigrette - Guacamole and tortilla chips - Rice or quinoa pilaf - A light soup, like tomato or corn chowder - Sparkling water or a light white wine These sides complement the flavors of the stuffed peppers and make the meal more complete. You can tell stuffed mini bell peppers are done by checking a few signs. First, look for the peppers to be tender and slightly wrinkled. The cheese on top should be golden and bubbly. If you poke a pepper with a fork, it should feel soft but not mushy. Cooking time is usually 30 to 35 minutes at 375°F (190°C). If unsure, a food thermometer should read 165°F (74°C) inside the filling. Stuffed mini bell peppers are fun, tasty, and easy to make. We explored their main ingredients, seasonings, and garnishes. You learned how to prep, mix, and bake them perfectly. Plus, I shared great tips for customizing and serving your dish. Don’t forget about storing leftovers for later! Experiment with flavors and try different options. There’s so much you can do with this dish. Enjoy making stuffed peppers that please everyone at your table!](https://dailydishly.com/wp-content/uploads/2025/07/7be91d44-d02b-4978-8cdb-a2e2cd47e9c1-768x768.webp)
![For these grilled veggie skewers, you will need: - 1 large zucchini, sliced into thick rounds - 1 red bell pepper, cut into squares - 1 yellow bell pepper, cut into squares - 1 red onion, cut into chunks - 8 cherry tomatoes - 1 cup mushrooms, halved These vegetables bring color and flavor to your skewers. You can mix and match based on your taste. Try using eggplant or asparagus for a twist. The marinade adds zest and depth to the veggies. You will need: - 3 tablespoons olive oil - 2 teaspoons dried oregano - 1 teaspoon garlic powder - Salt and pepper to taste This simple mix enhances the natural flavors of the vegetables. Adjust the salt and pepper to fit your liking. Garnishes can make your skewers pop! Consider using: - Fresh parsley, chopped Adding parsley gives a fresh touch. It also adds a nice green color to the dish. You can also sprinkle feta cheese for a creamy bite. For the full recipe, check the Grilled Mediterranean Veggie Skewers. Start by gathering your veggies. Use a large bowl to combine: - 1 large zucchini, sliced into thick rounds - 1 red bell pepper, cut into squares - 1 yellow bell pepper, cut into squares - 1 red onion, cut into chunks - 8 cherry tomatoes - 1 cup mushrooms, halved Make sure to wash all your vegetables well. This keeps them fresh and clean. Cut them into even pieces. This helps them cook evenly on the grill. Next, we make the marinade. In a small bowl, whisk together: - 3 tablespoons olive oil - 2 teaspoons dried oregano - 1 teaspoon garlic powder - Salt and pepper to taste Mix until well combined. Pour this mixture over your veggies in the large bowl. Toss gently. Make sure every piece is coated. This will add great flavor to your skewers. Now it’s time to grill! First, preheat your grill to medium-high heat. While it heats, thread the marinated vegetables onto the skewers. Alternate between different types for a colorful look. Once the grill is hot, place the skewers on it. Grill for about 10-12 minutes. Turn the skewers occasionally. You want nice grill marks and tender veggies. When they are done, remove them from the grill. Let them cool slightly before serving. You can garnish with fresh parsley for an extra burst of flavor. For the full recipe, check out [Full Recipe]. Enjoy your grilled Mediterranean veggie skewers! To grill veggie skewers well, start with a clean grill. This helps prevent sticking. Preheat your grill to medium-high heat. This temperature cooks veggies evenly and keeps them crisp. Soak wooden skewers in water for at least 30 minutes. This step helps them not burn on the grill. When placing skewers on the grill, leave space between them. This promotes even heat flow. Keep a close eye on them. Turn the skewers every few minutes. This way, every side gets that nice grill mark. To get that perfect char, use high heat for a short time. Grill your skewers for about 10-12 minutes. Turn them often to avoid burning. The goal is tender veggies with those lovely grill lines. You want a bit of caramelization for extra flavor. Don’t forget to watch for the color change, too. When the veggies are brightly colored and tender, they are done. If you want a deeper char, leave them on a bit longer. Just be careful not to overcook them. Serve your grilled Mediterranean veggie skewers warm. They shine on their own, but pair nicely with dips. Try hummus or a yogurt sauce for added flavor. You can also serve them on a bed of fresh greens. This adds a nice crunch and vibrancy. For a fun twist, chop up leftovers and add them to salads. You can also use them in wraps or sandwiches. They keep well, making them a great meal prep option. For the full recipe, check out the details above. Enjoy your grilling! {{image_2}} You can swap in many other veggies for your skewers. Try using eggplant, asparagus, or even cauliflower. Each brings a unique taste and texture. For a sweeter note, add butternut squash or carrots. These flavors will shine when grilled. Don't be afraid to mix and match. The more colorful, the better! For a heartier meal, add protein to your skewers. Chicken or shrimp work well here. Cut them into bite-sized pieces for even cooking. You can marinate them just like the veggies. For a vegan option, try tofu or tempeh. They soak up flavors beautifully. Adding protein makes your skewers more filling and nutritious. While the olive oil and oregano mix is great, you can get creative. Try adding lemon juice or balsamic vinegar for extra zing. A bit of honey can bring a sweet touch. Experiment with spices like smoked paprika or cumin for warmth. Each marinade will change the flavor profile. Feel free to explore and find your favorite! Check out the Full Recipe for more details on creating the perfect skewers. After enjoying your Grilled Mediterranean Veggie Skewers, store leftovers in an airtight container. This keeps the flavors fresh. You can keep them in the fridge for three to four days. Make sure they cool down before sealing. Layer them with paper towels to absorb extra moisture. To reheat your skewers, use a skillet or grill. This helps maintain the charred flavor. Heat them on medium for about five minutes. Turn them gently to warm all sides. You can also use a microwave, but it may make them soft. If you choose the microwave, heat in short bursts to avoid overcooking. Freezing grilled skewers is a great option for meal prep. Let them cool completely first. Then, wrap each skewer in plastic wrap. Place the wrapped skewers in a freezer bag, removing as much air as possible. They can stay fresh for up to three months. To enjoy, thaw in the fridge overnight before reheating. Yes, you can use many types of vegetables. Try eggplant, asparagus, or even corn. Mixing colors and shapes makes your dish fun and tasty. Each vegetable adds its unique flavor. Experiment to find your favorites! Soak wooden skewers for at least 30 minutes. This helps prevent them from burning on the grill. If you forget to soak them, use metal skewers instead. They work great and need no soaking at all. Many sauces taste great with these skewers. Tzatziki sauce adds a cool, creamy bite. A balsamic glaze gives a sweet twist. You can also try a spicy harissa sauce for heat. Each sauce adds its own special touch to the dish. For the full recipe, check it out! Grilled Mediterranean Veggie Skewers are fun and easy to make. We looked at the best veggies, how to prepare them, and tasty marinades. I shared tips for grilling and great serving ideas. You can try different veggies and proteins to mix things up. Remember to store leftovers well so you can enjoy them later. With these guidelines, your grilling efforts will be a hit. Enjoy every bite and happy grilling!](https://dailydishly.com/wp-content/uploads/2025/07/4b70700e-9f85-4317-b9e4-a855a04e592b-768x768.webp)


