Garlic Butter Steak & Potatoes Skillet Delight

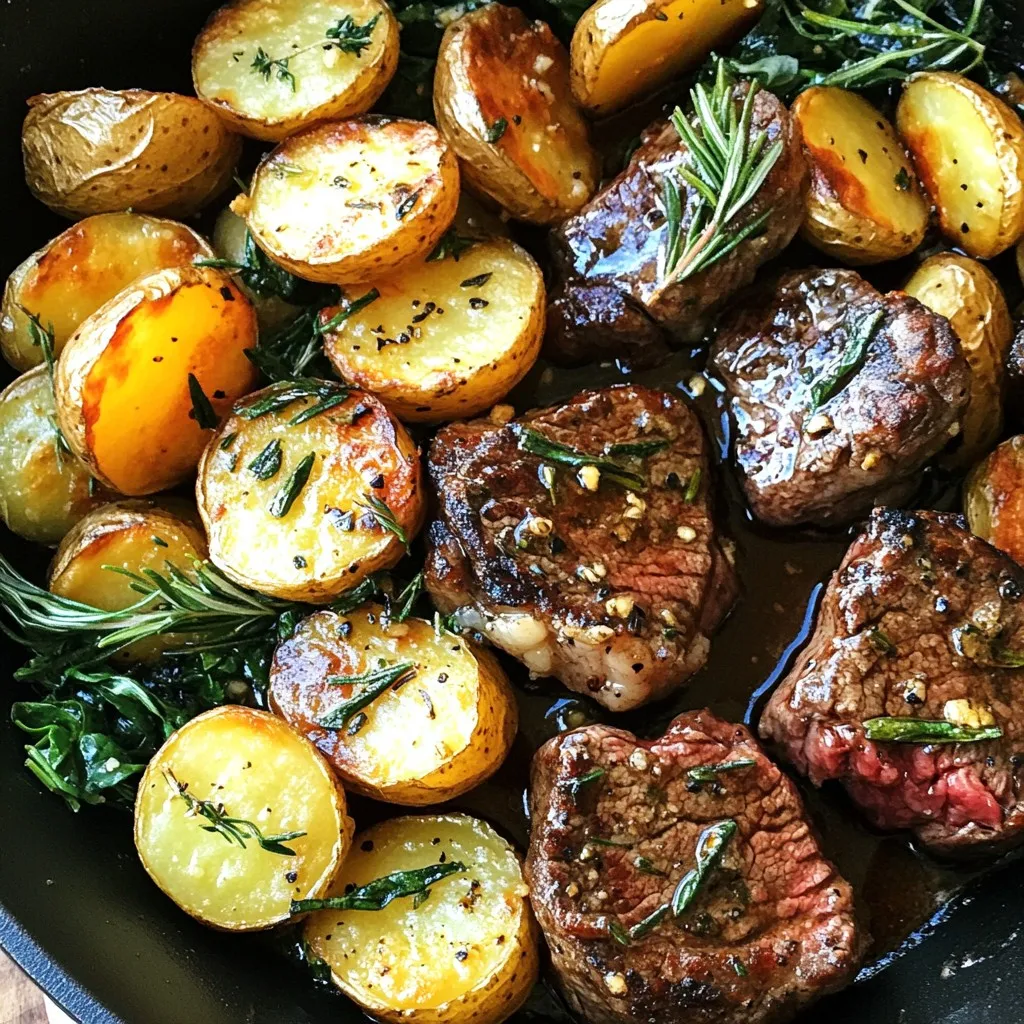
Do you want a meal that’s easy to make and tastes amazing? In this Garlic Butter Steak & Potatoes Skillet Delight, you’ll find juicy sirloin steak paired with crispy baby potatoes. With just a few fresh herbs and simple pantry staples, you can whip up a dinner that feels special. Let’s dive into how to create this mouthwatering dish step by step, so you can enjoy a delightfully tasty meal tonight!
Why I Love This Recipe
- Quick and Easy: This recipe can be prepared in just 30 minutes, making it perfect for a weeknight dinner.
- One-Pan Wonder: Cooking everything in one skillet means less cleanup, allowing you to enjoy your meal without the hassle.
- Flavorful Ingredients: The combination of garlic, butter, and fresh herbs elevates the dish, creating a rich and satisfying flavor.
- Customizable: You can easily add your favorite vegetables or adjust the seasonings to suit your taste preferences.
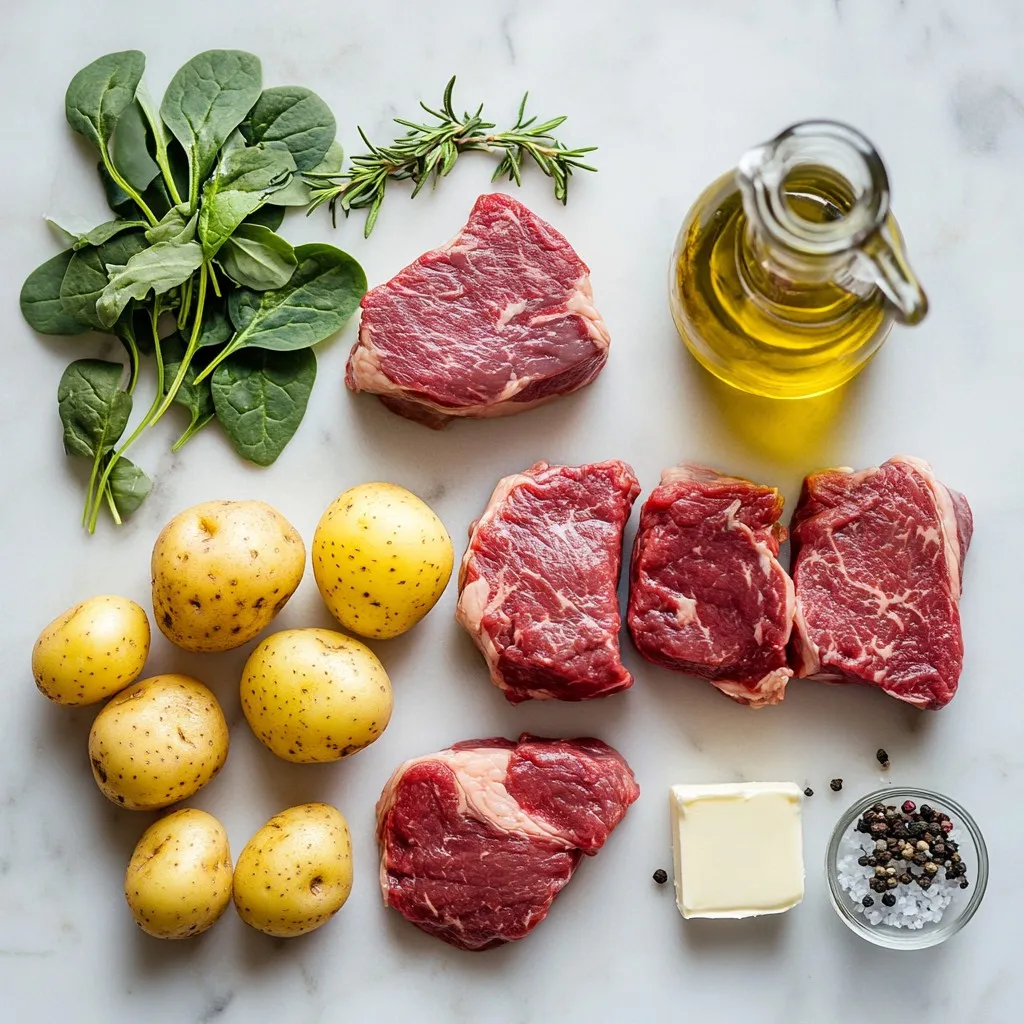
Ingredients
Main Ingredients
– 1 lb (450g) sirloin steak, cut into bite-sized pieces
– 1 lb (450g) baby potatoes, halved
– 4 tablespoons unsalted butter
– 4 cloves garlic, minced
– 1 teaspoon fresh thyme leaves
– 1 teaspoon fresh rosemary, chopped
– 2 cups baby spinach (optional for freshness)
Pantry Staples
– 1 tablespoon olive oil
– Salt and pepper
Recommended Tools
– Large skillet
– Pot for boiling
– Cooking spoon or spatula
When you gather your ingredients, remember that quality matters. Choose fresh herbs for the best flavor. I love using sirloin steak as it is tender and rich. Baby potatoes add a nice texture. The unsalted butter and garlic create a rich sauce that makes this dish special. Salt and pepper will enhance all the flavors, so do not skip them.
For tools, a large skillet is key for cooking. The pot is for boiling potatoes, and a cooking spoon or spatula will help you mix everything well. With these items ready, you can make a delightful Garlic Butter Steak & Potatoes Skillet.

Step-by-Step Instructions
Preparing the Potatoes
– Start by boiling the baby potatoes. Place them in a pot of salted water. Cook for 10-12 minutes until they are tender.
– Once cooked, drain the potatoes and set them aside. You want them ready for the next steps.
Cooking the Steak
– Heat olive oil in a large skillet over medium-high heat.
– When the oil is hot, add the sirloin steak pieces. Season them with salt and pepper.
– Sear for about 3-4 minutes until they turn brown. Cook to your liking.
– Once done, remove the steak from the skillet and set it aside.
Combining Ingredients
– In the same skillet, reduce the heat to medium. Add the boiled potatoes.
– Sauté them for 5-7 minutes until they become crispy on the edges.
– Push the potatoes to one side of the skillet. Add the butter to the other side.
– Let the butter melt, then add minced garlic, thyme, and rosemary. Cook until it smells great, about 1 minute.
– Stir the potatoes into the garlic butter mixture. Make sure they are well coated.
– Return the steak to the skillet and toss everything together.
– If you want, add baby spinach and stir until it wilts, about 1-2 minutes.
– Adjust the seasoning with more salt and pepper if needed.
– Remove from heat and let the dish rest for a few minutes before serving.
Tips & Tricks
Cooking Tips
To get that perfect steak doneness, start with a good cut. Sirloin steak works great here. Sear it on high heat for just 3-4 minutes. Check for a nice brown crust. Use a meat thermometer if you have one. Aim for 130°F for medium-rare. Let it rest after cooking; this keeps it juicy.
For crispy potatoes, boil them first. This softens them, making them easier to crisp. Drain well and sauté in hot olive oil. Cook them for 5-7 minutes until golden. Don’t crowd the skillet; this helps them crisp up nicely.
Flavor Enhancements
Want to boost the flavor? Add more herbs! Fresh parsley or oregano can brighten the dish. You can mix in some red pepper flakes for heat. Don’t be afraid to experiment with spices.
Customizing the garlic butter is easy, too. Try adding lemon juice for brightness. You can also mix in some grated cheese for a richer taste. Always taste as you go to find your perfect blend.
Serving Suggestions
For a rustic look, serve right from the skillet. This makes it feel warm and inviting. You can use a wooden spoon for serving. It adds to the charm of the dish.
Garnishing can elevate your meal. Add fresh thyme sprigs on top for color. A sprinkle of freshly cracked black pepper can also make it pop. A squeeze of lemon juice right before serving adds a nice touch, too.
Pro Tips
- Choose the Right Cut: Opt for sirloin or ribeye steak for a balance of flavor and tenderness. These cuts sear well and complement the garlic butter beautifully.
- Don’t Overcrowd the Skillet: If you’re making a larger batch, cook the steak in batches to ensure a good sear. Overcrowding can cause steaming instead of browning.
- Infuse More Flavor: For an extra layer of flavor, marinate the steak in olive oil, garlic, and herbs for at least an hour before cooking.
- Perfectly Crisp Potatoes: Ensure the potatoes are dried well after boiling to achieve a crispier texture when sautéing. Moisture can prevent them from browning.

Variations
Protein Options
You can switch out the sirloin steak for other meats. Here are some great choices:
– Ribeye steak for a richer flavor.
– Chicken breast for a lighter option.
– Pork tenderloin for a juicy bite.
If you want a vegetarian dish, try this option:
– Use firm tofu. Cut it into cubes and sauté until golden.
Different Vegetables
Seasonal vegetables can add fresh flavors. Here are some ideas:
– Swap baby potatoes for sweet potatoes.
– Try carrots or bell peppers for a sweet crunch.
Adding more greens is easy too:
– Toss in kale or Swiss chard for added nutrition.
– Stir in zucchini for a light touch.
Flavor Customizations
You can change up the flavors with sauces. Here are some fun ideas:
– Add a splash of soy sauce for a savory twist.
– Drizzle in balsamic vinegar for a sweet zing.
For a creamy texture, consider adding cheese:
– Sprinkle feta or goat cheese on top.
– Stir in cream cheese for a rich taste.
Storage Info
Storing Leftovers
To keep your Garlic Butter Steak & Potatoes Skillet fresh, follow these tips:
– Let the dish cool down to room temperature.
– Use an airtight container for storage.
– Store in the fridge for up to three days.
Reheating Tips
To enjoy your leftovers without losing flavor, try these methods:
– Use a skillet over medium heat. This keeps the meat juicy.
– You can also use a microwave. Heat in short bursts to avoid drying out.
– Aim for a temperature of 165°F (74°C) to ensure safety.
Freezing Instructions
If you want to freeze the dish, do this:
– Cool the meal completely before freezing.
– Use freezer-safe containers or bags. Remove as much air as possible.
– It lasts up to three months in the freezer.
For the best quality, thaw in the fridge overnight before reheating. This keeps the flavors intact and makes it easy to reheat.
FAQs
How to make Garlic Butter Steak & Potatoes Skillet?
To make this dish, start by boiling the halved baby potatoes in salted water. Cook them for about 10-12 minutes until they are tender. Once cooked, drain and set them aside.
In a large skillet, heat olive oil over medium-high heat. Add the steak pieces and season them with salt and pepper. Sear for about 3-4 minutes until they are browned. Remove the steak and set it aside.
Next, lower the heat to medium. Add the cooked potatoes to the skillet. Sauté them for about 5-7 minutes until they get crispy edges. Push the potatoes to one side of the skillet. Then, add butter to the other side. Let it melt, and then mix in the minced garlic, thyme, and rosemary. Cook until fragrant for about one minute.
Stir the potatoes into the garlic butter mix until well coated. Return the steak to the skillet and toss everything together. If you want, add baby spinach and stir until it wilts, about 1-2 minutes. Adjust seasoning if needed. Let the dish rest for a few minutes before serving.
What can I serve with this skillet dish?
This skillet dish pairs well with simple sides. You can serve it with:
– A fresh garden salad
– Steamed green beans
– Garlic bread
– Creamy coleslaw
– Roasted vegetables
These sides add color and balance to the meal.
Can I make this recipe in advance?
Yes, you can prep this dish ahead of time. You can boil the potatoes and cook the steak in advance. Store them in the fridge for up to two days. When you are ready to eat, reheat the steak and potatoes in a skillet. Add the garlic butter mixture and spinach just before serving to keep everything fresh and tasty.
This recipe for Garlic Butter Steak and Potatoes gives you a simple way to impress. Using sirloin steak, baby potatoes, and fresh herbs brings great flavors together. You learned key cooking tips for perfect doneness and how to make every bite crisp. Plus, we discussed tasty variations and how to store leftovers right.
Experimenting with different ingredients can make this dish your own. Enjoy making this skillet meal time and time agai

Garlic Butter Steak & Potatoes Skillet
Ingredients
- 1 lb sirloin steak, cut into bite-sized pieces
- 1 lb baby potatoes, halved
- 4 tablespoons unsalted butter
- 4 cloves garlic, minced
- 1 teaspoon fresh thyme leaves
- 1 teaspoon fresh rosemary, chopped
- to taste salt and pepper
- 2 cups baby spinach (optional for freshness)
- 1 tablespoon olive oil
Instructions
- Begin by boiling the halved baby potatoes in a pot of salted water for about 10-12 minutes, or until tender. Drain and set aside.
- In a large skillet, heat olive oil over medium-high heat. Once hot, add the steak pieces, seasoning with salt and pepper. Sear for about 3-4 minutes until browned and cooked to your desired doneness. Remove the steak from the skillet and set aside.
- In the same skillet, reduce the heat to medium and add the cooked potatoes. Sauté them for 5-7 minutes until they start to crisp up on edges.
- Push the potatoes to one side of the skillet. Add butter to the other side and let it melt. Then, add the minced garlic, thyme, and rosemary to the melted butter, cooking until fragrant (about 1 minute).
- Stir the potatoes into the garlic butter mix, ensuring they are well coated. Return the steak to the skillet and toss everything together to combine.
- If using, add the baby spinach and stir until wilted, about 1-2 minutes. Adjust seasoning with more salt and pepper if necessary.
- Remove from heat and let the dish rest for a few minutes before serving.


![To make Garlic Butter Shrimp and Asparagus, you need just a few simple ingredients. Each one adds flavor and texture to the dish. Here’s what you’ll need: - 1 pound large shrimp, peeled and deveined - 1 bunch asparagus, trimmed and cut into 2-inch pieces - 4 tablespoons unsalted butter - 4 cloves garlic, minced - 1 teaspoon red pepper flakes (optional) - Zest of 1 lemon - 2 tablespoons fresh lemon juice - Salt and pepper, to taste - Fresh parsley, chopped (for garnish) These ingredients come together to create a tasty weeknight meal. The shrimp provides protein, and asparagus adds crunch. The garlic and butter give it a rich flavor. Lemon zest and juice brighten the dish, while parsley adds a fresh touch. When you gather these ingredients, think about the freshness. Fresh shrimp and asparagus make a big difference. Use good quality butter for the best taste. You can find the full recipe in the section above. - Melt butter and sauté garlic. - Cook shrimp until pink. - Add asparagus and remaining butter. To start, I melt two tablespoons of butter in a large skillet over medium heat. Once the butter is hot, I add minced garlic. I sauté it for about one minute until it smells great. Next, I add the shrimp to the skillet in a single layer. I season them with salt, pepper, and red pepper flakes if I want some heat. I cook the shrimp for 2-3 minutes, flipping them halfway, until they turn pink. After the shrimp nearly cooks through, I push them to one side of the skillet. I then add asparagus to the other side. I add the last two tablespoons of butter to the asparagus. I stir it to coat the pieces in butter. I let it cook for 4-5 minutes until the asparagus is tender but still crisp. I stir occasionally to make sure everything cooks evenly. - Mix shrimp with asparagus. - Incorporate lemon zest and juice. - Adjust seasoning to taste. Once the shrimp and asparagus are both cooked, I mix them together in the skillet. I then add lemon zest and lemon juice for brightness. This step makes the dish pop with flavor. I toss everything to combine well and cook for another minute until heated through. Finally, I taste the dish and adjust the seasoning with more salt and pepper if needed. - Recommended heat levels. - Cooking times for optimal texture. For best results, I keep the heat at medium to cook the shrimp and asparagus evenly. Cooking shrimp takes about 2-3 minutes until it turns pink. For asparagus, I recommend around 4-5 minutes. This timing keeps the vegetables crisp-tender. If you follow these steps, your Garlic Butter Shrimp and Asparagus will be a tasty weeknight dish that everyone loves. You can find the Full Recipe for more details. To know when shrimp is done, look for a pink color. The shrimp should curl into a C shape. If it’s straight, it is overcooked. Aim for 2-3 minutes on each side. This keeps shrimp juicy and tender. Use a timer to avoid guesswork. For crisp-tender asparagus, cook for about 4-5 minutes. It should be bright green and still firm. Start with fresh asparagus. Trim the ends for better texture. You can snap them off using your hands. This method removes the tough part easily. Try adding fresh herbs like basil or thyme for extra taste. You can also sprinkle some lemon zest on top for brightness. Serve the dish on a colorful plate. Garnish with parsley for a pop of color. This makes your meal more appealing and fun to eat. For the full recipe, check the link above. {{image_2}} You can switch shrimp for chicken or tofu. Chicken gives a hearty feel. Tofu is great for a meatless meal. If using chicken, cut it into bite-sized pieces. Cook it for about 6-8 minutes until fully cooked. If using tofu, use firm tofu and cook it for about 5-7 minutes. This keeps it crispy and delicious. Feel free to add other veggies to your dish. Bell peppers and snap peas work well. They add color and crunch. You can also use mushrooms or zucchini. Just remember to adjust cooking times. For bell peppers, add them with the shrimp. Cook for about 3-4 minutes. For snap peas, toss them in with the asparagus. Cook for 2-3 minutes for a nice bite. Try adding different herbs or spices for a new flavor. Basil or thyme can give a nice twist. You can also add some lemon pepper for extra zing. Using flavored oils or butters can change the taste too. Garlic-infused oil adds depth, while lemon butter gives a fresh touch. Experimenting can make this dish exciting every time you cook it! For the complete recipe, check out the [Full Recipe]. To keep Garlic Butter Shrimp and Asparagus fresh, place leftovers in an airtight container. This helps lock in moisture and flavor. Store the dish in the fridge, where it will last for 2-3 days. If you want to enjoy it later, make sure to refrigerate it as soon as possible after cooking. You can freeze this dish, but keep in mind that shrimp can change texture. To freeze, place the cooled dish in a freezer-safe container. Be sure to remove as much air as possible. It will keep well for about 2-3 months. When you are ready to eat it, thaw it overnight in the fridge. When reheating your Garlic Butter Shrimp and Asparagus, I recommend these methods: - Microwave: Place it in a microwave-safe dish. Heat in short bursts, stirring in between, to avoid uneven cooking. - Stovetop: Heat in a skillet over low heat. Stir gently until warmed through. - Oven: Preheat the oven to 350°F. Place the dish in an oven-safe pan and cover with foil. Heat for about 15-20 minutes. These methods help keep your shrimp and asparagus tasty and enjoyable! Yes, you can use frozen shrimp. In fact, frozen shrimp can be just as good as fresh! To use frozen shrimp, you’ll want to thaw them first. Place them in the fridge overnight or run them under cold water for a quick thaw. After thawing, pat them dry. This helps the shrimp cook evenly and avoids excess water in your dish. Fresh shrimp should look moist and glossy. Look for a slight sheen on the shells. The flesh should be firm and not slimy. If you notice a strong fishy smell, it’s best to avoid that shrimp. Fresh shrimp should smell mild and sweet, like the ocean. You have many tasty options! Garlic Butter Shrimp and Asparagus pairs well with: - Rice - Quinoa - Pasta - Crusty bread You can also serve it with a fresh salad or steamed vegetables for a healthy side. Yes, this dish is perfect for meal prep. You can cook a big batch and store it in the fridge. Just keep the shrimp and asparagus in an airtight container. They will stay fresh for about three days. When you're ready to eat, reheat it in the microwave or on the stove. This dish also tastes great warm or at room temperature. For the full recipe, check out the details above! This blog post covered the essentials for making Garlic Butter Shrimp and Asparagus. You learned about the ingredients, step-by-step prep, and cooking tips. I provided variations to customize your dish and storage guidelines for leftovers. Remember, cooking shrimp is all about timing, and fresh ingredients make a big difference. I hope these tips help you create a meal that's tasty and memorable. Enjoy your cooking adventure!](https://dailydishly.com/wp-content/uploads/2025/06/c728854f-8c75-4a77-a1c9-2cca00683957-768x768.webp)
![- 4 large bell peppers - 2 cups cooked chicken, shredded - 1/2 cup buffalo sauce - 1/2 cup cream cheese - 1 cup shredded cheddar cheese - 1/2 cup celery, finely chopped - 1/4 cup green onions, sliced - Fresh parsley for garnish - Salt and pepper to taste The ingredients for Buffalo Chicken Stuffed Peppers are simple and fun to work with. Start with four large bell peppers. These can be any color you like. Next, use two cups of cooked chicken, shredded well. This can be leftover chicken or even rotisserie chicken for ease. Now, for the star of the show: the buffalo sauce. You need half a cup, but feel free to adjust it based on how spicy you want your dish. Then, add half a cup of cream cheese. This makes the filling creamy and rich. Next, grab a cup of shredded cheddar cheese. This cheese will melt beautifully and top off your stuffed peppers. For optional crunch and flavor, consider adding half a cup of finely chopped celery and a quarter cup of sliced green onions. These add freshness and texture to the filling. Finally, don't forget salt and pepper to taste. This enhances all the flavors. If you want to make your dish pop, garnish with fresh parsley before serving. For the full recipe, check out the [Full Recipe]. - Preheat the oven to 375°F (190°C). - Cut the tops off the bell peppers and remove the seeds and membranes. Set them aside. - In a large bowl, combine the shredded chicken with the buffalo sauce. - Add the softened cream cheese and 1 cup of shredded cheddar cheese. - Toss in the finely chopped celery and sliced green onions. - Mix until everything is well combined. Season with salt and pepper to taste. - Spoon the buffalo chicken mixture into each prepared bell pepper. Pack it in generously. - Place the stuffed peppers upright in a baking dish. Cover them with foil. - Bake in the preheated oven for 25 minutes. - After 25 minutes, remove the foil. Sprinkle the remaining cheddar cheese on top. - Bake for an additional 10-15 minutes until the cheese is bubbly and golden. - Let them cool for a few minutes before serving. - If you like, garnish with fresh parsley before serving. For the full recipe, check out the details above. Enjoy your meal! To make the perfect spicy filling, adjust the buffalo sauce. If you want more heat, add more sauce. For milder flavors, use less sauce. The right amount can make or break your dish! Also, think about cheese. You can use different types like mozzarella or pepper jack. They can change the flavor and spice level. Check the doneness of your peppers while cooking. They should be tender but not mushy. A fork can help test them. Covering the peppers with foil keeps them moist and helps cook evenly. After some time, you can remove the foil to let the cheese get bubbly and golden. Garnishing with fresh parsley adds color and a fresh taste. It makes your dish look appealing. You can serve the stuffed peppers on a nice plate or in a bowl for a cozy meal. Pair them with a side salad or some crunchy veggies to round out your dinner. For more details, check the Full Recipe. {{image_2}} You can switch up the protein in your stuffed peppers. Ground turkey works well. It has a mild flavor that blends nicely with buffalo sauce. Use a 1:1 ratio when swapping it in. Rotisserie chicken is another great option. It saves time and adds flavor. Shred the chicken and mix it with the buffalo sauce, just like in the full recipe. This gives your dish a tasty and easy twist. Adding veggies can boost nutrition and flavor. Black beans are a good choice. They add protein and fiber. Just rinse and drain them before mixing. Quinoa can add a nice texture. Cook it according to package instructions and fold it into the filling. This makes your peppers heartier and more satisfying. You can mix and match these options to fit your tastes. Switching sauces can change the whole dish. Try BBQ sauce instead of buffalo sauce for a sweet twist. Just use the same amount so the filling stays creamy. You can also experiment with other hot sauces. If you like it spicy, go for a habanero sauce. For a milder touch, try a sriracha or even a chipotle sauce. Each sauce brings its own flavor, making your stuffed peppers unique every time. To keep your buffalo chicken stuffed peppers fresh, use airtight containers. Glass containers work best, as they do not absorb smells. Plastic containers are good too, but ensure they are BPA-free. Store your leftovers in the fridge. They last for about three days. You can reheat your stuffed peppers in the oven or microwave. The oven gives the best taste. Preheat your oven to 350°F (175°C). Place the peppers in an oven-safe dish and cover with foil. Heat for about 15-20 minutes. If using a microwave, place the stuffed pepper on a microwave-safe plate. Heat for two to three minutes, checking every minute. To freeze stuffed peppers, cool them first. Wrap each pepper in plastic wrap and then in foil. This helps prevent freezer burn. Store them in a freezer bag for extra protection. They can last up to three months. To thaw, place them in the fridge overnight. Reheat as mentioned above. Enjoy your buffalo chicken stuffed peppers fresh out of the oven! For the full recipe, check the earlier section. To make Buffalo Chicken Stuffed Peppers vegan, you can use several substitutes. Instead of chicken, try shredded jackfruit or tofu. For cheese, use vegan cream cheese and shredded vegan cheese. These swaps keep the dish creamy and flavorful while fitting a vegan diet. You can still use buffalo sauce because many brands are vegan-friendly. This way, you enjoy the same spicy kick without animal products. Yes, you can prepare these stuffed peppers ahead of time. Mix the filling and stuff the peppers a day before. Cover them well and store them in the fridge. When ready to cook, take them out and bake as directed. You may need to adjust the baking time if they are cold from the fridge. This makes meal prep easy and quick for busy days. Buffalo Chicken Stuffed Peppers taste great with fresh sides. Here are some ideas: - Simple Green Salad: A mix of greens, tomatoes, and cucumbers. - Veggie Sticks: Carrots and celery with ranch or blue cheese dip. - Rice or Quinoa: A flavorful grain to balance the spice. - Corn on the Cob: Sweet corn adds a nice touch. These sides make your meal complete and delicious! For the full recipe, check out the detailed instructions above. You now know how to make Buffalo Chicken Stuffed Peppers, plus some great tips. Remember to use the right mix of flavors and adjust spices to your taste. Don't forget the fun in trying new ingredients and variations. Enjoy your meal and share it with others! This dish is simple to make, and leftovers can be stored well. Get creative and have fun in the kitchen!](https://dailydishly.com/wp-content/uploads/2025/06/c965f089-28dc-4039-a3b8-814f40f3cab4-768x768.webp)