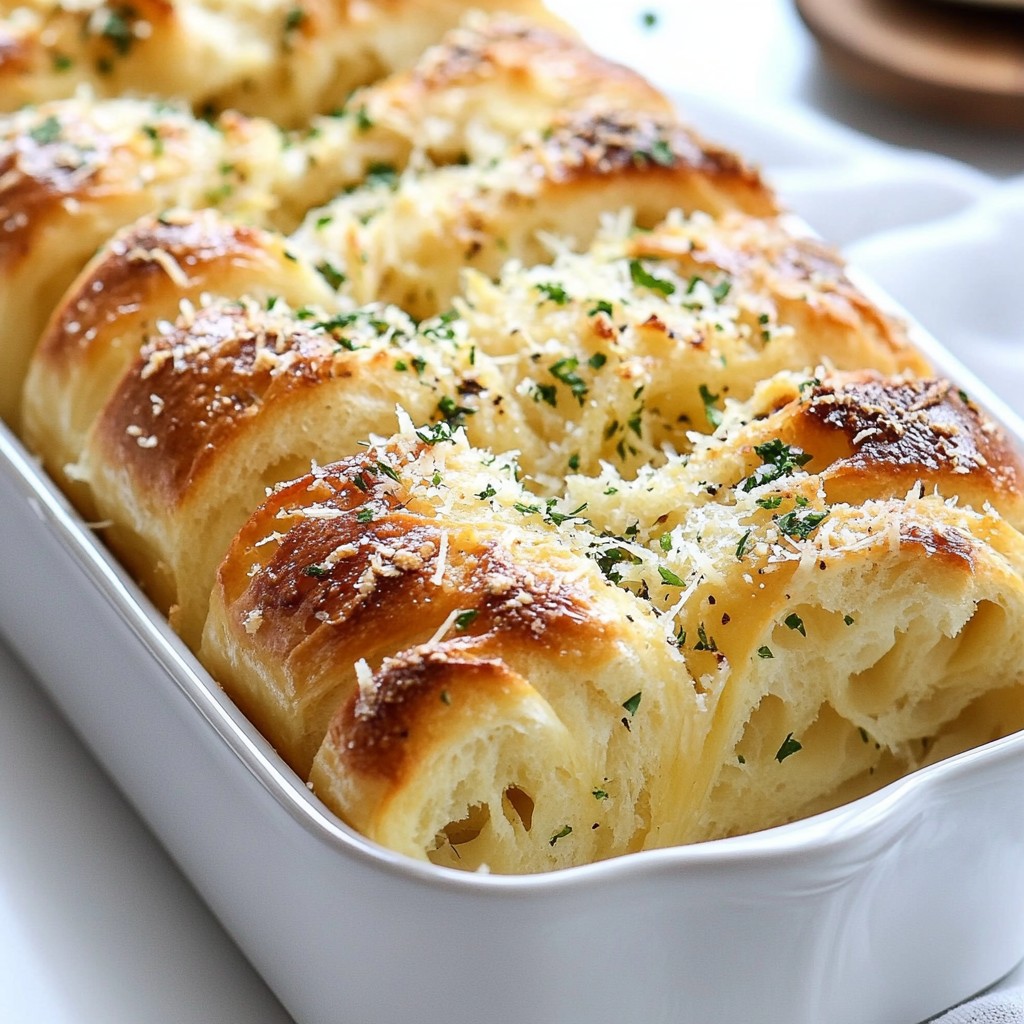
Are you ready to impress your family and friends with an easy, mouthwatering treat? Garlic Herb Pull-Apart Bread is your answer! This delightful bread features a warm, soft texture bursting with the irresistible flavors of garlic, herbs, and cheese. Follow my simple steps, and you’ll create a dish that everyone will love! Let’s dive into the ingredients and start your baking adventure!
Error: Connection error.
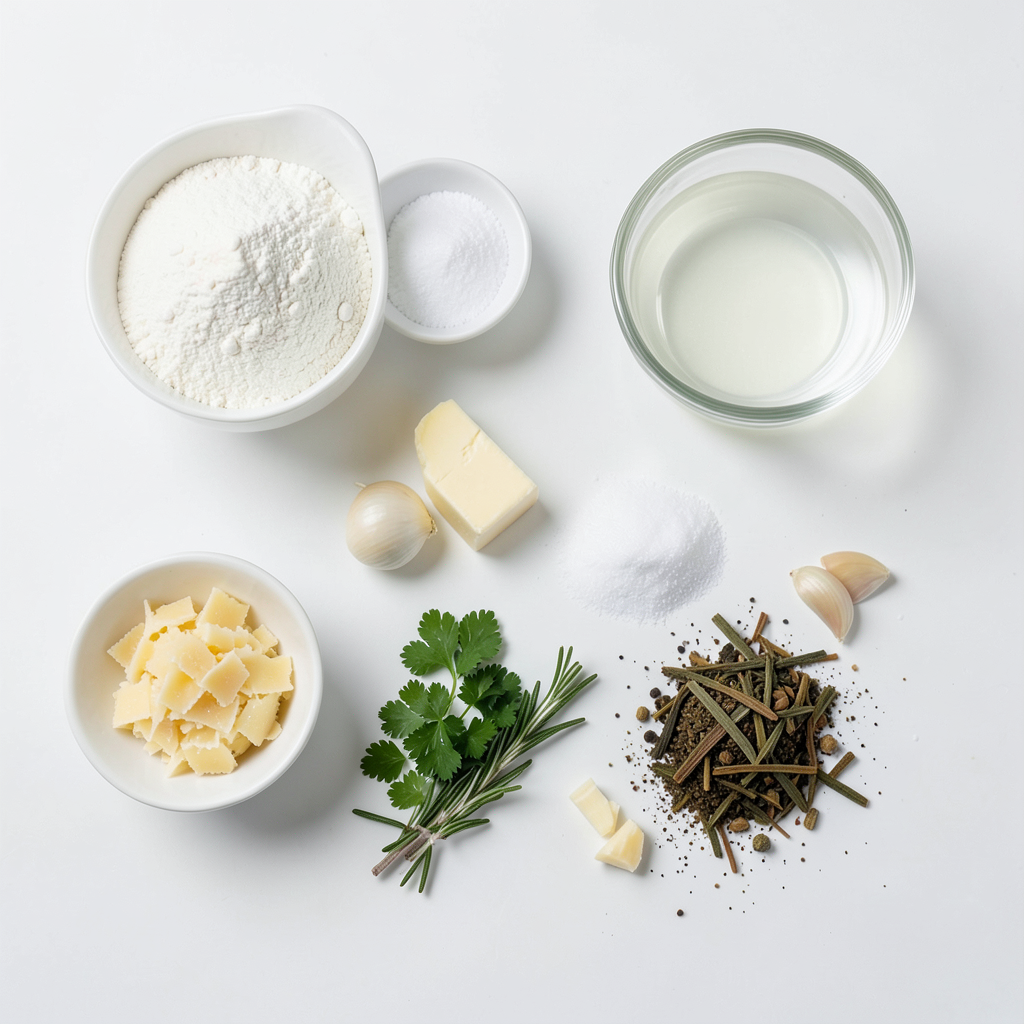
Ingredients
Main Ingredients
- 3 cups all-purpose flour
- 1 packet (2 1/4 tsp) instant yeast
- 1 teaspoon sugar
- 1 teaspoon salt
Flavor Enhancers
- 4 cloves garlic, minced
- 2 tablespoons fresh parsley, finely chopped
- 1 tablespoon fresh rosemary, finely chopped
- 1 teaspoon dried oregano
- 1/4 cup grated Parmesan cheese
Additional Components
- 1 cup warm water (110°F/43°C)
- 1/4 cup unsalted butter, melted
- 1/2 teaspoon black pepper
Gather these ingredients to make your Garlic Herb Pull-Apart Bread. Each one plays a key role in building flavor and texture.
What are the main ingredients? The main ingredients include flour, yeast, sugar, and salt. Flour forms the base of the bread. Yeast helps it rise. Sugar feeds the yeast, and salt adds taste.
What enhances the flavor? Garlic, parsley, rosemary, oregano, and Parmesan cheese boost the aroma and taste. Garlic gives a rich, savory note. Fresh herbs add brightness, while cheese brings depth.
What are the additional components? Warm water activates the yeast. Unsalted butter adds richness, and black pepper brings a hint of spice. These parts create a well-rounded flavor profile.
This combination of ingredients ensures your bread will be soft, flavorful, and hard to resist. Enjoy the process of mixing and baking, and watch your kitchen fill with the delightful scent of garlic and herbs!
Step-by-Step Instructions
Preparing the Yeast Mixture
First, you need to combine warm water, sugar, and yeast in a large bowl. Make sure the water is about 110°F (43°C). This warmth helps the yeast wake up and start working. Let this mixture sit for about 5 minutes. You will know it’s ready when it becomes frothy. This froth means the yeast is active and ready to help your bread rise.
Mixing the Dry Ingredients
In another bowl, gather your dry ingredients. Mix together 3 cups of all-purpose flour, 1 teaspoon of salt, 1/2 teaspoon of black pepper, and 1 teaspoon of dried oregano. Then, add in 2 tablespoons of finely chopped fresh parsley and 1 tablespoon of fresh rosemary. Stir well to combine all the flavors. This mix gives your bread that amazing garlic herb taste.
Forming the Dough
Now it’s time to bring everything together. Gradually add your dry ingredients to the yeast mixture. Use a wooden spoon to stir until a dough forms. Once it starts to come together, it’s time to knead. Knead the dough on a floured surface for about 5-7 minutes. You want it to feel smooth and elastic. This step is crucial for a good bread texture.
Tips & Tricks
Perfecting the Dough
To make great pull-apart bread, start with the yeast. Use warm water at 110°F (43°C) to wake up the yeast. If it's too hot, it will kill the yeast. Mix warm water, sugar, and yeast in a bowl. Let it sit until it bubbles. This shows your yeast is alive.
Kneading the dough is also key. After mixing, turn the dough onto a floured surface. Knead with your hands for about 5-7 minutes. This builds gluten and makes the dough stretchy. You want it smooth and elastic.
Flavor Tips
Herbs and spices can change the flavor. You can add more garlic or mix in herbs you love. If you want it spicy, add red pepper flakes. For a cheesy twist, mix in more Parmesan or your favorite cheese.
Think about toppings too. Try adding caramelized onions or sun-dried tomatoes. These can give your bread extra depth.
Baking Recommendations
To check if your bread is done, tap the bottom. It should sound hollow. If it looks golden brown, it’s likely ready.
For a perfect crust, brush the top with some melted butter before baking. This adds a lovely shine and flavor. Baking at 375°F (190°C) for 25-30 minutes gives the best results. Let it cool in the pan for a bit, then transfer to a wire rack.
Error: Connection error.
Variations
Cheese Options
You can change the cheese to suit your taste. Try mozzarella for a gooey pull. Cheddar adds a sharp bite that many love. You can even mix cheeses for a fun twist. Adding cheese between dough layers makes each pull cheesy and delicious. Just sprinkle some grated cheese before stacking dough pieces. This gives a tasty surprise in every bite.
Herb Variations
Herbs can really change the flavor of your bread. While I love using parsley and rosemary, you can try basil or thyme too. These herbs bring a nice earthiness. You can even mix herb blends for a unique taste. For example, a mix of dill and chives can add a fresh kick. Experimenting lets you find your favorite flavor!
Sweet Variations
Feeling adventurous? You can turn this bread into a sweet treat. Adding cinnamon and sugar gives it a warm flavor. You can also toss in raisins for a fruity touch. This sweet twist makes the bread perfect for dessert or brunch. Serve it warm with a drizzle of honey to make it even better!
Storage Info
Short-term Storage
To keep your Garlic Herb Pull-Apart Bread fresh for a few days, wrap it in plastic wrap. This helps seal in moisture. You can also place it in an airtight container. Store it at room temperature. Avoid refrigerating, as this can dry out the bread. Enjoy it within three days for the best taste.
Long-term Storage
For long-term storage, freezing is the best choice. Let the bread cool completely after baking. Then, wrap it tightly in plastic wrap and aluminum foil. This protects it from freezer burn. You can freeze it for up to three months. When you’re ready to eat, thaw it overnight in the fridge. Reheat it in the oven at 350°F (175°C) for about 10-15 minutes. This restores its warm, fluffy texture.
Serving Suggestions
Garlic Herb Pull-Apart Bread pairs well with many dishes. Serve it alongside soups like tomato or minestrone. It also complements fresh salads, adding a nice touch. You can enjoy it as a snack too. Dip it in olive oil or extra garlic butter for an added flavor kick!
FAQs
What is the best way to store leftover Garlic Herb Pull-Apart Bread?
To keep your bread fresh, store it in an airtight container. You can also wrap it in plastic wrap or foil. This method locks in moisture and keeps the bread soft. If you want to keep it longer, freezing is a great option. Just wrap the bread tightly in plastic wrap and place it in a freezer bag. When you’re ready to eat, thaw it in the fridge overnight and reheat it in the oven.
Can I use whole wheat flour instead of all-purpose flour?
Yes, you can use whole wheat flour, but it will change the bread's texture. Whole wheat flour absorbs more water. You may need to add a bit more warm water to the dough. Start with 3 cups of whole wheat flour and add 1 to 2 tablespoons of water as needed. This will help you get the right dough consistency.
How long does it take for the dough to rise?
The dough typically takes about 1 hour to rise. It should double in size. For best results, let it rise in a warm spot, like near a sunny window or inside a turned-off oven with the light on. If your kitchen is cool, the dough may take a bit longer, so be patient!
Can this recipe be made ahead of time?
Yes, you can prepare the dough a day ahead. After kneading, place it in a greased bowl and cover it. You can refrigerate the dough overnight. When you're ready, let it sit at room temperature for about 30 minutes before shaping it. This way, you can enjoy fresh pull-apart bread with less hassle!
You’ve learned how to make delicious Garlic Herb Pull-Apart Bread. We covered key ingredients, mixing techniques, and baking tips. You can customize flavors and store it fresh. This bread is perfect alongside meals or as a snack. Experiment with different herbs and cheeses to make it your own. Enjoy your baking and the tasty results!