Garlic Herb Roasted Carrots Simple and Flavorful Side

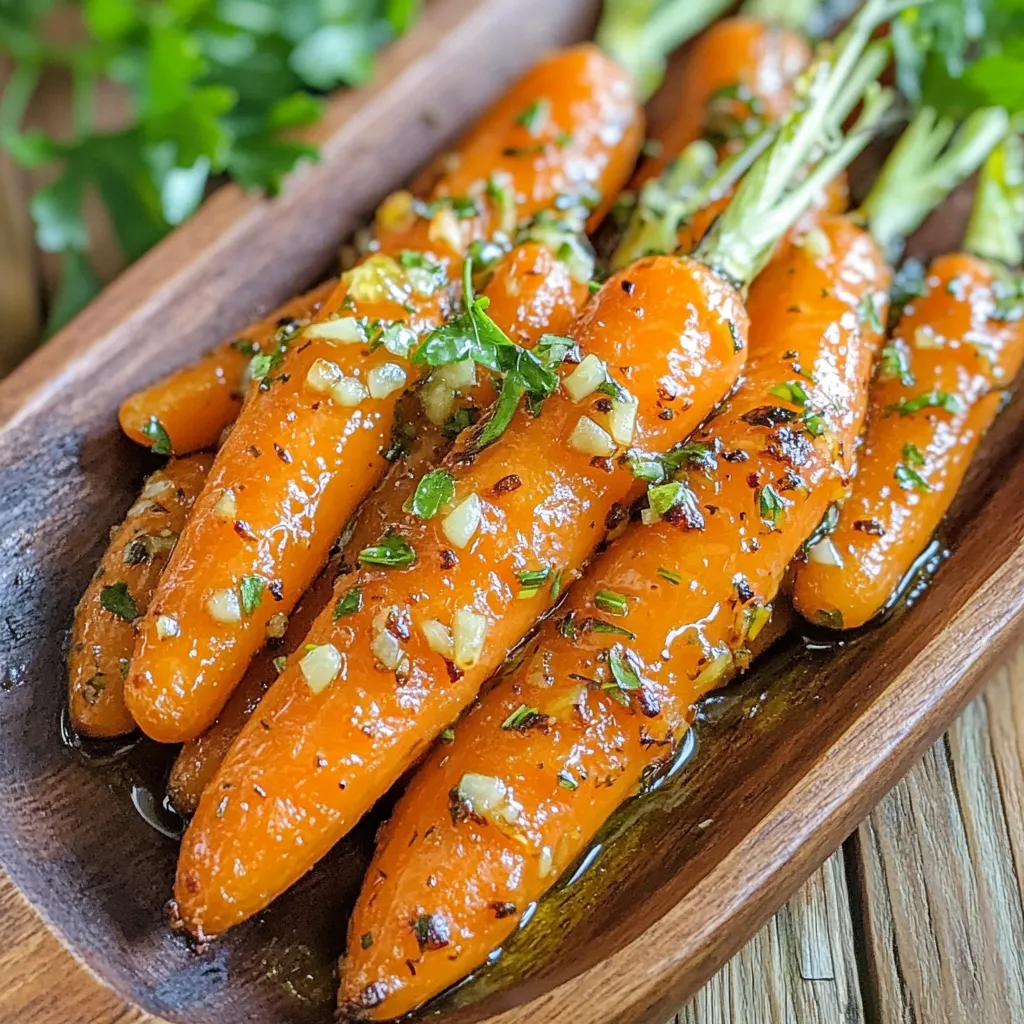
Looking for a side dish that’s simple yet bursting with flavor? You’ve come to the right place! These Garlic Herb Roasted Carrots are not just any vegetables; they’re a delightful twist to your dinner table. With fresh herbs, garlic, and a touch of honey, you’ll love how these baby carrots transform into something special. Let’s dive into this easy recipe that will impress your family and friends!
Ingredients
Main Ingredients
– 1 pound baby carrots, peeled and trimmed
– 4 cloves garlic, minced
– 3 tablespoons olive oil
– 1 tablespoon fresh rosemary, chopped
– 1 tablespoon fresh thyme, chopped
These ingredients create a bright and tasty dish. Baby carrots are sweet and tender. Garlic adds depth and warmth. Olive oil helps everything roast nicely. Fresh herbs like rosemary and thyme bring great flavor.
Seasoning and Garnish
– 1 teaspoon honey
– Salt and pepper to taste
– Fresh parsley for garnish
Honey gives a hint of sweetness. It balances the dish well. Salt and pepper enhance all the flavors. Fresh parsley adds a nice pop of color. It also brings a fresh taste when you sprinkle it on top.
Step-by-Step Instructions
Prepping the Carrots
To start, wash the baby carrots under cold water. If you have whole carrots, cut them into small pieces. Trim the ends of the carrots if needed. Peeling is not necessary, as baby carrots are tender and sweet. Make sure they are uniform in size for even cooking.
Combining Ingredients
In a large bowl, mix the baby carrots with minced garlic. Add three tablespoons of olive oil to the bowl. Next, stir in one tablespoon each of chopped rosemary and thyme. These herbs bring a lovely flavor. Add one teaspoon of honey for a hint of sweetness. Finally, season with salt and pepper to your taste. Toss everything well until the carrots are coated in the oil and herbs.
Roasting Process
Preheat your oven to 425°F (220°C). Spread the coated carrots on a baking sheet lined with parchment paper. Make sure they are in a single layer for even roasting. Roast the carrots for 25 to 30 minutes. Toss them halfway through to ensure they cook evenly. They should be tender and caramelized when done.
Tips & Tricks
Achieving Perfect Roast
To get the best roast on your carrots, focus on the oven temp and time. Set your oven to 425°F (220°C). This heat helps caramelize the sugars in the carrots. If you want softer carrots, roast them a bit longer. Check them around 25 minutes. If they need more time, give them an extra 5 minutes. Toss them halfway for even cooking.
Flavor Enhancements
Want to boost the flavor? Try adding spices like cumin or paprika. These spices add warmth and depth. Fresh herbs, like dill or basil, can also mix well. If you like a bit of heat, add red pepper flakes. A pinch can make a big difference. Just remember, start small and taste as you go.
Serving Suggestions
Garlic Herb Roasted Carrots pair well with many dishes. Serve them alongside grilled chicken or fish for a tasty meal. They also complement grain bowls and salads nicely. For a fun twist, chop them up and mix them into a pasta dish. You can even serve them as a snack with dips like hummus or yogurt. Enjoy experimenting!

Variations
Alternative Vegetables
You can roast many vegetables with garlic and herbs. Try using:
– Baby potatoes
– Zucchini
– Bell peppers
– Brussels sprouts
– Cauliflower
Each veggie brings its own unique taste. For instance, zucchini adds a nice soft texture. Brussels sprouts get crispy and nutty, especially when roasted.
Different Cooking Methods
You can cook these carrots in different ways. Air frying is quick and gives a nice crunch. When you air fry:
– Set the air fryer to 400°F (200°C).
– Cook for about 15-20 minutes.
– Shake the basket halfway for even cooking.
Roasting in the oven gives a deeper flavor. Follow the steps outlined in the recipe for the best results. Both methods work well; it just depends on your choice!
Flavor Profile Adjustments
You can change the flavor of your carrots easily. Try using different herbs like basil or dill. These herbs add a fresh twist. You can also add a splash of lemon juice or orange zest. This brightens the dish and adds a nice zing. Experiment with flavors to find what you love best!
Storage Info
Refrigeration Guidelines
To store leftovers, let the carrots cool first. Place them in an airtight container. Make sure the lid is tight to keep the moisture in. You can keep them in the fridge for up to three days. This keeps the flavor fresh and the texture nice.
Reheating Tips
The best way to reheat roasted carrots is in the oven. Preheat your oven to 350°F (175°C). Spread the carrots out on a baking sheet. Bake for about 10 minutes or until warm. This method keeps the carrots crispy. You can also use the microwave. Place them in a bowl and cover it with a damp paper towel. Heat for about 1-2 minutes, but this may make them softer.
Freezing Instructions
Yes, you can freeze Garlic Herb Roasted Carrots! First, let them cool completely. Then, place them in a freezer bag. Squeeze out as much air as you can before sealing. They can last for up to three months in the freezer. When you want to eat them, thaw in the fridge overnight. Reheat them in the oven for the best taste.
FAQs
Can I use regular carrots instead of baby carrots?
Yes, you can use regular carrots. Just peel and cut them into even pieces. Aim for sizes similar to baby carrots. This helps ensure they cook evenly. Regular carrots may take a bit longer to roast. Keep an eye on them and adjust the cooking time as needed.
How long can Garlic Herb Roasted Carrots be stored?
You can store Garlic Herb Roasted Carrots in the fridge for up to 4 days. Place them in an airtight container to keep them fresh. If you have leftovers, make sure to let them cool first. This helps prevent moisture buildup.
What temperature should I roast my carrots at for best results?
Roast your carrots at 425°F (220°C) for great results. This high heat helps caramelize the sugars in the carrots. You will get tender, flavorful carrots with a nice golden color. Remember to toss them halfway through for even cooking.
Garlic Herb Roasted Carrots are tasty and easy to make. We covered the key ingredients, like baby carrots, garlic, and fresh herbs. I shared steps for prepping, mixing, and roasting for the perfect texture. Don’t forget my tips on seasoning and storage! You can even switch up the veggies or cooking method. Try to serve these carrots with your favorite main dish to elevate your meals. With a few easy tweaks, you can enjoy this simple dish in many ways. Happy cooking!


![- 500g chicken thighs, boneless and skinless - 1/4 cup honey - 3 cloves garlic, minced - 2 tablespoons soy sauce - 1 tablespoon apple cider vinegar - 1 teaspoon grated fresh ginger - 1 tablespoon sesame oil - Salt and pepper to taste - 1 teaspoon cornstarch mixed with 1 tablespoon water (for thickening) - Garnishes: 2 green onions (chopped), sesame seeds For this sticky honey garlic chicken, the ingredients are simple yet powerful. The chicken thighs give you juicy meat. Honey adds sweetness. Garlic gives a savory kick. For the marinade, combine soy sauce, apple cider vinegar, and ginger. This mix brings depth to the dish. You can add sesame oil for a nutty flavor. Adjust salt and pepper as you like. If you want a thicker sauce, use cornstarch mixed with water. The texture will be perfect for coating the chicken. Garnish with green onions and sesame seeds. They add color and extra flavor. Follow the full recipe to make this dish shine. Each ingredient plays a role in making your meal tasty and fun. - Cut chicken thighs into bite-sized pieces. - Season chicken with salt and pepper. Start by trimming the chicken thighs. I like to cut them into small, even pieces. This helps them cook quickly and evenly. Don't skip the salt and pepper. It makes a big difference in flavor. - Whisk honey, garlic, soy sauce, vinegar, ginger, and sesame oil together. In a bowl, combine honey, minced garlic, soy sauce, apple cider vinegar, grated ginger, and sesame oil. Whisk until smooth. This marinade adds a sweet and savory taste. It coats the chicken well, making each bite delicious. - Marinate chicken for at least 30 minutes. - Cook chicken in a skillet over medium-high heat. - Optional: Thicken sauce with cornstarch mixture. Place the chicken into the marinade. Stir to coat all pieces. Let it sit in the fridge for at least 30 minutes. This step is key for flavor. When ready, heat a large skillet on medium-high. Add the marinated chicken and all the marinade. Cook for 5-7 minutes. Turn the chicken so it cooks evenly. You want it to be golden and sticky. If you like a thicker sauce, mix cornstarch with water. Stir it in and cook for one more minute. This will make the sauce extra rich. Enjoy your Sticky Honey Garlic Chicken over rice or quinoa. Don't forget to check the [Full Recipe] for all details! Marinating chicken is key to flavor. I suggest marinating for at least 30 minutes. If you have time, two hours will give you even better taste. The longer it sits, the more the flavors soak in. Store leftover marinade in a sealed container in the fridge for up to three days. You can also freeze it for later use. To get a nice crust on the chicken, start with a hot skillet. Add the chicken pieces without crowding the pan. This helps them brown well. Cook for about 5 to 7 minutes, turning them as needed. For glaze, aim for a thick, sticky sauce. If it seems too thin, add the cornstarch mixture. This will help it cling better to the chicken. Serve your sticky honey garlic chicken over steamed rice or quinoa. These sides soak up the tasty sauce. For a nice touch, garnish with chopped green onions and sesame seeds. This will make your dish look even more appealing. Enjoy the colors and textures! {{image_2}} You can switch up the protein in this dish. Tofu or shrimp works great. They both soak up the honey garlic flavor well. If you want a gluten-free option for soy sauce, try tamari. It tastes similar but is safe for those avoiding gluten. Want to spice things up? Add chili flakes for some heat. A little goes a long way! You can also mix in fruit juices like orange or pineapple for a sweeter touch. This adds layers of flavor that make your dish pop. You can cook this chicken in different ways. Oven-baking gives it a nice, even cook. Pan-frying creates a crispy edge, while an air fryer cooks it quickly and healthily. Each method offers a unique taste and texture, so choose what fits your mood. For the complete experience, check out the Full Recipe to explore all the flavors! To store leftovers, let the chicken cool first. Use a clean, airtight container. Glass or plastic containers work well. Place the chicken inside and seal it tight. It keeps the flavor fresh and prevents spills. Store it in the fridge. It will remain safe for up to four days. If you want to keep sticky honey garlic chicken longer, freezing is great. Place the cooled chicken in a freezer-safe bag. Remove as much air as possible. This helps prevent freezer burn. You can freeze it for up to three months. When ready to eat, move the bag to the fridge. Let it thaw overnight. You can also use a microwave for quick thawing. Reheat it in a skillet over low heat. Stir occasionally to warm it evenly. Leftovers last about four days in the fridge. Always check for signs of spoilage. Look for a change in color or texture. If it smells off, don’t eat it. When in doubt, throw it out. Keeping track of how long it has been stored helps avoid waste. Enjoy your sticky honey garlic chicken safely! For the full recipe, check out the earlier section. To make sticky honey garlic chicken, follow these steps: 1. Cut 500g of chicken thighs into bite-sized pieces. Season with salt and pepper. 2. In a bowl, whisk together 1/4 cup of honey, 3 cloves of minced garlic, 2 tablespoons of soy sauce, 1 tablespoon of apple cider vinegar, 1 teaspoon of grated fresh ginger, and 1 tablespoon of sesame oil. 3. Add the chicken to the marinade and mix well. Cover and marinate in the fridge for at least 30 minutes. 4. Preheat a large skillet over medium-high heat. Add the marinated chicken and marinade to the skillet. 5. Cook for 5-7 minutes, turning occasionally until the chicken is cooked through and glazed. If desired, stir in a mixture of 1 teaspoon cornstarch with 1 tablespoon water to thicken the sauce. 6. Remove from heat and let it rest for a couple of minutes before serving. Enjoy your sticky honey garlic chicken! Yes, you can use chicken breast instead of thighs. Here are some pros and cons: - Pros: Chicken breast is leaner and has less fat. It cooks quickly and can be healthier. - Cons: Chicken thighs are juicier and have more flavor. They stay moist better during cooking, making them great for marinades. Sticky honey garlic chicken pairs well with many sides and drinks: - Sides: Serve it over steamed rice or quinoa for a complete meal. Roasted vegetables or a fresh salad are also great options. - Drinks: Pair with iced tea or a light white wine to balance the sweetness. You might also enjoy sparkling water with a splash of lemon for a refreshing choice. For the full recipe, check out the details above. In this blog post, I covered how to make sticky honey garlic chicken. You learned about the key ingredients, from chicken thighs to honey and garlic. I shared steps for prepping, marinating, and cooking the chicken. I also provided tips on storage and variations. Cooking this dish can be fun and rewarding. Feel free to try your own twists and share this recipe with others. Enjoy every bite!](https://dailydishly.com/wp-content/uploads/2025/06/451e3f6b-ae28-4867-90ea-91cbf2b8848b-768x768.webp)