Garlic Shrimp and Rice Flavorful Easy Dinner Recipe

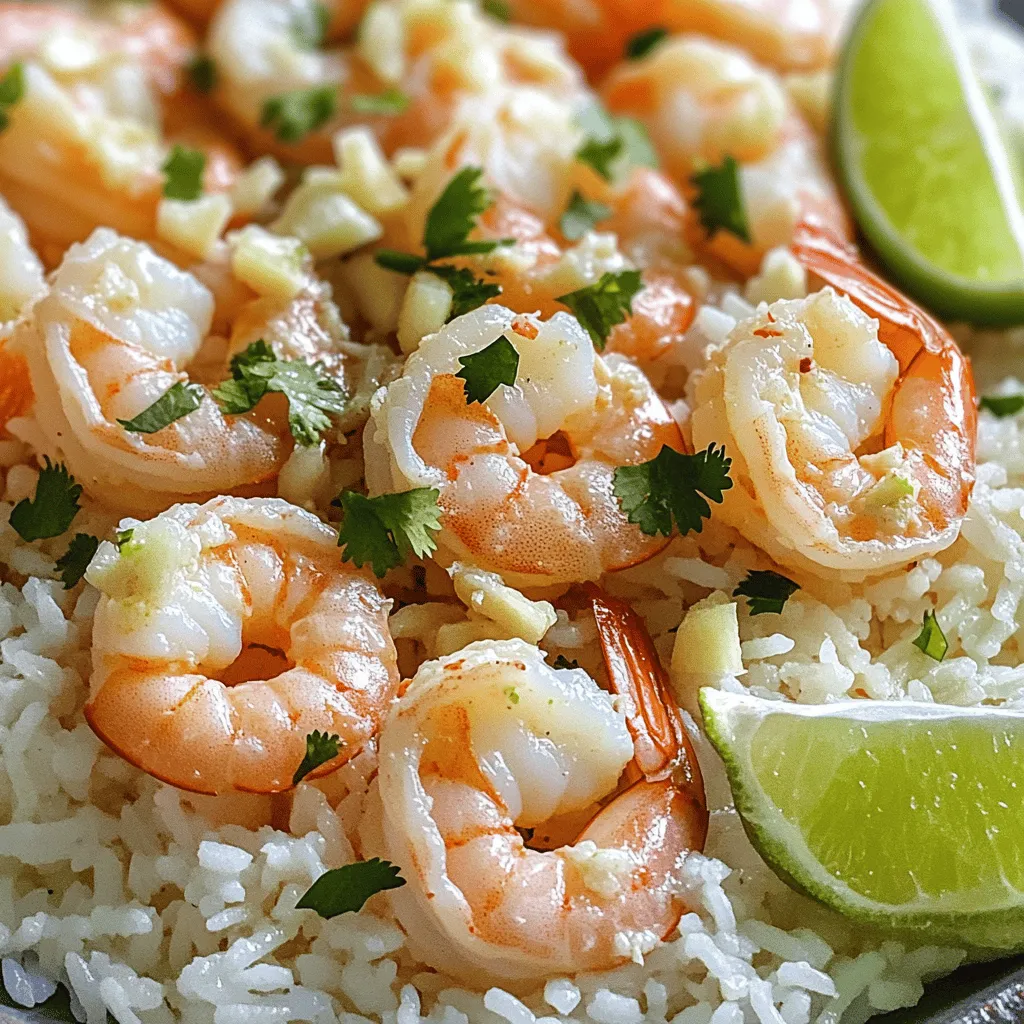
Are you ready for an easy dinner that bursts with flavor? This Garlic Shrimp and Rice recipe is a dish you can whip up quickly and enjoy any night of the week. Packed with simple ingredients and bold taste, it’s perfect for busy schedules or when you want to impress guests. Join me as we dive into this delightful recipe that will have everyone asking for seconds!
Ingredients
Complete Ingredient List
For this garlic shrimp and rice dish, you will need the following ingredients:
– 1 lb shrimp (peeled and deveined)
– 1 cup jasmine rice
– 1 1/2 cups coconut milk
– 4 cloves garlic (minced)
– 1 tablespoon olive oil
– 1 tablespoon butter
– 1/2 teaspoon red pepper flakes
– Salt and pepper to taste
– Fresh cilantro (for garnish)
– Lime wedges (for serving)
These simple items work together to create a tasty meal. Each ingredient adds its own unique flavor.
Ingredient Substitutions
If you don’t have all the exact ingredients, don’t worry. You can swap some out for what you have.
– Shrimp: Use chicken or tofu for a different protein.
– Jasmine rice: Any white rice works, but jasmine gives a nice scent.
– Coconut milk: You can use chicken broth if you want a lighter dish.
– Garlic: Garlic powder can be a quick substitute, but fresh is best.
– Red pepper flakes: If you like less heat, just skip these or use paprika.
These substitutions keep the dish fun and fresh.
Recommended Kitchen Tools
To make this dish, you will need a few key tools:
– Medium saucepan for cooking the rice.
– Large skillet for cooking the shrimp.
– Wooden spoon for stirring.
– Measuring cups and spoons for accuracy.
– Knife and cutting board for chopping garlic and garnishes.
Using the right tools makes cooking easier. With these items, you will create a delicious meal without a hassle.
Step-by-Step Instructions
Preparation of Rice
First, rinse the jasmine rice in cold water. Keep rinsing until the water runs clear. This helps remove extra starch, which makes the rice less sticky. After rinsing, drain the rice well. Next, combine the rinsed rice and coconut milk in a medium saucepan. Bring this mixture to a boil over medium heat. When it starts boiling, reduce the heat to low. Cover the pot and let it simmer for about 15-18 minutes. The rice should be tender and the coconut milk fully absorbed.
Cooking Garlic Shrimp
While the rice cooks, heat olive oil and butter in a large skillet over medium-high heat. Add minced garlic and red pepper flakes to the skillet. Sauté for about 1 minute until the garlic smells great. Be careful not to let it burn! Next, add the peeled and deveined shrimp to the skillet. Cook the shrimp for 3-4 minutes. They should turn pink and look opaque. Season them with salt and pepper to taste. When done, remove the skillet from heat and set it aside.
Combining Ingredients and Serving
Once the rice is ready, fluff it with a fork. Divide the coconut rice among your serving plates. Then, top the rice with the garlic shrimp. Spoon any extra sauce from the skillet over the shrimp. To finish, garnish your dish with fresh cilantro and serve with lime wedges on the side. Enjoy your Garlic Shrimp and Rice!
Tips & Tricks
Ensuring Perfectly Cooked Rice
To cook rice well, rinse it first. Rinsing removes extra starch. Use cold water until it runs clear. For this recipe, combine 1 cup of jasmine rice with 1 ½ cups of coconut milk. Bring it to a boil, then lower the heat. Cover and let it simmer for 15-18 minutes. Check if the rice is tender and the milk is absorbed. Fluff the rice with a fork before serving.
Flavor Enhancements for Garlic Shrimp
To boost the flavor of garlic shrimp, start with fresh garlic. Mince 4 cloves and sauté them in olive oil and butter. Add ½ teaspoon of red pepper flakes for spice. Cook the shrimp until they turn pink, about 3-4 minutes. Season with salt and pepper. For a twist, try adding lime juice or zest. This will add brightness to the dish.
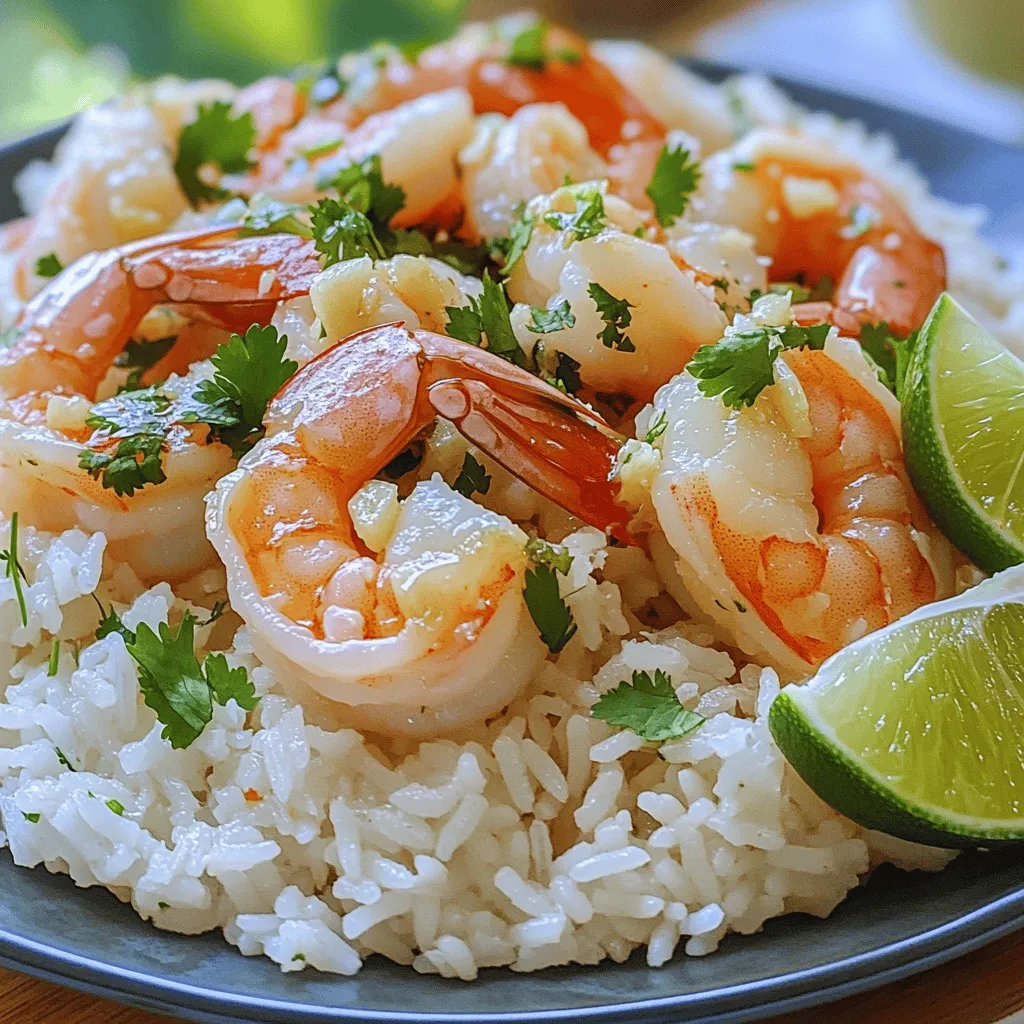
Presentation Tips for Serving
Presentation matters! Serve the coconut rice in a bowl or on a plate. Top it with the garlic shrimp. Spoon any extra sauce over the shrimp for flavor. Add a sprinkle of fresh cilantro for color. Serve lime wedges on the side for a fresh burst. This makes the dish look inviting and delicious. Enjoy your meal!

Variations
Spicy Garlic Shrimp and Rice
To add heat, use more red pepper flakes. You can also add chopped jalapeños for a fresh kick. This gives the dish a nice balance of spice and flavor. Just remember, start with a little and taste as you go. You can always add more heat later!
Coconut Rice Alternatives
If you want to change the rice, try using brown rice or quinoa. Both add different textures and flavors. Brown rice is chewier and has a nutty taste. Quinoa is light and fluffy. Just adjust the cooking time based on what you choose. Each option gives a new twist to the recipe.
Vegetable Add-ins for Extra Nutrition
Adding veggies can make this dish more colorful and healthy. Try bell peppers, snap peas, or spinach. You can sauté them with the garlic for extra flavor. Adding vegetables not only boosts nutrition but also makes the meal more filling. This way, you get a hearty dish that everyone will love.
Storage Info
Proper Storage Techniques
To keep your garlic shrimp and rice tasty, store leftovers in an airtight container. Make sure it cools down first. If you leave it out too long, bacteria can grow. Ideally, eat the leftovers within 2-3 days for the best flavor and safety.
Reheating Instructions
When you’re ready to enjoy it again, reheat the garlic shrimp and rice on the stove. Use medium heat, adding a splash of water to keep it moist. Stir often until it’s warm. You can also use a microwave. Heat it in short bursts, stirring in between. This helps avoid hot spots.
Freezing Garlic Shrimp and Rice
Freezing is a great option if you want to save some for later. Place the garlic shrimp and rice in a freezer-safe container. Make sure to leave some space for expansion. It can last up to 2 months in the freezer. To enjoy it, thaw it overnight in the fridge. Then, reheat as mentioned above. This way, you keep the flavors fresh!
FAQs
What type of shrimp is best for this recipe?
For this dish, fresh or frozen shrimp works well. I prefer medium or large shrimp. They cook evenly and stay juicy. If using frozen shrimp, thaw them first. This ensures they cook properly and taste great.
Can I make this dish ahead of time?
You can prepare the coconut rice ahead. Cook it and store it in the fridge. When ready to eat, just reheat it. Cook the shrimp fresh for the best flavor. If you cook the shrimp early, they may lose some texture.
How can I customize the spice level?
To make it spicier, add more red pepper flakes. You can also use fresh chopped chili. For a milder dish, reduce the amount of red pepper flakes. Taste as you go to find your perfect spice level.Start by rinsing jasmine rice. Then, cook it with coconut milk. While the rice cooks, sauté garlic in olive oil. Add shrimp and season them. Finally, serve it all together for a tasty meal.
This blog covered how to make garlic shrimp and rice. We explored ingredients, step-by-step instructions, and helpful tips. You learned easy ways to swap ingredients and add flavor. We discussed variations for spice and nutrition, plus storage and reheating tips.
Great meals don’t have to be hard. With these steps, you can impress your family and friends. Enjoy every bite, and don’t hesitate to experiment. Your kitchen is a place for fun and creativity.


![- 4 chicken thighs, bone-in and skin-on - 1/4 cup honey - 4 cloves garlic, minced - 2 tablespoons soy sauce (or tamari for gluten-free) - 1 tablespoon apple cider vinegar - 1 tablespoon olive oil - 1 teaspoon grated fresh ginger - 1/2 teaspoon black pepper - Chopped green onions - Sesame seeds The main ingredients in this dish are simple yet powerful. Chicken thighs offer rich flavor and juicy texture. Honey adds sweetness that balances the savory notes. Garlic brings a punch that enhances every bite. The additional ingredients work together to create a delicious marinade. Soy sauce adds umami depth, while apple cider vinegar brings brightness. Olive oil helps keep the chicken moist during cooking. For seasoning, fresh ginger adds warmth. Black pepper gives a slight kick. The green onions and sesame seeds make for a lovely garnish, adding color and crunch. You can find the complete process in the Full Recipe. These ingredients blend to create a honey garlic glaze that makes this chicken dish truly special. Preparing the marinade To start, grab a medium bowl. Whisk together the honey, minced garlic, soy sauce, apple cider vinegar, olive oil, grated ginger, black pepper, and a small pinch of salt. Mix until all ingredients blend well. This sauce will give your chicken a sweet and savory flavor. Marinating the chicken Next, take your chicken thighs and place them in a zip-lock bag or shallow dish. Pour the marinade over the chicken, making sure each piece gets coated. Seal the bag or cover the dish. Refrigerate for at least one hour. For deeper flavor, marinate overnight. Preheating the oven While the chicken marinates, preheat your oven to 400°F (200°C). A hot oven helps the chicken cook evenly and crisp the skin. Baking the chicken After marinating, remove the chicken from the marinade. Don’t throw the marinade away; you will use it later. Place the chicken thighs skin side up on a baking tray lined with parchment paper. Bake in the preheated oven for 30-35 minutes. The chicken is ready when it reaches an internal temperature of 165°F (74°C) and the skin is crispy. Cooking the sauce While your chicken bakes, pour the reserved marinade into a small saucepan. Heat it over medium heat. Let it simmer for about 5-7 minutes until it thickens slightly. This will be your delicious glaze. Glazing and serving When the chicken is done, brush the thickened glaze over the thighs. Return the tray to the oven for another 5 minutes to caramelize the glaze. Once done, remove and sprinkle with chopped green onions and sesame seeds. Let the chicken rest for a few minutes before serving. Enjoy your Honey Garlic Glazed Chicken Thighs! For the full recipe, check the earlier section. - The best time to marinate chicken thighs is at least one hour. For deeper flavor, marinate overnight. - Use a zip-lock bag for even coating. Squeeze out air to let the marinade soak in well. - To get crispy skin, bake the chicken thighs skin side up. This allows the fat to render and crisp up. - Check the internal temperature with a meat thermometer. It should reach 165°F (74°C) for safe eating. - Pair your honey garlic glazed chicken with steamed rice or roasted vegetables. - For a nice look, garnish with chopped green onions and sesame seeds. This adds color and crunch. For the full recipe, refer to the instructions above. Enjoy your cooking! {{image_2}} You can switch up the protein in this dish. Chicken breast works well if you want less fat. For a plant-based option, try tofu. Just press it to remove excess water and cut it into cubes. You can also change the sweetener. If you want a lower sugar option, use maple syrup or agave nectar. These alternatives blend nicely with the other flavors. Make this dish even better by adding spices or herbs. Try ginger or chili flakes for a kick. Fresh herbs like cilantro or basil can bring a nice twist too. You can also play with acids. Lime juice adds a bright flavor, while balsamic vinegar gives a sweet tang. Try adding a splash during cooking for a new taste. Grilling the chicken gives it a smoky flavor. Just marinate as usual and grill over medium heat. It takes about 20 minutes, and you’ll get nice grill marks. If you own an Instant Pot, you can use it for this recipe too. Cook the marinated chicken on high for 10 minutes, then let it naturally release. This method keeps the chicken super juicy. For the full recipe, check out the complete instructions and details. To keep your honey garlic glazed chicken thighs fresh, store them in the fridge. Place the cooked chicken in an airtight container. It can last up to 3 days in the refrigerator. If you want to store it longer, consider freezing it. Wrap the chicken tightly in plastic wrap, then place it in a freezer-safe bag. This way, it can stay good for up to 3 months. When it's time to enjoy leftovers, reheating can be simple. The best way to reheat is in the oven. Set your oven to 350°F (175°C). Place the chicken on a baking sheet and cover it with foil. This helps keep the chicken moist. Heat it for about 15-20 minutes or until it's warm. You can also use a microwave, but use a lower power setting to avoid drying it out. Cover the chicken with a damp paper towel to keep moisture in. You can store your honey garlic glazed chicken thighs safely for a few days. In the fridge, they stay good for 3 days. In the freezer, they last for 3 months. Signs of spoilage include a strange smell, changes in color, or a slimy texture. Always check before eating to stay safe. For more details on how to make this dish, check the Full Recipe. Can I use boneless chicken thighs? Yes, you can use boneless chicken thighs. They will cook faster than bone-in thighs. Check the internal temperature to ensure they reach 165°F (74°C). How to make the glaze thicker? To thicken the glaze, simmer it longer. Cook it on medium heat until it reduces and becomes syrupy. You can also add a cornstarch slurry for extra thickness. How to make it gluten-free? Use tamari instead of soy sauce. Tamari is a gluten-free option that tastes great. Can I add vegetables to the dish? Yes, you can add vegetables. Try bell peppers, broccoli, or carrots. Toss them on the baking tray with the chicken. How many servings does this recipe yield? This recipe makes four servings. It’s perfect for a small family meal. Can I double the recipe for a larger group? Yes, you can double the recipe. Just ensure your baking tray has enough space. You may need to adjust cooking time slightly. For the complete recipe, check out the [Full Recipe]. This recipe uses simple ingredients like chicken thighs, honey, and garlic. You learned how to prepare and cook tasty chicken with an easy glaze. I shared tips to help with marinating and cooking for the best results. Feel free to explore variations and enjoy leftovers too. Try different flavors and cooking methods. Cooking should be fun and personal. Use your taste to create amazing meals. Enjoy making this dish with friends and family!](https://dailydishly.com/wp-content/uploads/2025/07/b9cba3e0-ee7f-4dbf-9eac-9b8411a1c4fd-768x768.webp)
. First, drain the tofu by placing it on a clean towel. Press it to remove extra water. Cut the tofu into 1-inch cubes. Toss these cubes in cornstarch until they are well-coated. This step makes the tofu crispy when cooked. Next, grab a medium saucepan. Pour in the vegetable broth and bring it to a boil. Add the jasmine rice and stir once. Cover the pot and reduce the heat to low. Cook for about 15 minutes. The rice will be tender when the liquid is absorbed. Fluff it with a fork and set it aside. Now, take a large skillet or wok. Heat the vegetable oil over medium-high heat. Add the cornstarch-coated tofu cubes. Fry them until golden and crispy, about 8 to 10 minutes. Remove the tofu and set it on paper towels to drain excess oil. In the same skillet, add the broccoli, red bell pepper, and carrots. Stir-fry these veggies for 4 to 5 minutes. They should be tender yet still bright in color. Add the green onions and sauté for one more minute. In a small bowl, mix together the Sriracha, soy sauce, sesame oil, and honey or maple syrup. This sauce gives the dish its spicy kick and sweet balance. Pour this mixture over the sautéed vegetables. Stir well to coat everything. Now, it’s time to bring everything together. Add the crispy tofu back into the skillet with the veggies and sauce. Gently toss everything to ensure the tofu is well-coated. Finally, serve this spicy mixture over a bed of jasmine rice in bowls. Garnish with sesame seeds and fresh cilantro for a tasty touch. For the complete recipe, refer to the Full Recipe section. Tofu can be soft if not pressed. Pressing tofu helps remove excess water. This step makes the tofu crispier when cooked. Use a tofu press or wrap it in a clean towel. Place a heavy object on top for about 30 minutes. If you don't have cornstarch, try using rice flour. It also creates a nice crust on the tofu. Sriracha can be spicy. You can adjust it to fit your taste. Start with just one tablespoon, then add more as needed. If you enjoy extra heat, add chili flakes or cayenne pepper. For a milder taste, mix a little honey or maple syrup into the sauce. This will balance out the heat nicely. This bowl pairs well with other side dishes. Try serving it with a simple salad or steamed edamame. For leftovers, keep the tofu and veggies separate from the rice. This keeps everything fresh. You can also wrap the tofu mixture in a tortilla for a tasty lunch. The Spicy Sriracha Tofu Bowl is versatile and fun to enjoy in different ways. {{image_2}} If you want to change the protein, try tempeh or seitan. Both give a nice texture. Tempeh has a nutty flavor and works well with the sauce. Seitan is chewy, making it a great meat substitute. These options are also vegan, so they fit perfectly into plant-based meals. You can swap in other vegetables to mix things up. Snow peas, zucchini, or bell peppers add color and crunch. Seasonal veggies like asparagus or squash can change the dish based on what’s fresh. Feel free to experiment with whatever you have on hand. Different hot sauces can spice things up. Try sriracha alternatives like sambal oelek or chili garlic sauce. You can also add herbs like basil or cilantro for a fresh twist. Mixing in garlic or ginger gives extra flavor too. To keep your Spicy Sriracha Tofu Bowl fresh, store it in an airtight container. Place it in the fridge if you plan to eat it within the next three days. Make sure to separate the tofu and rice from the vegetables to keep everything crisp. You can layer them in the container or use different ones. When reheating, the best method is using a skillet over medium heat. This helps keep the tofu crispy. Add a splash of water to create steam, which warms everything through without drying it out. Stir gently to avoid breaking the tofu. You can also use a microwave, but be aware the texture may change slightly. Heat in short bursts, stirring in between. Yes, you can freeze the Spicy Sriracha Tofu Bowl, but the texture of the tofu may change. For best results, freeze the tofu separately from the vegetables and rice. Spread them out on a baking sheet to freeze individually before transferring to a freezer bag. This method prevents them from sticking together. When ready to eat, thaw in the fridge overnight before reheating. To make this dish vegan, swap out honey for maple syrup. Maple syrup gives a nice sweetness. It works well and keeps the flavors balanced. You can also use agave nectar. Both options will keep your bowl plant-based and tasty. Yes, you can make it gluten-free. Use gluten-free soy sauce instead of regular soy sauce. Brands like Tamari offer great flavor without gluten. Check the label to be sure it's certified gluten-free. To reduce servings, cut the ingredient amounts in half. For example, use half a block of tofu and half a cup of rice. Adjust the sauce ingredients too. This way, you still keep the bold flavors, but you make just enough for a smaller meal. Tofu is a great source of protein. It is low in calories and high in iron. It also contains calcium, which is good for bones. If you are watching your diet, tofu fits well. But be careful if you have soy allergies. Sriracha sauce comes from Thailand. It was created in the 1930s by a woman named Thanom Chakkapak. She made it in the town of Si Racha. Today, Sriracha is popular worldwide, known for its spicy and sweet flavor. This blog post walks you through creating a tasty Spicy Sriracha Tofu Bowl. We covered all the main ingredients, including firm tofu, jasmine rice, and fresh vegetables. You learned step-by-step instructions, useful tips, and ways to customize the dish. As you explore this recipe, feel free to tweak it to fit your taste. Enjoy making this flavorful meal that caters to diverse diets and preferences. Your kitchen is a place for creativity and delicious food!](https://dailydishly.com/wp-content/uploads/2025/07/ee3e23f0-fb80-42df-ace0-60219f206871-768x768.webp)


![- 2 cans (15 oz each) black beans, rinsed and drained - 1 tablespoon olive oil - 1 medium onion, finely chopped - 3 cloves garlic, minced - 1 chipotle pepper in adobo sauce, minced (or more for extra spiciness) - 1 teaspoon ground cumin - 1 teaspoon smoked paprika - Salt and black pepper to taste - 8 small corn or flour tortillas - 1 avocado, sliced - 1 cup cherry tomatoes, halved - Fresh cilantro, chopped for garnish - Lime wedges, for serving Using high-quality ingredients makes a big difference. I prefer fresh, whole foods. Canned beans are great too, but rinse them well. They taste better and are healthier. If you want a vegan dish, this recipe is perfect. Just use corn tortillas. They are usually gluten-free. If you need a gluten-free option, corn tortillas are a good choice. They add a nice crunch. You can also use whole wheat tortillas for a different flavor. - Sour cream - Shredded cheese - Sliced jalapeños Toppings can really enhance your tacos. I love adding sour cream for creaminess. Shredded cheese adds flavor. For heat, try sliced jalapeños. Making toppings at home is often better than store-bought. You control the taste and freshness. Plus, it's fun to experiment. Try making your own salsa or guacamole for a tasty twist. Start by heating the olive oil in a large skillet over medium heat. Once hot, add the finely chopped onion. Sauté it for about five minutes. When the onion softens, add the minced garlic and chipotle pepper. Stir for one to two minutes, until you smell the garlic. Next, add the black beans, ground cumin, smoked paprika, salt, and pepper. Cook this mixture for five to seven minutes. Stir occasionally and mash some beans with a fork. This will make the mixture creamy. If you taste it and think it needs more flavor, add more salt or spices. Now, let's warm the tortillas. You can use a dry skillet or a microwave. For the skillet, place the tortillas over medium heat. Heat each side for about 30 seconds or until they feel soft. If you use a microwave, wrap them in a damp paper towel and heat for 15 to 20 seconds. Corn tortillas can break easily, so handle them gently. Flour tortillas are more flexible, but both taste great! It's time to put everything together! Start by placing a warm tortilla on a plate. Spoon some of the spicy black bean mixture onto the center. Then, add sliced avocado and halved cherry tomatoes on top. Finish with a sprinkle of fresh cilantro for color and flavor. For a pretty presentation, arrange the tacos on a large platter. Add lime wedges next to them for squeezing. You can even serve them with a side of salsa for extra fun! For the full recipe, check out the details above. Temperature control is key when cooking beans. Start with medium heat. This helps the beans warm evenly without burning. Stir often to avoid sticking. The perfect texture for the bean mixture is creamy but not mushy. Lightly mash some beans as you cook. This gives a nice blend of smooth and chunky. To boost flavor, consider adding spices like chili powder or cayenne pepper. Fresh herbs like cilantro or parsley also add brightness. Marinating the bean mixture can deepen the flavor. Let it sit for at least 30 minutes to absorb the spices. This step is easy and makes a big difference. Meal prepping your ingredients is a smart way to save time. Chop onions and garlic a day ahead. You can also mash the beans in advance. Store each ingredient in separate containers. When you're ready, assembly is quick! For faster assembly, warm all tortillas at once. Use a large skillet to heat them. This way, you can serve warm tacos to everyone. For the full recipe, check out the details above. {{image_2}} You can change up your Spicy Black Bean Tacos by adding different proteins. If you want meat, try diced chicken or ground beef. For a plant-based option, use lentils or quinoa. Both options add new flavors and textures. You can spice up those chicken tacos with smoky seasonings. Add chipotle or cayenne for even more heat. Tacos vary by region, so you can get creative! For a twist, make black bean burritos by wrapping the filling in a larger tortilla. You could also create taco bowls by layering the ingredients in a bowl instead of a tortilla. Each method brings its own fun to the table and allows for more customization. Using seasonal produce makes your tacos fresh and vibrant. In summer, add grilled zucchini or corn for a sweet crunch. In the fall, try roasted butternut squash for a warm flavor. You can also use leftover veggies from your fridge. Toss them in with the black beans for a tasty, resourceful meal. To store your taco filling, first let it cool to room temperature. Place it in an airtight container. This keeps it fresh for up to four days in the fridge. If you want to freeze the bean mixture, use a freezer-safe container. Label it with the date. The filling can last up to three months in the freezer. To reheat, simply thaw it overnight in the fridge and warm it on the stove. Stir occasionally until heated through. Store leftover tortillas in a zip-top bag. This helps prevent them from drying out. Keep the bag in the fridge for best results. If your tortillas get stale, don’t worry! You can revive them. Just wrap them in a damp paper towel and microwave for 10-15 seconds. This will make them soft and pliable again. The black bean mixture will last in the fridge for about four days. Tortillas can last one to two weeks if stored well. To stay safe, always check for any odd smells or mold before eating. When in doubt, throw it out! Enjoy your Spicy Black Bean Tacos knowing you stored them safely. For the complete recipe, visit the [Full Recipe] link. To make your tacos less spicy, skip the chipotle pepper. You can also use bell peppers for flavor. Adding a dollop of sour cream or yogurt cools the heat too. If you want a milder taste, use less cumin and smoked paprika. Try adding sweet corn or diced tomatoes for a fresh twist. Yes, you can use canned black beans. They are safe and save you time. Just rinse and drain them to remove extra salt. Canned beans are cooked, so you only need to heat them in your taco mix. This makes cooking easier and faster. Pair your tacos with some tasty sides. Try serving them with Mexican rice or a fresh salad. Guacamole is a great dip too. If you want a drink, serve with limeade or iced tea. These sides balance the flavors and make your meal complete. For more ideas, check out the Full Recipe. In this post, I covered how to make Spicy Black Bean Tacos from start to finish. We explored key ingredients, cooking steps, and tips to enhance flavor and texture. I also shared ideas for variations, storage, and how to handle leftovers. Tacos are fun and easy to make. You can customize them any way you want. Enjoy your cooking adventure!](https://dailydishly.com/wp-content/uploads/2025/06/e30d655b-3f29-4259-b589-8a39593520a7-768x768.webp)
