Greek Orzo Salad with Chicken Flavorful Fresh Bite

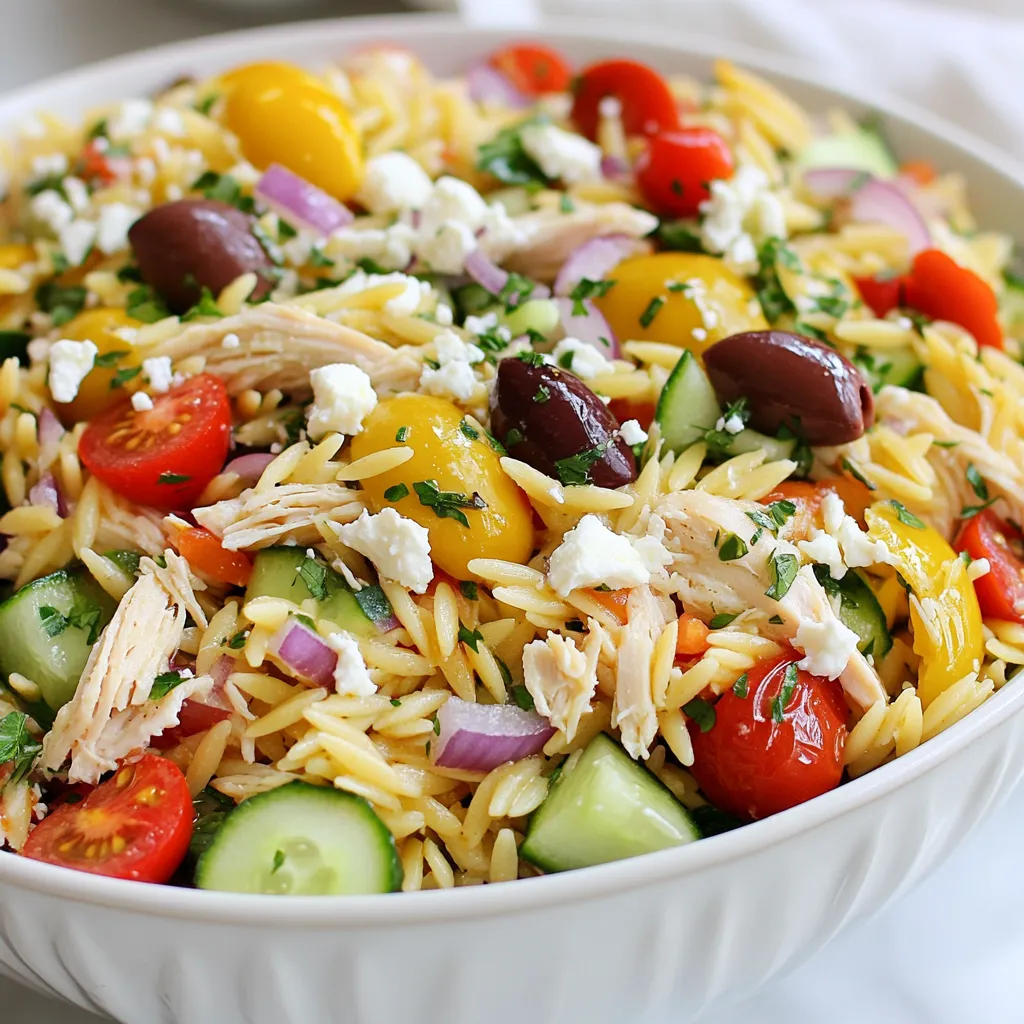
If you’re craving a bright, flavorful dish that’s easy to make, look no further! This Greek Orzo Salad with Chicken packs a punch with vibrant ingredients and fresh taste. I’ll guide you through the simple steps and helpful tips to create this hearty meal. Whether you need a lunch idea or a side dish for dinner, you’ll love the blend of flavors in every bite. Ready to dive in?
Why I Love This Recipe
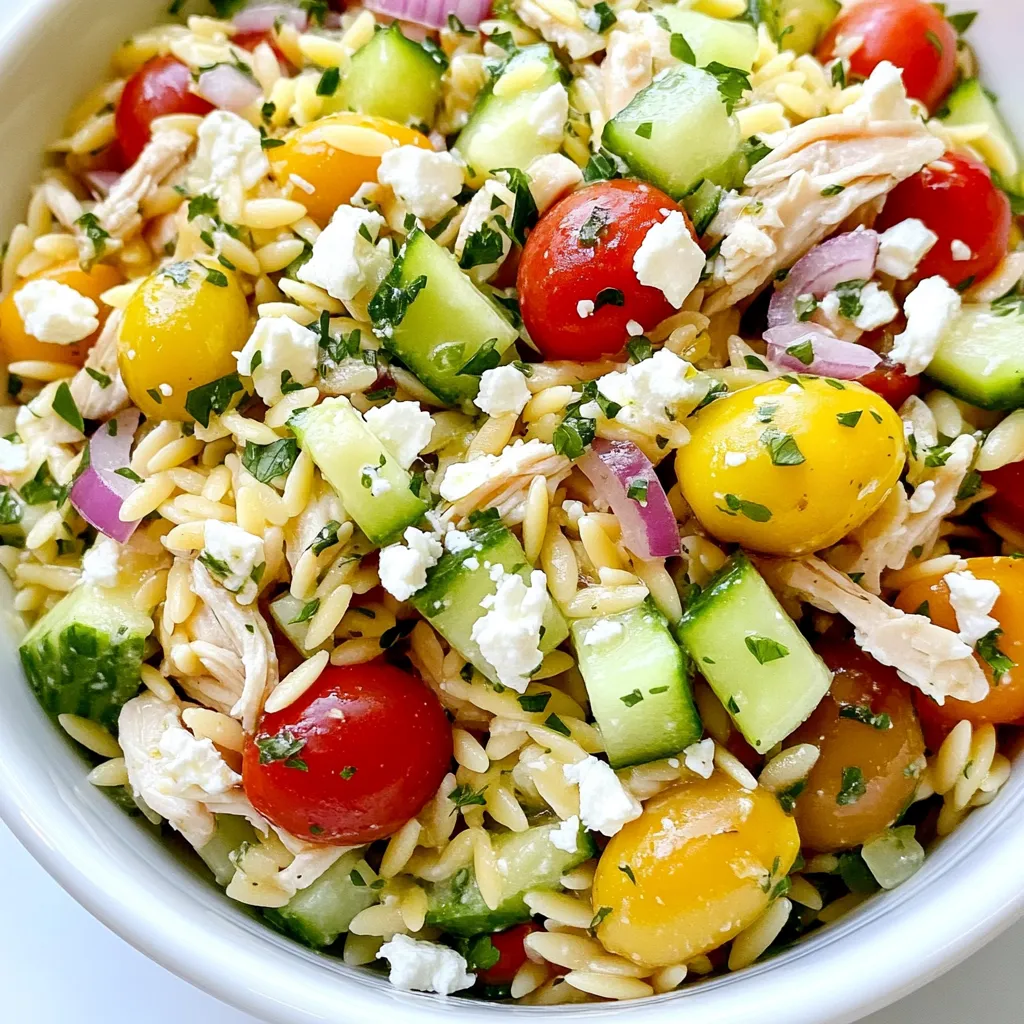
- Fresh and Vibrant: This salad bursts with fresh vegetables and herbs, making it a colorful and nutritious option for any meal.
- Quick and Easy: With a prep time of just 15 minutes, this recipe is perfect for busy weeknights or last-minute gatherings.
- Versatile Ingredients: Feel free to customize with your favorite veggies or proteins, making it adaptable to different tastes and dietary needs.
- Make-Ahead Friendly: This salad tastes even better after sitting, making it ideal for meal prep or potlucks.
Ingredients
List of Ingredients
To make Greek Orzo Salad with Chicken, gather these fresh ingredients:
– 1 cup orzo pasta
– 1 cup cooked chicken breast, shredded
– 1 cup cherry tomatoes, halved
– 1 cucumber, diced
– 1/2 red onion, finely chopped
– 1/2 cup Kalamata olives, pitted and halved
– 1/2 cup feta cheese, crumbled
– 1/4 cup fresh parsley, chopped
– 3 tablespoons extra virgin olive oil
– 2 tablespoons lemon juice
– 1 teaspoon dried oregano
– Salt and pepper to taste
Optional Garnishes
For added flair, consider these garnishes:
– Extra chopped parsley
– More crumbled feta cheese
– Lemon wedges
Nutritional Information
This salad is not only tasty but also healthy. Each serving has:
– Calories: approximately 350
– Protein: 25 grams
– Carbohydrates: 30 grams
– Fat: 15 grams
– Fiber: 3 grams
Step-by-Step Instructions
Cooking the Orzo
Start by boiling water in a large pot. Add one cup of orzo pasta once the water boils. Cook it according to the package instructions. You want it to be al dente. This means it should be firm but not hard. After cooking, drain the orzo. Rinse it under cold water to stop the cooking process. This step keeps the pasta from getting mushy. Set it aside while you prepare the other ingredients.
Preparing the Salad Ingredients
In a large mixing bowl, combine your salad ingredients. First, add the cooled orzo. Then, mix in one cup of shredded cooked chicken breast. Next, add one cup of halved cherry tomatoes. Dice one cucumber and toss that in too. Finely chop half of a red onion and add it to the bowl. Now, add half a cup of Kalamata olives. Finally, sprinkle in half a cup of crumbled feta cheese. This mix creates a colorful and tasty salad.
Making the Dressing
Grab a small bowl for the dressing. Whisk together three tablespoons of extra virgin olive oil and two tablespoons of lemon juice. Add one teaspoon of dried oregano. Season with salt and pepper to taste. Whisk until the dressing is well blended. This dressing adds a bright flavor to the salad. Pour it over the pasta and chicken mixture in your large bowl. Gently toss everything together until well coated.
Tips & Tricks
Chilling for Flavor Enhancement
Chilling your Greek orzo salad is key. After mixing, let it sit in the fridge for at least 30 minutes. This time allows the flavors to blend. The salad tastes fresher and more vibrant after chilling. Plus, the cool salad is perfect on a hot day.
Adjusting Seasonings
Always taste your salad before serving. If it needs more flavor, add salt and pepper. You can also add more lemon juice for extra zing. Each ingredient brings its own taste. Adjust them to fit your preference. Remember, seasoning makes your dish shine.
Presentation Tips
Presentation matters! Serve the salad in a large, colorful bowl. Top it with extra parsley and a sprinkle of feta. For individual servings, use wide bowls. This way, each person sees all the bright colors. A beautiful dish makes it more inviting and fun to eat.
Pro Tips
- Chill for Flavor: Allow the salad to sit in the refrigerator for at least 30 minutes before serving to enhance and meld the flavors.
- Fresh Ingredients Matter: Use fresh vegetables and herbs to maximize the taste and nutritional value of your salad.
- Customize Your Protein: Feel free to substitute the chicken with grilled shrimp or chickpeas for a different protein option.
- Dress Just Before Serving: If preparing in advance, keep the dressing separate until just before serving to maintain the pasta’s texture and prevent sogginess.

Variations
Vegan Version
You can easily make this salad vegan. Start by swapping the chicken for chickpeas or tofu. Both options add protein and a nice texture. Instead of feta cheese, use a vegan feta or skip it altogether. This keeps the salad fresh and tasty while meeting vegan needs.
Adding Additional Proteins
If you want more protein, consider adding shrimp or grilled fish. Both pair nicely with the flavors in this salad. You can even mix in some beans like black beans or white beans for extra fiber. Each option adds a new layer of taste and nutrition.
Seasonal Ingredient Swaps
Change the salad with seasonal ingredients. In summer, add bell peppers or zucchini for crunch. In fall, roasted sweet potatoes or butternut squash add warmth and flavor. You can also swap cherry tomatoes for diced heirloom tomatoes when they are in season for a richer taste. These changes keep your salad exciting all year.
Storage Info
How to Store Leftovers
To keep your Greek Orzo Salad fresh, place it in an airtight container. Make sure the salad cools down first. This helps avoid moisture buildup, which can make the salad soggy. You can store it in the fridge for a quick meal later.
Reheating Instructions
When you want to eat the salad again, you can enjoy it cold. If you prefer it warm, gently heat the salad in a pan over low heat. Stir it often to ensure even warming. Avoid using the microwave, as it can make the orzo too mushy.
Shelf Life of Greek Orzo Salad
Greek Orzo Salad stays fresh in the fridge for about 3 to 5 days. Make sure to check for any signs of spoilage. If the salad smells off or has changed color, it’s best to toss it. Enjoy your salad often, but remember to keep it safe!
FAQs
Can I use a different type of pasta?
Yes, you can use other pasta types. If you want a gluten-free option, try rice pasta. For a heartier bite, choose penne or fusilli. Each pasta type gives a different taste and texture. Just make sure to cook it until al dente. This keeps it firm in the salad.
How long can I keep Greek Orzo Salad in the fridge?
You can store Greek Orzo Salad in the fridge for up to three days. Make sure to keep it in an airtight container. This helps keep the flavors fresh. After a day, you might need to add a dash of lemon juice or olive oil. This keeps the salad from getting dry.
What’s the best way to serve this salad?
Serve the salad chilled for a refreshing taste. Use a large bowl to show off the colors. Garnish with extra parsley and a bit of feta on top. If serving guests, offer individual bowls to make it special. Pair this salad with grilled meats or as a light meal on its own.
This article covered the ingredients and steps needed to make Greek Orzo Salad. We discussed tips for flavor, variations, and proper storage. The options for customization allow you to create a dish that suits your taste. Always remember to chill the salad to boost flavor. With easy adjustments and simple storage tips, this salad can be a go-to meal for any occasion. Enjoy making your own flavorful Greek Orzo Sala

Mediterranean Sunshine Orzo Salad with Chicken
Ingredients
- 1 cup orzo pasta
- 1 cup cooked chicken breast, shredded
- 1 cup cherry tomatoes, halved
- 1 whole cucumber, diced
- 1/2 cup red onion, finely chopped
- 1/2 cup Kalamata olives, pitted and halved
- 1/2 cup feta cheese, crumbled
- 1/4 cup fresh parsley, chopped
- 3 tablespoons extra virgin olive oil
- 2 tablespoons lemon juice
- 1 teaspoon dried oregano
- to taste salt and pepper
Instructions
- Start by cooking the orzo pasta according to the package instructions. Once al dente, drain and rinse under cold water to cool.
- In a large mixing bowl, combine the cooled orzo, shredded chicken, halved cherry tomatoes, diced cucumber, chopped red onion, Kalamata olives, and crumbled feta cheese.
- In a separate small bowl, whisk together the olive oil, lemon juice, dried oregano, salt, and pepper until well blended.
- Pour the dressing over the pasta and chicken mixture. Gently toss until all ingredients are coated in the dressing.
- Add the chopped parsley and give it one final toss to combine evenly.
- Taste and adjust the seasoning with more salt and pepper if needed.
- For best results, let the salad sit in the refrigerator for at least 30 minutes to allow the flavors to meld together.


![- 2 cups cooked rotini pasta - 2 cups cooked chicken, shredded - 2 cups broccoli florets, steamed - 1 cup Alfredo sauce - 1 cup shredded mozzarella cheese - 1/2 cup grated Parmesan cheese - Seasoning ingredients: - 1 teaspoon garlic powder - 1/2 teaspoon onion powder - Salt and pepper to taste - 1/4 teaspoon red pepper flakes (optional) - 1 tablespoon olive oil - Fresh parsley, chopped (for garnish) The base of this dish is simple. You need rotini pasta, cooked chicken, and steamed broccoli. The Alfredo sauce brings creaminess. Cheese adds flavor and texture. You can change the chicken to turkey or tofu for a twist. Instead of rotini, use penne or any pasta you like. For a dairy-free option, use a plant-based Alfredo sauce. Gluten-free pasta works well too. Pick fresh broccoli for the best taste. When choosing chicken, look for moist and tender pieces. High-quality cheese melts better and tastes great. Use homemade Alfredo sauce for a richer flavor. First, you need to preheat your oven. Set it to 350°F (175°C). This step is key for even cooking. While the oven heats, you can prepare your other ingredients. Next, grab a large mixing bowl. Combine the cooked rotini pasta, shredded chicken, and steamed broccoli. These three ingredients create a hearty base. Pour in the Alfredo sauce, and sprinkle in the garlic and onion powders. Add salt, pepper, and red pepper flakes if you like some heat. Gently stir everything until well mixed. Now, it’s time to transfer the mixture to your casserole dish. Lightly grease a 9x13-inch dish with olive oil. Spread the pasta mixture evenly in the dish. Sprinkle the mozzarella and Parmesan cheese on top. Cover the dish with aluminum foil to keep moisture in. Bake it in the preheated oven for 20 minutes. After that, remove the foil and bake for another 10-15 minutes. Look for bubbly, golden cheese. Once done, let it cool for a few minutes before serving. Enjoy your comforting meal! To get the best texture and taste from your Chicken and Broccoli Alfredo Casserole, follow these tips: - Cook Pasta Al Dente: Make sure to cook the rotini just right. This means it should be firm to the bite. It will soak up some sauce while baking, so this is key. - Use Fresh Broccoli: Fresh broccoli gives better taste and texture than frozen. Steam it just until bright green. - Mix Well: When adding the Alfredo sauce, ensure every piece of chicken and broccoli gets coated. This makes each bite delicious. - Cover with Foil: Cover your casserole while it bakes. This keeps moisture in and helps the cheese melt evenly. Serving your casserole nicely can make it even more enjoyable. Here are some ideas: - Garnish with Parsley: A sprinkle of fresh chopped parsley adds color and a fresh taste. - Serve with a Side Salad: A light salad balances the creamy casserole. Think about a simple green salad with vinaigrette. - Use Individual Dishes: For a fun twist, serve in small, individual baking dishes. This adds a nice touch for guests. If you want to add more flavor or ingredients, consider these options: - Add More Veggies: You can mix in bell peppers, spinach, or even carrots. They add color and nutrients. - Spice It Up: Add more red pepper flakes or some cayenne for heat. Just a pinch can make a big difference. - Use Different Cheeses: Try adding gouda or cheddar for a different flavor. Mixing cheeses often creates a richer taste. - Top with Breadcrumbs: For a crunchy top, sprinkle some seasoned breadcrumbs before baking. It gives a nice contrast to the creamy dish. These tips can help you create a Chicken and Broccoli Alfredo Casserole that everyone will love. For the complete recipe, check out the [Full Recipe]. {{image_2}} You can change the proteins and veggies in this dish. Instead of chicken, try turkey or shrimp. Both add a nice twist. For veggies, swap broccoli for spinach or peas. You could even mix in bell peppers for extra flavor. If you prefer a meatless option, use tofu or more veggies. This makes the casserole feel fresh and new each time. The sauce and cheese can change the flavor too! Try using different Alfredo sauces. Some brands offer garlic or herb versions that can add a new taste. You could also make your own sauce with cream and cheese. For cheese, use cheddar or gouda instead of mozzarella. Each cheese gives a different touch. Mixing cheeses can create a rich flavor profile. There are many ways to cook this casserole. You can use a slow cooker for a hands-off approach. Just mix the ingredients and let it cook on low for about 4 hours. For a quick option, use a skillet. Cook everything on the stove and then bake it for a short time. This keeps it nice and hot. Each method brings out different textures and flavors. To keep your Chicken and Broccoli Alfredo Casserole fresh, store leftovers in an airtight container. Let the casserole cool completely before sealing it. This helps to prevent moisture buildup. You can keep it in the fridge for up to three days. When you’re ready to eat it, just reheat in the oven or microwave until warm. If you want to save some for later, freezing is a great option. First, let the casserole cool down. Then, wrap it tightly in plastic wrap or aluminum foil. You can also use a freezer-safe container. Chicken and Broccoli Alfredo Casserole can last up to three months in the freezer. When you’re ready to enjoy it, thaw it in the fridge overnight. Reheat it in the oven at 350°F (175°C) until it’s hot all through. In the fridge, Chicken and Broccoli Alfredo Casserole stays good for about three days. If you freeze it, you can enjoy it for about three months. Always check for signs of spoilage before eating. If it looks or smells off, it’s best to toss it. Proper storage helps you enjoy every last bite of this creamy comfort food. For the full recipe, check back to the top! How to make this dish ahead of time? You can make this casserole ahead of time. Just prepare the dish as normal but do not bake it. Cover it with foil and place it in the fridge. When you are ready to eat, simply bake it at 350°F for about 30-35 minutes. This method helps save time on busy nights. Is this casserole suitable for different diets? Yes, this casserole can fit many diets. If you need a gluten-free option, use gluten-free pasta. You can also make it dairy-free by using plant-based Alfredo sauce and cheese. For a lower-calorie version, use lean chicken and a lighter sauce. This way, everyone can enjoy it. What to do if the casserole turns out too dry or too wet? If your casserole is dry, add a splash of chicken broth or extra Alfredo sauce. Mix it in well before serving. If it is too wet, bake it a bit longer uncovered to let the moisture evaporate. This way, you can fix your dish and make it tasty again. For the full recipe, check out the detailed steps. This blog post covered a comforting Chicken and Broccoli Alfredo Casserole recipe. We detailed essential ingredients, possible substitutions, and tips for quality. You learned step-by-step instructions for preparation and baking. I shared helpful tips for serving and enhancing the dish. Additionally, we explored variations and storage guidelines. In closing, this recipe is versatile and easy to make. Enjoy trying out different ingredients to make it your own!](https://dailydishly.com/wp-content/uploads/2025/06/758c3e25-adc9-448d-9aec-bad37cea0959-768x768.webp)