Homemade Soft Pretzels Tasty and Easy Recipe Guide

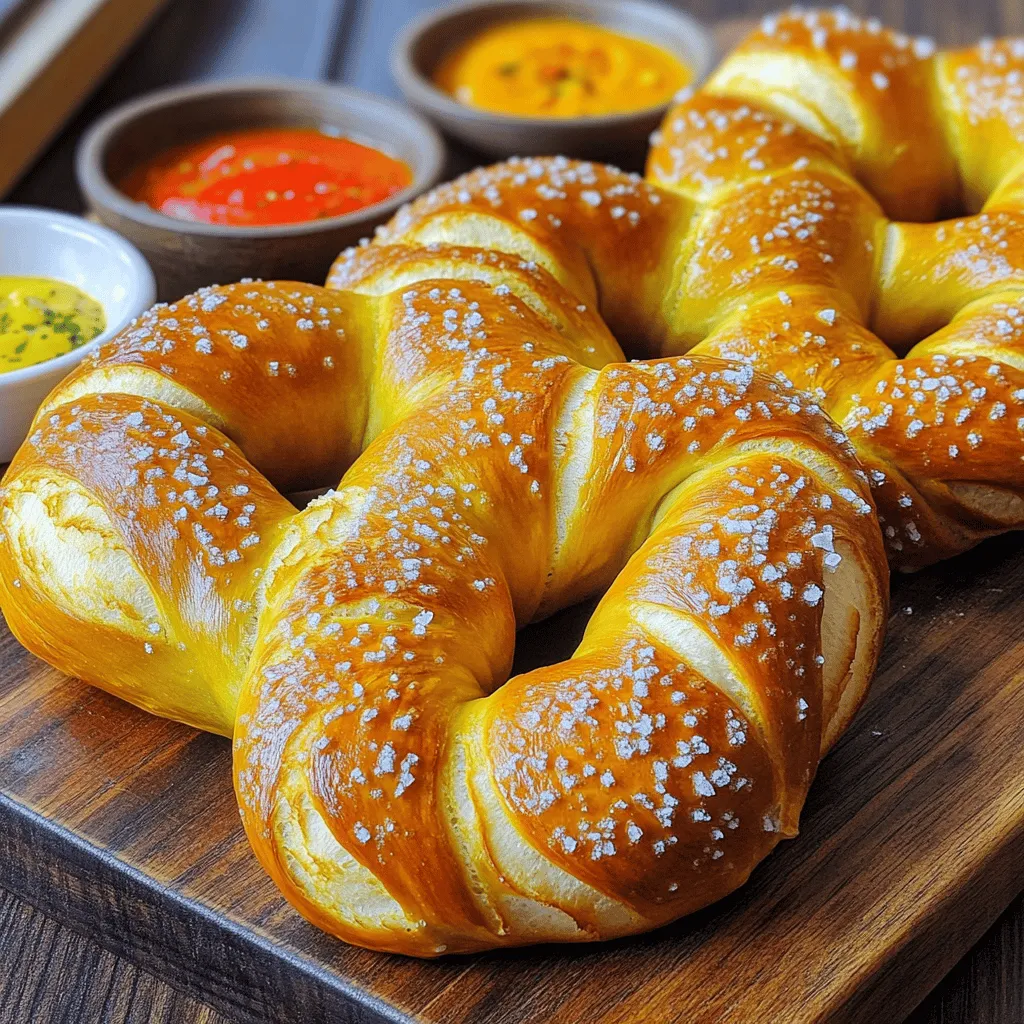
Craving a soft, chewy snack? Homemade soft pretzels are the answer! They’re fun to make and perfect for sharing. In this guide, I’ll walk you through easy steps to create these delicious treats at home. You’ll learn the best ingredients, tips for great results, and even some tasty variations. Let’s get started on your journey to pretzel perfection!
Ingredients
List of Required Ingredients (with measurements)
To make tasty soft pretzels, gather these items:
– 4 cups all-purpose flour
– 1 packet (2 ¼ teaspoons) active dry yeast
– 1 ½ cups warm water (110°F)
– ¼ cup granulated sugar
– 2 teaspoons salt
– ½ cup baking soda
– 1 large egg, beaten (for egg wash)
– Coarse sea salt (for sprinkling)
– 1 tablespoon olive oil (for greasing)
Recommended Quality for Best Results
Choosing the right ingredients matters. Use high-quality all-purpose flour for a better chew. Active dry yeast should be fresh. This ensures proper rising. Coarse sea salt adds crunch and flavor. Avoid table salt; it can be too fine. The warm water must be at the right temperature. Too hot or too cold can harm the yeast.
Optional Ingredients for Customization
Feel free to get creative! You can add toppings like:
– Grated cheese for a cheesy pretzel
– Dried herbs like garlic powder or rosemary for extra flavor
– Cinnamon sugar for a sweet twist
– Sesame seeds or poppy seeds for a unique crunch
These additions can make your pretzels even more fun!
Step-by-Step Instructions
Preparation of Yeast Mixture
Start by mixing warm water and sugar in a bowl. The water should be around 110°F. This warmth helps the yeast activate. Next, sprinkle the yeast over the top. Let it sit for about 5 to 10 minutes. You want to see it get frothy. This shows the yeast is alive and ready to work.
Dough Kneading and Rising
Once the yeast mixture is frothy, add the flour and salt. Stir them together until you form a dough. Next, you will knead the dough on a floured surface. This takes about 5 to 7 minutes. You want the dough to feel smooth and elastic. After kneading, place the dough in a greased bowl. Cover it with a towel and let it rise in a warm spot for about an hour. The dough should double in size during this time.
Shaping and Boiling the Pretzels
After the dough has risen, preheat your oven to 450°F. Line a baking sheet with parchment paper. Now, punch down the dough and divide it into 8 equal pieces. Roll each piece into a long rope, about 24 inches. To make the pretzel shape, form a loop and twist the ends together. Press the ends onto the lower part of the loop.
Bring 10 cups of water to a boil in a large pot. Add the baking soda to this water. Carefully drop each pretzel into the boiling water for about 30 seconds. Use a slotted spoon to remove them and place them on the baking sheet. Brush each pretzel with a beaten egg and sprinkle coarse sea salt on top. Bake for 12 to 15 minutes, until they turn golden brown. Now, you have warm, soft pretzels ready to enjoy!
Tips & Tricks
Achieving Perfect Texture and Color
To get the best soft pretzels, focus on the dough. The right texture helps them rise well. Knead it until smooth and elastic. This takes about 5-7 minutes. Let the dough rise in a warm place. Keep it covered to retain heat. The dough should double in size. This step is key for a fluffy pretzel.
Boiling the pretzels is also important. Use a large pot with water and baking soda. Boil each pretzel for 30 seconds. This gives them that nice color and chewiness. Don’t skip this step!
Common Mistakes to Avoid
Many people rush the dough. Don’t skip the rising time. If the dough doesn’t rise enough, pretzels will be dense. Also, be careful with boiling. If you boil too long, they become tough. Make sure to shape the pretzels properly. A twisted shape helps them cook evenly.
Another mistake is using too much salt. While salt adds flavor, too much can overpower the taste. Sprinkle lightly before baking. Finally, make sure your oven is hot enough before baking. A preheated oven ensures a great crust.
Equipment Recommendations for Best Results
Using the right tools makes a big difference. A large mixing bowl helps combine ingredients well. A clean surface is needed for kneading the dough. A slotted spoon is essential for lifting pretzels from boiling water.
Use parchment paper on your baking sheet. This prevents sticking and makes cleanup easy. A baking sheet with low edges works best. It allows air to circulate around the pretzels. Finally, a kitchen towel helps keep the dough warm while it rises.

Variations
Flavored Pretzels (e.g., Cheese, Garlic)
Flavored pretzels take your snack to the next level. You can add cheese or garlic to the dough for a tasty twist. For cheese, mix in 1 cup of shredded cheese like cheddar or mozzarella directly into the dough. If you love garlic, add minced garlic to the boiling water or sprinkle garlic powder on top before baking. These flavors blend well with the saltiness of pretzels.
Gluten-Free Alternative Options
If you need a gluten-free option, you can still enjoy pretzels. Use a gluten-free flour blend that works for baking. Make sure to add xanthan gum to help the dough hold together.The texture may vary, but the taste will still be great.
Sweet Pretzel Variations (e.g., Cinnamon Sugar)
Sweet pretzels are perfect for dessert or a treat. After boiling and before baking, brush the pretzels with melted butter. Then, mix sugar and cinnamon in a small bowl. Sprinkle this mix over the pretzels before they go in the oven. You can also dip baked pretzels in a sweet glaze made of powdered sugar and milk for an extra sweet touch. Enjoy these with a hot cup of cocoa or coffee!
Storage Info
Best Ways to Store Leftover Pretzels
To keep your pretzels fresh, store them in an airtight container. This will prevent them from getting hard. If you plan to eat them soon, leave them at room temperature for up to 2 days. If you want them to last longer, use the fridge. Just wrap them in plastic wrap first.
Reheating Methods for Optimal Taste
When you want to enjoy your leftover pretzels, reheating them is key. The best way is to use an oven. Preheat your oven to 350°F (175°C). Place the pretzels on a baking sheet and heat for about 5-10 minutes. This method makes them soft again. You can also microwave them, but they may get chewy. Heat them for about 15-20 seconds.
Freezing Homemade Soft Pretzels
If you want to save your pretzels for later, freezing is a great option. First, let them cool completely. Then, wrap each pretzel in plastic wrap. Place them in a freezer bag or container. They can last up to 3 months in the freezer. To enjoy them later, just thaw them in the fridge overnight and reheat as mentioned.
FAQs
How to fix tough or dry pretzels?
If your pretzels turn out tough or dry, don’t worry! You can fix them. First, check your dough. If you kneaded it too much, it could become tough. Next time, knead just until smooth. If they are baked already, try soaking them in warm water for a few seconds. This may help soften them. You can also brush them with melted butter after baking. This adds moisture and flavor.
Can I make pretzel dough in advance?
Yes, you can make pretzel dough in advance! Prepare the dough and let it rise as usual. After the first rise, punch it down and wrap it tightly in plastic wrap. Store it in the fridge for up to 24 hours. When you’re ready, let it come to room temperature before shaping. This helps the dough relax and makes it easier to work with.
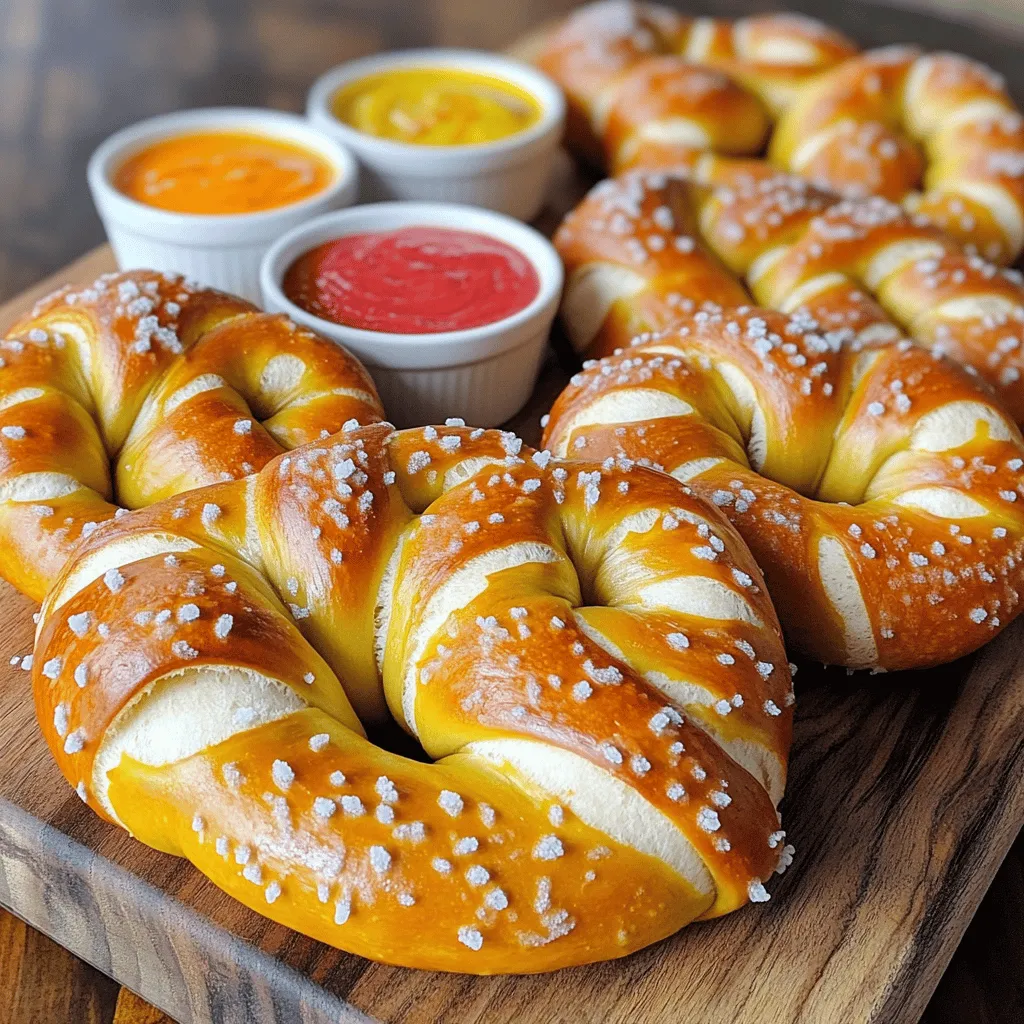
What are some good dipping sauces for soft pretzels?
Dipping sauces can enhance your soft pretzel experience. Here are some tasty options:
– Mustard: A classic choice, especially spicy or Dijon mustard.
– Cheese Sauce: Warm, gooey cheese sauce is a crowd favorite.
– Honey Mustard: A sweet and tangy mix that pairs well with pretzels.
– Cinnamon Sugar Dip: A sweet treat, perfect for dessert pretzels.
– Ranch Dressing: A creamy option that adds a nice flavor contrast.
Feel free to get creative! You can mix and match to find your favorite flavors.
In this post, we covered everything you need to make perfect pretzels. We discussed key ingredients, step-by-step instructions, and helpful tips for great results. You can explore fun variations to please anyone. Remember to store leftovers right to keep them fresh. Homemade pretzels bring joy and flavor to meals or snacks. Follow these steps, and you’ll impress everyone with your baking skills. Enjoy every bite, and don’t forget to share your pretzel creations!


![- 2 cups sushi rice - 4 sheets nori (seaweed) - 1 avocado, sliced - 1 cucumber, julienned - 1 carrot, julienned - 1 red bell pepper, julienned To make easy veggie sushi rolls, you need key ingredients that create the perfect base and flavor. Sushi rice is sticky and helps hold the rolls together. Nori provides a tasty wrap. Fresh veggies add crunch and color. - 1/4 cup rice vinegar - 1 tablespoon sugar - 1/2 teaspoon salt These seasoning ingredients enhance the rice's flavor. Rice vinegar gives a slight tang. Sugar adds a hint of sweetness, while salt balances the taste. This mixture makes the sushi rice shine. - Soy sauce for dipping - Optional garnishes (sesame seeds, wasabi) When serving, soy sauce adds a salty kick. You can sprinkle sesame seeds for added crunch. Wasabi provides a spicy option for those who like heat. Enjoying these rolls with the right dips makes them even better. For the full recipe, check the Easy Veggie Sushi Rolls section. To start, rinse the sushi rice under cold water. This helps remove the excess starch. Keep rinsing until the water runs clear. You can cook the rice in a rice cooker or on the stovetop. If using a rice cooker, add 2 ½ cups of water and follow the machine's instructions. For stovetop cooking, bring the rice and water to a boil. Then, lower the heat, cover, and simmer for about 20 minutes until the water is gone. Next, mix rice vinegar, sugar, and salt in a small bowl. After cooking, transfer the rice to a large bowl. While it is still warm, gently fold in the vinegar mixture. This adds great flavor to the rice. Allow the rice to cool to room temperature before using it. While the rice cools, slice your fresh veggies. Take an avocado and slice it into thin pieces. Next, julienne the cucumber and carrot. Finally, slice the red bell pepper into thin strips. Each vegetable adds a nice crunch and color to your sushi. Place a bamboo sushi mat on a flat surface. Put a sheet of nori on top, shiny side down. Wet your hands to stop the rice from sticking. Take about a handful of rice and spread it evenly over the nori, leaving a small margin at the top edge. Now it's time to roll! Add a few pieces of each vegetable horizontally across the center of the rice. Starting from the bottom edge, carefully roll the mat away from you, holding the filling with your fingers. Make sure to roll tightly, but not too tight. Moisten the top edge with water to seal the roll. Use a sharp knife to slice the roll into bite-sized pieces. Wipe the knife with a damp cloth between cuts for clean slices. Arrange the sushi rolls on a serving platter. If you like, sprinkle sesame seeds on top and serve with soy sauce for dipping. Enjoy your beautiful veggie sushi rolls! For the complete recipe, check out [Full Recipe]. - Overcooking rice: If you cook the rice too long, it becomes mushy. This ruins the texture of your sushi. Keep an eye on your timer! - Squashing the roll while slicing: When you cut the sushi, press too hard. This squashes the roll and makes a mess. Use a sharp knife and gentle pressure. - How to roll sushi without a mat: No mat? No problem! Use a clean kitchen towel instead. Place the nori on the towel, add rice and fillings, and roll tightly. Keep your hands wet to avoid sticking. - Adding sauces or spices: Soy sauce is classic, but you can try others too. Add a splash of sriracha for heat or sprinkle sesame seeds for crunch. Experiment with flavors you love! For the complete recipe, you can refer to the Full Recipe section. {{image_2}} You can add protein to your sushi rolls for extra flavor and nutrition. Tofu is a great choice. Try firm or extra-firm tofu. It holds its shape well. You can marinate it in soy sauce or sesame oil for added flavor. Then, grill or sauté it until golden. Tempeh is another tasty option. This soy product has a nutty flavor. Slice it thin and cook it the same way. Both tofu and tempeh make your rolls filling and satisfying. Don’t feel limited to just avocado and cucumber! Use seasonal veggies for variety. In spring, try adding asparagus or snap peas. They add a nice crunch. In summer, bell peppers and zucchini are perfect. They are sweet and juicy. In fall, consider roasted sweet potatoes or beets for earthiness. Winter brings hearty greens like kale or spinach. You can even use radishes for a spicy kick. Mix and match to find your favorite combinations. Get creative by blending cuisines! Add cream cheese for a sushi-style bagel roll. You can also try spicy kimchi for a Korean twist. Consider using hummus and roasted red peppers for a Mediterranean flair. For a Mexican spin, add black beans and corn. Top it with fresh cilantro and lime juice. Each fusion idea brings new flavors to your rolls. It makes sushi fun and exciting! For the complete recipe, check out the Full Recipe section. To store leftover sushi rolls, wrap them tightly in plastic wrap or foil. This keeps them fresh and prevents the rice from drying out. Place the wrapped rolls in an airtight container. Store them in the fridge for up to 24 hours. The sooner you eat them, the better they taste. Freezing sushi rolls is simple. Wrap each roll in plastic wrap, then place them in a freezer-safe bag. Squeeze out as much air as possible. You can freeze sushi for about one month. When you are ready to eat, thaw it in the fridge overnight. Avoid microwaving, as it can make the rice mushy. Sushi rolls taste best when fresh. If stored properly in the fridge, they last for one day. After that, they may lose their flavor and texture. If you freeze the rolls, they can stay fresh for one month. Always check for any off smells or changes in color before eating. The best rice for sushi is short-grain sushi rice. This rice is sticky and holds its shape well. It gives sushi rolls their unique texture. When cooked, this rice becomes chewy, which is great for sushi. Look for sushi rice in Asian grocery stores or online. You can also use medium-grain rice if sushi rice is hard to find. Just remember not to use long-grain rice, as it will not stick well. Yes, you can use other ingredients besides nori. If you don’t like nori, try using lettuce leaves. They are fresh and crunchy. You can also use rice paper, which adds a different texture. Another option is to use thinly sliced cucumber as a wrap. This keeps your sushi light and refreshing. Just be creative with your wraps and fillings. The choice is all yours! Absolutely! This recipe is great for meal prep. You can make sushi rolls in advance and store them. Just keep them in an airtight container in the fridge. They will stay fresh for about 24 hours. If you prep the rice and veggies ahead of time, it makes rolling easy. You can also cut the rolls into pieces before storing. This way, you have quick snacks or lunches ready to go. Enjoy making your sushi rolls ahead of time! For the full recipe, check out the Easy Veggie Sushi Rolls section. In this blog post, I covered how to create sushi from start to finish. We looked at key ingredients like sushi rice, nori, and fresh veggies. I shared step-by-step instructions to prepare the rice, slice the vegetables, and assemble your rolls. I also offered tips to avoid common mistakes and enhance flavor. You can add your favorite proteins and try different veggies or fusion styles. With proper storage, your sushi can stay fresh for days. Now, it’s time to roll up your sleeves and enjoy making sushi at home!](https://dailydishly.com/wp-content/uploads/2025/07/11ef977b-69a9-4776-8bce-81e4c28b3d11-768x768.webp)
![When making lemon garlic shrimp skewers, you need fresh and simple ingredients. Here’s what you will need: - 1 lb large shrimp, peeled and deveined - 3 tablespoons olive oil - Zest and juice of 2 lemons - 4 cloves garlic, minced - 1 teaspoon red pepper flakes - 1 teaspoon smoked paprika - Salt and pepper to taste - Fresh parsley, chopped - Skewers, soaked if wooden Each ingredient plays a key role in creating the bright and zesty flavor of the dish. The shrimp should be large and fresh for the best taste. This recipe uses lemon juice and zest to add brightness. Minced garlic gives a strong, savory kick. Red pepper flakes add some heat, while smoked paprika gives a nice depth of flavor. Don’t forget to soak wooden skewers in water for at least 30 minutes. This step helps to prevent burning on the grill. You can find the full recipe details in the recipe section. Enjoy the bright, fresh taste of lemon garlic shrimp skewers! To start, gather your ingredients. You will need olive oil, lemon zest, lemon juice, garlic, red pepper flakes, smoked paprika, salt, and pepper. In a large bowl, combine these ingredients. Whisk them together until they blend well. The smell of the lemon and garlic will fill your kitchen. This marinade packs a punch and will soak into the shrimp. Next, add your shrimp to the marinade. Make sure each shrimp gets a good coat of that zesty mix. This step is key for flavor. Once all the shrimp are coated, cover the bowl. Place it in the fridge for at least 30 minutes. This wait allows the flavors to seep into the shrimp, making them taste amazing. Now, it's time to grill. Preheat your grill or grill pan to medium-high heat. While it heats up, thread the marinated shrimp onto skewers. Don’t crowd them; leave some space for even cooking. When the grill is hot, place the skewers on it. Grill each side for 2-3 minutes. You will know the shrimp are done when they turn pink and opaque. This means they are perfectly cooked. Enjoy the aroma as they grill! For the full recipe, check the section above. To get the best shrimp, cook them for 2-3 minutes on each side. Use medium-high heat on your grill or grill pan. Watch for key signs of doneness: the shrimp should turn bright pink and become opaque. If they curl tightly, they may be overcooked. You can adjust the spices to match your taste. Try adding more red pepper flakes for heat, or use fresh herbs like cilantro or basil. If you want to swap oils, avocado oil works great too. You can even add a splash of soy sauce for a different twist. These lemon garlic shrimp skewers pair well with many sides. Try serving them with a fresh salad, rice, or grilled vegetables. For garnishing, sprinkle fresh parsley or lemon zest on top. This adds a pop of color and extra flavor. For the full recipe, check out the [Full Recipe]. {{image_2}} You can make your lemon garlic shrimp skewers even better by adding vegetables. I love using bell peppers, zucchini, or onions. These veggies add color and flavor. Here’s how to do it: - Bell Peppers: Cut them into bite-sized pieces. They add sweetness and crunch. - Zucchini: Slice it into thick rounds. It cooks quickly and stays tender. - Onions: Use red or yellow onions. Cut into wedges for a nice char. For mixed skewers, cook the shrimp and veggies together for about 2-3 minutes on each side. Just keep an eye on the cooking time. You want everything to be tender and cooked through. If you want more or less heat, it’s easy to adjust. To reduce heat, cut back on red pepper flakes. You can also use a milder spice blend. For more heat, add extra red pepper flakes or a dash of hot sauce. Try different marinades for new flavors. A honey-soy mix gives a sweet twist. A cilantro-lime marinade offers a fresh taste. These changes can make your skewers even more fun! If you want to switch things up, consider other seafood. Scallops are a great choice. They cook fast and taste amazing. You can also use firm fish like salmon or tuna. Just cut them into chunks. When cooking different seafood, adjust the cooking time. Fish usually cooks in 4-5 minutes. Scallops need about 2-3 minutes per side. Always look for that perfect pink and opaque look to know it’s done. To keep your shrimp skewers fresh, place them in an airtight container. You can store them in the fridge for up to three days. If you want to keep them longer, freeze them. Wrap each skewer in plastic wrap and then place them in a freezer bag. They can stay in the freezer for up to three months. When you reheat shrimp skewers, do it gently to keep them juicy. The oven works best. Preheat it to 350°F (175°C). Place the skewers on a baking sheet and cover them with foil. Heat for about 10 minutes. You can also use a microwave if you are in a hurry. Just heat them for 30 seconds at a time. Check often to avoid overcooking. Preparing shrimp skewers in advance is easy. You can marinate them the night before and store them in the fridge. This way, all the flavors mix well. If you have leftover shrimp, use them in salads, tacos, or pasta dishes. They add great flavor and protein to your meals. For more fun, try mixing them with veggies to make a stir-fry. For the full recipe, check out the Zesty Lemon Garlic Shrimp Skewers. I recommend marinating the shrimp for at least 30 minutes. This time allows the shrimp to soak up the lemon and garlic flavors. If you have more time, you can marinate them for up to 2 hours. Just don't go too long, or the shrimp may become tough from the acid in the marinade. Yes, you can prepare the skewers ahead of time. Just marinate the shrimp and thread them onto skewers. Cover and store them in the fridge for up to 2 hours before grilling. If you need more time, you can freeze the marinated skewers for later use. Just thaw them in the fridge before cooking. Look for large shrimp, ideally 16-20 count per pound. Large shrimp stay juicy and cook evenly on the grill. Always choose fresh or frozen shrimp that are peeled and deveined for the best results. Fresh shrimp should smell like the sea and have a firm texture. Perfectly cooked shrimp turn pink and opaque. This usually takes about 2-3 minutes per side on the grill. If you see them curl into a C shape, that’s a sign they are done. Overcooking shrimp can make them tough, so keep an eye on them while grilling. You learned how to make delicious lemon garlic shrimp skewers using simple ingredients. We covered marinating, grilling, and tips for perfect shrimp. You can spice it up or add veggies for new flavors. These skewers are easy to store, reheat, and even use in other meals. Enjoy making this dish and impressing friends or family with your grilling skills.](https://dailydishly.com/wp-content/uploads/2025/06/a1f3f783-88f9-44d5-88e1-43cf245073bc-768x768.webp)

![To make Roasted Garlic Parmesan Cauliflower, gather the following main ingredients: - 1 medium head of cauliflower, cut into florets - 6 cloves of garlic, minced - 1/4 cup grated Parmesan cheese - 3 tablespoons olive oil - 1 teaspoon garlic powder - 1/2 teaspoon smoked paprika - Salt and pepper to taste - Fresh parsley, chopped (for garnish) These ingredients create a rich and savory flavor in the dish. The garlic gives it a nice punch, while the Parmesan adds creaminess. You can add some optional ingredients to change up the flavor. Here are a few ideas: - Lemon juice for a tangy twist - Red pepper flakes for heat - Thyme or rosemary for an herbaceous note Using these optional ingredients can give you a unique spin on the original dish. To prepare this delicious dish, you’ll need a few basic tools: - A large mixing bowl - A baking sheet - Parchment paper for easy cleanup - A sharp knife for cutting the cauliflower - A spatula for tossing the florets Having the right tools makes cooking easier and more fun. You can find the full recipe in the guide above. First, you need to wash the cauliflower. Remove the leaves and cut the head into small florets. Make sure they are about the same size. This helps them cook evenly. You want each floret to be bite-sized. It makes serving easier and more fun to eat. In a large bowl, add your cauliflower florets. Now, add minced garlic, olive oil, garlic powder, smoked paprika, salt, and pepper. Toss everything well. Ensure each floret gets coated in the tasty mix. This step is key for great flavor. The garlic and spices will really shine through. Preheat your oven to 425°F (220°C). Spread the seasoned florets on a baking sheet lined with parchment paper. Make sure they are in a single layer. This helps them roast well. Bake for about 20-25 minutes. Stir halfway through to ensure even roasting. The cauliflower should turn tender and golden brown. When you take them out, sprinkle the Parmesan cheese on top. Pop them back in the oven for 5 more minutes. This will melt the cheese and make everything delicious. Finally, let the roasted cauliflower cool for a couple of minutes. Garnish with fresh parsley before serving. Enjoy your flavorful dish! For the full recipe, check [Full Recipe]. To get the best flavor, use fresh garlic. Fresh garlic gives a strong, rich taste. Mince the garlic finely for even better flavor. You can also add a pinch of lemon zest. This adds a bright note that balances the richness of the cheese. Roasting cauliflower is all about the heat. Preheat your oven to 425°F (220°C). This high heat gives the cauliflower a nice golden color. Spread the florets out on the baking sheet. If they are too close, they will steam instead of roast. Stir them halfway through cooking. This helps to brown all sides evenly. Roasted garlic parmesan cauliflower shines on its own. Serve it as a side dish with grilled chicken or fish. You can also toss it into salads for extra flavor. For a fun twist, make it a topping for baked potatoes. The creamy cheese and garlic mix perfectly with the fluffy potato. Don’t forget to check the Full Recipe for more tips! {{image_2}} You can switch up the cheese in this dish. Try using cheddar for a sharper taste. Goat cheese adds a creamy touch that melts nicely. Feta gives a tangy bite that pairs well with garlic. If you want a nutty flavor, use Gruyère instead. Each cheese brings its own flair to the roasted cauliflower. You can mix in other veggies for more color and taste. Broccoli works great with cauliflower. Brussels sprouts add a nice crunch. Carrots give a sweet note that balances the garlic. Feel free to toss in bell peppers or zucchini for extra flavor. Roasting them together makes a tasty medley. If you want a vegan version, swap the Parmesan for nutritional yeast. It gives a cheesy flavor without dairy. You can also use vegan cheese shreds that melt well. For extra creaminess, add a splash of almond milk. This way, you keep the dish flavorful and plant-based. You can find the full recipe for Roasted Garlic Parmesan Cauliflower [here]. After enjoying your Roasted Garlic Parmesan Cauliflower, let it cool first. Place any leftovers in an airtight container. You can store it in the fridge for up to 3 days. This keeps the flavors fresh and the texture nice. To reheat, preheat your oven to 350°F (175°C). Spread the cauliflower on a baking sheet. Heat it for about 10 to 15 minutes. This method keeps the cauliflower crisp. You can also microwave it for 1 to 2 minutes, but the texture may change. If you want to freeze this dish, first let it cool completely. Transfer the cauliflower to a freezer-safe bag or container. It can last for up to a month. To enjoy, thaw it overnight in the fridge. Reheat it in the oven for the best results. For more details, check the Full Recipe. Roasting cauliflower takes about 20 to 25 minutes. Preheat your oven to 425°F (220°C). Spread the cauliflower florets on a baking sheet. Roast until they turn tender and golden brown. Remember to stir halfway through for even cooking. Yes, you can prepare this dish ahead of time. You can cut the cauliflower and mix in the garlic and oil. Store it in the fridge for up to 24 hours before roasting. When you’re ready, just pop it in the oven. This makes it easy for busy days! You can serve Roasted Garlic Parmesan Cauliflower with many dishes. It pairs well with grilled chicken or fish. You can also enjoy it as a side for pasta. For a vegetarian meal, serve it with quinoa or a fresh salad. The flavors work great together and make for a fun meal! For the full recipe, check out the section above. This recipe for Roasted Garlic Parmesan Cauliflower covers everything from ingredients to storage tips. You learned how to prepare, season, and roast the cauliflower for the best flavor. Remember to try different cheeses or veggie options for fun twists. When storing leftovers, keep them safe for another meal. Enjoy this dish alongside your favorites. Cook with confidence, and let your taste buds guide you!](https://dailydishly.com/wp-content/uploads/2025/06/e2797ad0-ebfe-4fec-85bd-8200cd052b8d-768x768.webp)
