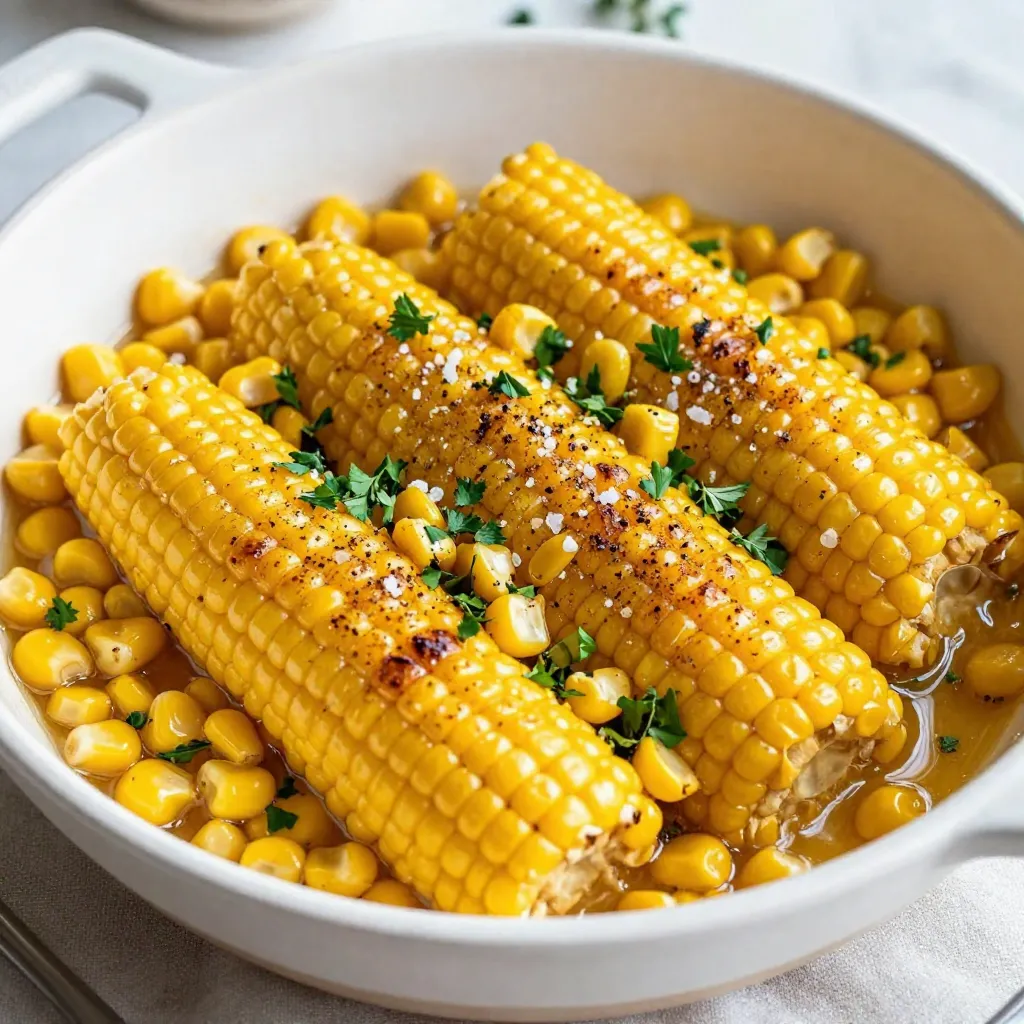
If you crave a sweet and savory side dish, Honey Butter Skillet Corn is a must-try! This easy recipe makes fresh corn shine with a tasty honey butter mix. You will love how simple the steps are and how great it tastes. In no time, you’ll create a dish that impresses family and friends. Let’s dive into the ingredients and get cooking!
Why I Love This Recipe
- Fresh and Sweet: The combination of fresh corn and honey creates a delightful sweetness that is hard to resist.
- Simple Ingredients: With just a few pantry staples, you can whip up this delicious dish in no time.
- Versatile Side Dish: This skillet corn pairs beautifully with a variety of main courses, making it perfect for any meal.
- Quick to Prepare: Ready in just 20 minutes, this recipe is great for busy weeknights or last-minute gatherings.
Ingredients
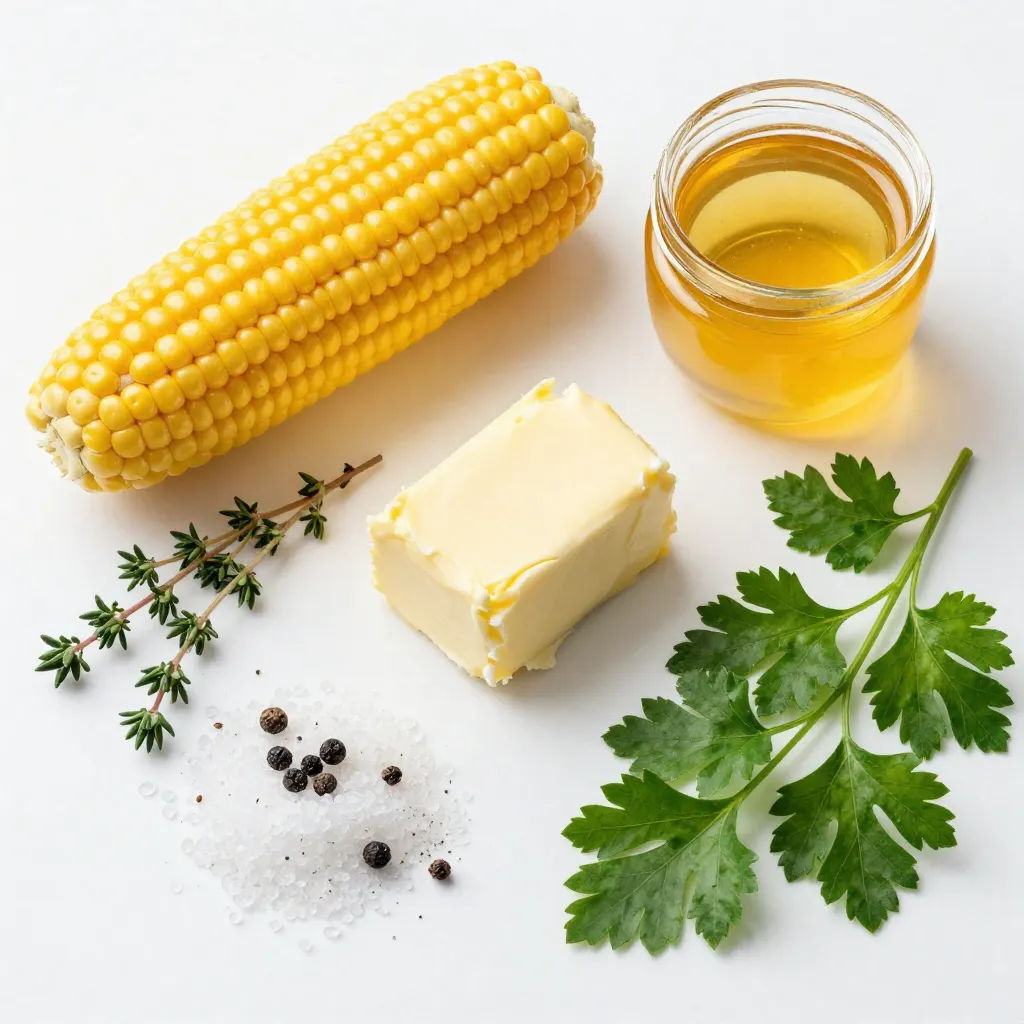
Fresh Corn Kernels
For this dish, I use 4 cups of fresh corn kernels. This is about 6 to 8 ears of corn. Fresh corn adds a sweet and bright flavor. To get the kernels, shuck the corn. Then, run a sharp knife along the cob. This method works best when you hold the cob vertically.
Butter and Honey
Next, you need 1/4 cup of unsalted butter and 1/4 cup of honey. Butter gives the dish richness. Honey adds a sweet touch. When you mix them, they create a tasty sauce for the corn.
Seasoning and Herbs
The last ingredients are seasonings. Use 1 teaspoon of sea salt and 1/2 teaspoon of freshly cracked black pepper. These add flavor to the corn. I also like to use 1 tablespoon of fresh thyme, or 1 teaspoon of dried thyme. Finally, 2 tablespoons of chopped fresh parsley make a nice garnish. They add color and freshness to the dish.
Step-by-Step Instructions
Preparing the Corn
Start with fresh corn. Shuck 6 to 8 ears of corn. Remove the kernels from the cobs. Hold the cob upright. Use a sharp knife to slice down the sides. This step gives you about 4 cups of kernels. Fresh corn makes a big difference in taste.
Making the Honey Butter Mixture
Grab a large skillet and place it on medium heat. Add 1/4 cup of unsalted butter. Let it melt completely. Once melted, drizzle in 1/4 cup of honey. Stir well to mix the butter and honey. This mixture adds a sweet touch to the corn.
Cooking the Corn
Now, it’s time to add the corn. Pour the fresh kernels into the skillet. Stir to coat them with the honey butter. Season with 1 teaspoon of sea salt and 1/2 teaspoon of black pepper. Sprinkle in 1 tablespoon of fresh thyme. Mix everything together well. Lower the heat to medium-low. Cook for about 7 to 10 minutes. Stir occasionally. You want the corn tender, but still crisp. When finished, remove from heat. Top with chopped fresh parsley for a pop of color.
Tips & Tricks
Achieving Perfect Corn Texture
To get the best corn texture, use fresh corn. Fresh corn tastes sweet and juicy. Shuck it just before cooking. This keeps it crisp. Cut the kernels off the cob with a sharp knife. Hold the cob upright. This method helps you get more kernels. Cooking time matters too. Cook for 7-10 minutes while stirring. This gives you tender corn without losing its crunch.
Enhancing Flavor Variations
You can make this dish your own with simple changes. Add a pinch of cayenne for heat. Mix in some lime juice for a zesty twist. Try herbs like basil or oregano instead of thyme. Each herb brings a new flavor. You could also add cheese. Feta or Parmesan can add a salty creaminess. Experiment to find your favorite mix!
Presentation Suggestions
How you serve your corn matters. You can keep it rustic by serving it in the skillet. This looks inviting and warm. For a fancier touch, transfer it to a nice bowl. Drizzle extra honey on top and sprinkle more thyme. Add a bit of chopped parsley for color. This makes the dish pop and look fresh. Serve warm for the best taste!
Pro Tips
- Choose Sweet Corn: For the best flavor, select fresh, sweet corn in-season. It will enhance the overall taste of your dish.
- Use a Non-Stick Skillet: To prevent sticking and ensure easy cleanup, use a non-stick skillet when cooking the corn.
- Experiment with Herbs: Feel free to substitute fresh thyme with other herbs like basil or cilantro for a unique flavor twist.
- Adjust Sweetness: If you prefer a less sweet corn dish, reduce the amount of honey to suit your taste.
Variations
Spicy Honey Butter Skillet Corn
You can spice up your honey butter skillet corn easily. Just add some heat! Try adding 1 tablespoon of diced jalapeños or a pinch of cayenne pepper. This gives the dish a warm kick. The sweet honey and spicy notes create a great balance. You can adjust the heat to your taste. Enjoy this version if you love heat!
Adding Cheese
Want to make your dish creamier? Add cheese! Stir in 1/2 cup of shredded cheddar or crumbled feta at the end. The cheese melts into the corn and adds richness. This makes the dish even more delicious. You can also use pepper jack for a spicy twist. Cheese makes everything better, right?
Using Frozen Corn
If fresh corn is not available, use frozen corn. Just make sure it is thawed and drained. The cooking time may be shorter, so keep an eye on it. Frozen corn still tastes great and is super easy to use. It’s a quick option for busy days. Enjoy the same sweet and savory flavors!
Storage Info
Refrigerating Leftovers
After enjoying Honey Butter Skillet Corn, you can store the leftovers. Place the corn in an airtight container. Make sure to cool it to room temperature first. It will stay fresh in the fridge for about three days. Before serving, check for any signs of spoilage.
Reheating Tips
To reheat, you can use the stovetop or microwave. If using the stovetop, add a bit of butter in a skillet. Heat the corn over medium heat. Stir often until warm. If using the microwave, place the corn in a microwave-safe bowl. Cover it and heat for about one to two minutes. Stir halfway through for even heating.
Freezing for Future Enjoyment
You can also freeze Honey Butter Skillet Corn. Start by cooling the corn completely. Transfer it to a freezer-safe bag. Remove as much air as possible before sealing. It can last in the freezer for up to three months. When you’re ready to eat, thaw it in the fridge overnight. Reheat using the tips above for the best taste.
FAQs
Can I use canned corn for this recipe?
Yes, you can use canned corn. Just drain it well before adding it to the skillet. Canned corn cooks faster than fresh corn. So, cook it for about 5 minutes instead of 7-10 minutes. This will keep the corn tender and tasty.
What can I serve with Honey Butter Skillet Corn?
Honey Butter Skillet Corn pairs well with many dishes. You can serve it with grilled chicken or fish for a balanced meal. It also goes great with barbecue ribs or burgers. For a vegetarian option, try it with stuffed peppers or a fresh salad.
How can I make this recipe vegan?
To make this recipe vegan, swap the butter for a plant-based alternative. Use a vegan butter or coconut oil instead. Replace honey with maple syrup for sweetness. Both options work well and keep the dish delicious and creamy. Enjoy your vegan twist on this sweet side!
This blog post detailed how to make honey butter skillet corn. You learned about fresh corn kernels, butter, and honey as key ingredients. I shared step-by-step instructions for cooking, along with tips for perfect texture and flavor. We also explored tasty variations, storage methods, and answered common questions.
Now, you can enjoy a simple but delicious side dish. Experiment with flavors, and store leftovers for later. Happy cookin