Are you ready to elevate your dinner game? This Honey Garlic Butter Shrimp recipe is simple, quick, and packed with flavor! With just a handful of ingredients, you can whip up a meal that impresses. Follow along as I guide you through step-by-step instructions, tips, and expert tricks to make the perfect shrimp dish. Let’s dive in and bring some deliciousness to your table tonight!
Ingredients
List of Ingredients
– 1 pound large shrimp, peeled and deveined
– 3 tablespoons unsalted butter
– 4 cloves garlic, minced
– 1/4 cup honey
– 2 tablespoons soy sauce
– 1 tablespoon freshly squeezed lemon juice
– Salt and pepper to taste
– Chopped fresh parsley for garnish
Measurement Notes
Accurate measurements are key for this dish. They ensure a tasty balance of flavors. For shrimp, look for large ones that are firm and bright in color. Fresh shrimp should smell like the ocean, not fishy. If you can, buy shrimp from a trusted source. This will give you the best taste and quality.
Step-by-Step Instructions
Preparing the Sauce
Start by melting the butter in a large skillet over medium heat. Once the butter is melted, add the minced garlic. Sauté the garlic for about one minute. Keep an eye on it to avoid burning. Next, add the honey, soy sauce, and lemon juice to the skillet. Stir everything well to mix the flavors. Increase the heat slightly and let the sauce simmer for about two minutes. This will help it thicken and enhance the taste.
Cooking the Shrimp
Now, it’s time to cook the shrimp. Add the peeled and deveined shrimp to the skillet. Season them with salt and pepper for some flavor. Cook the shrimp for two to three minutes on one side. You’ll know they’re ready to flip when they turn pink. Carefully flip the shrimp and cook the other side for another two to three minutes. The shrimp should be fully cooked and opaque.
Garnishing and Serving
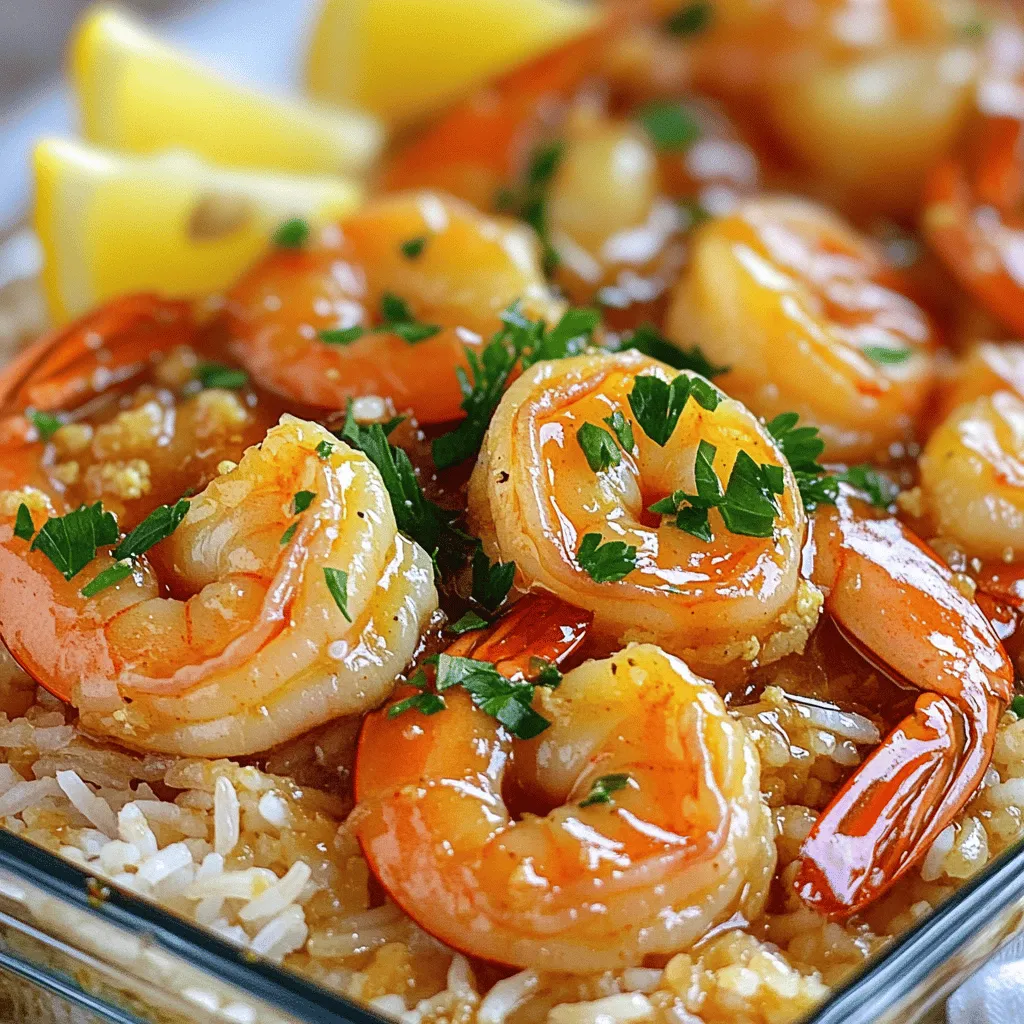
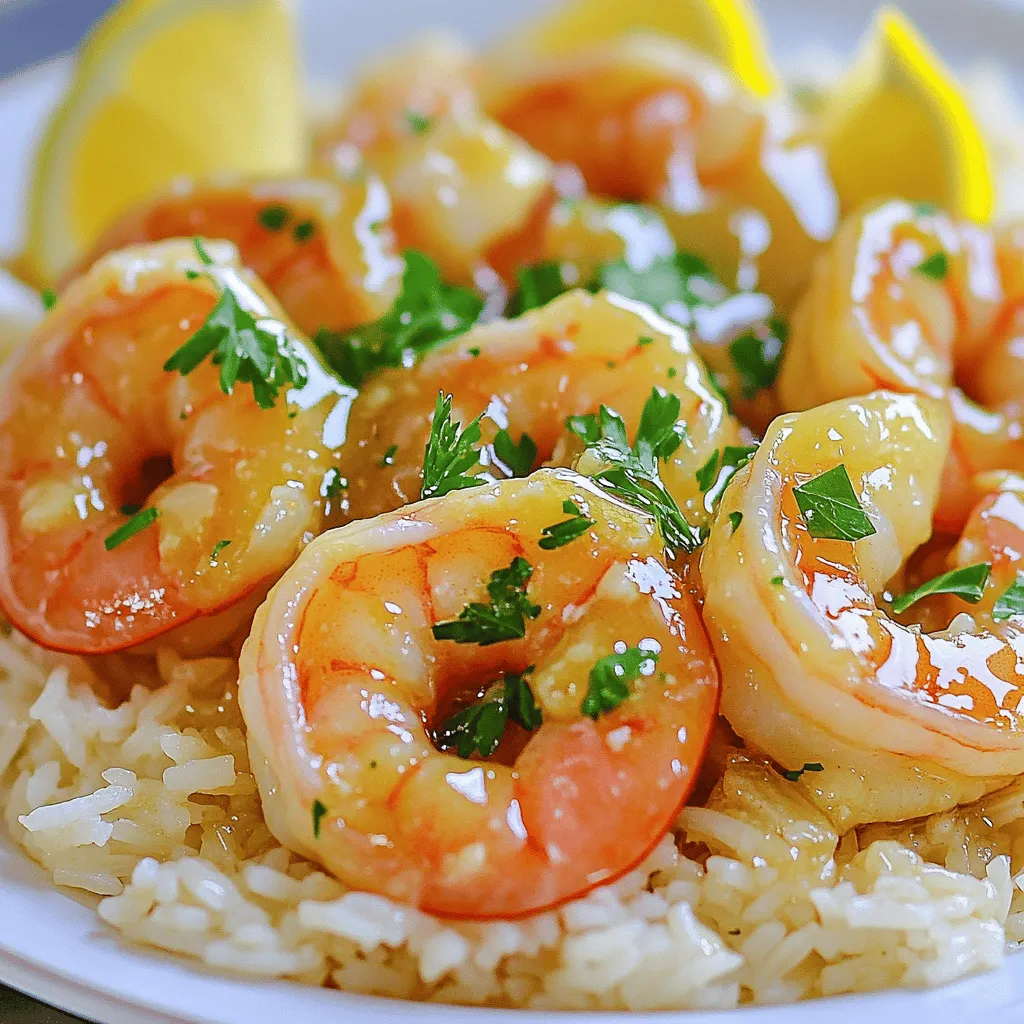
Once your shrimp are cooked, remove the skillet from the heat. For a fresh touch, garnish with chopped parsley. This adds color and flavor. Serve the honey garlic butter shrimp over a bed of rice or quinoa. Drizzle some of the remaining sauce on top for extra taste. Adding lemon wedges on the side can brighten the dish. Enjoy your meal!
Tips & Tricks
Cooking Tips
To tell when shrimp are perfectly cooked, look for a few signs. First, they should turn pink and opaque. This usually takes 2-3 minutes per side. If they curl into a C shape, that means they’re done. Be careful not to overcook them, as they can become tough.
Prevent garlic from burning during cooking by following a simple trick. Cook it over medium heat and watch it closely. Once it’s fragrant, add the honey and soy sauce quickly. This helps keep the garlic sweet and tasty.
Flavor Enhancements
You can add spices or herbs for extra flavor in this dish. A pinch of red pepper flakes can add heat. Fresh thyme or basil can brighten the taste. Don’t be afraid to experiment and find what you love.
For complementary sides, I suggest serving the shrimp with rice or quinoa. These grains soak up the sauce well. A crisp salad or steamed veggies also pairs nicely with the dish.
Equipment Recommendations
The best skillet for cooking shrimp is a non-stick one. It helps prevent sticking and makes cleaning easy. I recommend a large skillet that allows enough space for shrimp to cook evenly.
For peeling and deveining shrimp, use a small but sharp paring knife. This tool gives you control and precision. You can also use kitchen scissors for quick work. These tools make prep simple, so you can enjoy cooking.
Variations
Ingredient Swaps
You can change the sweetener in honey garlic butter shrimp. Try maple syrup or agave nectar. They add a nice twist while keeping the dish sweet.
If you don’t have fresh garlic, you can use garlic powder. This works well if you’re in a hurry. Just use 1/8 teaspoon of garlic powder for each clove.
Dietary Modifications
For a gluten-free version, swap soy sauce with tamari. This keeps the flavor while meeting gluten-free needs.
If you want it low-carb, use cauliflower rice instead of regular rice. This makes your meal lighter but still tasty.
International Twists
You can make this dish with Asian-inspired flavors. Try adding sesame oil or sriracha for a kick. These ingredients bring a zesty heat to your meal.
For a Mediterranean touch, mix in olives or feta cheese. This gives a whole new flavor profile that pairs well with shrimp.
Storage Info
Leftovers
After making honey garlic butter shrimp, let it cool to room temperature. Store leftovers in an airtight container. This keeps the shrimp fresh and tasty. In the fridge, honey garlic butter shrimp lasts for about 3 days.
Reheating Tips
To reheat shrimp, use a pan over low heat. This method warms them gently and keeps them juicy. Avoid the microwave; it can make shrimp rubbery. You can also mix leftover shrimp into pasta or salad for a quick meal.
Freezing Instructions
To freeze honey garlic butter shrimp, place it in a freezer-safe bag. Remove as much air as possible to prevent freezer burn. It can stay in the freezer for up to 3 months. When ready to eat, thaw it overnight in the fridge. Cook from frozen in a skillet over low heat until warm.
FAQs
Can I use frozen shrimp for this recipe?
Yes, you can use frozen shrimp. First, thaw them under cold water. This takes about 10-15 minutes. After thawing, dry the shrimp with a paper towel. Frozen shrimp may need a minute more to cook. Always check if they turn pink and opaque.
What can I substitute for honey?
If you can’t use honey, consider these options:
– Maple syrup
– Agave nectar
– Brown sugar
These sweeteners provide a similar taste. Adjust the amount to your liking.
How do I know when shrimp are done cooking?
Look for these signs:
– The shrimp turn bright pink.
– They curl into a C shape.
– The flesh becomes opaque.
Cooked shrimp should feel firm, not rubbery.
Can I make this dish ahead of time?
Yes, you can prepare the shrimp a few hours in advance. Cook the shrimp and let them cool. Store them in a container in the fridge. Reheat gently before serving to keep them tender.
Is this recipe suitable for meal prep?
Absolutely! Portion the shrimp into meal prep containers. They can last in the fridge for 2-3 days. To reheat, use low heat to avoid overcooking. You can serve them with rice or veggies for a quick meal.
This blog post covered a delicious honey garlic butter shrimp recipe. You learned about the necessary ingredients, including shrimp, butter, and garlic. I shared tips for preparing the sauce and cooking the shrimp perfectly. We looked at variations, storage info, and answered common questions.
Now, you can cook this dish with confidence. Enjoy the great flavor and flexibility of this recipe. Don’t hesitate to experiment and make it your own. Happy cooking!


